In this tutorial, you will learn how to create clones and templates of Virtual Machines in Proxmox.
Take a look at our earlier tutorials on Proxmox.
- How to Install Proxmox (Server Virtualization) on Debian
- How to Create a Virtual Machine in Proxmox
- How to Create Containers in Proxmox
- How to Backup and Restore VMs in Proxmox
A clone is simply an exact copy of a virtual machine state. The original virtual machine is known as the parent, while the copy is called the clone.
The clone is configured with the same specifications as the original virtual machine: hostname, username, installed software, virtual hardware, and other configurations.
The difference between a clone and a template is that a template is a blueprint that is used to create new Virtual Machines with the same computer resources and configuration.
Creating a Clone of VM in Proxmox
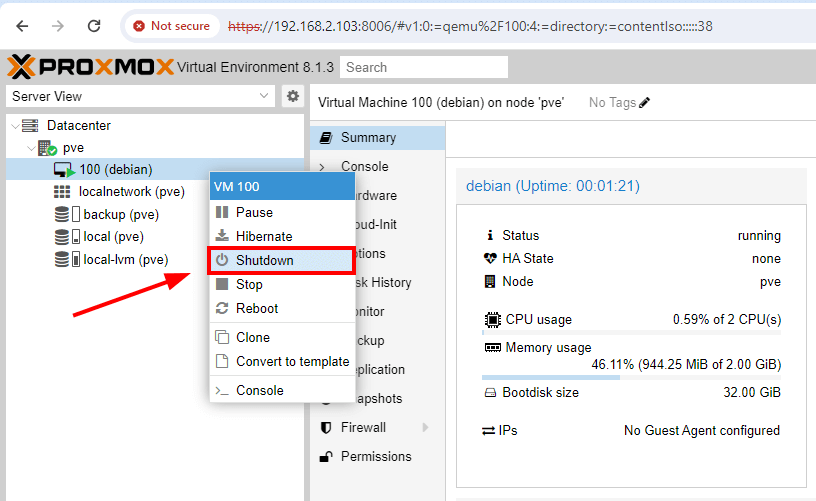
Before you create a clone from your virtual machine, you need to shut it down first. On your Proxmox dashboard, right-click on your VM and select the ‘shutdown‘ option.
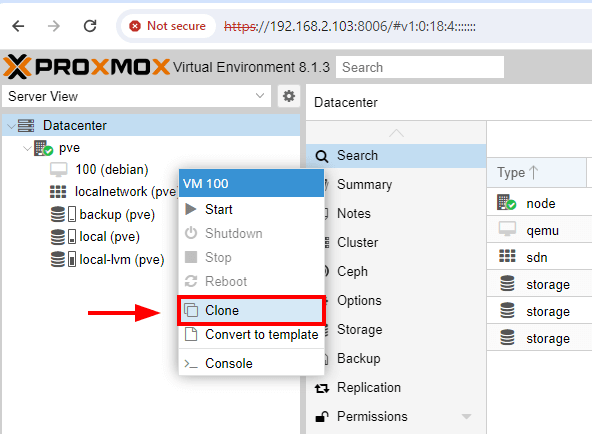
Once the VM is powered off, proceed and right-click on the VM once again and select the ‘clone‘ option.
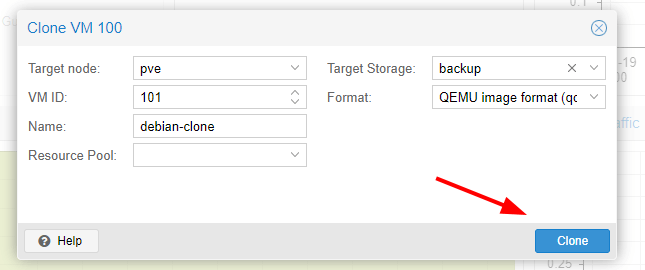
On your screen, you will see the pop-up dialogue box. Provide the name of your VM clone and be sure to select your storage target.
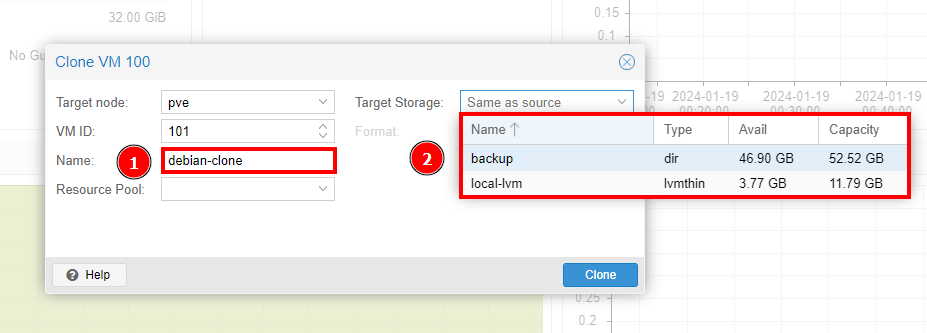
Once done, click the ‘clone‘ button to start the cloning process.
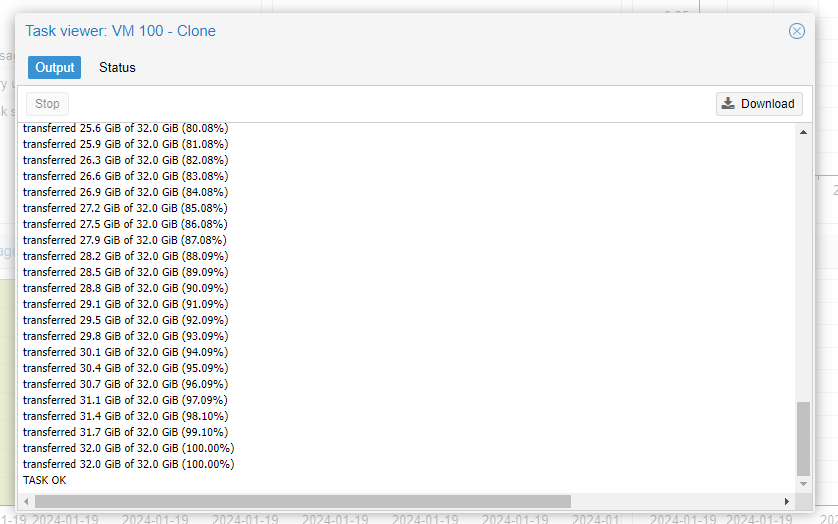
A task viewer pop-up will appear indicating the cloning progress. Once complete, you will see the ‘TASK OK‘ notification at the end. Click the ‘close‘ button to exit from the pop-up window.
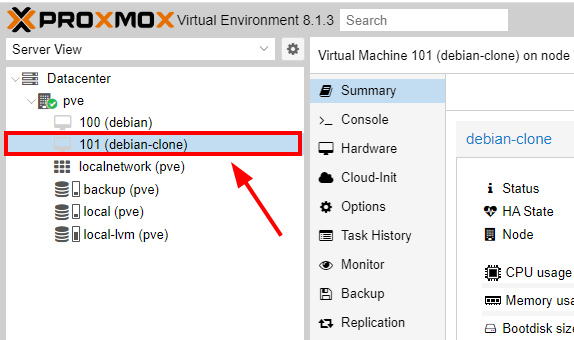
Once the clone has successfully been created, you will be able to see it on the server view on the left sidebar.
Creating a Template of VM in Proxmox
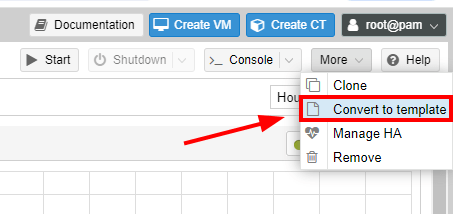
To create a template from a virtual machine, click the virtual machine on the server view sidebar and head over to the far right. Click the ‘More‘ button and select ‘Convert to template‘ to start creating the template.
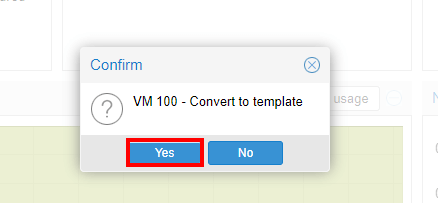
On the confirmation pop-up click ‘Yes‘ to confirm the creation of the VM template.
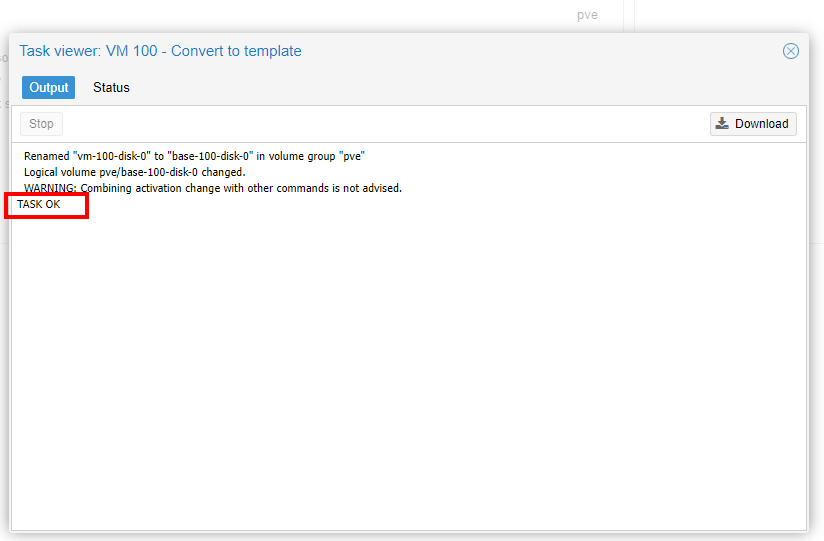
Once again, the task viewer will show the progress of the VM template creation. Wait for the ‘TASK OK‘ notification output and click the close button to exit the window.
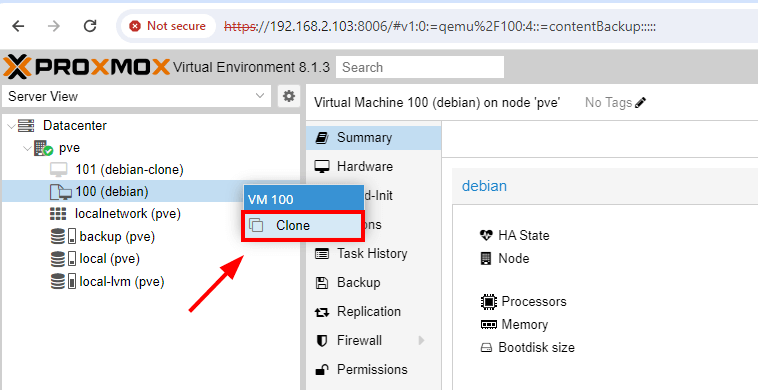
Once the template has been created, you can make a clone out of it by right-clicking and selecting the ‘clone‘.
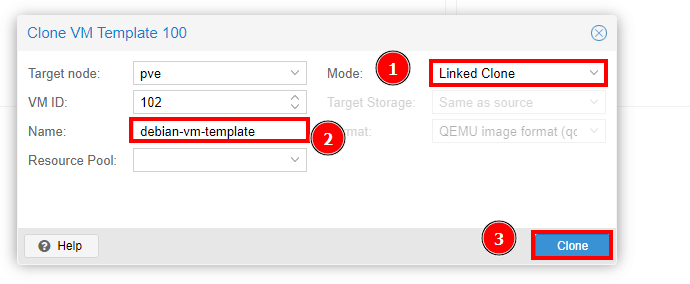
Next, fill out the clone details including the name of the clone and clone mode. For our case, we have selected ‘Linked clone‘ as the clone mode.
The difference between Linked Clone and Full Clone is that the former shares the same storage with the original template while the latter is purely self-contained and does not share the storage.
Then finally click ‘Clone‘.
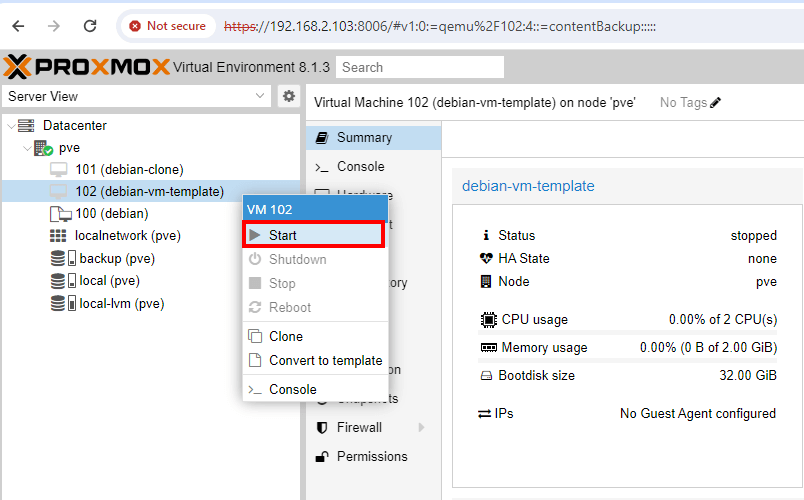
Once created, right-click on the clone and select ‘Start‘ to power it on.
From here, you can proceed to work with your VM instance.
Conclusion
As you have seen, both cloning and creating templates from a VM is super easy and takes just a few steps. That’s all for this tutorial.
In this guide, you have learned how to create a clone and a template from a virtual machine. Your feedback will be highly appreciated.