Rocket.Chat is a free, open-source, scalable, highly customizable, and secure platform that allows you to communicate and collaborate with your team, share files, and chat in real-time. It is cross-platform and it runs on Linux, Windows, macOS, Android, and iOS mobile operating systems.
It is similar to Slack and features live chat, free audio and video conferencing, channels, guest access, screen sharing, and file sharing. To ensure secure communication, it supports LDAP group synchronization, two-factor authentication (2FA), End-to-End encryption, Single Sign-On, and several Oauth providers.
Importantly, being fully open-source, you can access its source code to fully customize, extend, or add new functionality to meet your team’s or business requirements.
In this article, you will learn how to install and configure Rocket.Chat server and client on a Linux system.
Step 1: Installing Snaps in Linux
1. The easiest way to install Rocket.Chat is by using Snaps – are supported by most if not all modern Linux distributions and they are secure because they run confined under a restrictive security sandbox. Additionally, with snaps, you can also auto-update when a new version of a package is available.
First, ensure that you have the snapd package installed on your system, otherwise install it using your default package manager as shown.
$ sudo apt install snapd		#Ubuntu and Debian
$ sudo dnf install snapd		#Fedora 22+/CentOS/RHEL 8
$ sudo yum install snapd		#CentOS/RHEL 7
2. When the installation is complete, you need to enable the systemd unit that manages the main snap communication socket as follows. Note that this command will start the socket and enable it to start at system boot. On Ubuntu, this should be done automatically after the package installation is complete.
$ sudo systemctl enable --now snapd.socket
Additionally, you can enable classic snap support by creating a symbolic link between /var/lib/snapd/snap and /snap.
$ sudo ln -s /var/lib/snapd/snap /snap
Step 2: Installing Rocket.Chat in Linux
3. Now that you have Snapd installed, run the following command to install the rocketchat-server.
$ sudo snap install rocketchat-server
4. When the snap installation is complete, your rocket.chat server will start running and listening on port 3000 by default. Open a web browser and enter the following address to set up rocket.chat on the system.
http://SERVER_IP:3000
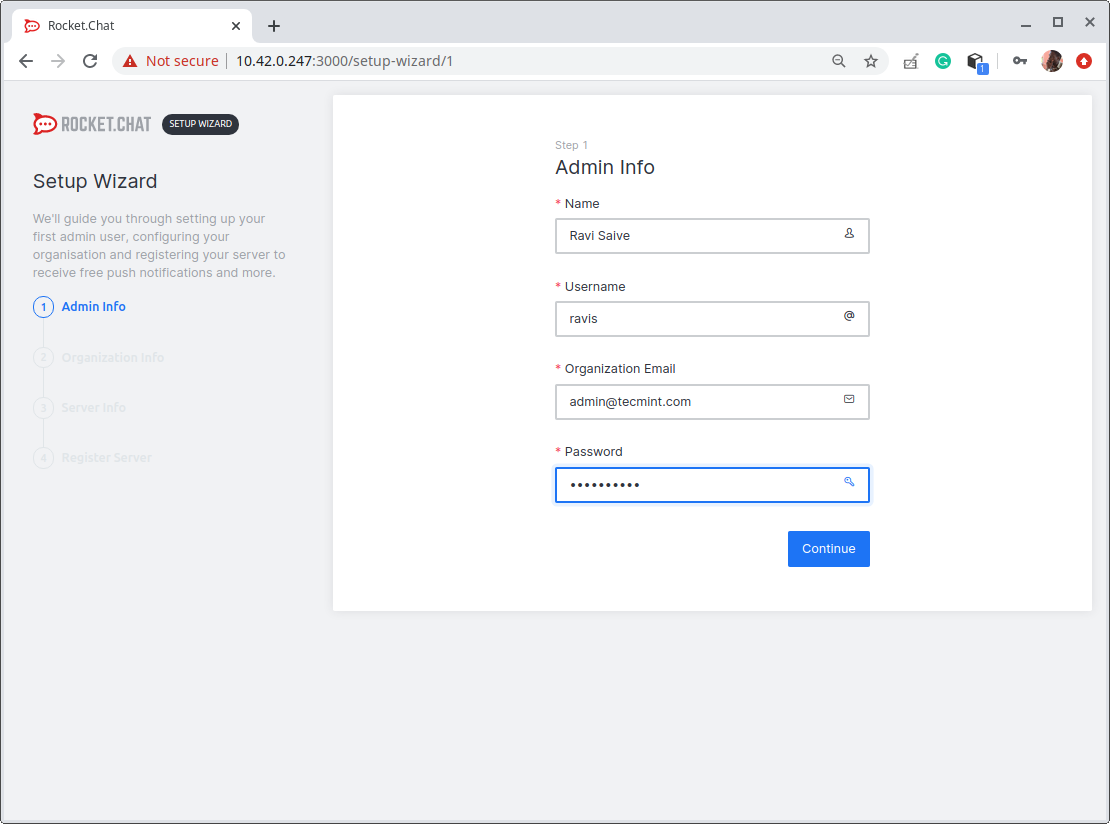
5. After the setup wizard loads, provide the administrative user’s full name, username, organizational email, and password.
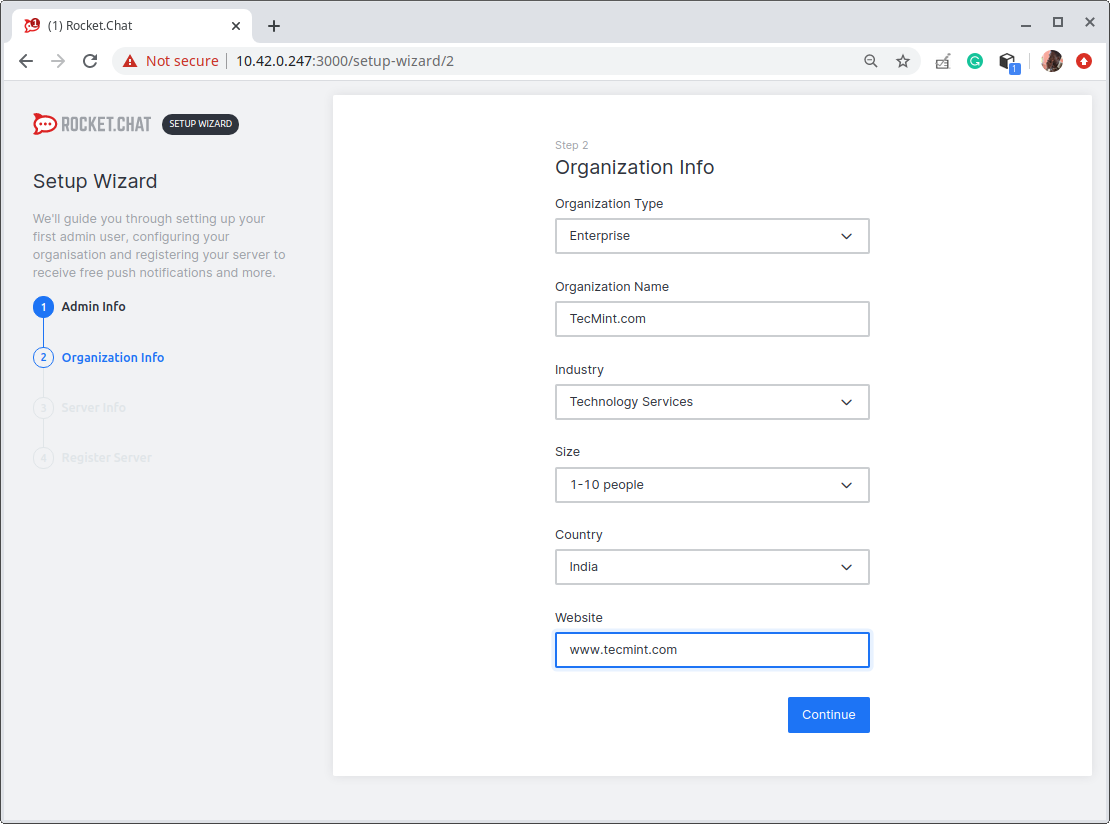
6. Next, provide the organizational information (organization type, name, industry, size, country, and website), then click Continue.
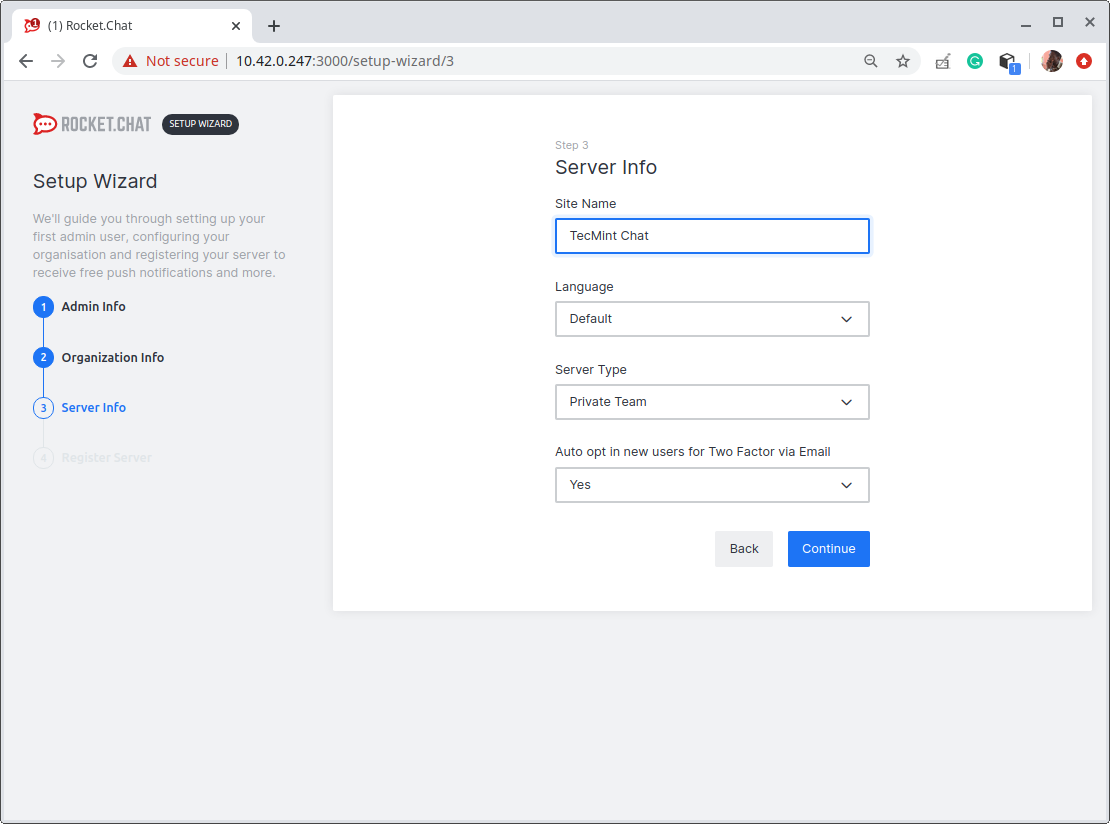
7. Next, provide the server information (site name, default, server type, and also enable 2FA or not). Then click Continue.
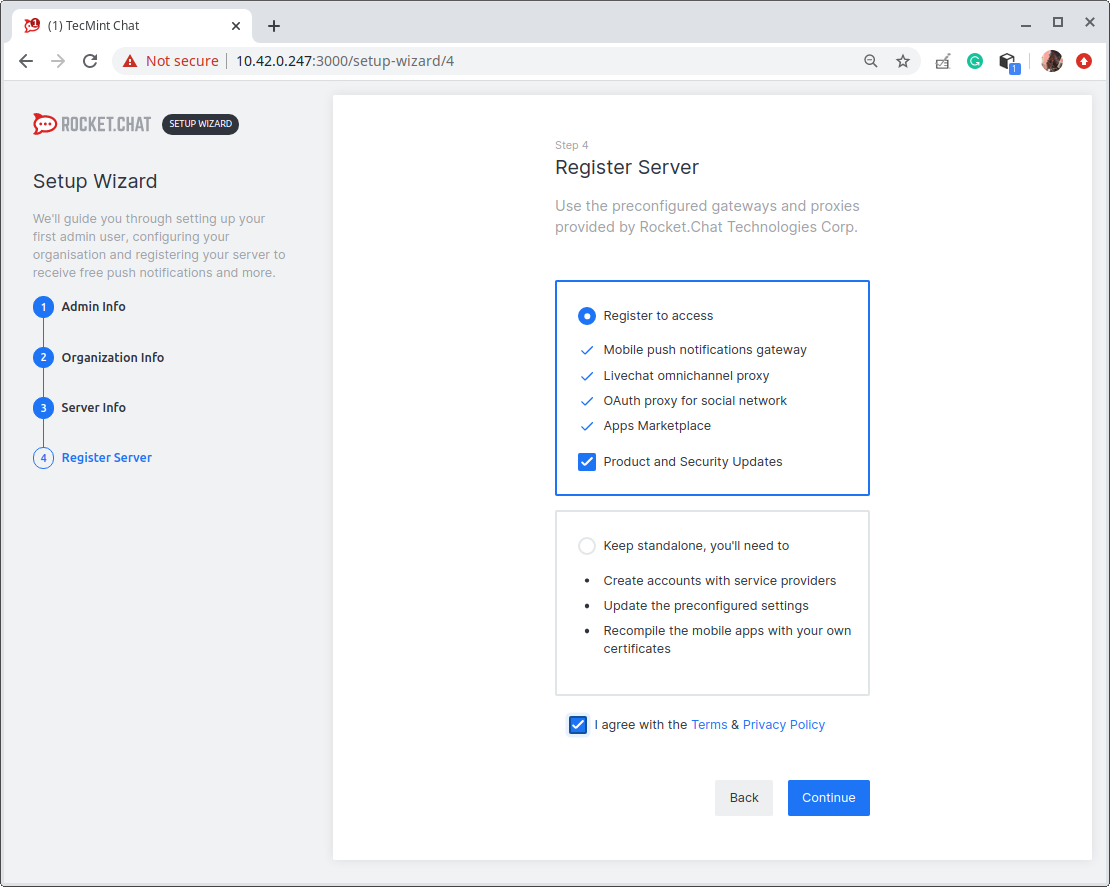
8. On the next page, register the server. There are two options here, the default is to use the preconfigured gateways and proxies provided by Rocket.Chat (this is the recommended option).
Alternatively, you can choose to keep standalone and create accounts with service providers, update preconfigured settings, and also recompile the mobile apps with your private certificates. And click Continue.
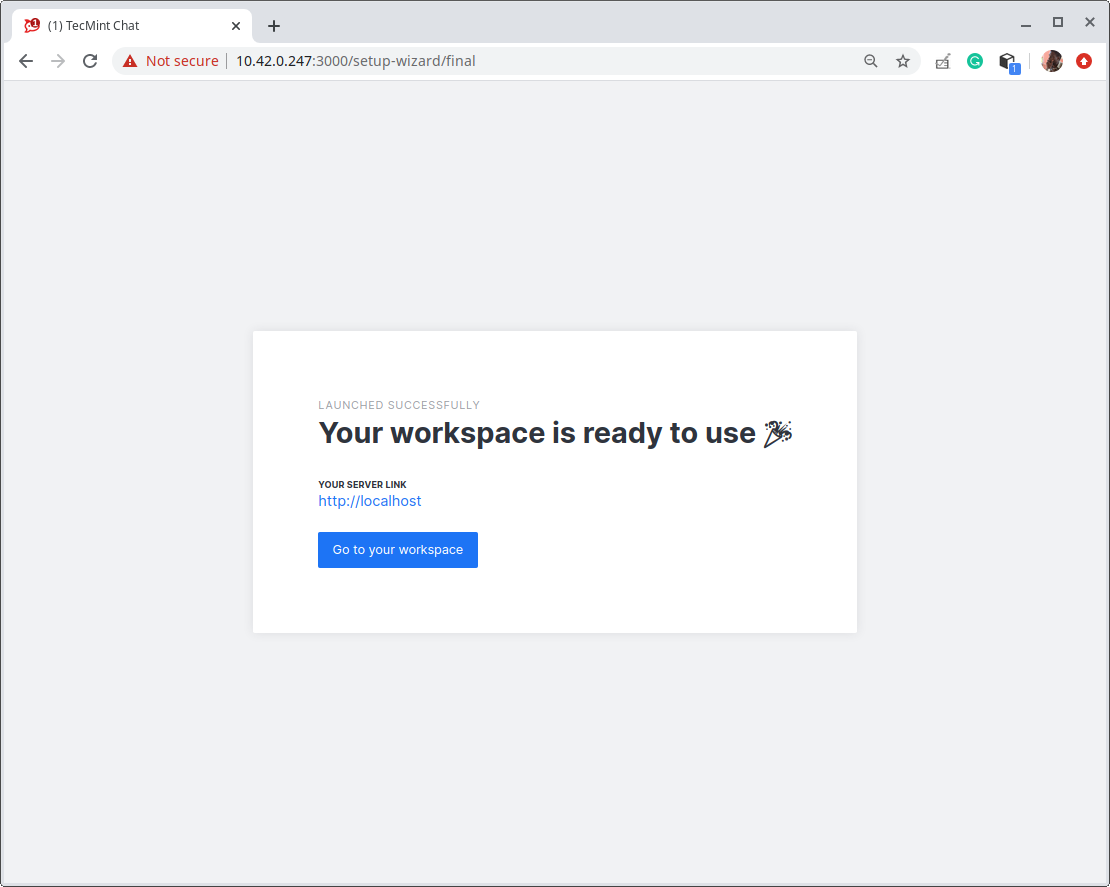
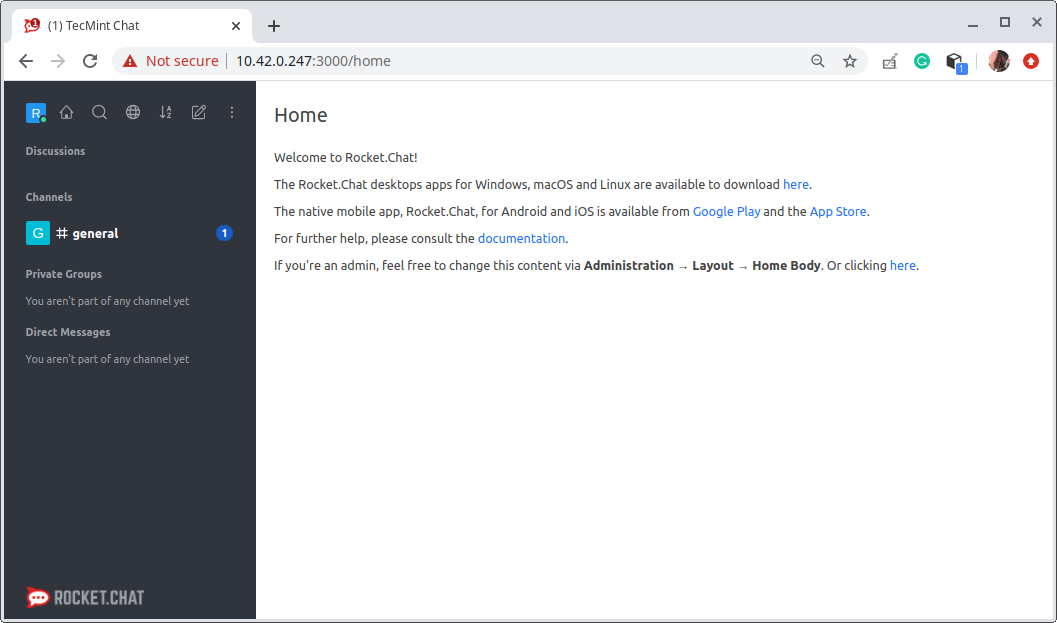
The setup is complete and your workspace is ready. Click Go to your workspace.
Step 3: Configuring Reverse Proxy for Rocket.Chat
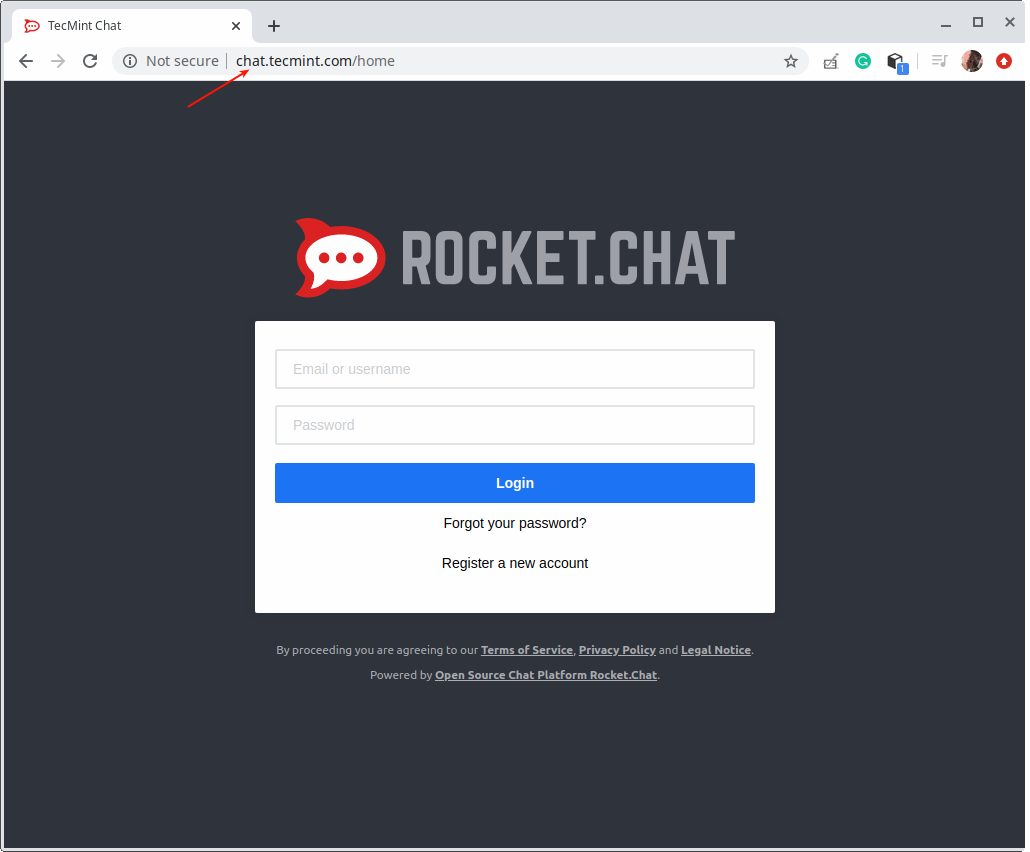
9. A reverse proxy such as NGINX or Apache allows you to configure the Rocket.Chat application to be accessible via a domain or subdomain (e.g http://chat.tecmint.com) instead of typing the server’s address and application port (e.g http://10.42.0.247:3000).
Additionally, Rocket.Chat is a middle-tier application server that does not handle SSL/TLS. A reverse proxy also allows you to configure SSL/TLS certificates to enable HTTPS.
Enable Nginx Reverse Proxy for Rocket.Chat
10. First, install the NGINX package if it is not installed yet on your system.
$ sudo apt apt install nginx		#Ubuntu/Debian
$ sudo dnf install nginx		#Fedora 22+/CentOS/RHEL 8
$ sudo yum install nginx		#CentOS/RHEL 7
11. Once the package installation is complete, start the Nginx service, for now, enable it to automatically start at system boot and check its status to ensure that it is running.
$ sudo systemctl enable --now nginx
$ sudo systemctl status nginx
12. Next, create a virtual server block file for the Rocket.Chat application under the /etc/nginx/conf.d/ directory, for example.
$ sudo vim /etc/nginx/conf.d/chat.tecmint.com.conf
Then copy and paste the following configuration in the file (replace chat.tecmint.com with your valid subdomain or domain).
upstream backend {
    server 127.0.0.1:3000;
}

server {
    listen 80;
    server_name chat.tecmint.com;

    # You can increase the limit if you need to.
    client_max_body_size 200M;

    error_log /var/log/nginx/chat.tecmint.com.log;

    location / {
        proxy_pass http://backend/;
        proxy_http_version 1.1;
        proxy_set_header Upgrade $http_upgrade;
        proxy_set_header Connection "upgrade";
        proxy_set_header Host $http_host;

        proxy_set_header X-Real-IP $remote_addr;
        proxy_set_header X-Forwarded-For $proxy_add_x_forwarded_for;
        proxy_set_header X-Forward-Proto http;
        proxy_set_header X-Nginx-Proxy true;
        proxy_redirect off;
    }
}
Save the file and close it.
13. Then check the NGINX configuration for any syntax issue. If it’s OK, restart the Nginx service to apply the recent changes.
$ sudo nginx -t
$ sudo systemctl restart nginx
Enable Apache Reverse Proxy for Rocket.Chat
14. Start by installing the Apache2 package if it is not installed yet, on your system.
$ sudo apt install apache2		#Ubuntu/Debian
$ sudo dnf install httpd		#Fedora 22+/CentOS/RHEL 8
$ sudo yum install httpd		#CentOS/RHEL 7
15. Next, start and enable the apache service and check if it is up and running as follows.
----- On Ubuntu/Debian -----
$ sudo systemctl enable --now apache2
$ sudo systemctl status apache2

----- On CentsOS/RHEL 7/8 -----
$ sudo systemctl enable --now httpd
$ sudo systemctl status httpd
16. Next, create a virtual host file for the Rocket.Chat application under the /etc/apache2/sites-available/ or /etc/httpd/conf.d/ directory, for example.
----- On Ubuntu/Debian -----
$ sudo vim /etc/apache2/sites-available/chat.tecmint.com.conf

----- On CentsOS/RHEL 7/8 -----
$ sudo vim /etc/httpd/conf.d/chat.tecmint.com.conf
17. Copy and paste the following configuration in it, replace chat.tecmint.com with your valid domain.
<VirtualHost *:80>
    ServerAdmin [email protected]
    ServerName chat.tecmint.com

    LogLevel info
    ErrorLog /var/log/chat.tecmint.com_error.log
    TransferLog /var/log/chat.tecmint.com_access.log

    <Location />
        Require all granted
    </Location>

    RewriteEngine On
    RewriteCond %{HTTP:Upgrade} =websocket [NC]
    RewriteRule /(.*)           ws://localhost:3000/$1 [P,L]
    RewriteCond %{HTTP:Upgrade} !=websocket [NC]
    RewriteRule /(.*)           http://localhost:3000/$1 [P,L]

    ProxyPassReverse /          http://localhost:3000/
</VirtualHost>
Save the file and close it.
18. On Ubuntu and Debian enable the required apache2 modules and restart the service to apply the recent changes.
$ sudo a2enmod proxy_http
$ sudo a2enmod proxy_wstunnel
$ sudo a2enmod rewrite
$ sudo systemctl restart apache2
On CentOS/RHEL and Fedora, simply restart the apache service.
# systemctl restart httpd
19. Now everything is configured correctly, open your broswer and type the folloiwng address. The Rocket.Chat application should be accessible using your domain configured in the proxy server.
http://chat.tecmint.com
20. The next crucial step is to add the security and privacy benefits of an HTTPS certificate to your chat service. For a production environment, we recommend using Let’s Encrypt which is free and trusted by most modern web browsers.
Note that Let’s Encrypt is automated: you can use certbot, a free open-source tool to automatically get and install or simply get and manually install Let’s Encrypt certificates in mainstream Linux distributions and web servers.
Step 4: Installing Rocket.Chat Clients on Desktop
21. Last but not least, you can download and install a Rocket.Chat desktop app for Linux, Mac, or Windows from the Rocket.Chat project website. It also provides mobile apps for Android and iOS.
To install the desktop application on Linux, you either download a deb (x64) or rpm(x64) package depending on your Linux distribution.
$ wget -c https://github.com/RocketChat/Rocket.Chat.Electron/releases/download/2.17.7/rocketchat_2.17.7_amd64.deb
OR
$ wget -c https://github.com/RocketChat/Rocket.Chat.Electron/releases/download/2.17.7/rocketchat-2.17.7.x86_64.rpm
22. Then install the package using the dpkg or rpm package manager as shown.
$ sudo dpkg -i rocketchat_2.17.7_amd64.deb      #Ubuntu/Debian
$ sudo rpm -i rocketchat-2.17.7.x86_64.rpm      #CentOS/RedHat
23. Once the package installation is complete, search for rocket.chat in the System Menu and launch it. After it loads, enter your server’s URL to connect to it as shown in the following screenshot.


We use it in kır company for more than 1 year. It is great
@Samet
Nice! Thanks for sharing your experience with us.