A vast majority of Linux users are familiar with a Linux desktop PC which provides a graphical environment with which you can interact with the system. However, unlike a Linux desktop, a headless server is an operating system that runs without a GUI (Graphical User Environment).
It is installed on hardware that is not connected to any peripheral device such as a monitor, keyboard, or mouse during its operation (although these are required during the initial setup).
In most cases, headless servers are remotely accessed and administered on the command line via the SSH protocol using SSH clients such as PuTTY.
The main goal of headless servers is to provide access to crucial services such as web and database services to clients or users. Headless servers are mostly found in data centers and run enterprise or production workloads.
[ez-toc]
Pros of a Headless Linux System
Graphical installations are usually associated with high resource overhead. Applications such as the Firefox browser, and GIMP are resource-intensive programs and end up hogging lots of system memory and CPU.
This impacts the performance of critical production workloads or applications which have to make do with the few resources that are available.
Since there are no graphical components on headless servers, most of the resources are accorded to critical applications which results in optimized performance.
Headless servers ensure critical enterprise workloads run smoothly since there is no competition for system resources with other non-critical applications. It’s, therefore, efficient to host your applications on a headless server since there are no fancy graphical applications that will impact performance.
Installation of a Headless Linux Server
The installation of a headless Linux server is similar to installing a Linux OS with a graphical environment. Most Linux distributions such as Ubuntu, Rocky Linux, AlmaLinux, and Debian provide a minimal ISO installation image which has a small memory footprint and provides only the essential tools to install the operating system.
This is different from a full DVD ISO which is usually quite large – mostly gigabytes in memory – and provides all the graphical tools and utilities.
Download Linux ISO Image
For this guide, we will demonstrate how you can get started with installing the Debian 11 server (Debian Bullseye). So, head over to the Debian Download Page and grab the net installer ISO which is roughly 400MB in size.
Also, note you can use any Linux distribution ISO image to set up a headless server.
Create a Bootable Linux USB Drive
Once you have downloaded the ISO image, the next step is to burn the ISO to a USB drive which will be used as the bootable medium.
You can create a LiveUSB medium using USB creator tools or you can also do this on the command line using the dd command as shown.
$ dd if=~/Downloads/debian-11.6.0-amd64-netinst.iso of=/dev/sdx bs=4M status=progress
Installing Linux Headless Server Using USB Drive
With the bootable USB drive in place, plug it into the bare metal server which should, at first, be connected to a monitor and keyboard for the initial setup.
Power on the server and navigate to the BIOS settings. Ensure that the USB drive is first on the boot order priority. Save and changes and continue booting.
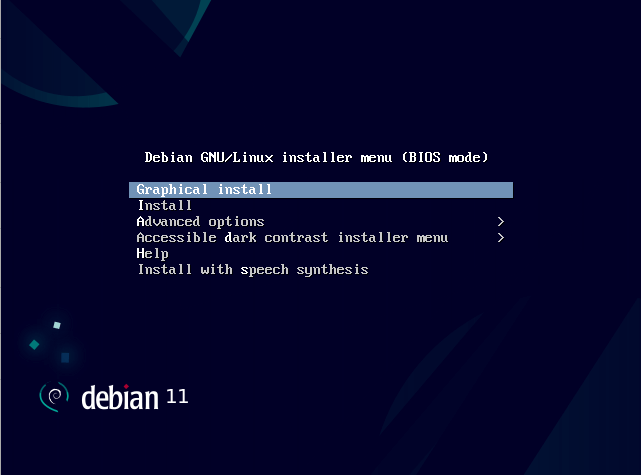
Once the system powers on, you will be presented with a list of menu options. Here, we will go with Graphical Install which provides a graphical installation method to make work easier.
The next steps will require you to make a couple of selections. These include choosing the installation language, timezone, keyboard layout, hostname, creating a regular user account and root account as well as partitioning the hard drive.
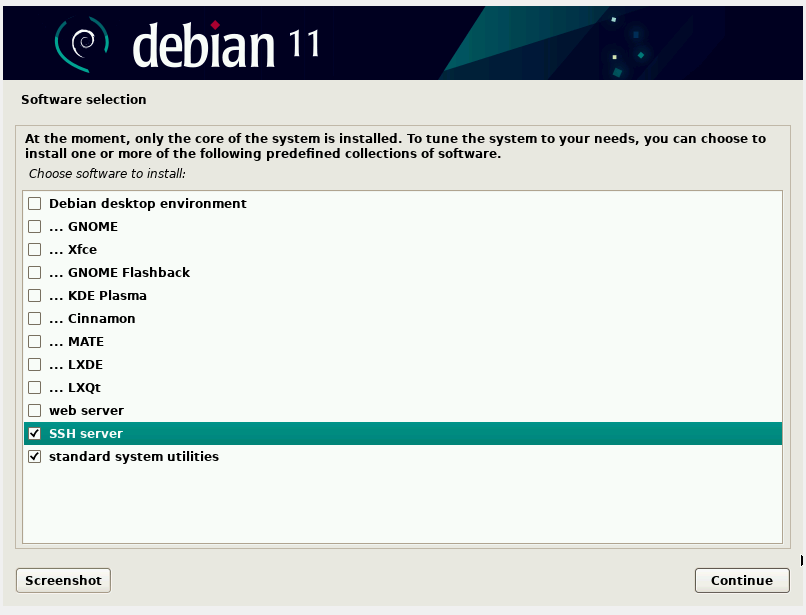
Lastly, you will be presented with a ‘Software Selection’ step that provides a wide array of desktop environments to choose from.
But since our mission is to install a headless server, we will only select the ‘SSH Server‘ and ‘Standard system utilities‘ options and click ‘Continue‘. This ensures that we only install the necessary packages required for the headless server to run.
From here onwards, proceed with the Debian installation till the end and reboot the system.
Debian Post-Installation
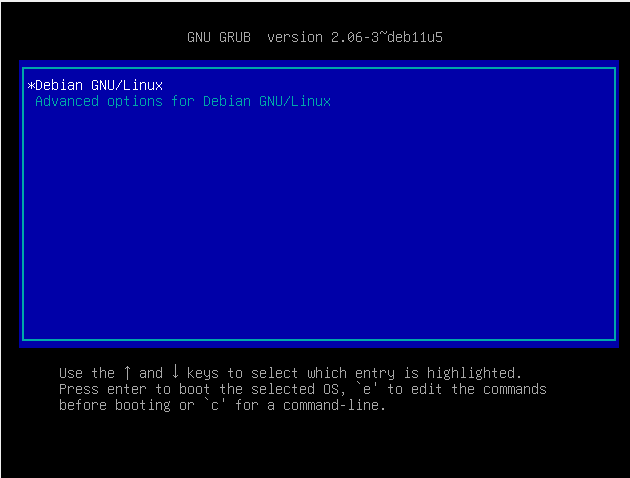
Upon rebooting your server you will see the following screen. The first option is already pre-select, so simply press ENTER.
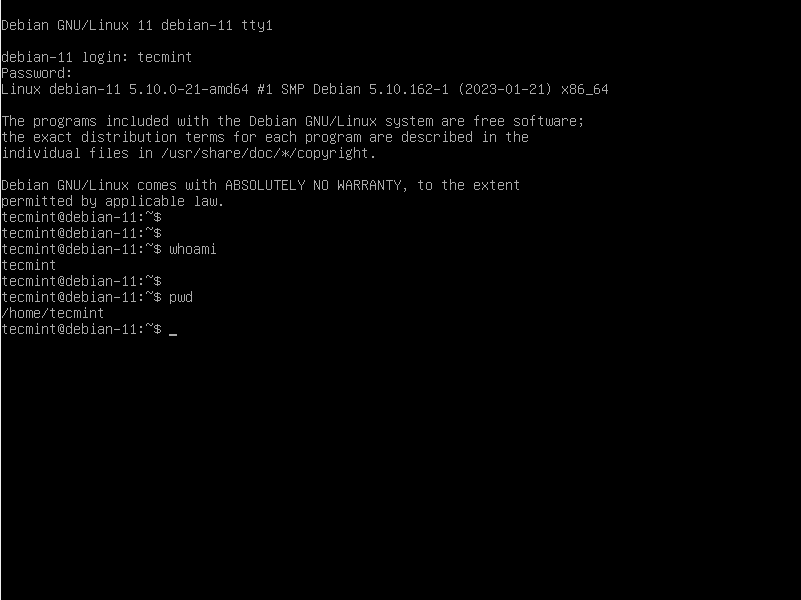
On the login screen, provide your username and password and press ENTER on both occasions to access the system. Evidently, there’s no graphical environment, and going forward, access to the system will be on the command line via the SSH protocol.
Testing Remote Connection to Headless Server
Speaking of SSH, we need to confirm if the service is running. To verify this, switch to the root user
$ su -
Then run the following command to check the running status of SSH.
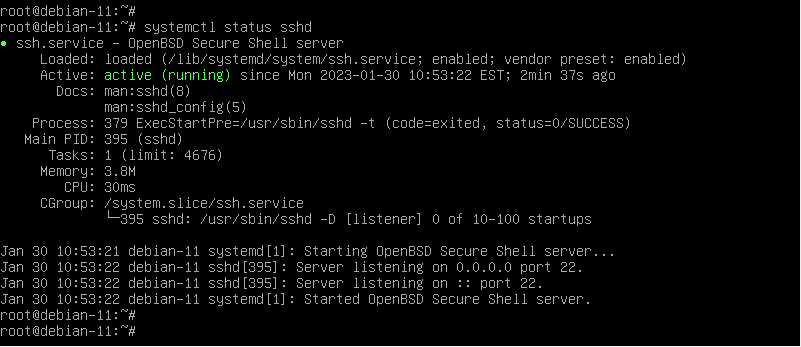
# systemctl status sshd
The following output confirms that the service is running. Be sure to enable the service to autostart on boot.
# systemctl enable sshd
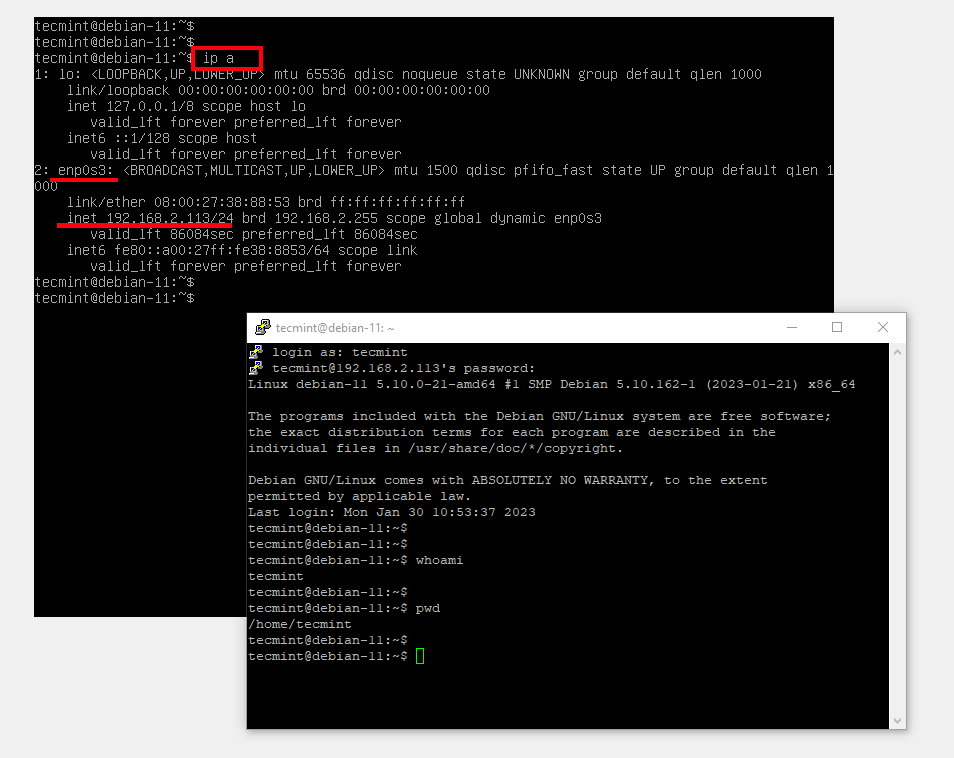
To test remote connectivity to the server, first, check its IP address by running the ip command:
# ip a
Locate your active interface – in this case enp0s3 – and check the address prefixed by the ‘inet’ directive. In our case, the IP of our server is 192.168.2.113.
Next, head over to a remote PC within the LAN and try to ping the server. If you get positive ping results, this implies that the server is reachable.
Finally, you can use an SSH client like PuTTY to access and login into the server.
Perfect! This confirms that we have successfully installed and set up a Headless Linux system. At this point, you can now disconnect the monitor, keyboard, and mouse since the server will now be accessed and managed remotely via the SSH service.
Conclusion
In this guide, we have demonstrated how you can go about setting up a headless Linux system using Debian 11. The procedure for accomplishing the same feat is similar in other distributions, of course with slight variations here and there.
But rest assured, the minimal ISO provided by a Linux distribution is all you need to successfully install and set up a headless server.


Strangely this is posted as a HEADLESS install – but in fact, it is not.
Headless means without a monitor. You should be able to do a headless install remotely – meaning you don’t have to be at the actual pc/server.
I think you could save a lot of users time – edit the headline here and don’t try to sell it as a headless install. That is simply wrong.
This is NOT a headless install.
Like 99% of articles on headless installation, this one does not explain how to install remotely. For all the folks who need an actual remote installation, take a look here:
https://github.com/philpagel/debian-headless
This is a totally misleading article. I have a headless x86 device (i.e. no display) with no ability to add a display. This article doesn’t cover how to install on a headless system it covers how to install if you don’t desire to use a graphical interface!
@Ray,
I understand your frustration, and I agree that it’s important for articles to cover a wide range of installation scenarios, including headless systems. It appears this article may not have met your specific needs.
I may be old, but headless install means installing on a system without a dedicated display card. Options left are serial console, ssh, remote management card, or automagically.