

In a world of emerging and ever-evolving cyber threats and breaches, applying security updates will go a long way in safeguarding your system against potential threats. And what a joy it would be if the application of these updates is done automatically without your intervention!
This means that you would worry less about manually updating your system and focus on other system administration tasks.
Recommended Read: dnf-automatic – Install Security Updates Automatically in CentOS 8
In this tutorial, you will learn how to use yum-cron to install and configure security updates automatically on your CentOS 7 system.
So what is Yum-Cron?
Yum-cron is a yum module and command-line tool that allows a user to configure a cron job for the Yum package manager.
Step 1: Installing Yum-cron Utility in CentOS 7
The Yum-cron comes preinstalled on CentOS 7, but if for whatever reason it is not present, you can install it by running the command.
# yum install yum-cron
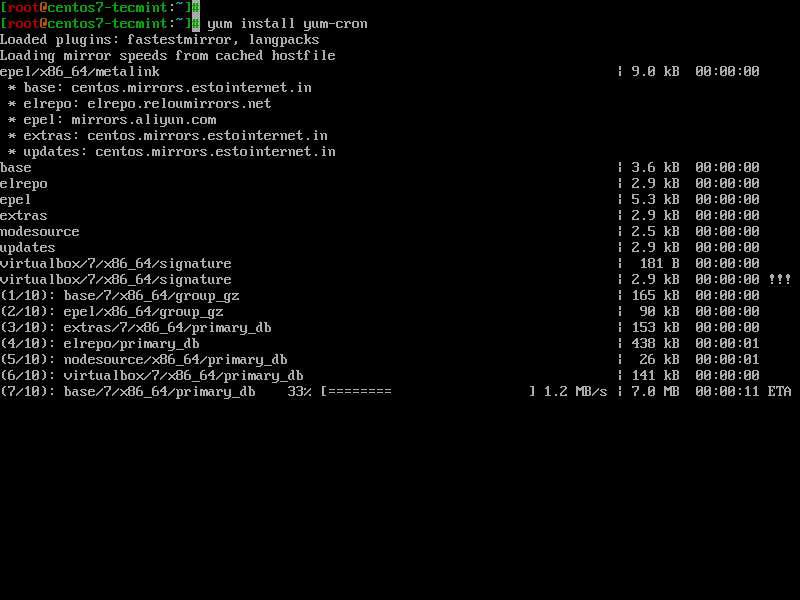
Once the installation is complete, confirm the existence of yum-cron utility by running the rpm command with grep command.
# rpm -qa | grep yum-cron

Step 2: Configuring Automatic Security Updates in CentOS 7
After the successful installation of the yum-cron utility, you need to configure it to automatically retrieve security updates and update your system. There are 2 kinds of updates: the default update which is initialized using the yum update command, minimal update and finally the security update.
In this guide, we will configure the system to automatically receive security updates. So open and edit the yum-cron.conf file located in the path shown.
# vi /etc/yum/yum-cron.conf
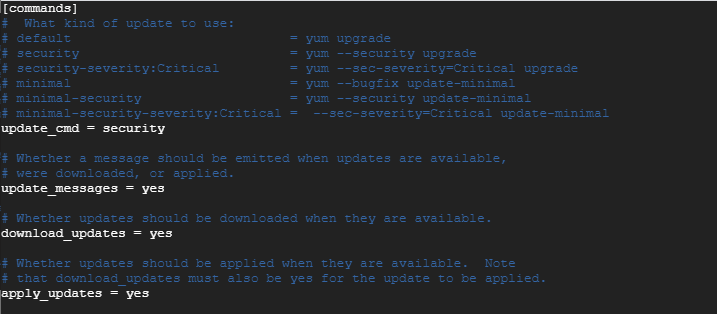
Locate the string update_cmd. By default, this is set to default. Now edit and set the value to ‘security’.
update_cmd = security
Next, locate the update_messages parameter and ensure its value is set to ‘yes’.
update_messages = yes
Likewise, do the same for download_updates as well as apply_updates.
download_updates = yes
apply_updates = yes
Your configuration should look as shown below.
Save and exit the configuration file.
For the changes to come into effect, start and enable the yum-cron daemon or service on boot as shown.
# systemctl start yum-cron
# systemctl enable yum-cron
# systemctl status yum-cron

Step 3: How to Exclude Packages from Updating in Yum
Sometimes, you may need to maintain the version of packages and not update them due to compatibility issues that may arise with other applications that depend on the package. Sometimes, this may even include the kernel itself.
To achieve this, head back to the yum-cron.conf configuration file. At the bottom, in the [base] section, append a line with the ‘exclude’ parameter and define the packages you want to exclude from updating.
exclude = mysql* php* kernel*
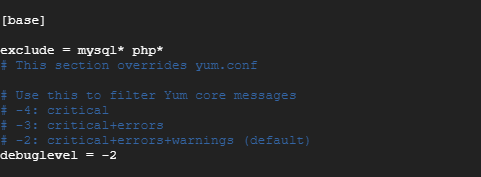
All package names that begin with mysql & php will be excluded from automatic updates.
Restart yum-cron to effect the changes.
# systemctl restart yum-cron
Step 4: Checking yum-cron Logs
The yum-cron logs are stored in /var/log/yum.log file. To view the packages that have been updated run the cat command.
# cat /var/log/yum.log | grep -i updated
Automatic system updates are controlled by a cron job that runs daily and is stored in the /var/log/cron file. To check the logs for the daily cron job run.
# cat /var/log/cron | grep -i yum-daily
Your CentOS 7 system is now fully configured for automatic security updates and you won’t have to stress over manually updating your system.

Do the CentOS 7 repos provide the metadata required to support the
yum --securityusage? I read elsewhere that they do not (and that it’s a feature only available to the repos used by RH subscribers) and that as a result, these updates are essentially a no-op on CentOS7.You are correct, AFAIK,
yum update --securitywill have no effect on Centos Base and Update repos as it lacks the metadata needed… EPEL works on Centos and the repo has the metadata to support this.Without trying the command listed in the article, I’m not sure if the commands listed in the article will install all updates or only 3rd party repos that support this on Centos, but regardless it’s misleading. It would work on RHEL, however.
The conservative approach when applying updates is to perform a system reboot, especially for security updates and indeed kernel updates. Yes, indeed a reboot is vital.
What about if the security update requires a system reboot to take effect. And if there any new kernel update available is that going to get updated automatically with this configuration. Thanks