As you get started, ensure that the KVM hypervisor is installed on your system. An acronym for Kernel-based Virtual Machine, KVM is a combination of kernel modules & utilities needed to run virtual machines on a host system. These include QEMU, virt-install, libvirtd daemon, virt-manager and so many more.
We have elaborate articles on:
For this guide, I’ll be working on Ubuntu 20.04 to illustrate how virt-manager can be used to create as well as manage virtual machines.
Creating Virtual Machines using Virt-Manager
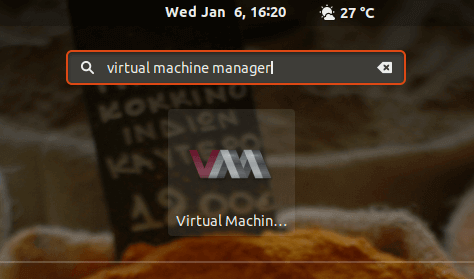
To start off, launch virt-manager. This can be achieved in two ways. You can use the application manager to search for the virt-manager application as shown.
If you are running on a terminal, run the following command:
$ sudo virt-manager
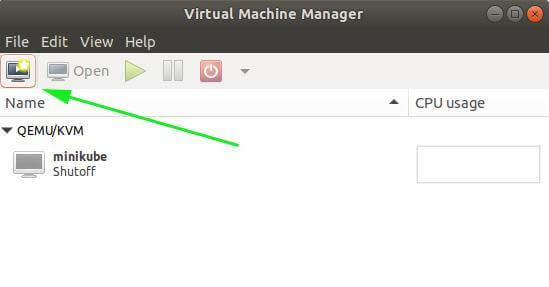
This will launch the Virtual Machines manager GUI application as shown.

To get started with creating a virtual machine, click on the ‘New virtual machine’ icon at the top left corner, just below the ‘File’ menu item.
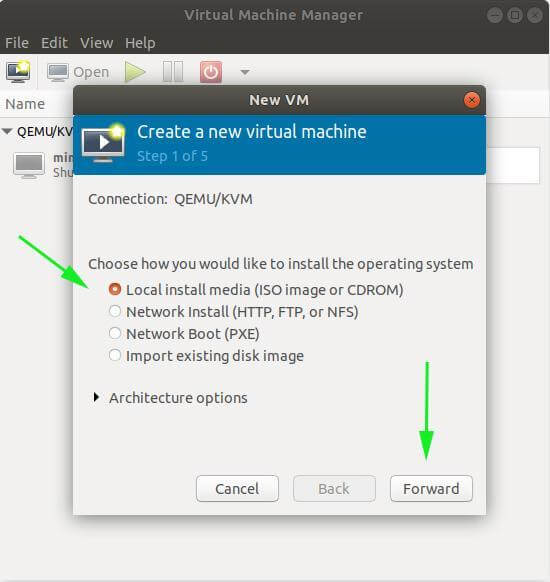
The next step presents a list of options that you can choose from when selecting your preferred operating system.
- The first option – Local Install Media (ISO image or CDROM) – allows you to select an ISO image sitting on your local system or select an operating system from an inserted CD or DVD drive.
- The second option – Network Install (HTTP, FTP, or NFS) – allows you to select an ISO image over the network. For this to work, the ISO image should be mounted on a web server, FTP server, or Network File System. We have a comprehensive guide on how to deploy a virtual machine over the network using HTTP, FTP, and NFS.
- The third option – Network Boot (PXE) – allows the virtual machine to boot from the Network card.
- And the fourth option – Import existing disk image – Allows you to spawn a virtual machine from an existing KVM virtual image.
Be sure to select the option that suits you. In my case, I already have a Debian 10 ISO image on my local system. Therefore, I’ll select the first option and click the ‘Forward’ button.
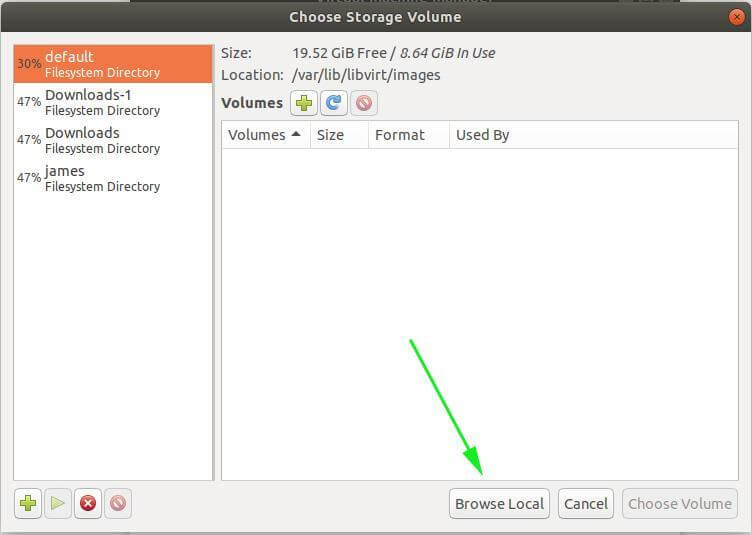
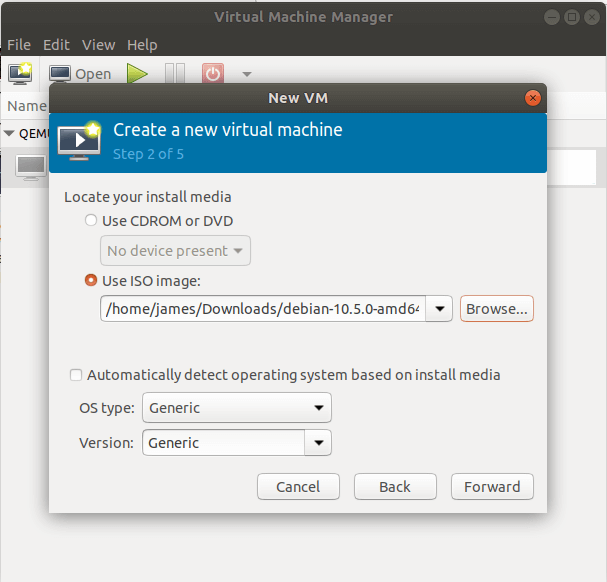
Next, click on the ‘browse local’ button and select your disk image.
In the image below, the ISO image has already been selected. Accept the defaults for ‘OS type’ and ‘Version’ and click ‘Forward’.
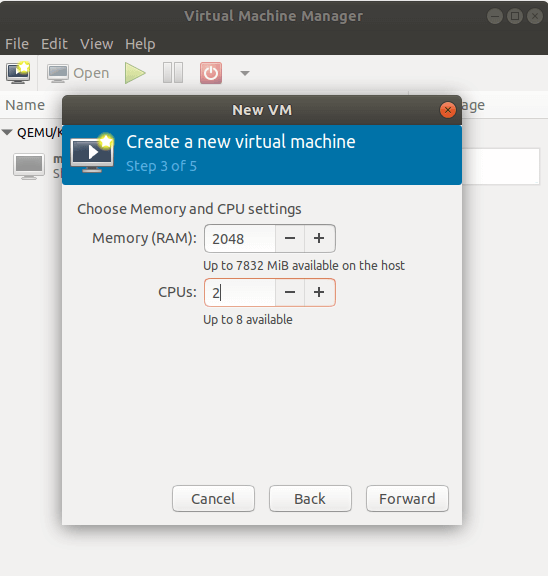
In the next step, specify the RAM size and the number of CPU cores to be assigned and click ‘Forward’.
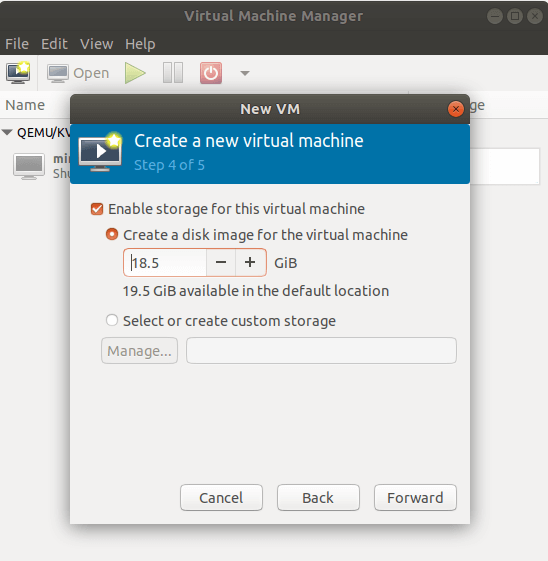
Next, specify the disk space for the virtual machine and hit ‘Forward’.
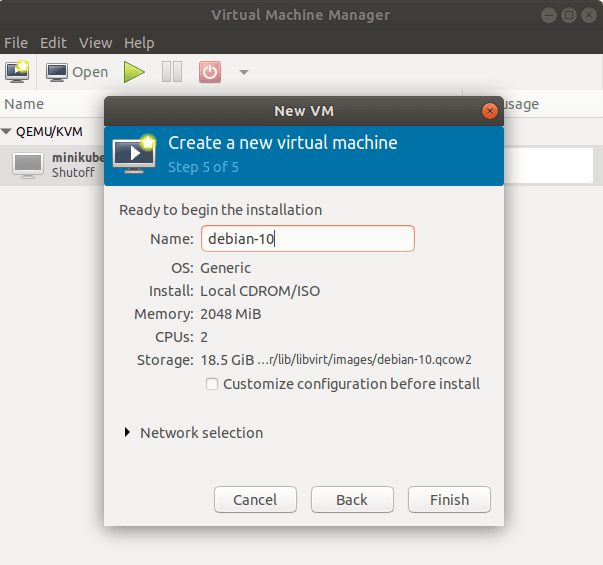
In the last step, provide the preferred name of the virtual machine and confirm that all the other VM details are okay. Additionally, you can choose to configure the Network preferences. For example, you can opt to go with the default NAT network or change to a bridged network if you want your guest machine to be in the same network as the host.
To start the virtual machine, click on the ‘Finish’ button.
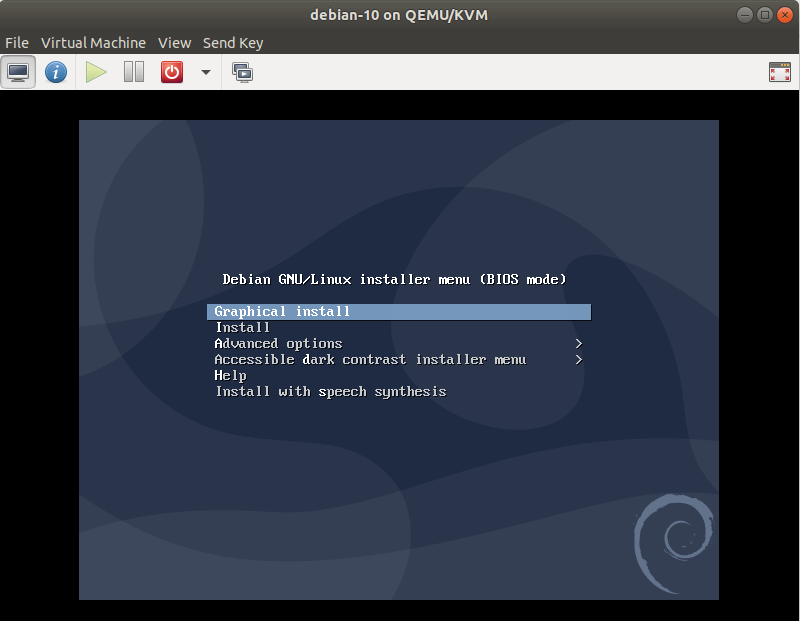
This launches the virtual machine. For those who have installed Debian 10 before, this step should look familiar. However, we will not complete the installation as our main focus is creating and managing virtual machines using KVM. We have an elaborate guide on how to install Debian 10.
That’s pretty much it. In the next article, we will see how to manage KVM virtual machines with Virt-manager or you can also use cockpit to manage virtual machines. If you have any queries about this article, feel free to ask in the comments.
Source: access.redhat.com


Thank you for sharing. I wonder do you have a posting on how to script out a vm image with KVM for deployment or a create template for rapid deployment? Thank you in advance
@Reed,
Here is your requested article – How to Create a KVM Virtual Machine Template