A virtual machine template is essentially a copy of the installed virtual machine that comes in handy when you want to deploy multiple instances of virtual machines. Creating a template is a 3 step process that involves creating a virtual machine, installing all the requisites packages that you want to be installed, and finally cleaning up the template.
Let’s go ahead and see how you can accomplish this.
Step 1: Installing KVM in Linux
The first step is to install KVM on your system. We have comprehensive tutorials on:
Additionally, ensure that the libvirtd daemon is running and is enable to automatically kick on bootup.
$ sudo systemctl enable libvirtd
$ sudo systemctl start libvirtd
Verify if the libvirtd daemon is running.
$ sudo systemctl status libvirtd

If you are running a Ubuntu / Debian system, ensure that the vhost-net image is loaded.
$ sudo modprobe vhost_net
Step 2: Create a KVM Virtual Image
Before we get to creating a template, we need to, first of all, have an installation instance. On the command-line, we are going to create a 20G CentOS 8 KVM image using the qemu-img command as shown.
$ sudo qemu-img create -o preallocation=metadata -f qcow2 /var/lib/libvirt/images/centos8.qcow2 20G

Next, use the virt-install command to create a CentOS 8 virtual machine as shown.
$ sudo virt-install --virt-type kvm --name centos8 --ram 2096 \
--disk /var/lib/libvirt/images/centos8.qcow2,format=qcow2 \
--network network=default \
--graphics vnc,listen=0.0.0.0 --noautoconsole \
--os-type=linux --os-variant=rhel7.0 \
--location=/home/tecmint/Downloads/CentOS-8-x86_64-1905-dvd1.iso

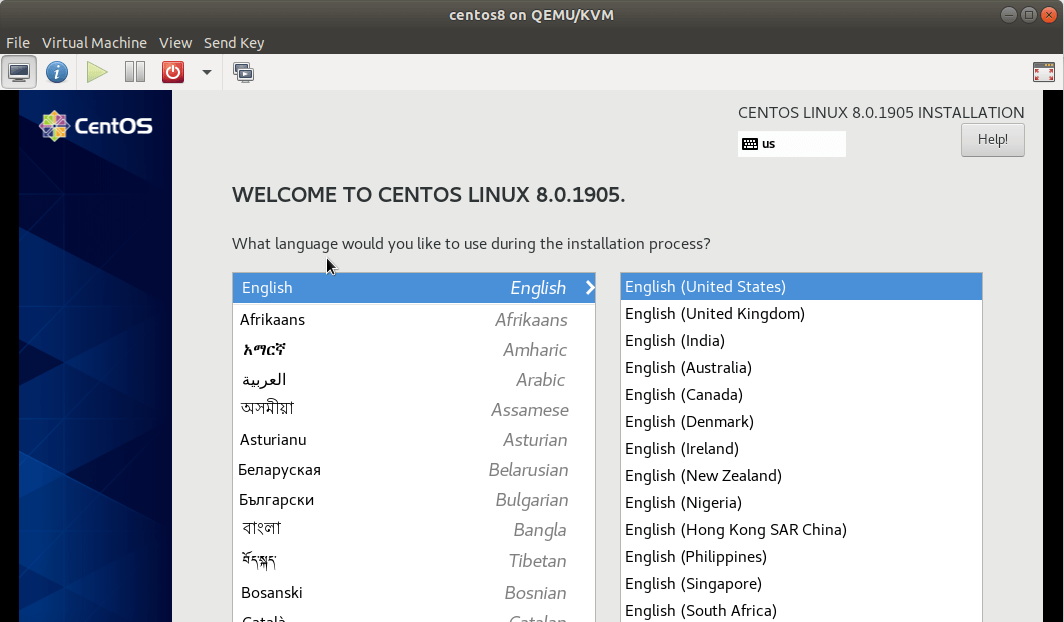
This launches the virtual machine instance. You can confirm this by heading over to the virt-manager and opening the console window as shown. What you can see is the default welcome page for the installer. Be sure to complete the installation to the very end.
Step 3: Creating KVM Virtual Machine Template Image
Once the installation is complete, log into the VM and update all the system packages.
$ sudo dnf update
Install the prerequisite packages that you feel are essential to get started with. In this case, I will install EPEL release, wget, curl, net-tools, and vim. This may be different for your case.
$ sudo dnf install epel-release wget curl net-tools vim
If you intend to deploy your template on a cloud platform, install the cloud-init packages as shown.
$ sudo dnf install cloud-init cloud-utils-growpart acpid
Next, disable the zeroconf route.
$ echo "NOZEROCONF=yes" >> /etc/sysconfig/network
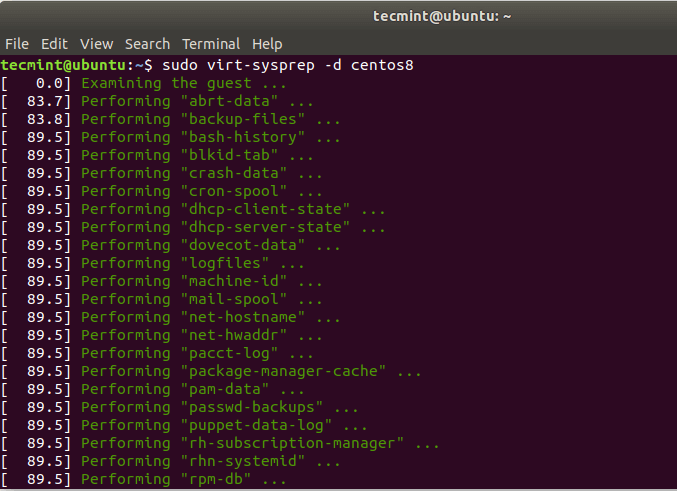
Once you are done, be sure to power off your virtual machine and clean up the VM template image as shown.
$ sudo virt-sysprep -d centos8
The virt-sysprep is a command-line utility that resets a virtual machine in order for clones to be made from it. It removes entries such as SSH host keys, log files, user accounts, and some persistent network configurations. To use the command, first, you must always make sure that the VM is powered off.
$ sudo virt-sysprep -d centos8
Lastly, invoke the command shown to undefine the VM domain.
$ sudo virsh undefine centos8

The template image is now ready for cloning and deployment.


This is not really a template of the VM. It is a new VM. It has a new machine-id which means it cannot be a source for more than one VM.
When I checked the status to verify if libvirtd is running, with this command in the parenthesis (
sudo systemctl status libvirtd), the report stated “inactive (dead)” .Here is the full report:
$ sudo systemctl status libvirtd
○ libvirtd.service - Virtualization daemon
     Loaded: loaded (/usr/lib/systemd/system/libvirtd.service; enabled; preset: disabled)
    Drop-In: /usr/lib/systemd/system/service.d
             └─10-timeout-abort.conf
     Active: inactive (dead)
TriggeredBy: ○ libvirtd-ro.socket
             ○ libvirtd.socket
             ○ libvirtd-tls.socket
             ○ libvirtd-tcp.socket
             ○ libvirtd-admin.socket
       Docs: man:libvirtd(8)
             https://libvirt.org
What needs to be done to fix this and make sure everything is installed and running properly?
Thanks
Hello,
Could you please provide the next step? I mean how to find a template for cloning? I cannot do it. After undefined, I don’t see vm at all.
Thank you