In the current trend of IT Infrastructure, Cloud Computing occupies a tremendous role. Most of the top companies are looking for Cloud Providers to have their Infrastructure. As per our requirement, we can provision our servers at any time. According to the server configuration, we will be charged per usage.
Amazon Marketplace is the place where you can find software from qualified third-party vendors. It is like an online software store where you can buy software and use it as per your need.
In this article, we will see the detailed steps to launch CentOS-Stream from AWS Marketplace.
Set Up CentOS Stream on AWS
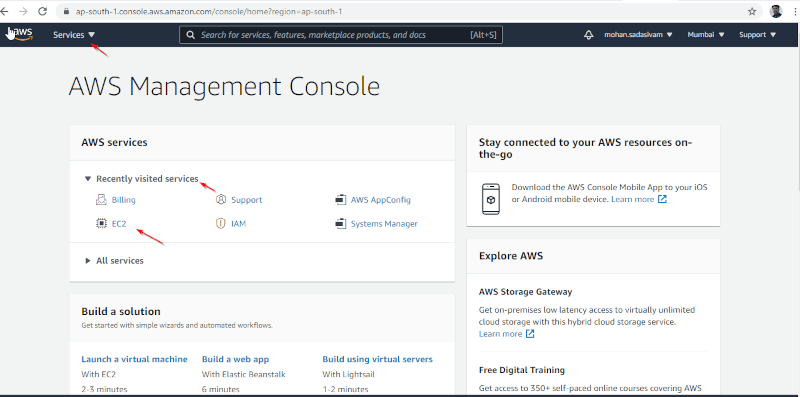
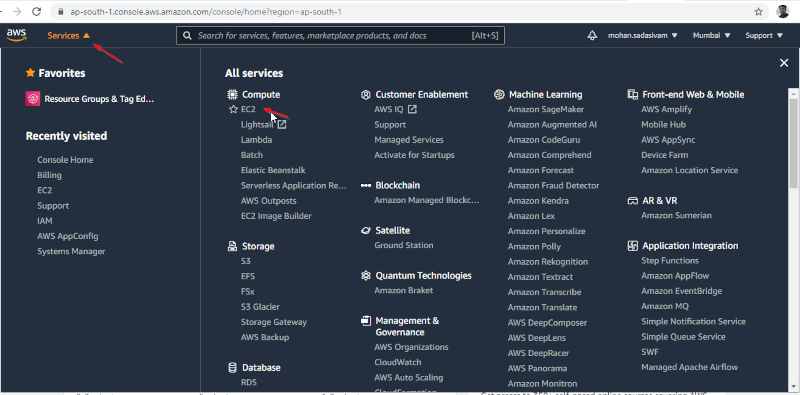
1. Log in to AWS Console, click the ‘Services‘ tab from the right top, and select EC2. Also, you will be shown ‘recently visited services‘.
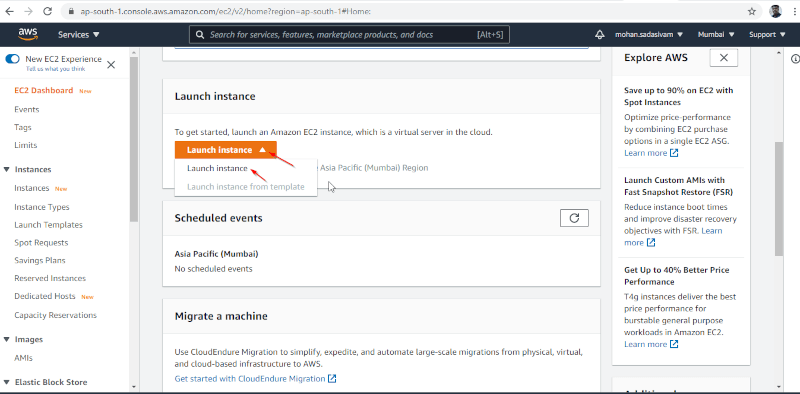
2. Click ‘Launch Instance to launch an Amazon EC2 instance.
3. Click ‘AWS Marketplace‘.

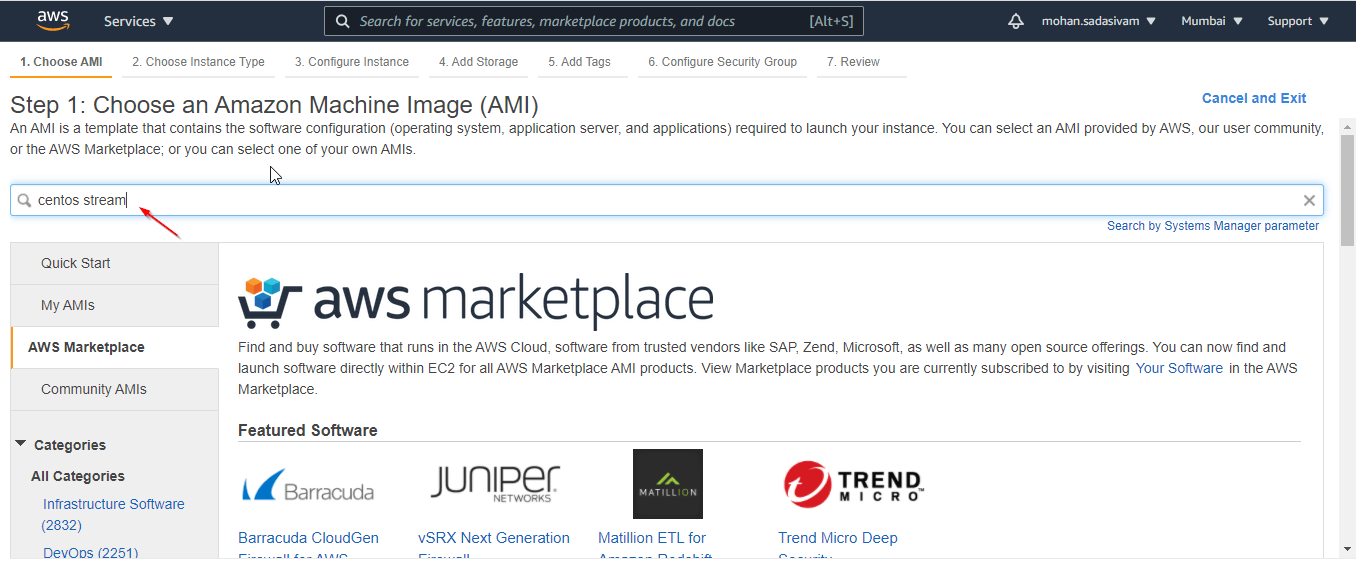
4. Search ‘centos stream‘ in the search bar.
5. You can get CentOS Stream Images. Select as per your requirement. Here I am selecting the first option. From here, there are 7 steps to Launch the Instance.

6. Once selected the Image, you will get details of the release with price details. Click ‘Continue’.

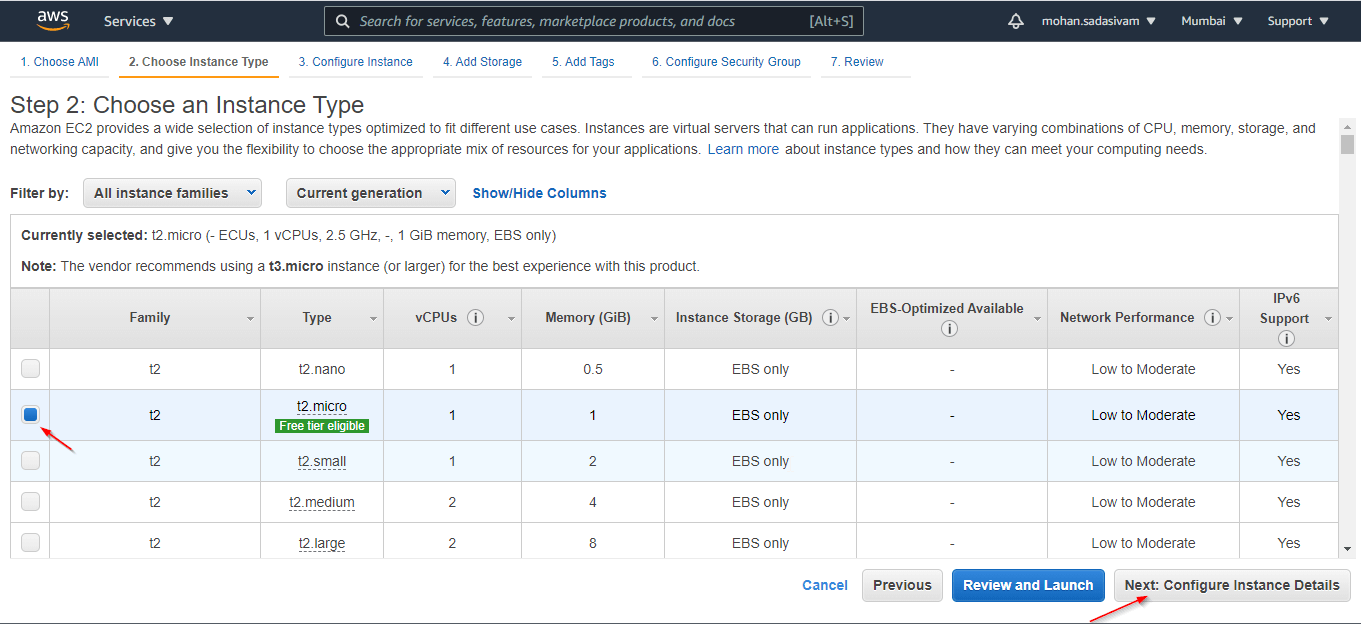
7. According to the Instance type, the price will get vary. Here I am selecting ‘t2 – Free Tier‘ for demonstration.
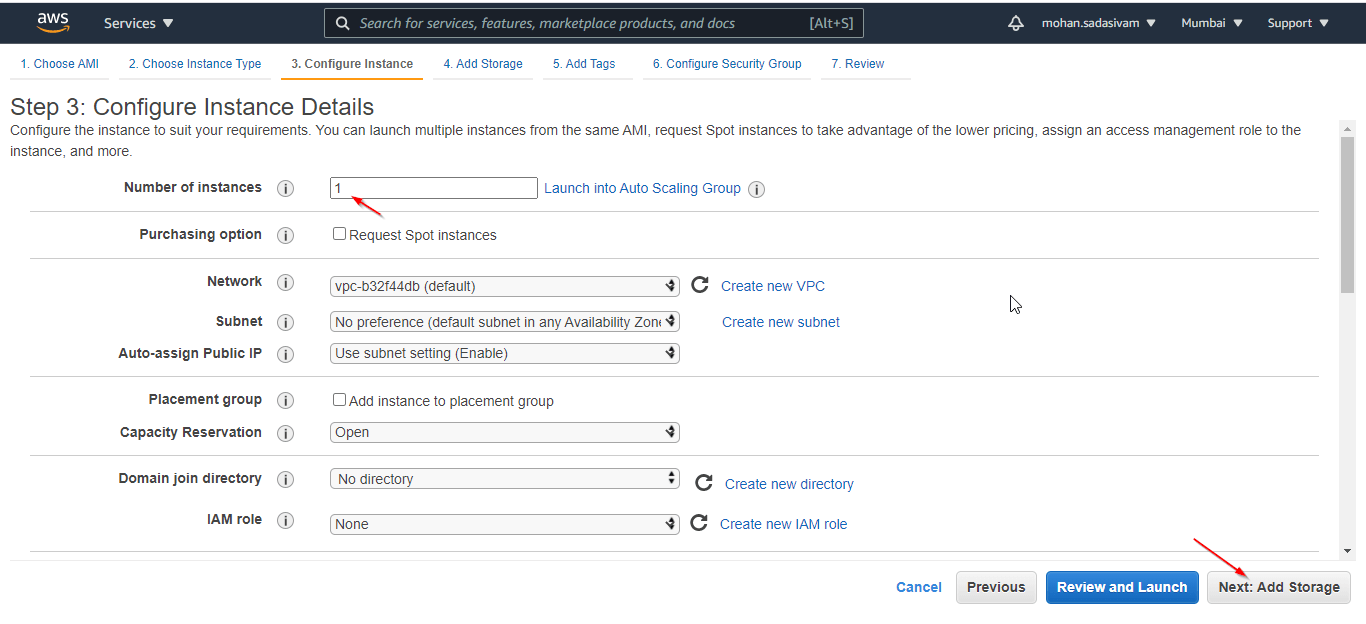
8. Configure the Instance Details. You can launch multiple Instances in a single shot.
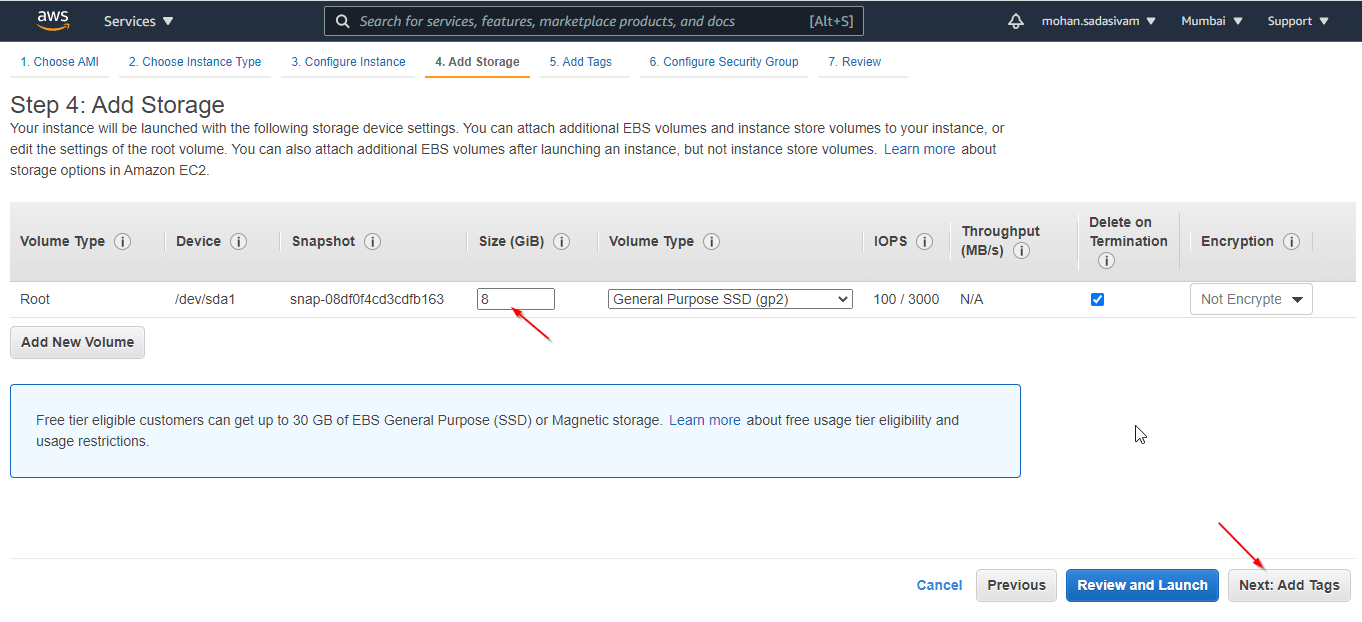
9. Add Storage if you require more. By default, 8GB will be provided.
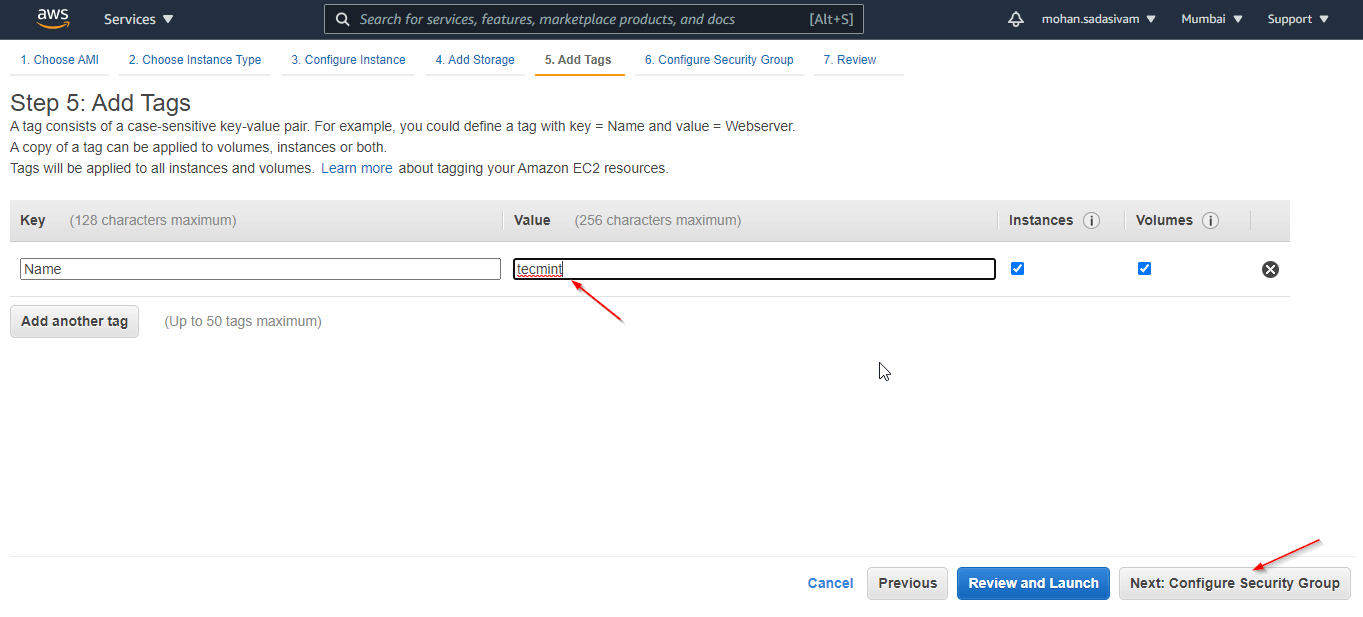
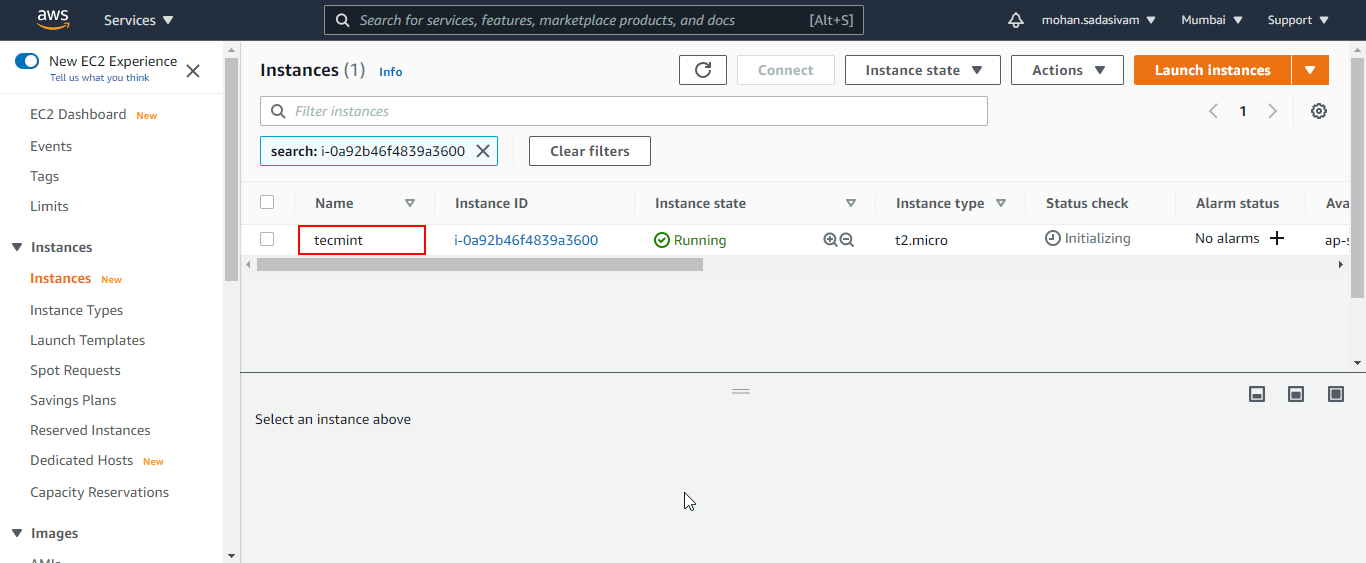
10. Add tag for Instance identification. Here, I have named as ‘tecmint‘.

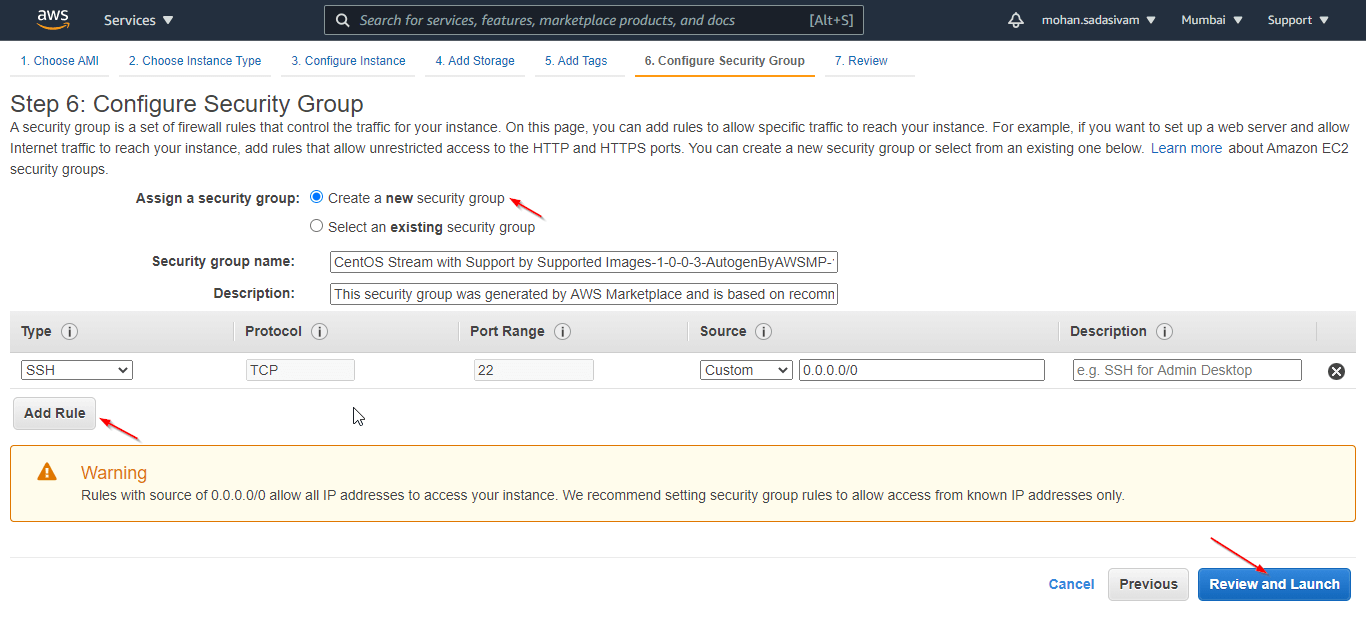
11. Configure the Security Group by selecting a new security group and configure it according to your requirement. By default, ssh and its port would be opened.
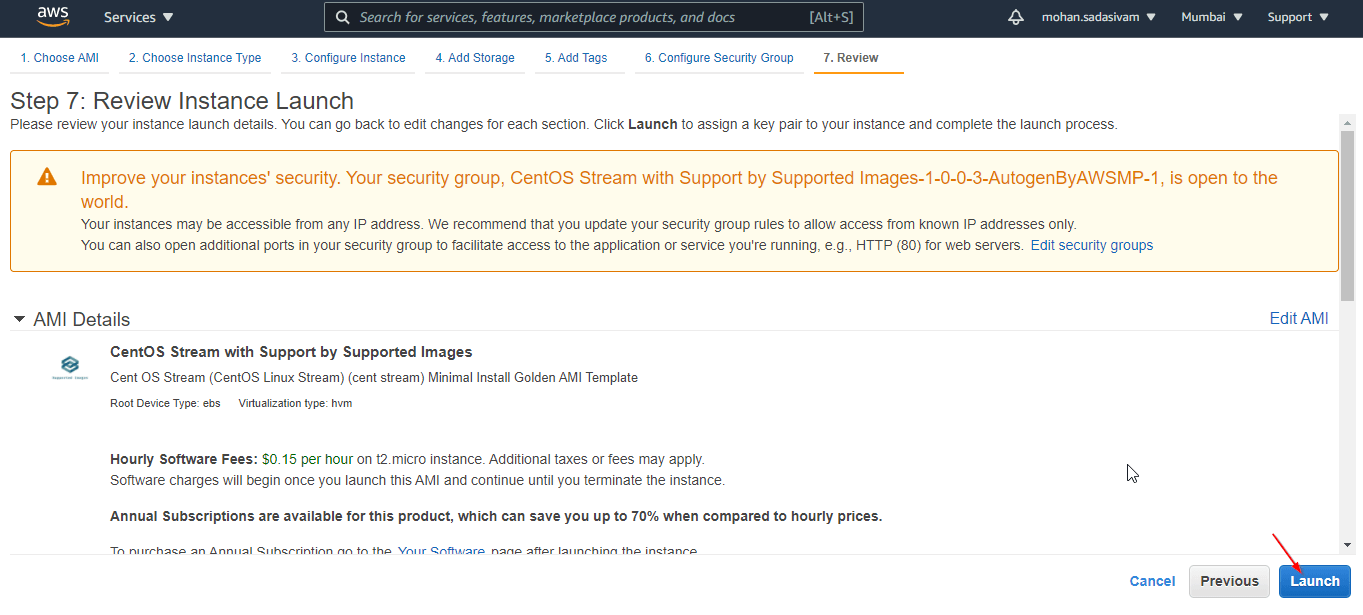
12. You can review all the configuration details of the Instance. Click ‘Launch‘ to proceed.
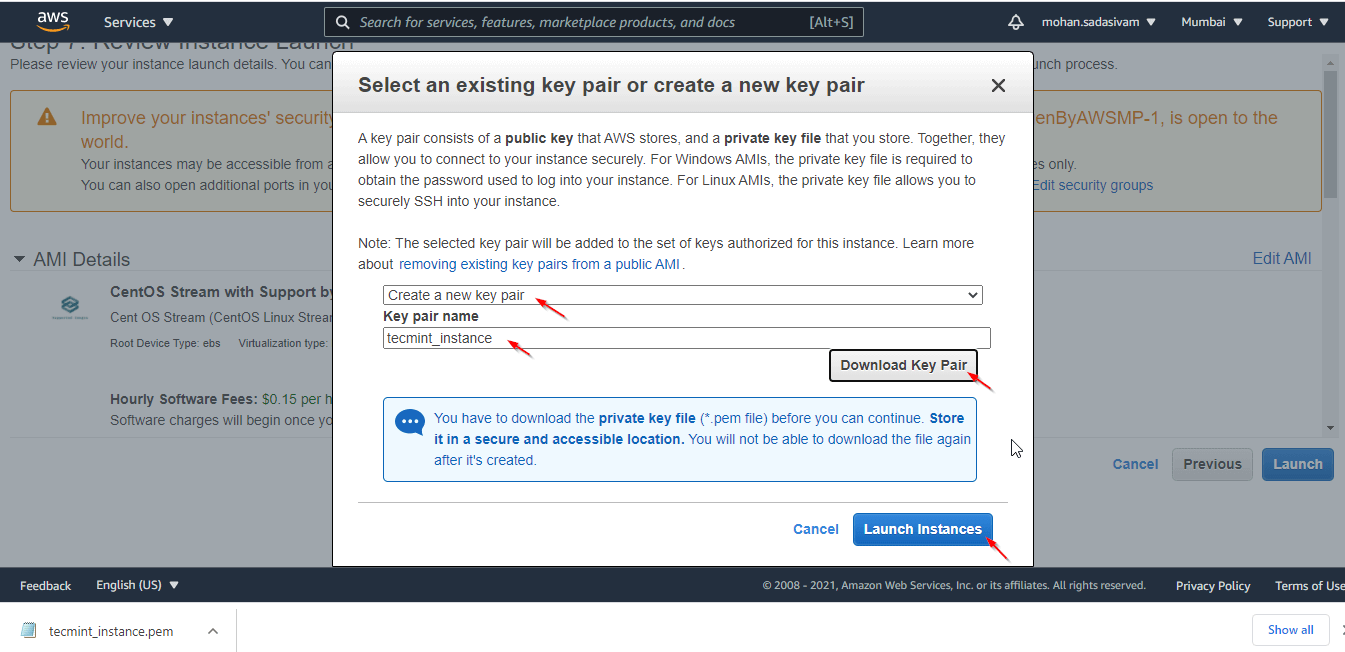
13. You will be asked to create or select a key pair for connecting the server from ssh client. Select ‘Create a new key pair‘, name your key pair, and download. Click ‘Launch Instance‘ to launch.
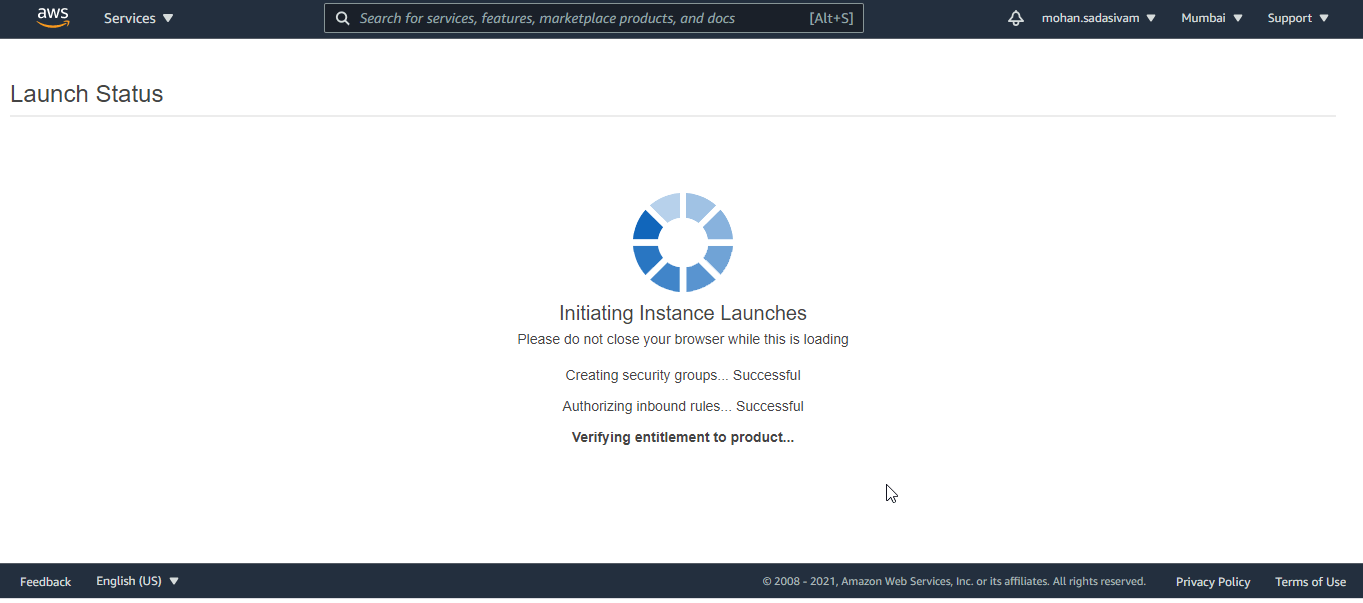
14. Once launched, an instance ID will be created. You can click the Instance ID to get into the Instance page.
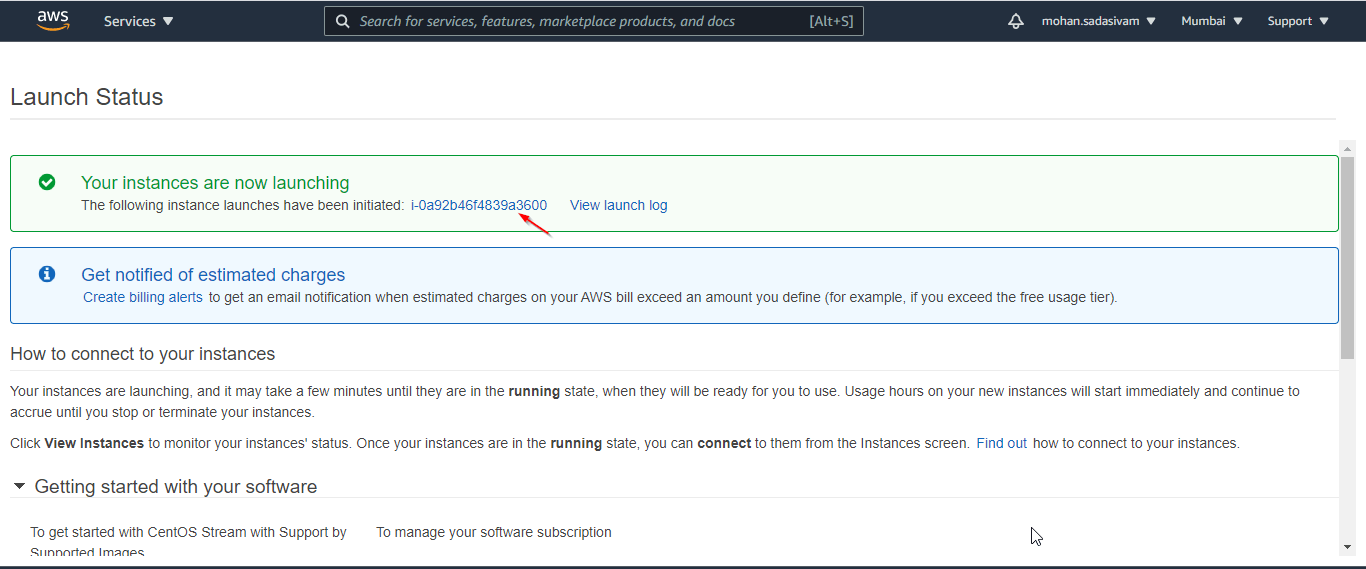
15. You can view the Instance that you launched.
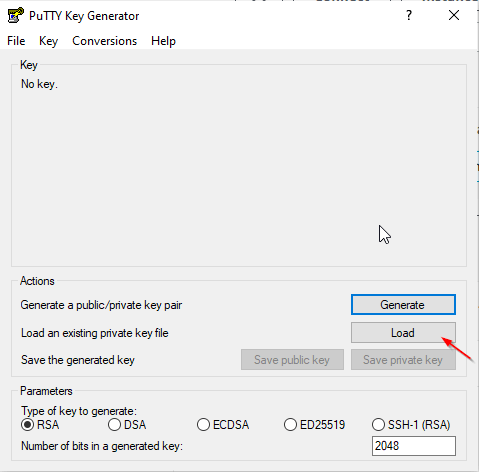
16. To connect to the CentOS-Stream server through Putty, you have to create a private key using the .pem (tecmint_instance) file downloaded from AWS while launching the instance. Open ‘Putty Key Generator’ and Load ‘tecmint_instance‘ from your local system.
17. Click ‘OK’ and save the private key.

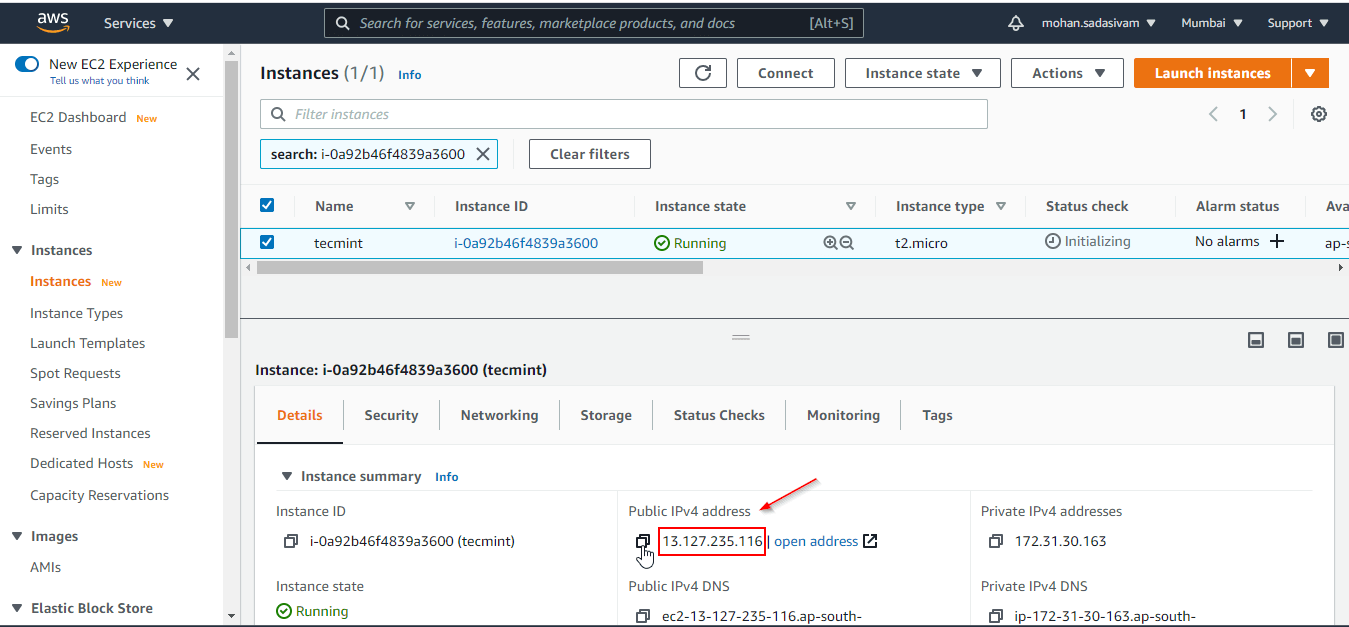
18. Copy the Public IP address of the CentOS-Stream Instance from the AWS Instances page.
19. Open PuTTy and enter the IP address. Expand SSH by clicking + symbol.

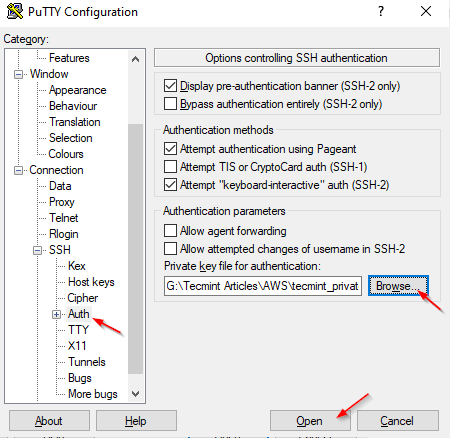
20. Click ‘Auth’, browse the private key that you created and click ‘Open’ to connect the server.
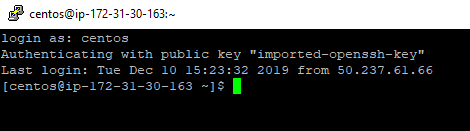
21. You will be connected, ‘centos‘ is the default username to connect using AWS key.
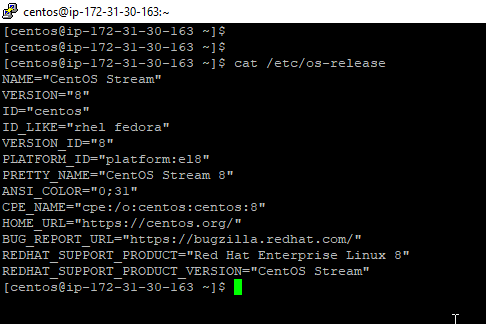
22. You can verify the OS release using the below cat command.
$ cat /etc/os-release
Conclusion
In this article, we have seen detailed steps to launch CentOS-Stream from AWS Marketplace. We will see other services of AWS in upcoming articles.