Alfresco is an open source ECM system (Enterprise Content Management) written in Java which provides electronic management, collaboration and business control.

This guide will cover how to install and configure Alfresco Community Edition on RHEL/CentOS 7/6, Debian 8 and Ubuntu systems with Nginx server as a frontend web server for the application.
Requirements
As for the minimum system requirements, Alfresco needs a machine with at least 4 GB of RAM and a 64-bit Operating System.
Step 1: Install Alfresco Community Edition
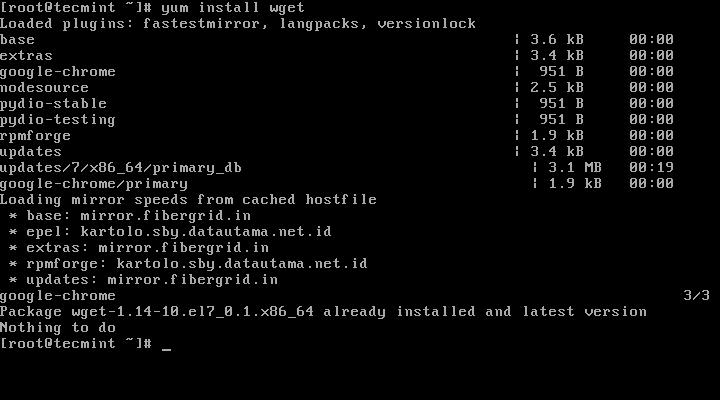
1. Before proceeding with Alfresco installation first assure that wget utility is installed on your machine by issuing the below command with root privileges or from root account.
# yum install wget
# apt-get install wget
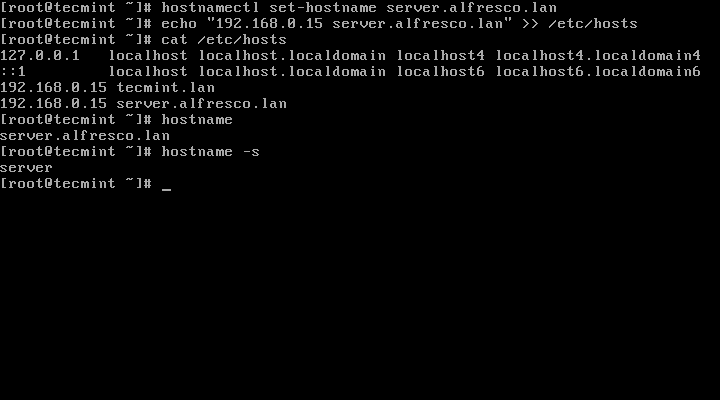
2. Next, setup your system hostname and assure that local resolution points to your server IP Address by issuing the following commands:
# hostnamectl set-hostname server.alfresco.lan
# echo “192.168.0.40 server.alfresco.lan” >> /etc/hosts
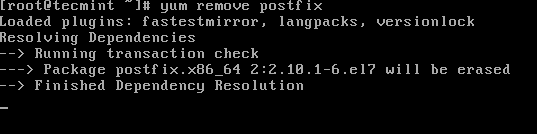
3. Remove any MTA from the machine (in this case Postfix Mail server) by issuing the below command:
# yum remove postfix
# apt-get remove postfix
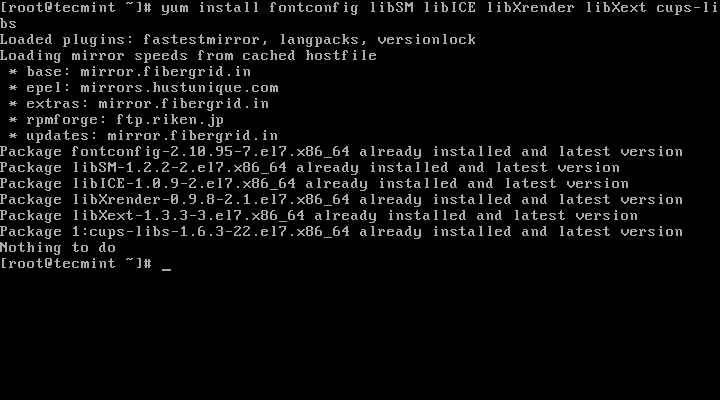
4. Install the following dependencies required by Alfresco software in order to run properly:
# yum install fontconfig libSM libICE libXrender libXext cups-libs
# apt-get install libice6 libsm6 libxt6 libxrender1 libfontconfig1 libcups2
5. Next, go to Alfresco Community Edition repository page hosted on sourceforge.net portal and grab the latest binary version (i.e. alfresco-community-5.0.d-installer-linux-x64.bin) for Linux using wget utility.
# wget http://nchc.dl.sourceforge.net/project/alfresco/Alfresco%205.0.d%20Community/alfresco-community-5.0.d-installer-linux-x64.bin
6. After the binary file download finishes, issue the following command in order to grant execution permissions for the file and run alfresco installer.
# chmod +x alfresco-community-5.0.d-installer-linux-x64.bin
# ./alfresco-community-5.0.d-installer-linux-x64.bin
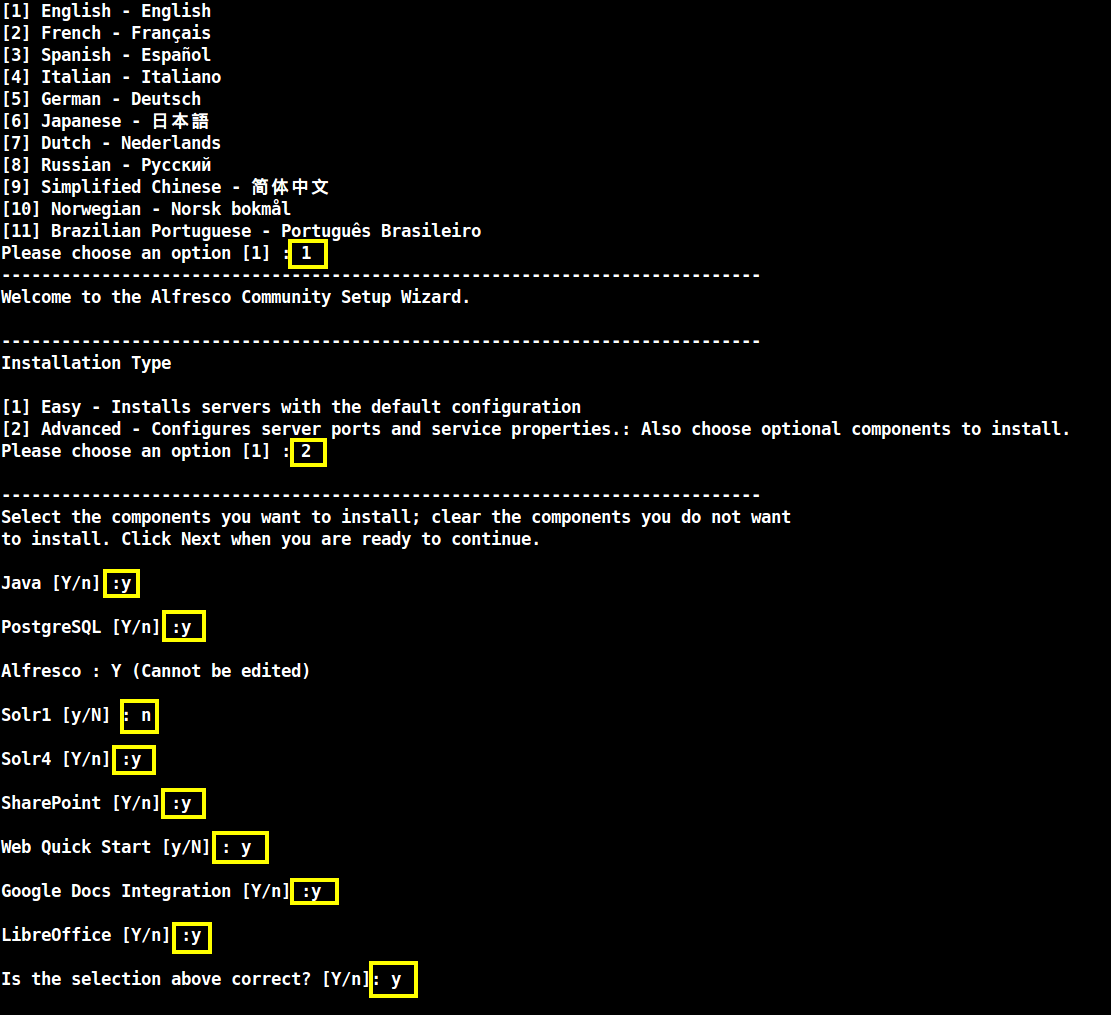
7. After the installation process starts, select the language and continue the installation process by using the below installation wizard as a guide to configure Alfresco:
[root@server ~]# ./alfresco-community-5.0.d-installer-linux-x64.bin Language Selection Please select the installation language [1] English - English [2] French - Français [3] Spanish - Español [4] Italian - Italiano [5] German - Deutsch [6] Japanese - 日本語 [7] Dutch - Nederlands [8] Russian - Русский [9] Simplified Chinese - 简体中文 [10] Norwegian - Norsk bokmål [11] Brazilian Portuguese - Português Brasileiro Please choose an option [1] :1---------------------------------------------------------------------------- Welcome to the Alfresco Community Setup Wizard. ---------------------------------------------------------------------------- Installation Type [1] Easy - Installs servers with the default configuration [2] Advanced - Configures server ports and service properties.: Also choose optional components to install. Please choose an option [1] :2---------------------------------------------------------------------------- Select the components you want to install; clear the components you do not want to install. Click Next when you are ready to continue. Java [Y/n] :yPostgreSQL [Y/n] :yAlfresco : Y (Cannot be edited) Solr1 [y/N] :nSolr4 [Y/n] :ySharePoint [Y/n] :yWeb Quick Start [y/N] :yGoogle Docs Integration [Y/n] :yLibreOffice [Y/n] :yIs the selection above correct? [Y/n]:y
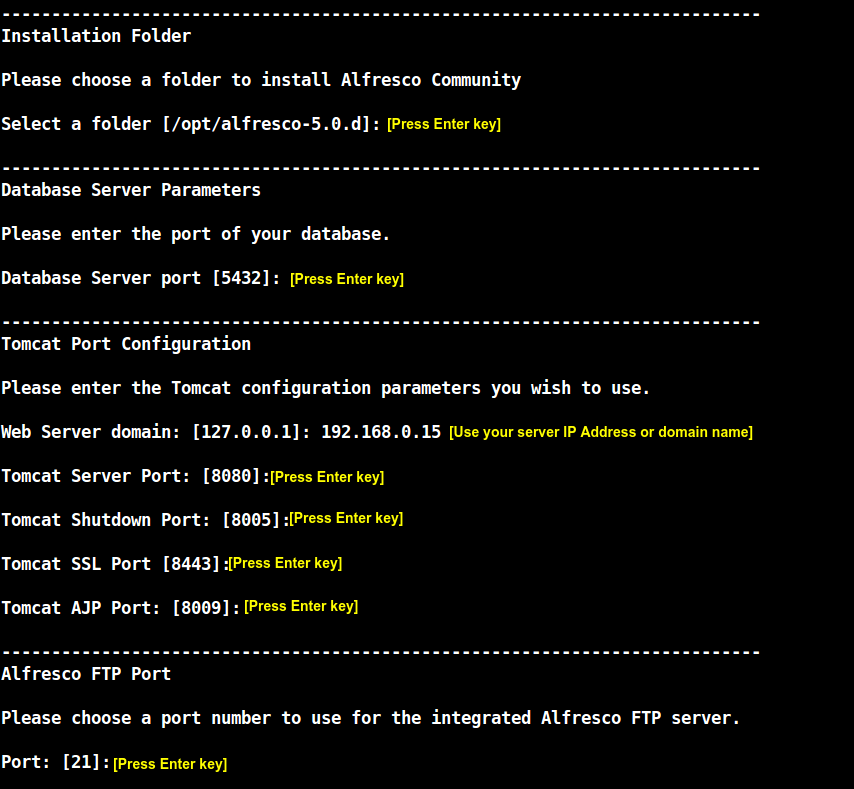
Alfresco Installation Wizard Continues….
---------------------------------------------------------------------------- Installation Folder Please choose a folder to install Alfresco Community Select a folder [/opt/alfresco-5.0.d]:[Press Enter key]---------------------------------------------------------------------------- Database Server Parameters Please enter the port of your database. Database Server port [5432]:[Press Enter key]---------------------------------------------------------------------------- Tomcat Port Configuration Please enter the Tomcat configuration parameters you wish to use. Web Server domain: [127.0.0.1]:192.168.0.15Tomcat Server Port: [8080]:[Press Enter keyTomcat Shutdown Port: [8005]:[Press Enter keyTomcat SSL Port [8443]:[Press Enter keyTomcat AJP Port: [8009]:[Press Enter key---------------------------------------------------------------------------- Alfresco FTP Port Please choose a port number to use for the integrated Alfresco FTP server. Port: [21]:[Press Enter key
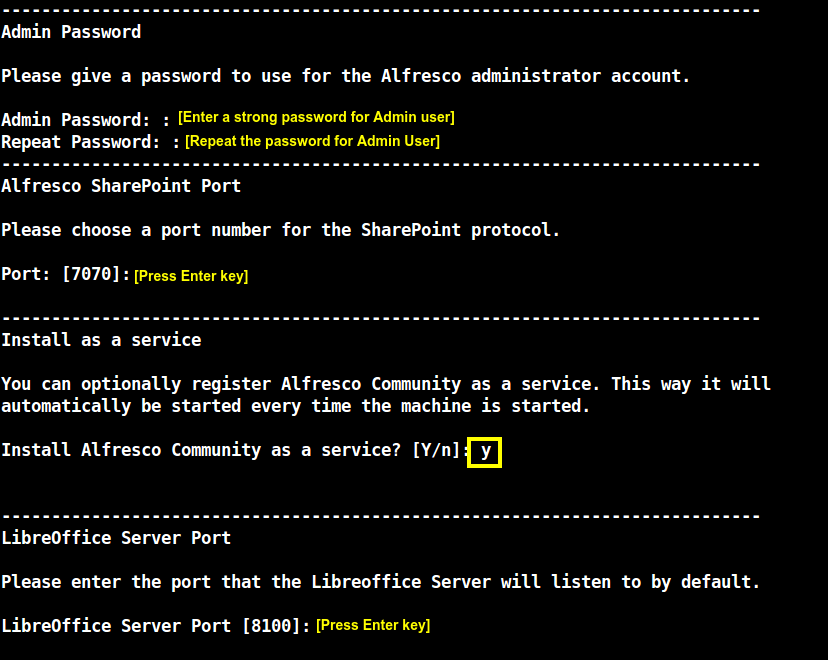
Alfresco Installation Continues…
---------------------------------------------------------------------------- Admin Password Please give a password to use for the Alfresco administrator account. Admin Password: :[Enter a strong password for Admin user]Repeat Password: :[Repeat the password for Admin User]---------------------------------------------------------------------------- Alfresco SharePoint Port Please choose a port number for the SharePoint protocol. Port: [7070]:[Press Enter key]---------------------------------------------------------------------------- Install as a service You can optionally register Alfresco Community as a service. This way it will automatically be started every time the machine is started. Install Alfresco Community as a service? [Y/n]:y---------------------------------------------------------------------------- LibreOffice Server Port Please enter the port that the Libreoffice Server will listen to by default. LibreOffice Server Port [8100]:[Press Enter key]----------------------------------------------------------------------------
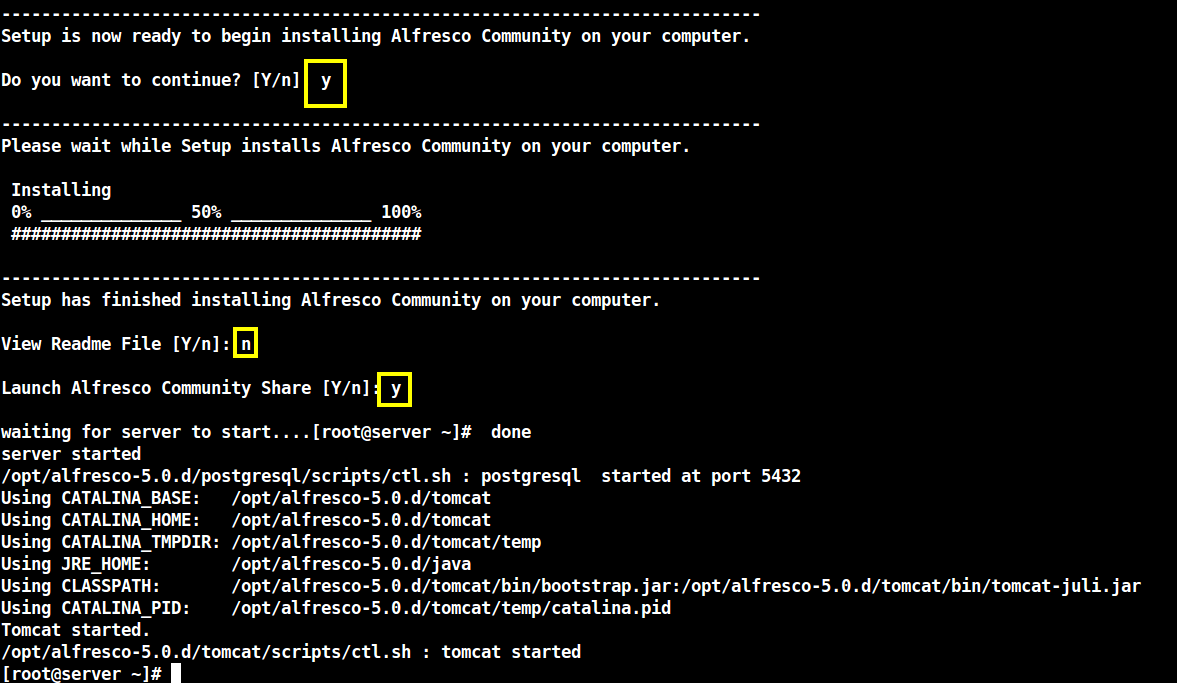
Alfresco Installation Setup Continues..
---------------------------------------------------------------------------- Setup is now ready to begin installing Alfresco Community on your computer. Do you want to continue? [Y/n]:y---------------------------------------------------------------------------- Please wait while Setup installs Alfresco Community on your computer. Installing 0% ______________ 50% ______________ 100% ######################################### ---------------------------------------------------------------------------- Setup has finished installing Alfresco Community on your computer. View Readme File [Y/n]:nLaunch Alfresco Community Share [Y/n]:ywaiting for server to start....[root@server ~]# done server started /opt/alfresco-5.0.d/postgresql/scripts/ctl.sh : postgresql started at port 5432 Using CATALINA_BASE: /opt/alfresco-5.0.d/tomcat Using CATALINA_HOME: /opt/alfresco-5.0.d/tomcat Using CATALINA_TMPDIR: /opt/alfresco-5.0.d/tomcat/temp Using JRE_HOME: /opt/alfresco-5.0.d/java Using CLASSPATH: /opt/alfresco-5.0.d/tomcat/bin/bootstrap.jar:/opt/alfresco-5.0.d/tomcat/bin/tomcat-juli.jar Using CATALINA_PID: /opt/alfresco-5.0.d/tomcat/temp/catalina.pid Tomcat started. /opt/alfresco-5.0.d/tomcat/scripts/ctl.sh : tomcat started
8. After the installation process finishes and Alfresco services are started issue the below commands in order to open the following firewall ports to allow external hosts in your network to connect to the web application.
# firewall-cmd --add-port=8080/tcp -permanent
# firewall-cmd --add-port=8443/tcp -permanent
# firewall-cmd --add-port=7070/tcp -permanent
# firewall-cmd --reload
In case you need to add other firewall rules to open ports in order to access custom Alfresco services issue the ss command to get a list of all the services running on your machine.
# ss -tulpn
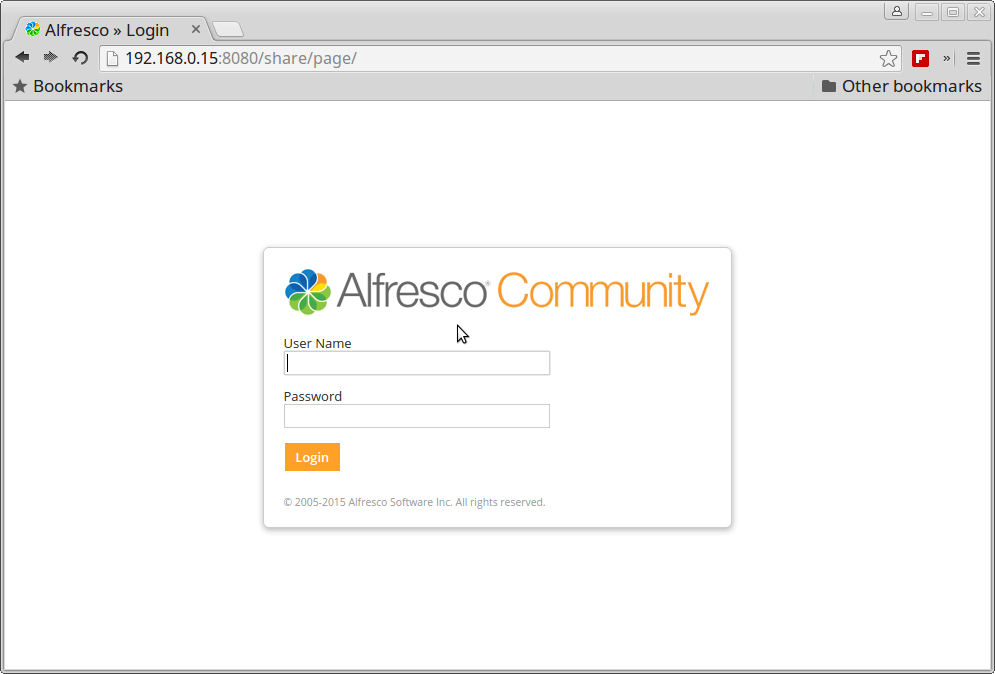
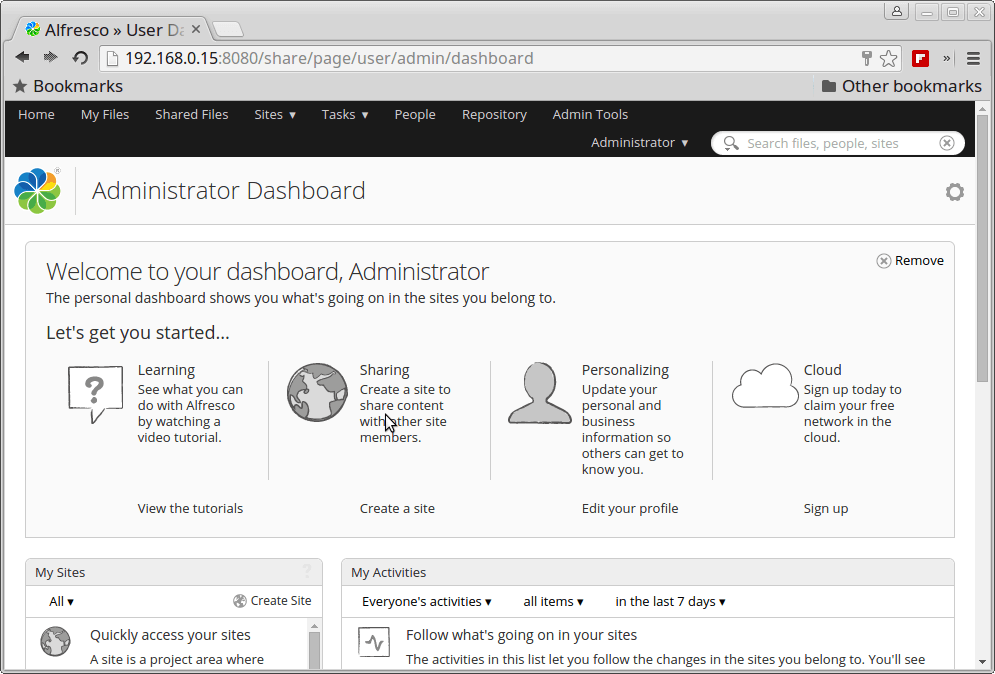
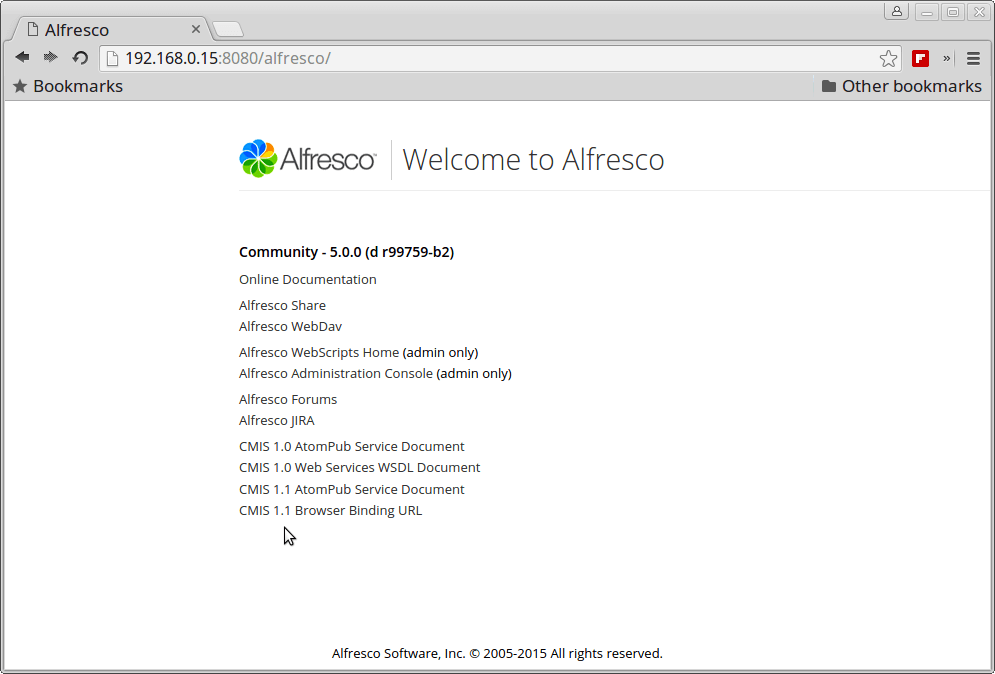
9. To access Alfresco web services, open a browser and use the following URLs (replace the IP Address or domain accordingly). Login with admin user and the password configured for Admin through the installation process.
http://IP-or-domain.tld:8080/share/
http://IP-or-domain.tld:8080/alfresco/
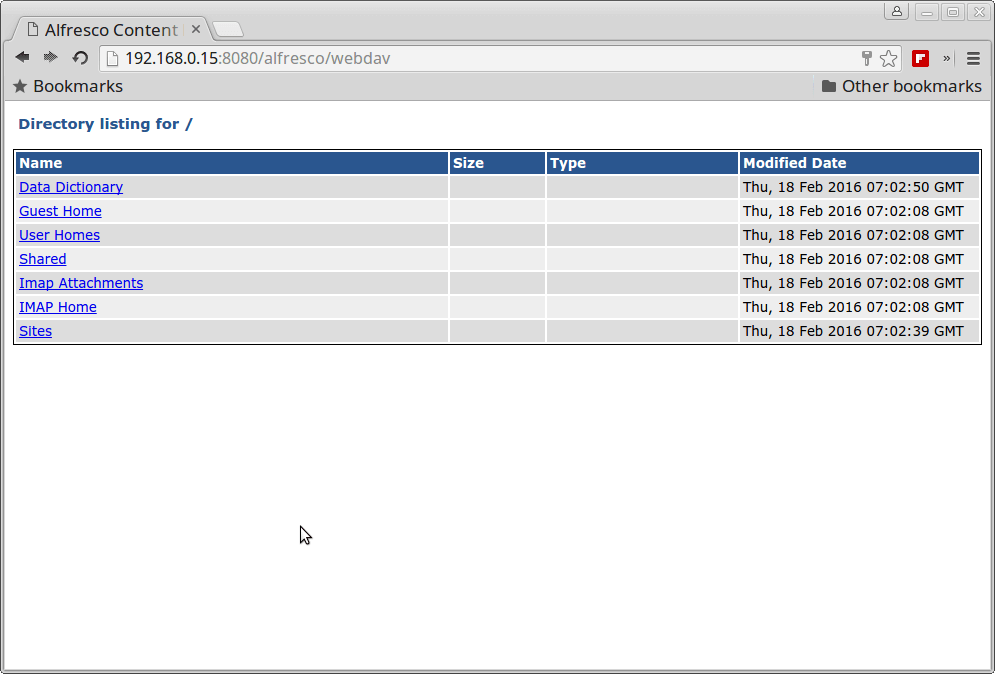
For WebDAV.
http://IP-or-domain.tld:8080/alfresco/webdav
For HTTPS accept the security exception.
https://IP-or-domain.tld:8443/share/
Alfresco SharePoint Module with Microsoft.
http://IP-or-domain.tld:7070/
Step 2: Configure Nginx as Frontend Web Server for Alfresco
10. In order to install Nginx server on the system, first add Epel Repositories on CentOS/RHEL by issuing the below command:
# yum install epel-release
11. After Epel repos are added into the system proceed with Nginx web server installation by issuing the following command:
# yum install nginx       [On RHEL/CentOS Systems]
# apt-get install nginx   [On Debian/Ubuntu Systems]
12. On the next step open Nginx configuration file from /etc/nginx/nginx.conf with a text editor and make the following changes:
location / {
        proxy_pass http://127.0.0.1:8080;
        proxy_redirect off;
        proxy_set_header Host $host;
        proxy_set_header X-Real-IP $remote_addr;
        proxy_set_header X-Forwarded-For $proxy_add_x_forwarded_for;
        proxy_set_header X-Forwarded-Proto $scheme;
    }
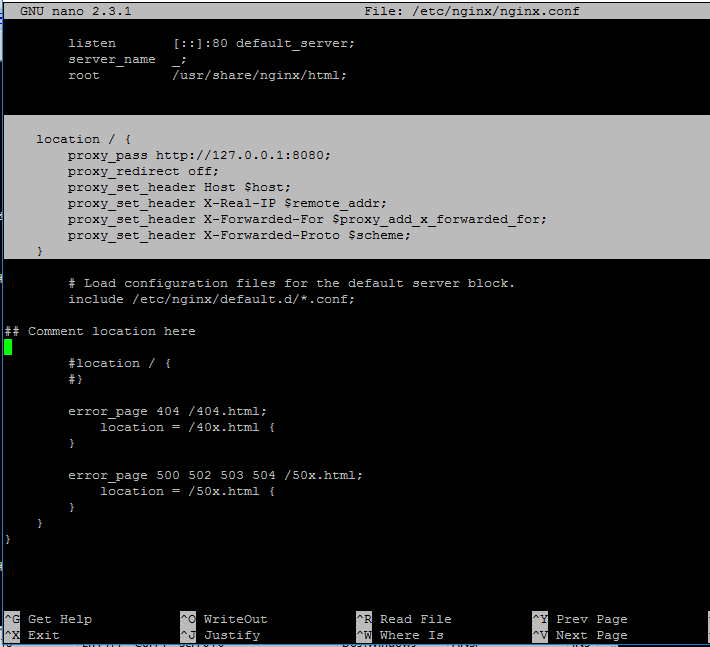
Go below and make sure you comment the second location statement by placing a # in front of the following lines:
#location / {
#        }
13. After you’re done, save and close Nginx configuration file and restart daemon to reflect change by issuing the following command:
# systemctl restart nginx.service
14. In order to access Alfresco web interface add a new firewall rule to open port 80 on your machine and navigate to the below URL. Also, make sure Selinux policy is disabled on RHEL/CentOS systems.
# firewall-cmd --add-service=http -permanent
# firewall-cmd --reload
# setenforce 0
To completely disable Selinux policy on the system, open /etc/selinux/config file and set the line SELINUX from enforcing to disabled.
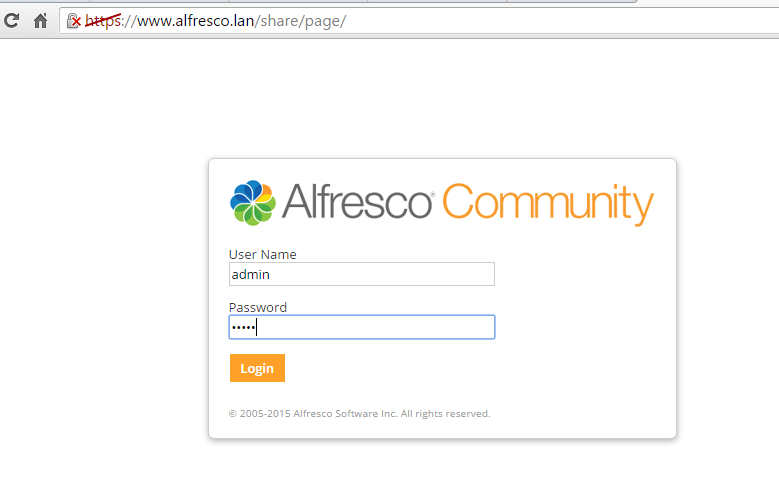
15. Now you can access Alfresco through Nginx.
 http://IP-or-domain.tld/share/
 http://IP-or-domain.tld/alfresco/
 http://IP-or-domain.tld/alfresco/webdav
15. In case you want to securely visit Alfresco web interface through Nginx proxy with SSL, create a Self-Signed Certificate for Nginx on /etc/nginx/ssl/ directory and fill the certificate with your custom settings as illustrated on below screenshot:
# mkdir /etc/nginx/ssl
# cd /etc/nginx/ssl/
# openssl req -x509 -nodes -days 365 -newkey rsa:2048 -keyout alfresco.key -out alfresco.crt
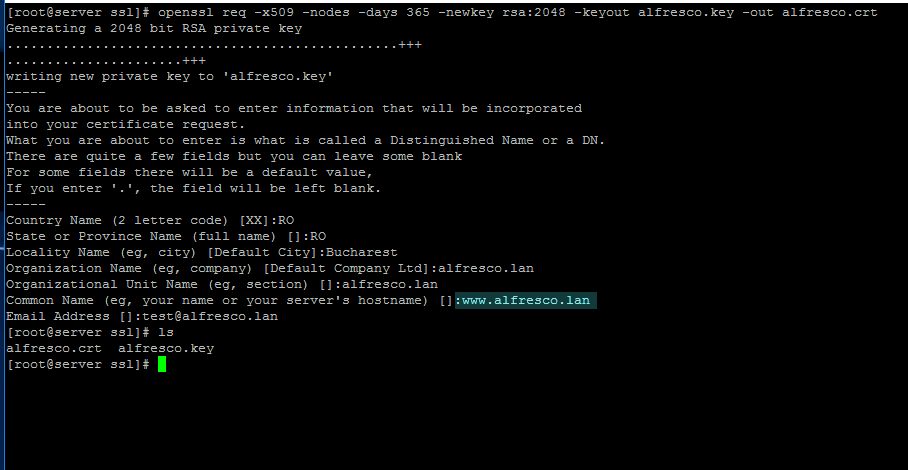
Pay attention to Certificate Common Name to match your domain hostname.
17. Next, open Nginx configuration file for editing and add the following block before the last closing curly bracket (the } symbol).
# vi /etc/nginx/nginx.conf
Nginx SSL block excerpt:
server {
    listen 443;
    server_name _;

    ssl_certificate           /etc/nginx/ssl/alfresco.crt;
    ssl_certificate_key       /etc/nginx/ssl/alfresco.key;

    ssl on;
    ssl_session_cache  builtin:1000  shared:SSL:10m;
    ssl_protocols  TLSv1 TLSv1.1 TLSv1.2;
    ssl_ciphers HIGH:!aNULL:!eNULL:!EXPORT:!CAMELLIA:!DES:!MD5:!PSK:!RC4;
    ssl_prefer_server_ciphers on;

    access_log            /var/log/nginx/ssl.access.log;

      location / {
        proxy_pass http://127.0.0.1:8080;
        proxy_redirect off;
        proxy_set_header Host $host;
        proxy_set_header X-Real-IP $remote_addr;
        proxy_set_header X-Forwarded-For $proxy_add_x_forwarded_for;
        proxy_set_header X-Forwarded-Proto $scheme;
    }
## This is the last curly bracket before editing the file.
  }
18. Finally, restart Nginx daemon to apply changes, add a new firewall rule for 443 port.
# systemctl restart nginx
# firewall-cmd -add-service=https --permanent
# firewall-cmd --reload
and instruct the browser to your domain URL using the HTTPS protocol.
https://IP_or_domain.tld/share/
https://IP_or_domain.tld/alfresco/
19. In order to enable Alfresco and Nginx daemons system-wide run the below command:
# systemctl enable nginx alfresco
That’s all! Alfresco offers integration with MS Office and LibreOffice via CIFs protocol providing a familiar workflow for users.


How to change the Web Server address I just type the default 192.168.0.15 and cannot access Afresco still.
Any ideas?
How about a step by step guide to install the alfresco 6.0 version ?
@Rajagopal,
Yes, let me update the article to alfresco 6.0 version..
Using nginx with ssl after ignoring the auto-signed certificate error, alfresco does not open, says “404 Not Found” although it can open the index normally.
Follows my configuration file: /etc/nginx/sites-availables/name-ip-ssl.conf
## File content ## server { listen 443 ssl; server_name 192.168.10.11; ssl_certificate /etc/nginx/ssl/cert.crt; ssl_certificate_key /etc/nginx/ssl/cert.key; ssl_session_cache shared:SSL:1m; ssl_session_timeout 5m; ssl_ciphers HIGH:!aNULL:!MD5; ssl_prefer_server_ciphers on; access_log /var/log/nginx/192.168.10.11-ssl.access.log; error_log /var/log/nginx/192.168.10.11-ssl.error.log; root /srv/http; location / { index index.html index.htm index.php; autoindex on; autoindex_exact_size off; autoindex_localtime on; } location /phpmyadmin { rewrite ^/* /phpMyAdmin last; } location ~ \.php$ { #fastcgi_pass 127.0.0.1:9000; (depending on your php-fpm socket configuration) fastcgi_pass unix:/run/php-fpm/php-fpm.sock; fastcgi_index index.php; include fastcgi.conf; } }Congratulations on the article.
I’m having trouble enabling services to start automatically.
Synchronizing state of nginx.service with SysV service script with /lib/systemd/systemd-sysv-install.
Executing: /lib/systemd/systemd-sysv-install enable nginx
alfresco.service is not a native service, redirecting to systemd-sysv-install.
Executing: /lib/systemd/systemd-sysv-install enable alfresco
update-rc.d: error: alfresco Default-Start contains no runlevels, aborting.
Hello, Cesar,
I followed all the setup steps listed and I’m having problems on the client side to access the alfresco page via nginx with ssl.
I created a self signed certificate however the browsers continue to classify as “unsafe”
On CentOS 7, you need to install cairo
yum install cairo
Correction on firewall command:
should be two dash before add-port and permanent options
@Kholil,
Thanks, corrected in the writeup..
Excellent tutorial, I Used a lot of it for my setup. I have everything working with nginx including a certificate. When I go to
https://shareit shows the cert and when I login it goes back to the http page.On the resulting page if I switch http to https it sticks from that page forward, but for some reason the transition from the login page to the next page it switches to http. Missing something?
Thanks.
JR
It looks like a redirect issue with your nginx configuration. Post your nginx configuration in order to debug the issue.
Please find my configuration.
user nginx; worker_processes auto; error_log /var/log/nginx/error.log; pid /run/nginx.pid; # Load dynamic modules. See /usr/share/nginx/README.dynamic. include /usr/share/nginx/modules/*.conf; events { worker_connections 1024; } http { log_format main '$remote_addr - $remote_user [$time_local] "$request" ' '$status $body_bytes_sent "$http_referer" ' '"$http_user_agent" "$http_x_forwarded_for"'; access_log /var/log/nginx/access.log main; sendfile on; tcp_nopush on; tcp_nodelay on; keepalive_timeout 65; types_hash_max_size 2048; include /etc/nginx/mime.types; default_type application/octet-stream; # Load modular configuration files from the /etc/nginx/conf.d directory. # See http://nginx.org/en/docs/ngx_core_module.html#include # for more information. include /etc/nginx/conf.d/*.conf; server { listen 80 default_server; listen [::]:80 default_server; server_name _; root /usr/share/nginx/html; # Load configuration files for the default server block. include /etc/nginx/default.d/*.conf; location / { proxy_pass http://127.0.0.1:8080; proxy_redirect off; proxy_set_header HOST $host; proxy_set_header X-Real-IP $remote_addr; proxy_set_header X-Forward-For $proxy_add_x_forwarded_for; proxy_set_header X-Forwarded-Proto $scheme; } error_page 404 /404.html; location = /40x.html { } error_page 500 502 503 504 /50x.html; location = /50x.html { } } server { listen 443; server_name _; ssl_certificate /etc/nginx/ssl/alfresco.meyo.local.crt; ssl_certificate_key /etc/nginx/ssl/alfresco.meyo.local.key; ssl on; ssl_session_cache builtin:1000 shared:SSL:10m; ssl_protocols TLSv1 TLSv1.1 TLSv1.2; ssl_ciphers HIGH:!aNULL:!eNULL:!EXPORT:!CAMELLIA:!DES:!MD5:!PSK:!RC4; ssl_prefer_server_ciphers on; access_log /var/log/nginx/ssl.access.log; location / { proxy_pass http://127.0.0.1:8080; proxy_redirect off; proxy_set_header Host $host; proxy_set_header X-Real-IP $remote_addr; proxy_set_header X-Forwarded-For $proxy_add_x_forwarded_for; proxy_set_header X-Forwarded-Proto $scheme; } ## This is the last curly bracket before editing the file. } }Configuration file looks OK! Try to force the redirect from http to https by adding the following line after the
server_namedirective on default 80 default server:return 301 https://$host$request_uri;Also, make sure you delete of all your browser cache.
Thanks for the help, partly worked or worked but I noticed some other things:
With https, not https, after login get “Something’s Wrong with this page” at https://alfresco/share/pages/dologin. Refresh brings it to the dashboard.
Also when in https the logout button doesn’t do anything. and the use current page/use my dashboard under the user’s login name do nothing. When I added that redirect in and select another page, those buttons just mentioned say they couldn’t update the homepage.
Thoughts?
Thanks.
JR
Completley remove http portion from nginx conf file (server directives with port 80 ) and let nginx bind only on https port. This way you should see if the problem persist. In http directives I see an include statement to /etc/nginx/default.d/*.conf. Are there any conf files in that directory that could break or confuse the redirect?
Hi
I have an error following the execution of the installation alfresco.
[root@server ~]#chmod +x alfresco-community-5.0.d-installer-linux-x64.bin
[root@server ~]#./alfresco-community-5.0.d-installer-linux-x64.bin
./alfresco-community-5.0.d-installer-linux-x64.bin: ligne1: Syntax error near the unexpected symbol <>
./alfresco-community-5.0.d-installer-linux-x64.bin: ligne1: ”
thx
Seems to be a problem with their binaries. Try to use a different version of the installer binaries.
Has there been a version change in nginx? My nginx.conf file does not look like yours and when I do step 13, I receive a ‘”location” directive is not allowed here in /etc/nginx/nginx.conf:35; configuration file /etc/nginx/nginx.conf test failed’ error.
This is the best guide on the net; any help or updates would be hugely appreciated!
Post your entire nginx.conf configuration here to see where the problem resides.
Following is the default nginx.conf file without any edits:
user www-data;
worker_processes auto;
pid /run/nginx.pid;
events {
worker_connections 768;
# multi_accept on;
}
http {
##
# Basic Settings
##
sendfile on;
tcp_nopush on;
tcp_nodelay on;
keepalive_timeout 65;
types_hash_max_size 2048;
# server_tokens off;
# server_names_hash_bucket_size 64;
# server_name_in_redirect off;
include /etc/nginx/mime.types;
default_type application/octet-stream;
##
# SSL Settings
##
ssl_protocols TLSv1 TLSv1.1 TLSv1.2; # Dropping SSLv3, ref: POODLE
ssl_prefer_server_ciphers on;
##
# Logging Settings
##
access_log /var/log/nginx/access.log;
error_log /var/log/nginx/error.log;
##
# Gzip Settings
##
gzip on;
gzip_disable “msie6”;
# gzip_vary on;
# gzip_proxied any;
# gzip_comp_level 6;
# gzip_buffers 16 8k;
# gzip_http_version 1.1;
# gzip_types text/plain text/css application/json application/javascript text/xml application/xml application/xml+rss text/javascript;
##
# Virtual Host Configs
##
include /etc/nginx/conf.d/*.conf;
include /etc/nginx/sites-enabled/*;
}
#mail {
# # See sample authentication script at:
# # http://wiki.nginx.org/ImapAuthenticateWithApachePhpScript
#
# # auth_http localhost/auth.php;
# # pop3_capabilities “TOP” “USER”;
# # imap_capabilities “IMAP4rev1” “UIDPLUS”;
#
# server {
# listen localhost:110;
# protocol pop3;
# proxy on;
# }
#
# server {
# listen localhost:143;
# protocol imap;
# proxy on;
# }
#}
The issue is very simple, if you look closely to your nginx configuration file you will see that it ships with separate virtual hosts configuration files. I suggest you add the proxy block in the specific configuration file from sites-enabled directory.
Hi,
Just want to know after install you can map alfresco as windows drive (smb or cifs) ?
thx.
You must enable SMB/CIFS protocol in Alfresco configuration. Read the official documentation http://docs.alfresco.com/5.0/concepts/fileserv-subsystem-CIFS.html
Hello, nice guide work perfect but i need a little help if you test ms office plugging or libre office to preview document and editing online you know something about that
This part only covers installation steps. For advanced topics configuring Alfresco please visit official docs at http://docs.alfresco.com/
Hi, trying to install Alfresco on CetOS 7: at the end I have error:
error running /home/y/postgresql/bin/createuser -p 5432 -U postgres
any Ideas?
Run Alfresco installer from root account or from a user with root privileges suing sudo.
Installation process goes from “root”.
typos!!
firewall-cmd –ad-port=8080/tcp –permanent
# firewall-cmd –ad-port=8443/tcp –permanent
# firewall-cmd –ad-port=7070/tcp –permanent
# firewall-cmd –reload
should be –add-port and –permanent
@Napata,
Thanks for pointing out those typos, corrected in the writeup…
typos!! !!
should be!!! —
example: firewall-cmd –add-port=8080/tcp –permanent
minus minus in visible as one minus on your web page
Hello Matei, I’m planning to install community on my server and I wanted to know if you had a document version of the instructions I can download.
Dear All,
Thank you so much.
Please,do you have best how tô integrate workflow.
Best Regards.