Laravel is an open-source, well-known, and modern PHP-based web framework with expressive, elegant, and easy to understand syntax which makes it easy to build large, robust web applications.
Its key features include a simple, fast routing engine, powerful dependency injection container, multiple back-ends for session and cache storage, expressive and intuitive database ORM (Object-relational Mapping), robust background job processing, and real-time event broadcasting.
Also, it uses tools such as Composer – a PHP package manager for managing dependencies and Artisan – a command-line interface for building and managing web applications.
In this article, you will learn how to install the latest version of the Laravel PHP web framework on CentOS 8 Linux distribution.
Server Requirements
The Laravel framework has the following requirements:
- PHP >= 7.2.5 with these PHP extensions OpenSSL, PDO, Mbstring, Tokenizer, XML, Ctype and JSON.
- Composer – for installing and manage dependencies.
Step 1: Installing LEMP Stack in CentOS 8
1. To start off, update system software packages and install LEMP stack (Linux, Nginx, MariaDB / MySQL, and PHP) using the following dnf commands.
# dnf update
# dnf install nginx php php-fpm php-common php-xml php-mbstring php-json php-zip mariadb-server php-mysqlnd
2. When the LEMP installation is complete, you need to start the PHP-PFM, Nginx and MariaDB services using the following systemctl commands.
# systemctl start php-fpm nginx mariadb
# systemctl enable php-fpm nginx mariadb
# systemctl status php-fpm nginx mariadb
3. Next, you need to secure and harden the MariaDB database engine using the security script as shown.
# mysql_secure_installation
Answer the following questions to secure the server installation.
Enter current password for root (enter for none):EnterSet root password? [Y/n]y#set new root password Remove anonymous users? [Y/n]yDisallow root login remotely? [Y/n]yRemove test database and access to it? [Y/n]yReload privilege tables now? [Y/n]y
4. If you have the firewalld service running, you need to open the HTTP and HTTPS service in the firewall to enable client requests to the Nginx web server.
# firewall-cmd --zone=public --permanent --add-service=http
# firewall-cmd --zone=public --permanent --add-service=https
# firewall-cmd --reload
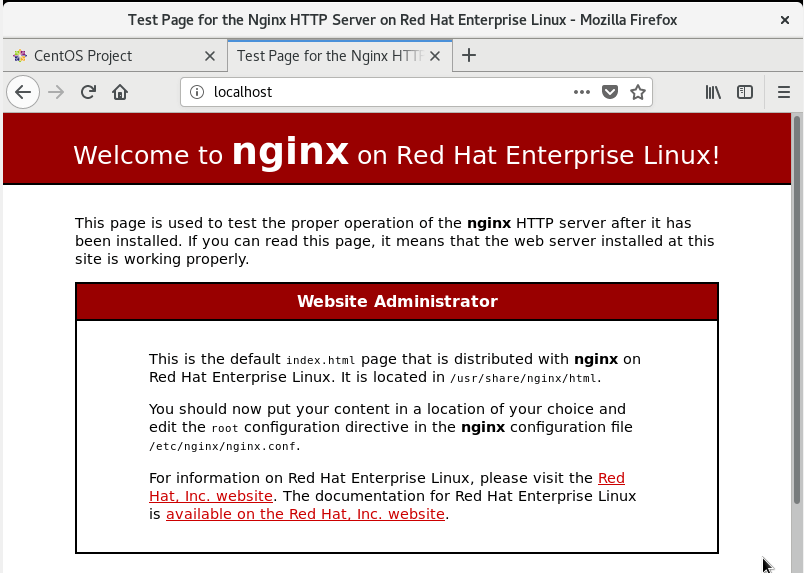
5. Finally, you can confirm that your LEMP stack is running using a browser at your system’s IP address.
http://server-IP
Step 2: Configuring and Securing PHP-FPM and Nginx
6. To process requests from the Nginx web server, PHP-FPM can listen on a Unix socket or TCP socket and this is defined by the listen parameter in the /etc/php-fpm.d/www.conf configuration file.
# vi /etc/php-fpm.d/www.conf
By default, it is configured to listen on a Unix socket as shown in the following screenshot. The value here will be specified in the Nginx server block file later on.

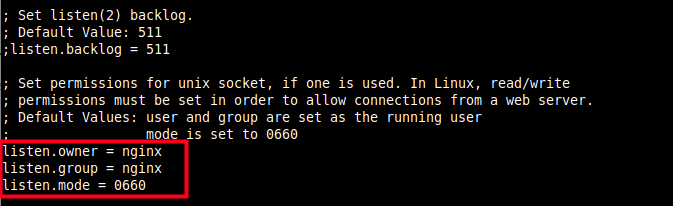
7. If using a Unix socket, you should also set the correct ownership and permissions on it as shown in the screenshot. Uncomment the following parameters and set their values to the user and group to match the user and group Nginx is running as.
listen.owner = nginx
listen.group = nginx
listen.mode = 066
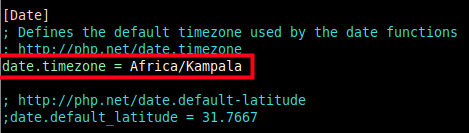
8. Next, also set the system-wide time zone in the /etc/php.ini configuration file.
# vi /etc/php.ini
Look for the line “;date.timezone” and uncomment it, then set its value as shown in the screenshot (use values that apply to your region/continent and country).
date.timezone = Africa/Kampala
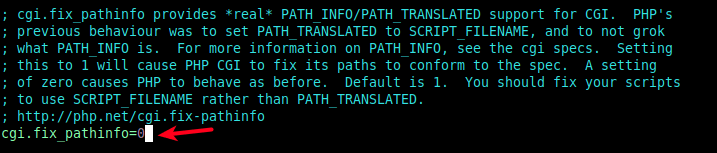
9. To mitigate the risk of Nginx passing requests from malicious users who use other extensions to execute PHP code to PHP-FPM, uncomment the following parameter and set it’s value to 0.
cgi.fix_pathinfo=1
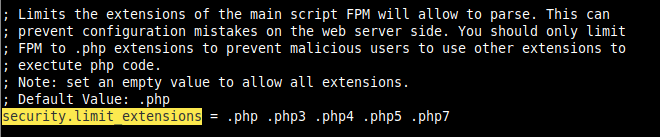
10. In relation to the previous point, also uncomment the following parameter in the /etc/php-fpm.d/www.conf file. Read the comment for more explanation.
security.limit_extensions = .php .php3 .php4 .php5 .php7
Step 3: Installing Composer and Laravel PHP Framework
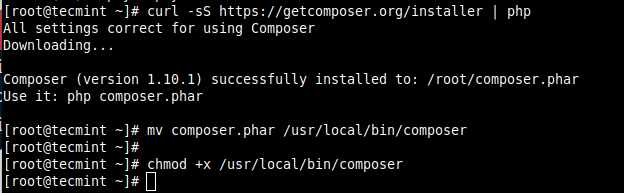
11. Next, install the Composer package by running the following commands. The first command downloads the installer, then runs it using PHP.
# curl -sS https://getcomposer.org/installer | php
# mv composer.phar /usr/local/bin/composer
# chmod +x /usr/local/bin/composer
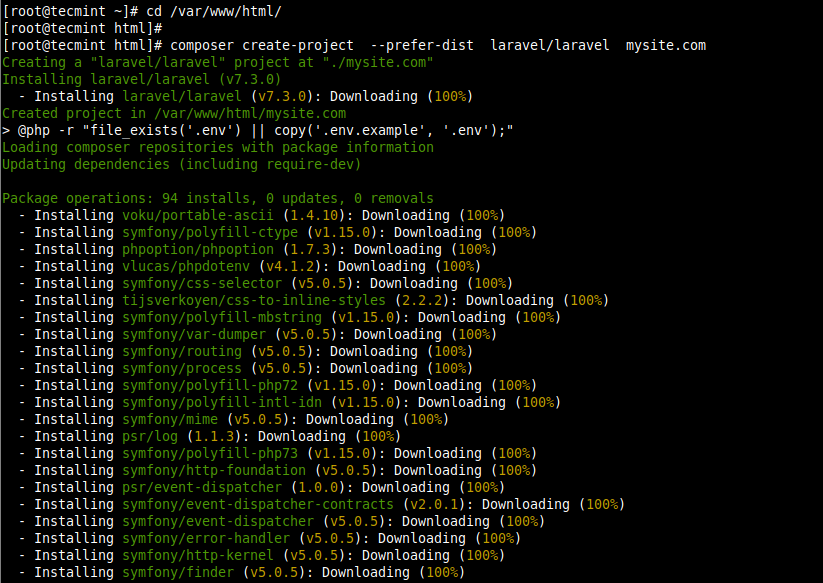
12. Now that Composer is installed, use it to install Laravel files and dependencies as follows. Replace mysite.com with the name of the directory where the Laravel files will be stored, the absolute path (or root path in Nginx configuration file) will be /var/www/html/mysite.com.
# cd /var/www/html/
# composer create-project --prefer-dist laravel/laravel mysite.com
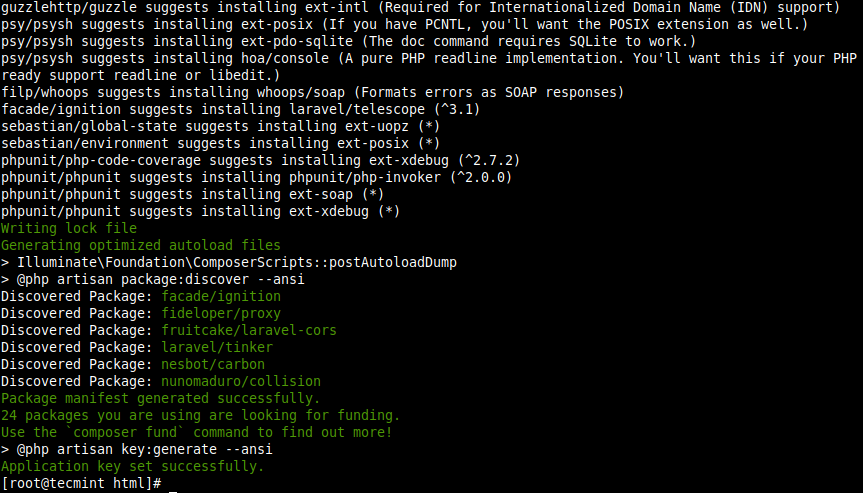
If all goes well during the process, the application should be installed successfully and a key should be generated as shown in the following screenshot.
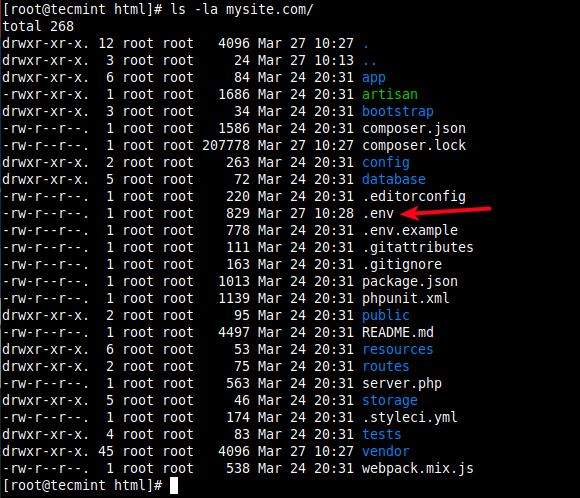
13. During the installation process, the .env environment file was created and the required application was also generated, so you don’t need to create them manually like before. To confirm this, run a long listing of the laravel root directory using ls command.
# ls -la mysite.com/
14. Next, you need to configure the correct ownership and permissions on the storage and the bootstrap/cache directories to be writable by the Nginx web server.
# chown -R :nginx /var/www/html/mysite.com/storage/
# chown -R :nginx /var/www/html/mysite.com/bootstrap/cache/
# chmod -R 0777 /var/www/html/mysite.com/storage/
# chmod -R 0775 /var/www/html/mysite.com/bootstrap/cache/
15. If SELinux enabled on your server, you should also update the security context of the storage and bootstrap/cache directories.
# semanage fcontext -a -t httpd_sys_rw_content_t '/var/www/html/mysite.com/storage(/.*)?'
# semanage fcontext -a -t httpd_sys_rw_content_t '/var/www/html/mysite.com/bootstrap/cache(/.*)?'
# restorecon -Rv '/var/www/html/mysite.com'
Step 4: Configure Nginx Server Block For Laravel
16. For Nginx to start serving your website or application, you need to create a server block for it in a .conf file under /etc/nginx/conf.d/ directory as shown.
# vi /etc/nginx/conf.d/mysite.com.conf
Copy and paste the following configuration in the file. Take note of the root and fastcgi_pass parameters.
server {
	listen      80;
       server_name mysite.com;
       root        /var/www/html/mysite.com/public;
       index       index.php;

       charset utf-8;
       gzip on;
	gzip_types text/css application/javascript text/javascript application/x-javascript  image/svg+xml text/plain text/xsd text/xsl text/xml image/x-icon;
        location / {
        	try_files $uri $uri/ /index.php?$query_string;
        }

        location ~ \.php {
                include fastcgi.conf;
                fastcgi_split_path_info ^(.+\.php)(/.+)$;
                fastcgi_pass unix:/run/php-fpm/www.sock;
        }
        location ~ /\.ht {
                deny all;
        }
}
17. Save the file and check if the Nginx configuration syntax is correct by running.
# nginx -t

18. Then restart the PHP-FPM and Nginx services for the recent changes to take effect.
# systemctl restart php-fpm
# systemctl restart Nginx
Step 5: Accessing Laravel Website from a Web Browser
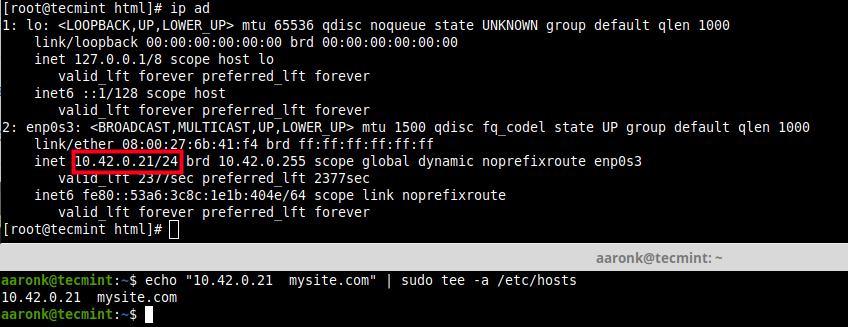
19. To access the Laravel website at mysite.com, which is not a fully qualified domain name (FQDN) and it is not registered (it’s only used for testing purposes), we will use the /etc/hosts file on your local machine to create local DNS.
Run the following command to add the server IP address and domain in the required file (replace the value according to your settings).
# ip add		#get remote server IP
$ echo "10.42.0.21  mysite.com" | sudo tee -a /etc/hosts
20. Next, open a web browser on the local machine and use the following address to navigate.
http://mysite.com
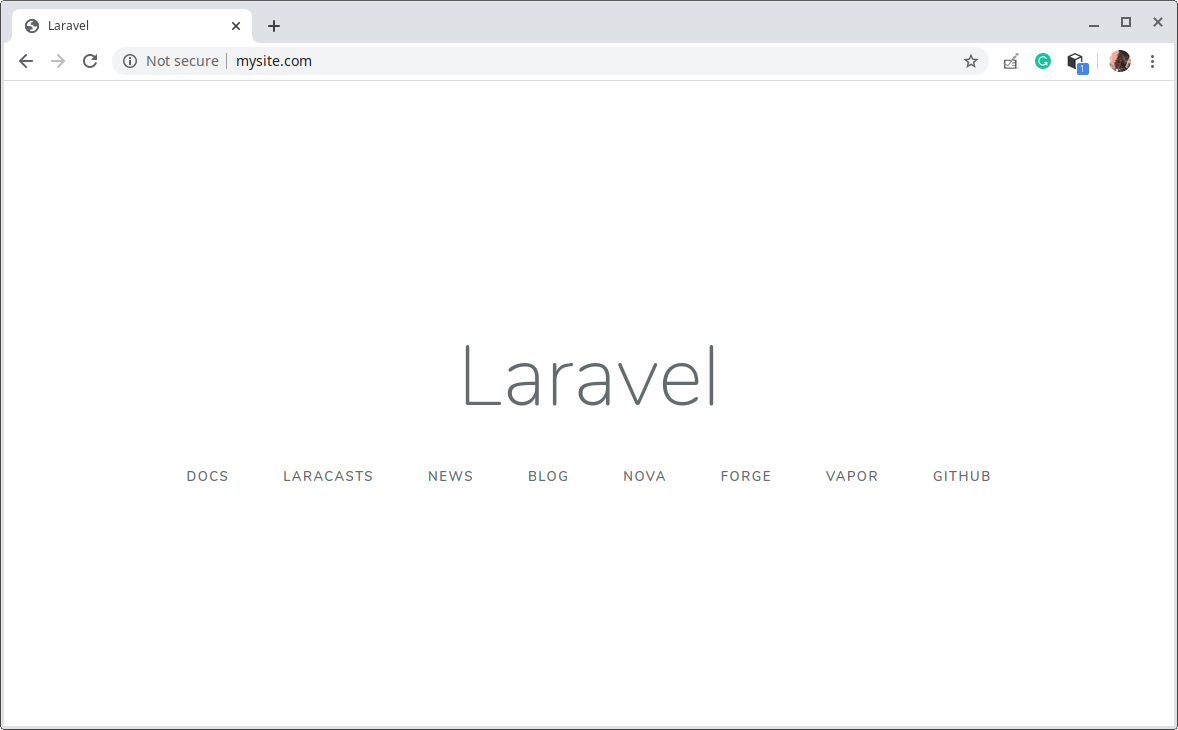
You have successfully deployed Laravel on CentOS 8. You can now start developing your website or web application using Laravel. For more information, see Laravel Getting Started guide.


The purpose of this article is to show you how I solved the problem and, at the same time, introduce you to CodeIgniter, a lightweight, easy to use PHP framework that you can use to build high quality, robust, PHP web sites and applications.