For those of you who don’t know what LEMP is – this is a combination of software packages – Linux, Nginx (pronounced EngineX), MariaDB and PHP.
You can use LEMP for both testing purposes or in a real production environment to deploy web applications using PHP frameworks such as Laravel or Yii, or content management systems such as WordPress, Drupal, or Joomla
You may wonder what’s the difference between LAMP and LEMP. Well, the only difference is the web server that is included – Apache (in LAMP) and Nginx (in LEMP). Both web servers are pretty good and while Apache is the most frequently used one, Nginx doesn’t back down in any way.
Another widely-used application normally installed alongside the LEMP stack is PhpMyAdmin – is a PHP web-based tool for administering a MySQL/MariaDB database server from a web browser.
If you looking for a LAMP setup for your Ubuntu 20.04, then you should read our LAMP setup guide on Ubuntu 20.04.
Prerequisites:
In this article, you will learn how to install and configure the LEMP stack with PhpMyAdmin in Ubuntu 20.04 server.
Step 1: Installing Nginx on Ubuntu 20.04
1. Nginx is a fast modern web server designed to server many concurrent connections without consuming too many server resources. This is why it’s often the preferred choice in enterprise environments.
NGINX is also commonly used as a load balancer and web content cache. It supports Name-based and IP-based virtual servers (analogous to virtual hosts in Apache).
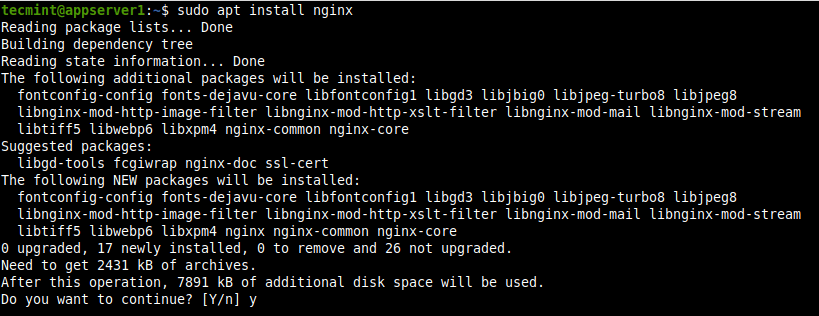
You can install Nginx on your Ubuntu 20.04 desktop or server by running the following command.
$ sudo apt update
$ sudo apt install nginx
The Nginx configuration files are stored under the /etc/nginx directory and its main configuration file is /etc/nginx/nginx.conf. Importantly, its default document root for storing your web files is /usr/share/nginx/html/. But you can use the standard /var/www/html which should be configured in your website’s or application’s server block configuration file.
2. The Ubuntu package installer triggers systemd to start the Nginx service and enable it to automatically start every time the server is rebooted. Use the following systemctl commands to confirm that the service is running and is enabled.
$ sudo systemctl status nginx
$ sudo systemctl is-enabled nginx

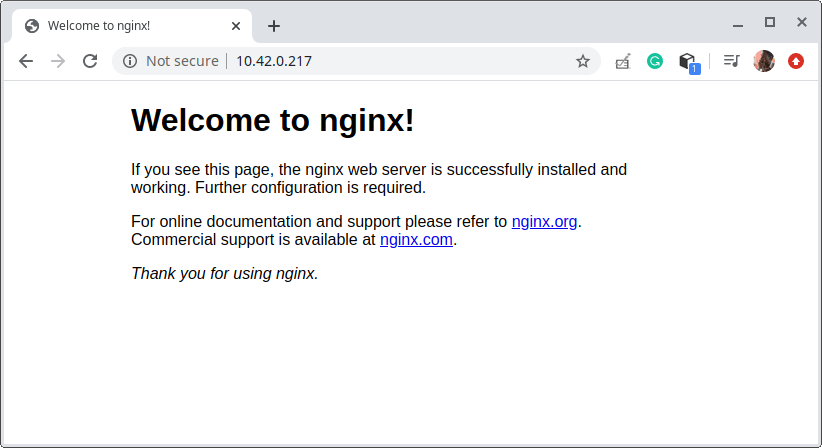
3. Now it’s time to check if the Nginx installation was successful by calling the Nginx page via browser using server IP Address.
http://SERVER_IP
If you don’t know your server IP address, you can find using IP command as shown.
$ ip addr show
The NGINX default web page should load as shown in the following screenshot, confirming correct installation and operation.
Step 2: Installing MariaDB Database on Ubuntu 20.04
4. MariaDB is a relatively new relational database management system that was designed as a community fork of MySQL after it’s Oracle acquisition.
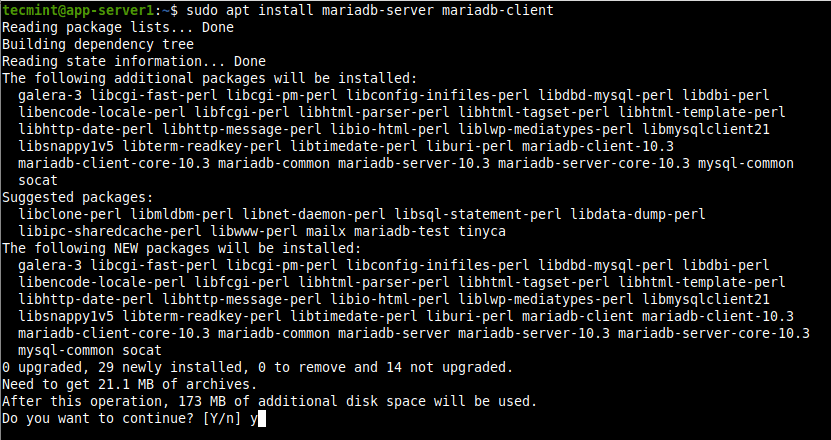
The installation of MariaDB is simple and can be started with command as:
$ sudo apt install mariadb-server mariadb-client
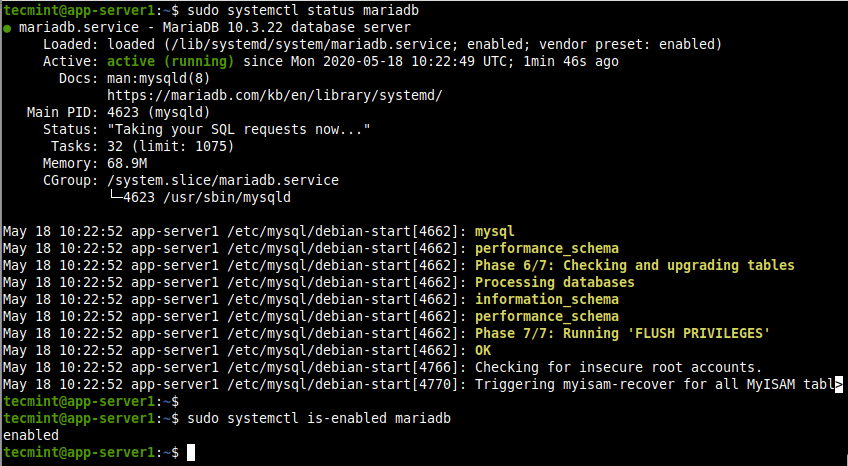
5. The MariaDB service is also automatically started and enabled to always start at system boot and you can confirm this using the following commands.
$ sudo systemctl status mariadb
$ sudo systemctl is-enabled mariadb
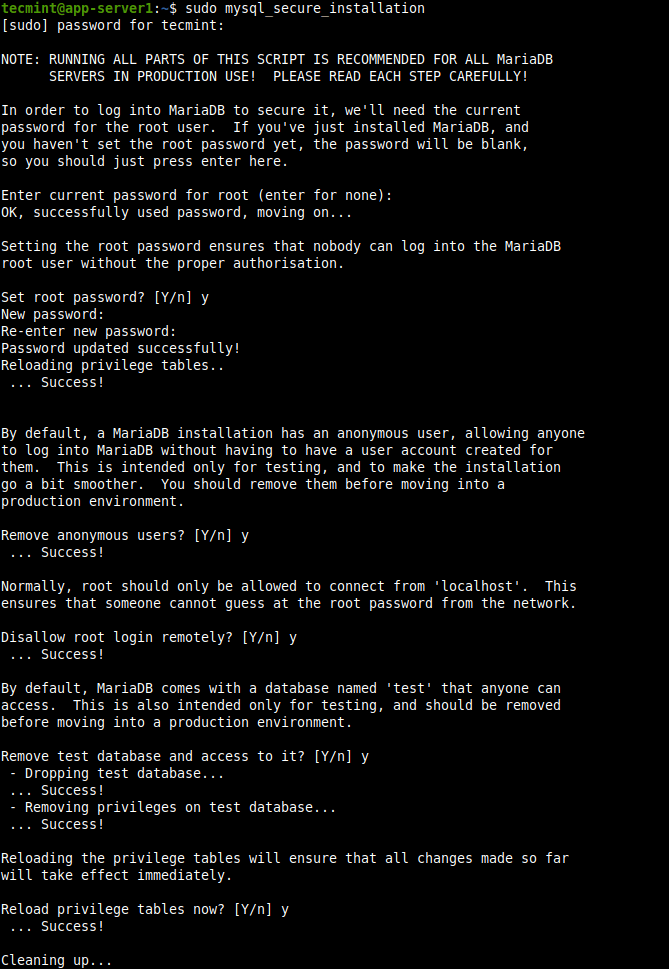
6. If you wish to improve the MariaDB security, you can run the mysql_secure_installation command, which will provide some basic, yet important options to configure:
$ sudo mysql_secure_installation
Then choose the option to set the database root (or administrator) user’s password and follow the prompts and carefully read the questions. To secure your database server, answer the questions as shown in the screenshot.
- Enter current password for root (enter for none): Enter
- Set a root password? [Y/n]
y - Remove anonymous users? [Y/n]
y - Disallow root login remotely? [Y/n]
y - Remove test database and access to it? [Y/n]
y - Reload privilege tables now? [Y/n]
y
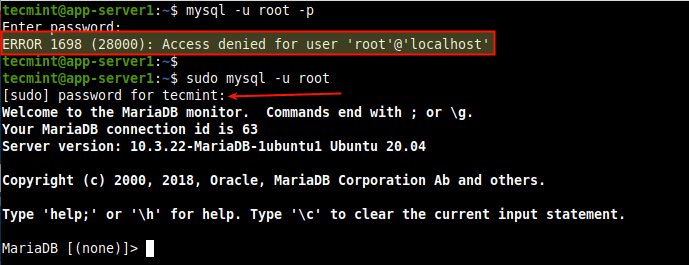
7. To create, manage, and perform database operations, you need to mysql shell command with the -u flag to specify the database username and -p to provide the user’s password.
To connect as the root user, use the sudo command (even without the -p flag) otherwise you will receive the error highlighted in the following screenshot.
$ mysql -u root -p
$ sudo mysql -u root
Step 3: Installing PHP in Ubuntu 20.04
8. PHP is a popular open-source, flexible, and dynamic scripting language for building websites and web applications. It supports a variety of programming techniques. Importantly, the PHP community is large and diverse, composed of countless libraries, frameworks, and other useful components.
NGINX uses FPM (FastCGI Process Manager) or PHP-FPM, to process PHP scripts. PHP-FPM is a widely-used alternative PHP FastCGI implementation that ships with many additional features and it is used for powering high-traffic sites/web applications.
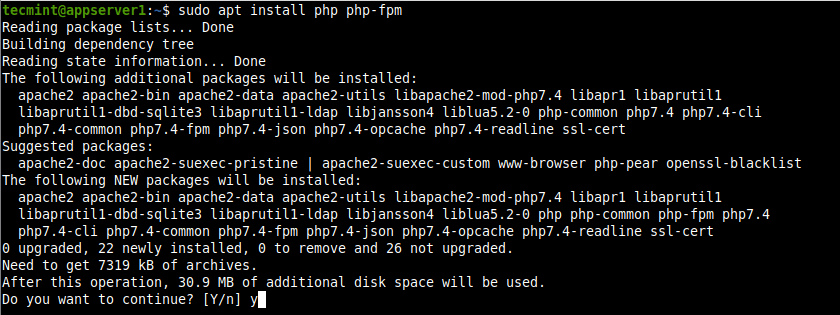
To install PHP and PHP-FPM, run the following command which will also install some required additional packages.
$ sudo apt install php php-mysql php-fpm
Since PHP 7.4 is the default version of PHP in Ubuntu 20.04, the PHP configuration files are located in /etc/php/7.4/ and the PHP-FPM configuration files are stored under /etc/php/7.4/fpm.
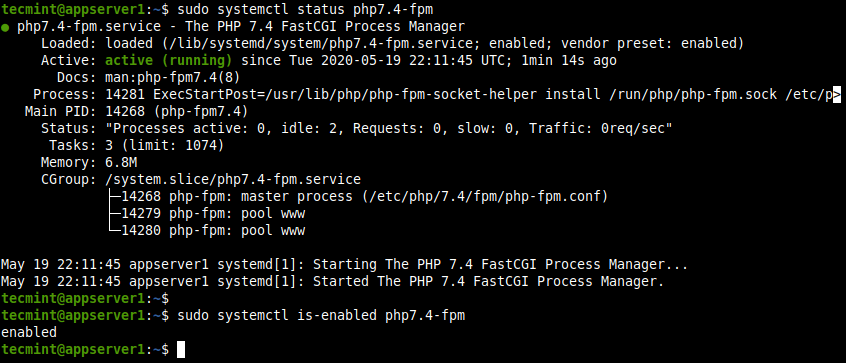
9. Next, check if the php7.4-fpm service is up and running and whether it is enabled with the following command.
$ sudo systemctl status php7.4-fpm
$ sudo systemctl is-enabled php7.4-fpm
Step 4: Configuring Nginx to work with PHP-FPM
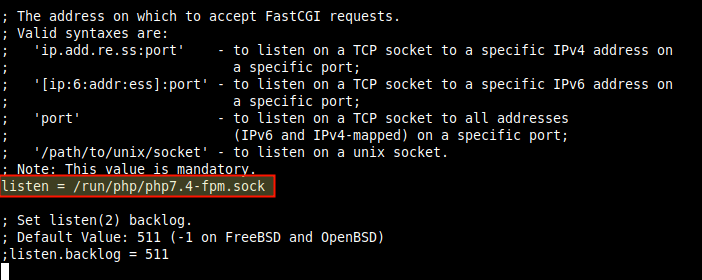
10. Now you need to configure NGINX to proxy client requests to PHP-FPM, which by default is configured to listen on a UNIX socket as defined by the listen parameter in the /etc/php/7.4/fpm/pool.d/www.conf default pool configuration file.
$ sudo vi /etc/php/7.4/fpm/pool.d/www.conf
11. In the default server block configuration file (/etc/nginx/sites-available/default), uncomment the location directive for processing PHP requests to look like the one shown in the following screenshot.
$ sudo vi /etc/nginx/sites-available/default
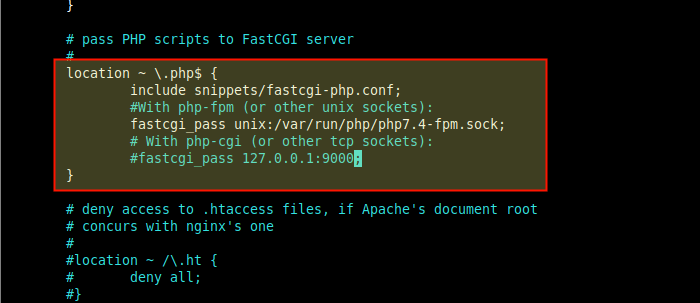
Save the file and exit.
12. Then test the NGINX configuration syntax for correctness. If it is OK, restart the Nginx service to apply the new changes.
$ sudo nginx -t
$ sudo systemctl restart nginx

13. Now test if NGINX can work in conjunction with PHP-FPM to process PHP requests. Create a simple info.php page under the document root directory.
$ echo "<?php phpinfo(); ?>" | sudo tee /var/www/html/info.php
14. In your browser, navigate using the following address. The PHP configuration page should load showing as shown in the following screenshot.
http://SERVER_IP/info.php

Step 5: Installing PhpMyAdmin in Ubuntu 20.04
15. PhpMyAdmin is a free and open-source web-based PHP application specifically created for administering MySQL/MariaDB database servers through a web browser. It provides an intuitive graphical interface and supports a wide range of common features for database administration tasks.
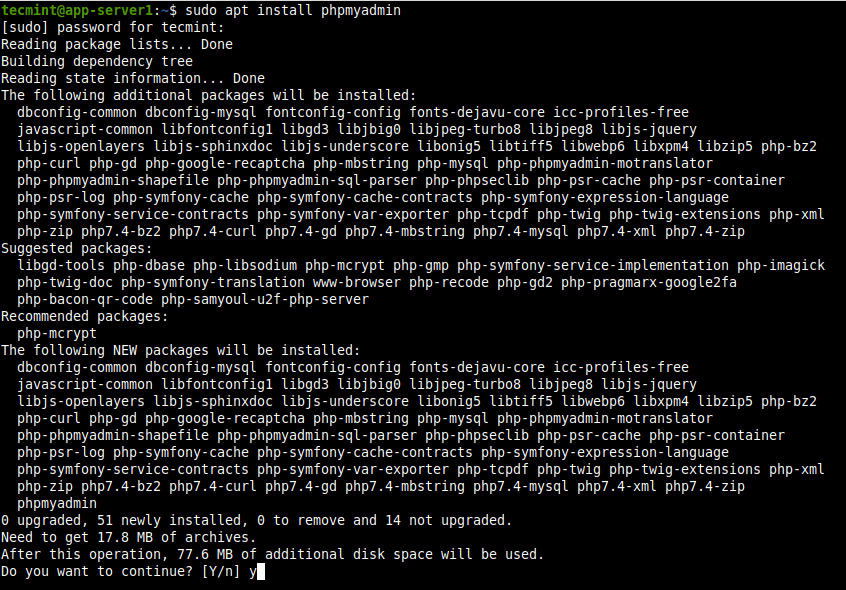
$ sudo apt install phpmyadmin
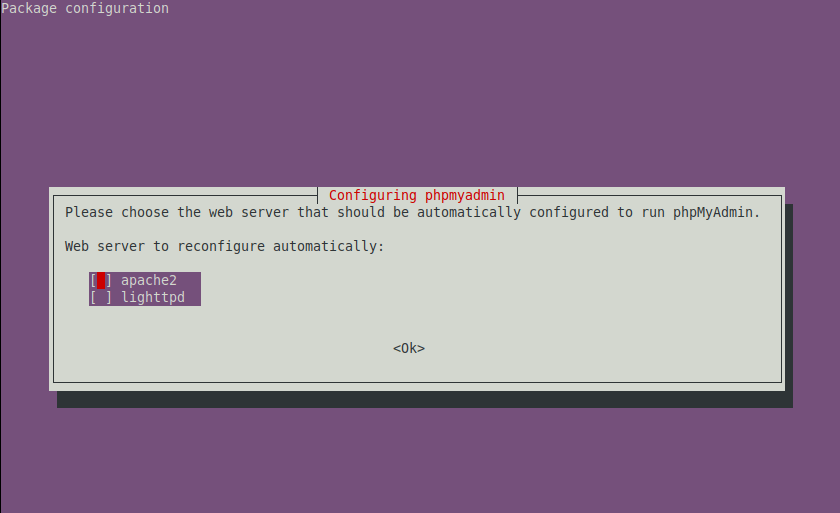
16. During the package installation, you will be asked to configure several aspects of the PhpMyAdmin package. First, will be prompted to choose the default web server for running it. Press Esc because NGINX is not on the list provided.
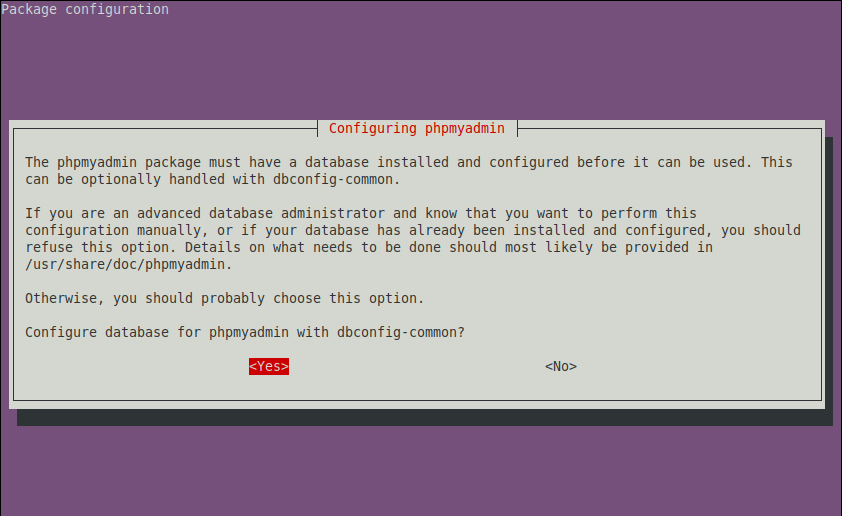
17. Next, PhpMyAdmin requires a database to work with. In this package configuration prompt, choose Yes to configure a database for PhpMyAdmin with the dbconfig-common package.
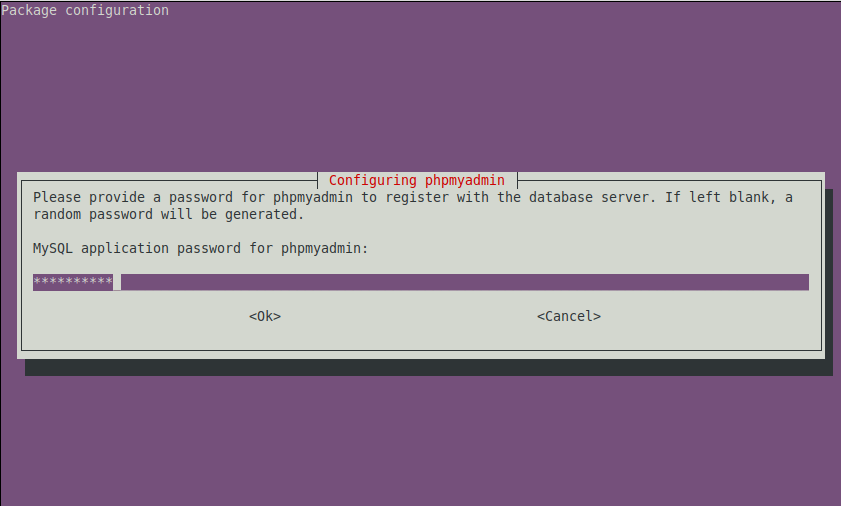
18. In the next prompt, you need to provide a password for PhpMyAdmin to register with the MariaDB database. Enter a secure password and click Enter.
Step 6: Configuring NGINX to Serve PhpMyAdmin Site
19. To enable NGINX to serve the PhpMyAdmin site located at /usr/share/phpmyadmin, create a symlink for this directory under the document root, then set the correct permissions and ownership on the PHPMyAdmin directory as follows.
$ sudo ln -s  /usr/share/phpmyadmin /var/www/html/phpmyadmin
$ sudo chmod 775 -R /usr/share/phpmyadmin/
$ sudo chown root:www-data -R /usr/share/phpmyadmin/
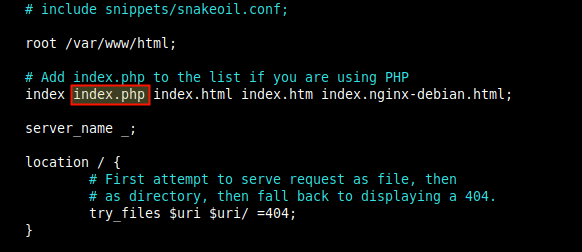
20. Besides, ensure that the index directive in the default server block configuration (/etc/nginx/sites-available/default) file includes index.php as shown in the following screenshot.
21. Next, restart the Nginx service once more to apply the above changes.
$ sudo systemctl restart nginx
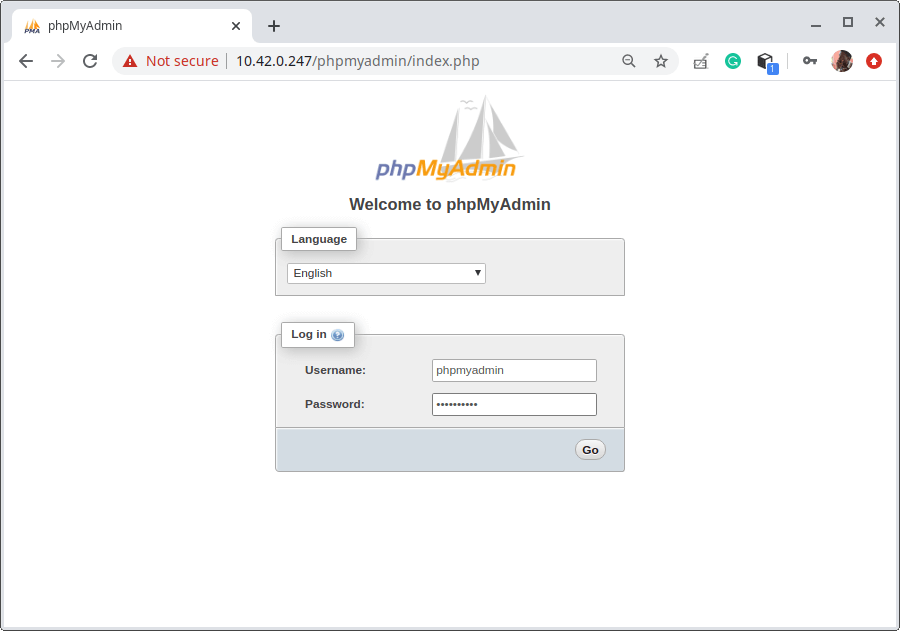
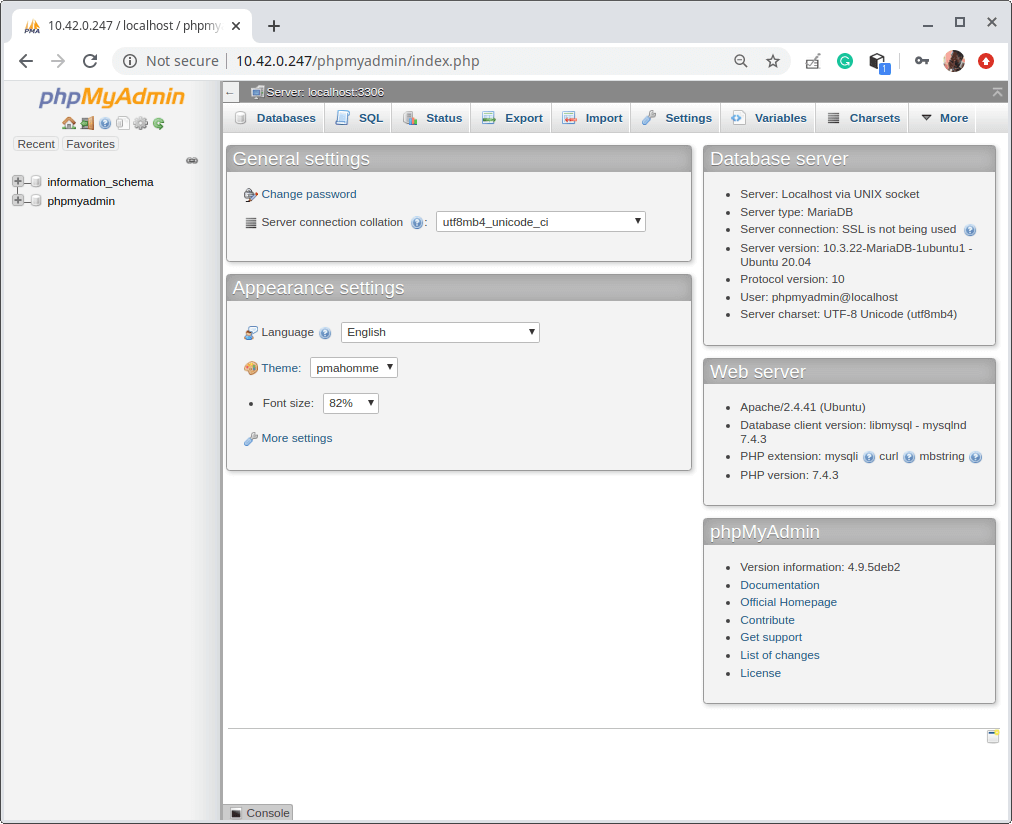
22. Now access the PhpMyAdmin site from a browser using the following address.
http://SERVER_IP/phpmyadmin
At the login page, authenticate with the PHPMyAdmin username and password. Remember the remote root user login is disabled unless you are accessing PHPMyAdmin on the localhost where the MariaDB database is installed, the root access will not work.
Last but not least, secure your PhpMyAdmin installation using our guide: 4 Useful Tips to Secure PhpMyAdmin Web Interface.
Conclusion
Your LEMP setup is now complete and you can start building your web applications or simply play with the Nginx and MariaDB services you just installed. These are widely used and gaining more knowledge in them is highly recommended for system administrators.


Hi friends,
The tutorial is completely nice and very helpful, but for those who don’t want to bother installing the LEMP stack one by one, you can use the auto-installer tools.
For this, I usually use the LEMPer Stack, it might be useful for auto-installing the LEMP stack and at the same time managing a VPS/cloud server for hosting PHP websites without the need for Cpanel :)
LEMPer Stack – This tool is free and open-source, you can contribute to its development via the Github repo => https://github.com/joglomedia/LEMPer
Looking forward to your feedback/review…
How can I install letsencrypt with this procedure? Any guide to check. Would be appreciated. Looking from hours. Thanks!
@Sai,
You can install Letsencrypt using these instructions…
Can’t see any link to the guide. I guess there is an issue with comment system. Can you please check this out?
@Sai,
You can use the same following article to install Lets Encrypt on Ubuntu-based Linux distro’s
https://www.tecmint.com/install-lemp-with-phpmyadmin-in-ubuntu-20-04/
Sorry. You’re reffereing to the same page. There is no letencrypt part in this guide.
@Sai,
Sorry, here is the article that will help you to install Let’s Encrypt certificate for your domain.
How to Secure Nginx with Let’s Encrypt on Ubuntu and Debian
Thank you! Finally, a straight-to-the-point guide that gets me up and running ASAP. Why was I messing with Docker when I know I want a LEMP stack. I can configure containers later when I need them. For now web-building time. Whoot!
Hi, I tried to create the simple info.php page under the document root directory. Problem is, when I typed the address
https://SERVER_IP/info.phpin my browser, the PHP configuration page did not load. They said it is a PHP script and asked me if I wanted to open the file with Text Editor. I’m a complete noob in this and I really don’t know what to do. What did I do wrong?@TR,
Please check Configuring Nginx to work with PHP-FPM section, and follow instructions correctly to have PHP working…
Thanks for this. Works like a charm.
Typo alert: There is a dot too much in step 22 code.
@Pep,
Thanks for pointing out, corrected step 22 in the article…
Would you add Adminer as an alternative to phpMyAdmin?
@Frederick
You can have Adminer as an alternative to PhpMyAdmin here –
I tried to install Adminer package and follow the above phpMyAdmin instructions and can access to Adminer page. But I got connection refuse, don’t know where I did wrong.
Hi, awesome tutorial!
It’s only a shame that this tut is for nginx and the “4 Useful Tips to Secure PhpMyAdmin Web Interface” post is for apache.
Awesome tutorial! I’m going to be using this for the rest of my life. :) Certainly, I’m going to be using this on my stream.
One typo I think…
22. Now access the PhpMyAdmin site from a browser using the following address.
http://SERVER_IP/phpmyadmin.should read
http://SERVER_IP/phpmyadmin/index.php@Chicken
Thanks for mentioning this, if you enter this URL,
http://SERVER_IP/phpmyadmin, it should automatically redirect tohttp://SERVER_IP/phpmyadmin/index.php.I have this error when open phpMyAdmin page:
Can anybody help my about this issue?
My site error 403 Forbidden.
What happens?
@Xe
There are many possible causes of this error. It is likely a permissions problem on the web document directory. Ensure that the webserver can read/write to that directory.
Thanks, very simple tutorial
Thank you a lot for this manual!!!
No command ‘mysql_secure_intallation’ found ????????????????
@Seq,
Sorry for the trouble, the correct command is ‘mysql_secure_installation‘.