In this tutorial, you will learn how to install local software packages (.DEB) in Debian and its derivatives such as Ubuntu and Linux Mint using three different command line tools and they are dpkg, apt, and gdebi.
This is useful to those new users who have migrated from Windows to Ubuntu or Linux Mint. The very basic problem they face is installing local software on the system.
However, Ubuntu and Linux Mint have their own Graphical Software Center for easy software installation, but we will be looking forward to installing deb packages through the terminal way.
1. Install .deb Package Using dpkg Command
Dpkg is a package manager for Debian and its derivatives such as Ubuntu and Linux Mint. It is used to install, build, remove, and manage .deb packages. but unlike other Linux package management systems, it cannot automatically download and install packages with their dependencies.
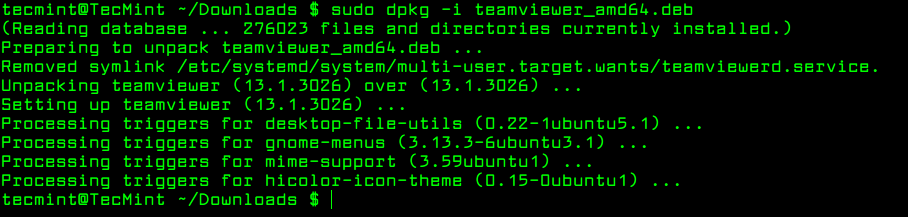
To install a .deb package, use the dpkg command with the -i flag along with the package name as shown.
$ sudo dpkg -i teamviewer_amd64.deb
If you get any dependency errors while installing or after installing and launching a program, you can use the following apt command to resolve and install dependencies using the -f flag, which tells the program to fix broken dependencies.
$ sudo apt-get install -f
Remove Deb Packages Using dpkg Command
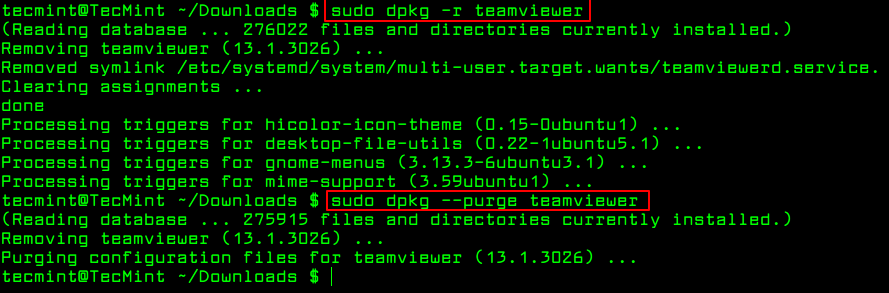
To remove a .deb package use the -r option or if you want to remove all its files including configuration files, you can purge it using the --purge option as shown.
$ sudo dpkg -r teamviewer       [Remove Package]
$ sudo dpkg --purge teamviewer  [Remove Package with Configuration Files]
To know more about installed packages, read our article that shows how to list all files installed from a .deb package.
2. Install .deb Package Using Apt Command
The apt command is an advanced command-line tool, which offers new software package installation, existing software package upgradation, updating of the package list index, and even upgrading the whole Ubuntu or Linux Mint system.
It also offers apt-get and apt-cache command-line tools for managing packages more interactively on Debian and its derivatives such as Ubuntu and Linux Mint systems.
Essentially, apt-get or apt do not understand .deb files, they are designed to primarily handle package names (for example teamviewer, apache2, mariadb, etc..) and they retrieve and install .deb archives associated with a package name, from a source specified in the /etc/apt/sources.list file.
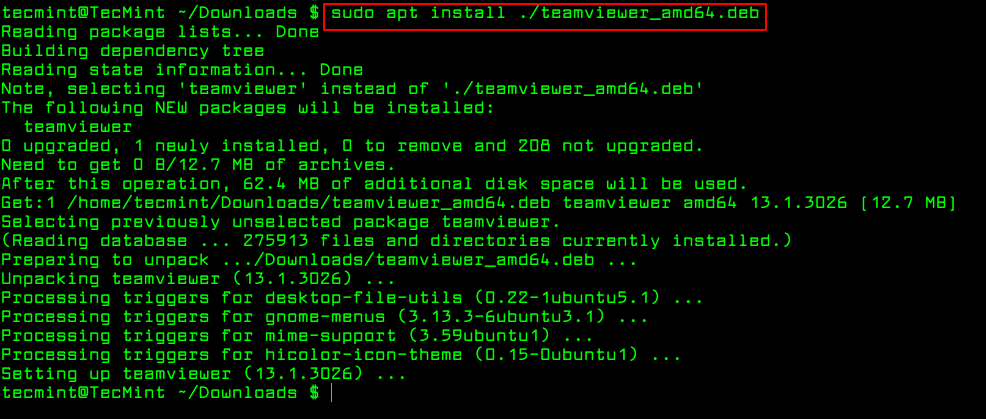
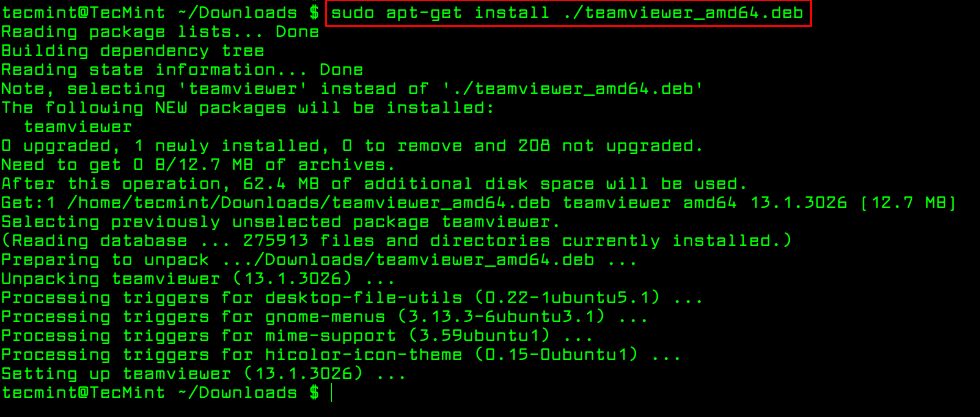
The only trick to installing a .deb Debian package using apt-get or apt is by specifying a local relative or absolute path (./ if in current dir) to the package, otherwise it will try to retrieve the package from remote sources and the operation will fail.
$ sudo apt install ./teamviewer_amd64.deb
$ sudo apt-get install ./teamviewer_amd64.deb
Remove Deb Packages using apt Command
To remove a .deb package use the remove option or if you want to remove all its files including configuration files, you can purge it using the purge option as shown.
$ sudo apt-get remove teamviewer
$ sudo apt-get purge teamviewer
OR
$ sudo apt remove teamviewer
$ sudo apt purge teamviewer
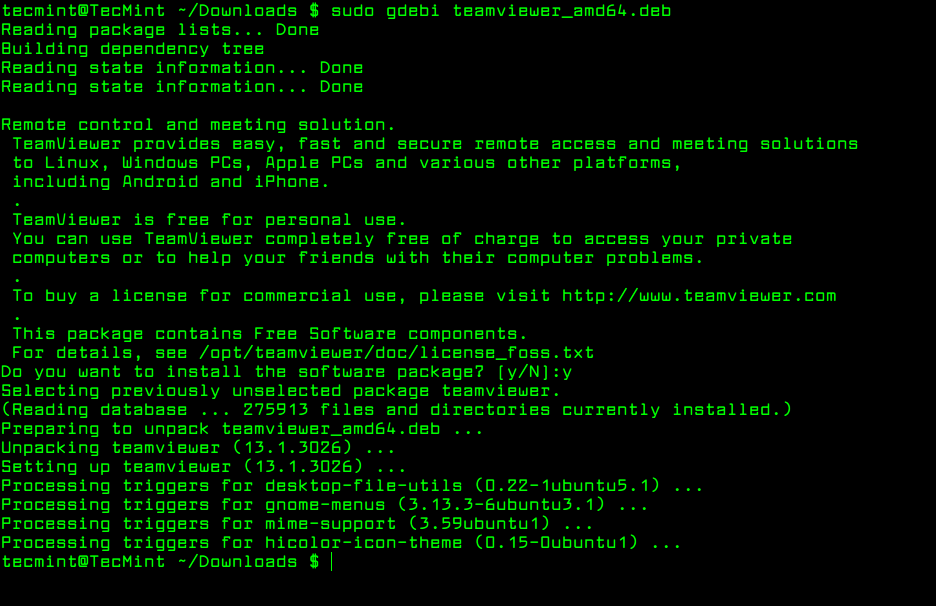
3. Install .deb Package Using Gdebi Command
gdebi is a tiny command line and GUI tool for installing local deb packages. It resolves and installs package dependencies on the fly. To install a package, use the following command.
$ sudo gdebi teamviewer_13.1.3026_amd64.deb
To remove a .deb package installed from gdebi, you can use apt, apt-get or dpkg commands using purge option as shown.
$ sudo apt purge teamviewer
OR
$ sudo apt-get purge teamviewer
OR
$ sudo dpkg --purge teamviewer
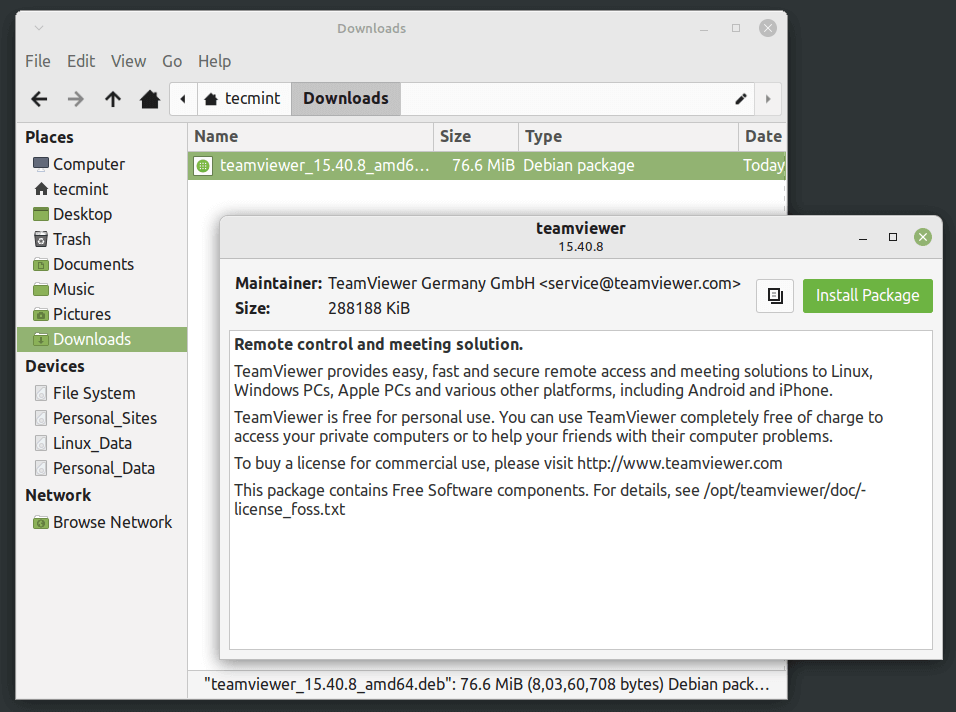
Install .deb Packages Using Gdebi GUI
The most recommended way for beginners to installing .deb files is through the Gdebi GUI installer. Simply, go to the directory where you have downloaded the file and double-click to install it as shown.
That’s It! In this tutorial, we have explained three different command line tools for installing or removing .deb Debian packages in Ubuntu and Linux Mint.
If you know any other way of installing local packages, do share with us using our comment section below.


It’s so much easier using Synaptic. No esoteric, unintuitive commands to learn, just click and go.
I installed the latest 4.16 version of ‘devede‘ using gdebi. It doesn’t work on my distro (Mint 18.02) and now I want to go back to version 4.4 in the repository but I cannot uninstall version 4.16:
The same result for the other two methods (“it’s not installed”), and yet I can run it from the “start” menu – so Mint can find it somehow. It seems odd to me that gdebi can install something yet not provide any means to uninstall it.
But gripes aside, what the heck do I do now?
Thanks for this, it helped me to write a little script to update apt-get, install a dependency for my tiny laptop, and install and start zoom with just one command on a minimal live USB distribution.
Content of updateAndZoom.sh
Thanks again
Good information thank you. BTW, which font did you use in the terminal? (Green text) It looks great!
I use the larabie font bold in Kali but it just doesn’t look quite as bold and spaced as your font :-)
Good information and useful…
I would like to see someplace where you have all beginner needs to install and adjust when new Linux is replacing some other operating system.
Like: the programs one might need, the closing of ports, software firewall, and how to handle so much logging and where to look…
@xABBAAA
You can check out our comprehensive BEGINNER’S GUIDE FOR LINUX – Start Learning Linux in Minutes: https://www.tecmint.com/free-online-linux-learning-guide-for-beginners/.
It also includes advanced topics to broaden your knowledge about Linux.