MongoDB is a popular document-based and general-purpose NoSQL database engine that stores data in JSON format. It’s free and opensource and ships with a set of cool and nifty features such as file storage, data replication, Ad-hoc queries, and load balancing just to mention a few. Some of the blue-chip companies that have incorporated MongoDB in their applications include Adobe, Facebook, Google, eBay, and Coinbase.
In this tutorial, you will learn how to install MongoDB on CentOS 8.
Step 1: Add MongoDB Repository
Since MongoDB is not present in the CentOS 8 default repository, we are going to add it manually. So firstly, create a repository file as shown.
# vi /etc/yum.repos.d/mongodb.repo
Paste the configuration below and save the file.
[mongodb-org-4.2]
name=MongoDB Repository
baseurl=https://repo.mongodb.org/yum/redhat/$releasever/mongodb-org/development/x86_64/
gpgcheck=1
enabled=1
gpgkey=https://www.mongodb.org/static/pgp/server-4.2.asc
Step 2: Install MongoDB in CentOS 8
Having enabled the repository, the next step will be to install MongoDB using the following dnf command.
# dnf install mongodb-org
Next, start and enable MongoDB to start on boot by running the commands below.
# systemctl start mongod
# sudo systemctl enable mongod
To verify the status of MongoDB, run:
# systemctl status mongod
Alternatively, you can use the netstat utility to confirm that indeed Mongod service is listening.
# netstat -pnltu
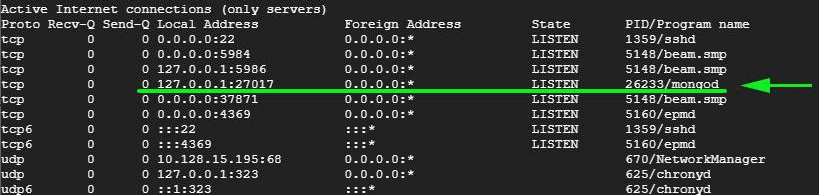
Great! we have confirmed that MongoDB is up and running.
Step 3: Access MongoDB Shell
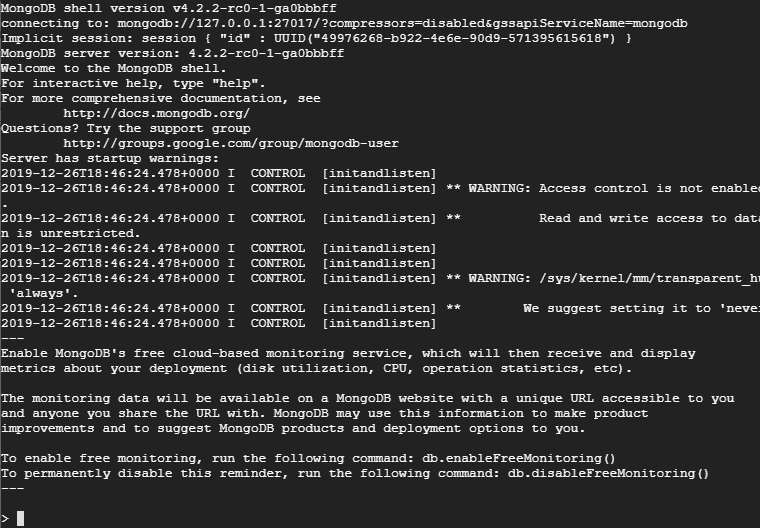
You can now access MongoDB’s shell by simply issuing the command:
# mongo
You should get output similar output as shown in the screenshot below.
Creating MongoDBan Admin User
Let’s now switch gears and create an Admin user.
It’s always good advice to create an admin user with elevated privileges to perform elevated tasks. To do so, first access MongoDB’s shell:
# mongo
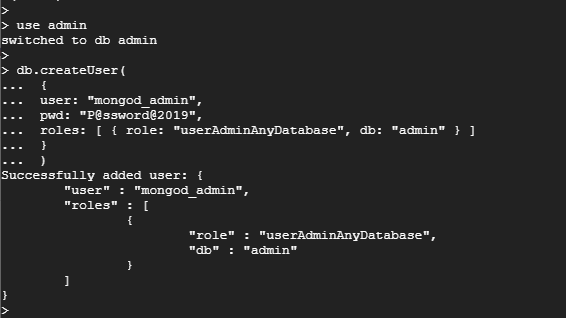
Next, switch to the database admin by running.
> use admin
Now create a new MongoDB user by running the code below.
> db.createUser(
 {
 user: "mongod_admin",
 pwd: "P@ssword@2019",
 roles: [ { role: "userAdminAnyDatabase", db: "admin" } ]
 }
 )
If successful you should get the output below.
Successfully added user: {
	"user" : "mongod_admin",
	"roles" : [
		{
			"role" : "userAdminAnyDatabase",
			"db" : "admin"
		}
	]
}
To list MongoDB users created, run.
> show users

Configuring Authentication for MongoDB
As it is, all users can access the shell and execute any commands, which is not recommended at all for security purposes. With that in mind, we need to create authentication for the admin user we just created so as to prevent other users from running commands without authorization.
To enable authentication edit the /lib/systemd/system/mongod.service file, under the [Service] section, locate and edit the Environment parameter as shown.
Environment="OPTIONS= --auth -f /etc/mongod.conf"

Save and exit the configuration file.
For the changes to come into effect, reload the system and restart MongoDB.
# systemctl daemon-reload
# systemctl restart mongod
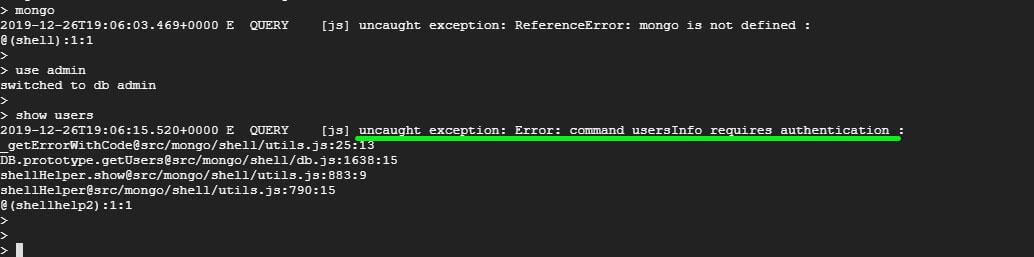
If you now try listing the users without authentication, you should get an error as shown.
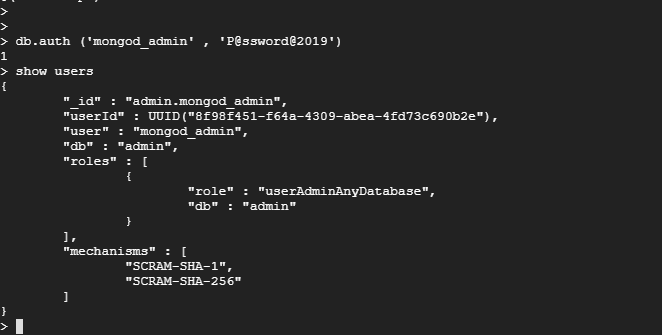
To authenticate, simply pass the credentials as shown.
> db.auth('mongod_admin', 'P@ssword@2019')
Now you can run any command after that. Let’s try listing the users once more:
> show users
This time, all went well since the authentication credentials were provided.
To exit the database engine run.
> exit
And that’s all for today. We hope that by now you are comfortable installing MongoDB4 on your CentOS 8 system and getting started with a few necessary steps.


