PgAdmin4 is a easy to use web interface for managing PostgreSQL databases. It can be used on multiple platforms such as Linux, Windows and Mac OS X. In pgAdmin 4 there is migration from bootstrap 3 to bootstrap 4.
In this tutorial we are going to install pgAdmin 4 on a CentOS 7 system.
Note: This tutorial assumes that you already have PostgreSQL 9.2 or above installed on your CentOS 7. For instructions how to install it, you can follow our guide: How to install PostgreSQL 10 on CentOS and Fedora.
How to Install pgAdmin 4 in CentOS 7
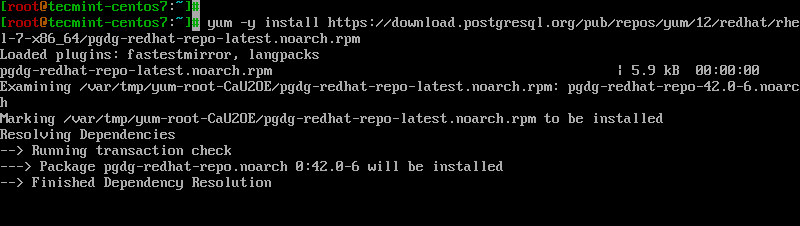
This step should have been completed upon the installation of PostgreSQL, but if you haven’t, you can complete it with:
# yum -y install https://download.postgresql.org/pub/repos/yum/12/redhat/rhel-7-x86_64/pgdg-redhat-repo-latest.noarch.rpm
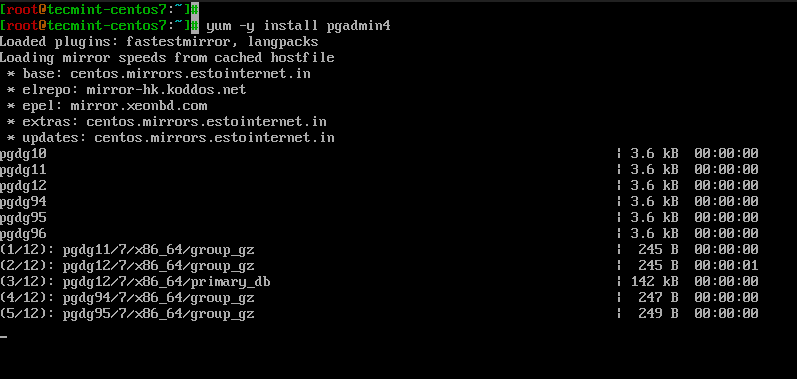
Now you are ready to install pgAdmin with:
# yum -y install pgadmin4
During the installation, due to dependencies, the following two will be installed as well – pgadmin4-web and httpd web server.
How to Configure pgAdmin 4 in CentOS 7
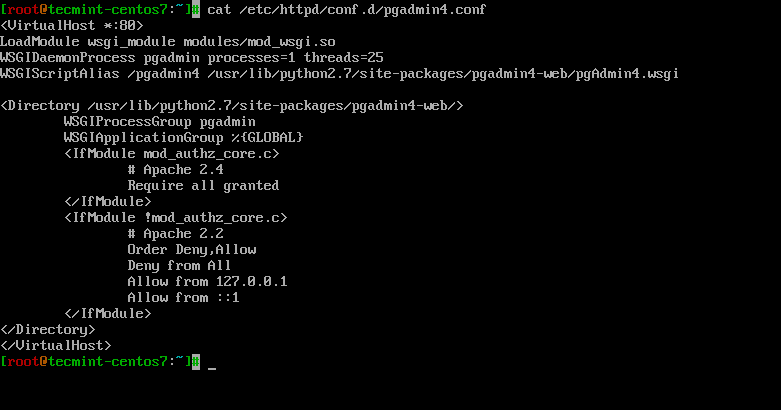
There are few minor configuration changes that need to be done to have pgAdmin4 running. First we will rename the sample conf file from pgadmin4.conf.sample to pgadmin4.conf:
# mv /etc/httpd/conf.d/pgadmin4.conf.sample /etc/httpd/conf.d/pgadmin4.conf
# vi /etc/httpd/conf.d/pgadmin4.conf
Adjust the file so it looks like this:
<VirtualHost *:80>
LoadModule wsgi_module modules/mod_wsgi.so
WSGIDaemonProcess pgadmin processes=1 threads=25
WSGIScriptAlias /pgadmin4 /usr/lib/python2.7/site-packages/pgadmin4-web/pgAdmin4.wsgi

<Directory /usr/lib/python2.7/site-packages/pgadmin4-web/>
        WSGIProcessGroup pgadmin
        WSGIApplicationGroup %{GLOBAL}
        <IfModule mod_authz_core.c>
                # Apache 2.4
                Require all granted
        </IfModule>
        <IfModule !mod_authz_core.c>
                # Apache 2.2
                Order Deny,Allow
                Deny from All
                Allow from 127.0.0.1
                Allow from ::1
        </IfModule>
</Directory>
</VirtualHost>
Next we will create logs and lib directories for pgAdmin4 and set their ownership:
# mkdir -p /var/lib/pgadmin4/
# mkdir -p /var/log/pgadmin4/
# chown -R apache:apache /var/lib/pgadmin4
# chown -R apache:apache /var/log/pgadmin4

And then we can extend the contents of our config_distro.py.
# vi /usr/lib/python2.7/site-packages/pgadmin4-web/config_distro.py
And add the following lines:
LOG_FILE = '/var/log/pgadmin4/pgadmin4.log'
SQLITE_PATH = '/var/lib/pgadmin4/pgadmin4.db'
SESSION_DB_PATH = '/var/lib/pgadmin4/sessions'
STORAGE_DIR = '/var/lib/pgadmin4/storage'

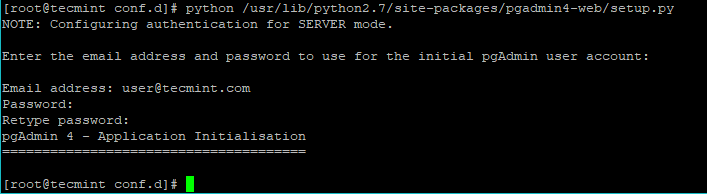
Finally we will create our user account, with which we will authenticate in the web interface. To do this, run:
# python /usr/lib/python2.7/site-packages/pgadmin4-web/setup.py
Now you can access your server’s http://ip-address/pgadmin4 or http://localhost/pgadmin4 to reach the pgAdmin4 interface:
If you receive 403 error while accessing PgAdmin4 interface, you need to set the correct SELinux context on the following files.
# chcon -t httpd_sys_rw_content_t /var/log/pgadmin4 -R
# chcon -t httpd_sys_rw_content_t /var/lib/pgadmin4 -R
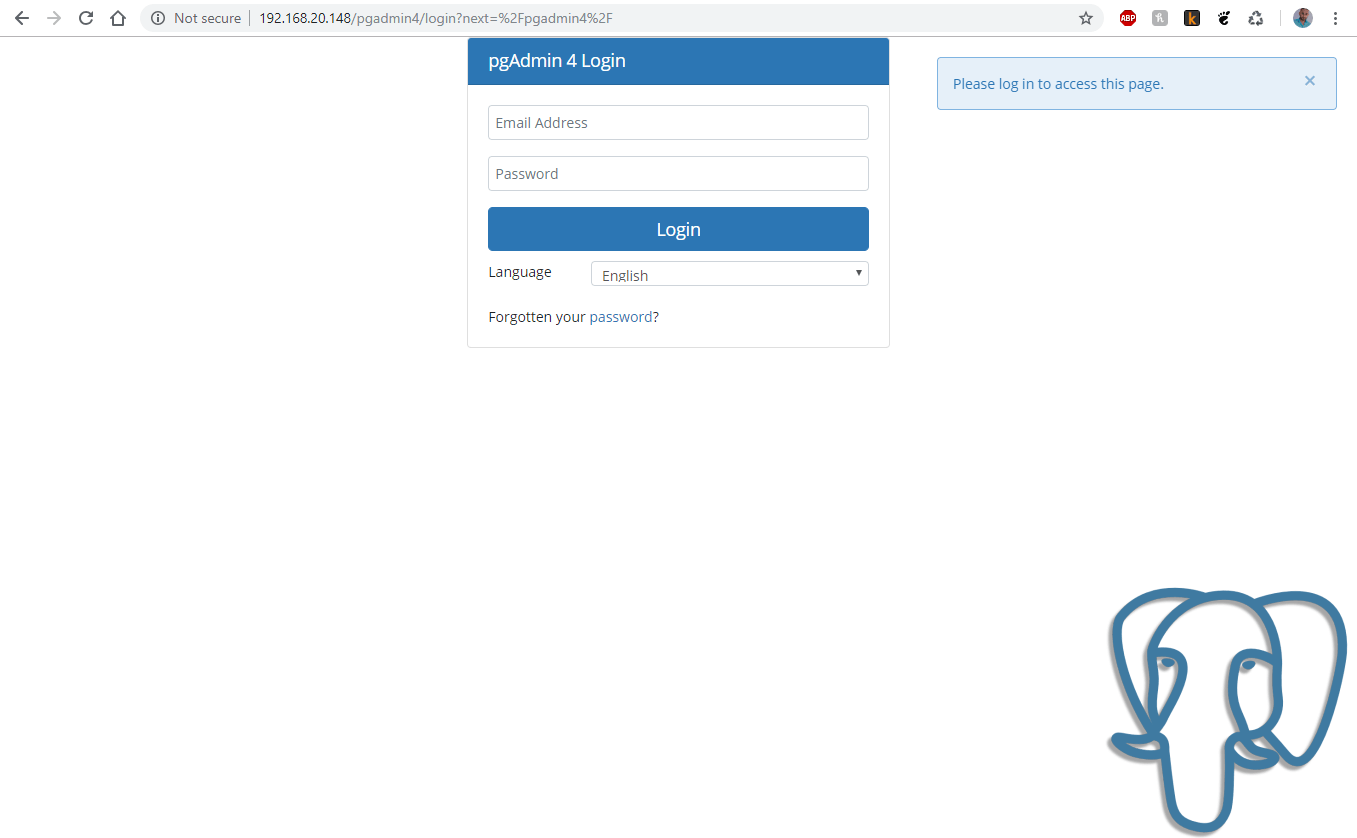
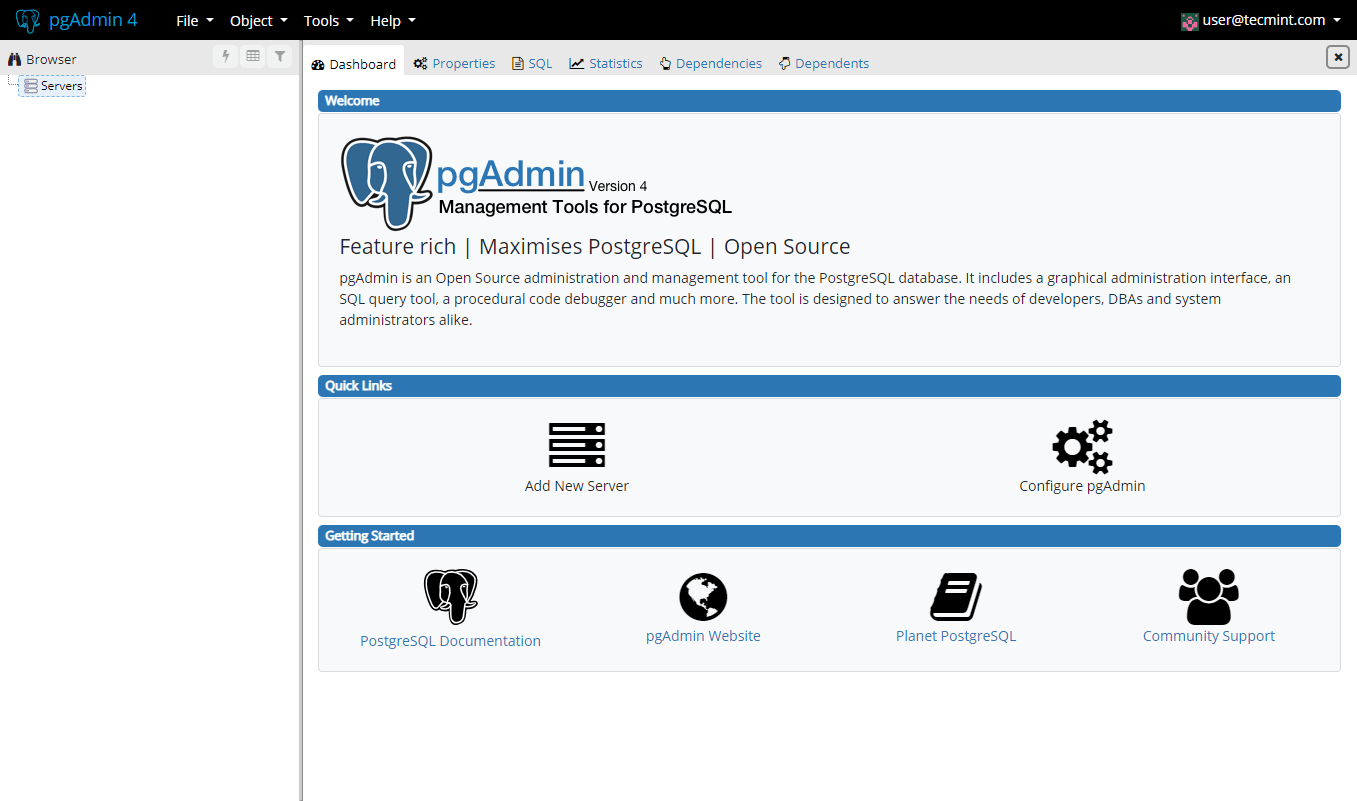
To authenticate, use the email address and password that you have used earlier. Once authenticate, you should see the pgAdmin4 interface:
At your first login, you will need to add a new server to manage. Click on “Add New Server”. You will need to configure the PostgresQL connection. In the first tab “General”, enter the following settings:
- Name – give name of the server you are configuring.
- Comment – leave a comment to give description of the instance.
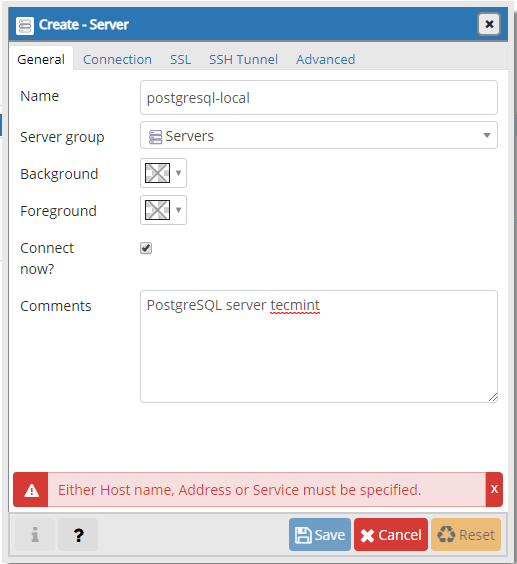
The second tab “Connection” is more important one, as you will have to enter:
- Host – host/IP address of the PostgreSQL instance.
- Port – default port is 5432.
- Maintenance database – this should be postgres.
- Username – the username which will be connecting. You can use postgres user.
- Password – password for the above user.
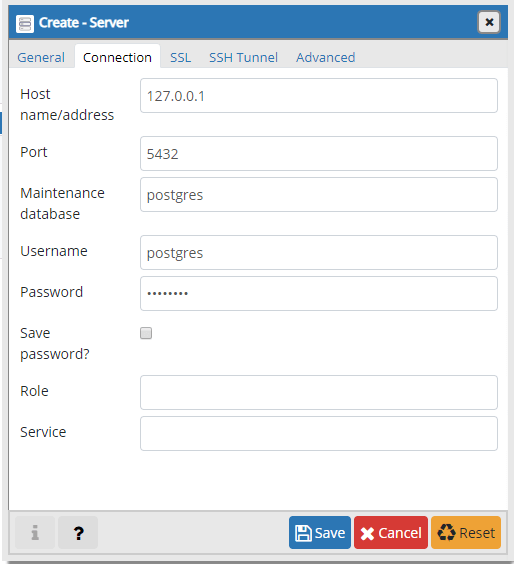
When you have filled everything, Save the changes. If the connection was successful, you should see the following page:
This was it. Your pgAdmin4 installation is complete and you can start managing your PostgreSQL database.


Cannot install pgadmin4 on centos 7.8.2003. libpq.so.5 must be updated to version 12.4, but the system version of 9.2.24 it is needed by the package redhat-lsb-core. It is suicide to update libpq.so.5.
greetings,
Seems that pgadmin4 moved to python 3.6.
OK, and now we have ver 4.17 HOW can we install it on centos 7 now? running python
/usr/lib/python2.7/site-packages/pgadmin4-web/setup.pyis stoping by error. SO?? maybe it is time to change manual here?The post should come with a warning or be taken down, lots of wasted hours, not acceptable, have the decency to take it down.
@Greg,
I have just tested on my CentOS 7 system, and the given instructions worked without any errors…
Indeed I couldn’t get it to work until I run:
# python /usr/lib/python2.7/site-packages/pgadmin4-web/pgAdmin4.pyand connect on URL http://127.0.0.1:5050/
thanks for the comments!
These instructions are incomplete. You need to run:
# python /usr/lib/python2.7/site-packages/pgadmin4-web/pgAdmin4.py…to start the app!
Also, the default url it start on is: http://127.0.0.1:5050 (not what you’ve posted here)
It’s unfortunate that one has to spend so much so much time troubleshooting due to incorrect instructions posted here !
I have the same problem as Fabrizio and Manoj: httpd running, but page not found when going to /pgadmin4
@Erik,
Please follow the guide correctly, and make sure to allow your IP address in
/etc/httpd/conf.d/pgadmin4.conffile.Hello Ravi, thnak you for your reply. I followed the instructions to the letter. I copied this content into /etc/httpd/conf.d/pgadmin4.conf :
LoadModule wsgi_module modules/mod_wsgi.so
WSGIDaemonProcess pgadmin processes=1 threads=25
WSGIScriptAlias /pgadmin4 /usr/lib/python2.7/site-packages/pgadmin4-web/pgAdmin4.wsgi
WSGIProcessGroup pgadmin
WSGIApplicationGroup %{GLOBAL}
# Apache 2.4
Require all granted
# Apache 2.2
Order Deny,Allow
Deny from All
Allow from 127.0.0.1
Allow from ::1
I do not understand where you would like me to add my IP address?
Thanks in advance,
Erik
Hmm, I noticed that everyting between is stripped in my comment…
Hi, after new install of pgadmin4 in new centos7 installation, I have problem with connection to ANY postgresql db, at ANY host on the network. In the same time other pga4 installation in the OLd host can see it normally.
it`s say that – Unable to connect to server:
could not connect to server: Permission denied
Is the server running on host “ANY ip address” and accepting
TCP/IP connections on port 5432?
what a problem ))??
Please help getting this error on execution of setup.py :
# python /usr/lib/python2.7/site-packages/pgadmin4-web/setup.py
Traceback (most recent call last):
File “/usr/lib/python2.7/site-packages/pgadmin4-web/setup.py”, line 413, in
setup_db()
File “/usr/lib/python2.7/site-packages/pgadmin4-web/setup.py”, line 347, in setup_db
app = create_app()
File “/usr/lib/python2.7/site-packages/pgadmin4-web/pgadmin/__init__.py”, line 399, in create_app
driver.init_app(app)
File “/usr/lib/python2.7/site-packages/pgadmin4-web/pgadmin/utils/driver/__init__.py”, line 40, in init_app
DriverRegistry.load_drivers()
File “/usr/lib/python2.7/site-packages/pgadmin4-web/pgadmin/utils/driver/registry.py”, line 88, in load_drivers
module = import_module(module_name)
File “/usr/lib64/python2.7/importlib/__init__.py”, line 37, in import_module
__import__(name)
File “/usr/lib/python2.7/site-packages/pgadmin4-web/pgadmin/utils/driver/psycopg2/__init__.py”, line 20, in
import psycopg2
File “/usr/lib64/python2.7/site-packages/psycopg2/__init__.py”, line 50, in
from psycopg2._psycopg import ( # noqa
ImportError: /usr/lib64/python2.7/site-packages/psycopg2/_psycopg.so: undefined symbol: PQconninfo
@Bob,
I think it could be missing psycopg2 python module, install it using pip command as shown.
This is what I finally just found in /var/log/httpd/error_log file:
[Mon Jun 24 10:31:38.070355 2019] [:error] [pid 27524] [remote 178.89.171.169:88] mod_wsgi (pid=27524): Target WSGI script ‘/usr/lib/python2.7/site-packages/pgadmin4-web/pgAdmin4.wsgi’ cannot be loaded as Python module.
[Mon Jun 24 10:31:38.070400 2019] [:error] [pid 27524] [remote 178.89.171.169:88] mod_wsgi (pid=27524): Exception occurred processing WSGI script ‘/usr/lib/python2.7/site-packages/pgadmin4-web/pgAdmin4.wsgi’.
[Mon Jun 24 10:31:38.070427 2019] [:error] [pid 27524] [remote 178.89.171.169:88] Traceback (most recent call last):
[Mon Jun 24 10:31:38.070458 2019] [:error] [pid 27524] [remote 178.89.171.169:88] File “/usr/lib/python2.7/site-packages/pgadmin4-web/pgAdmin4.wsgi”, line 36, in
[Mon Jun 24 10:31:38.070514 2019] [:error] [pid 27524] [remote 178.89.171.169:88] from pgAdmin4 import app as application
[Mon Jun 24 10:31:38.070532 2019] [:error] [pid 27524] [remote 178.89.171.169:88] File “/usr/lib/python2.7/site-packages/pgadmin4-web/pgAdmin4.py”, line 97, in
[Mon Jun 24 10:31:38.070554 2019] [:error] [pid 27524] [remote 178.89.171.169:88] app = create_app()
[Mon Jun 24 10:31:38.070568 2019] [:error] [pid 27524] [remote 178.89.171.169:88] File “/usr/lib/python2.7/site-packages/pgadmin4-web/pgadmin/__init__.py”, line 243, in create_app
[Mon Jun 24 10:31:38.070588 2019] [:error] [pid 27524] [remote 178.89.171.169:88] create_app_data_directory(config)
[Mon Jun 24 10:31:38.070601 2019] [:error] [pid 27524] [remote 178.89.171.169:88] File “/usr/lib/python2.7/site-packages/pgadmin4-web/pgadmin/setup/data_directory.py”, line 42, in create_app_data_directory
[Mon Jun 24 10:31:38.070622 2019] [:error] [pid 27524] [remote 178.89.171.169:88] os.chmod(config.SESSION_DB_PATH, 0o700)
[Mon Jun 24 10:31:38.070646 2019] [:error] [pid 27524] [remote 178.89.171.169:88] OSError: [Errno 1] Operation not permitted: ‘/var/lib/pgadmin4/sessions’
[Mon Jun 24 10:31:40.838538 2019] [:error] [pid 27524] [remote 178.89.171.169:92] mod_wsgi (pid=27524): Target WSGI script ‘/usr/lib/python2.7/site-packages/pgadmin4-web/pgAdmin4.wsgi’ cannot be loaded as Python module.
[Mon Jun 24 10:31:40.838578 2019] [:error] [pid 27524] [remote 178.89.171.169:92] mod_wsgi (pid=27524): Exception occurred processing WSGI script ‘/usr/lib/python2.7/site-packages/pgadmin4-web/pgAdmin4.wsgi’.
[Mon Jun 24 10:31:40.838615 2019] [:error] [pid 27524] [remote 178.89.171.169:92] Traceback (most recent call last):
[Mon Jun 24 10:31:40.838650 2019] [:error] [pid 27524] [remote 178.89.171.169:92] File “/usr/lib/python2.7/site-packages/pgadmin4-web/pgAdmin4.wsgi”, line 36, in
[Mon Jun 24 10:31:40.838713 2019] [:error] [pid 27524] [remote 178.89.171.169:92] from pgAdmin4 import app as application
[Mon Jun 24 10:31:40.838737 2019] [:error] [pid 27524] [remote 178.89.171.169:92] File “/usr/lib/python2.7/site-packages/pgadmin4-web/pgAdmin4.py”, line 97, in
[Mon Jun 24 10:31:40.838781 2019] [:error] [pid 27524] [remote 178.89.171.169:92] app = create_app()
[Mon Jun 24 10:31:40.838801 2019] [:error] [pid 27524] [remote 178.89.171.169:92] File “/usr/lib/python2.7/site-packages/pgadmin4-web/pgadmin/__init__.py”, line 243, in create_app
[Mon Jun 24 10:31:40.838836 2019] [:error] [pid 27524] [remote 178.89.171.169:92] create_app_data_directory(config)
[Mon Jun 24 10:31:40.838862 2019] [:error] [pid 27524] [remote 178.89.171.169:92] File “/usr/lib/python2.7/site-packages/pgadmin4-web/pgadmin/setup/data_directory.py”, line 42, in create_app_data_directory
[Mon Jun 24 10:31:40.838896 2019] [:error] [pid 27524] [remote 178.89.171.169:92] os.chmod(config.SESSION_DB_PATH, 0o700)
[Mon Jun 24 10:31:40.838934 2019] [:error] [pid 27524] [remote 178.89.171.169:92] OSError: [Errno 1] Operation not permitted: ‘/var/lib/pgadmin4/sessions’
@Yuriy,
It seems the problem was wsgi python version. Try to remove wsgi and install python wsgi as shown.
Also, try turning off SELinux with:
I followed the instructions for installing pgadmin on Centos7 and faced the following error when accessing http://ip-address/pgadmin4:
“Internal Server Error
The server encountered an internal error or misconfiguration and was unable to complete your request.
Please contact the server administrator at root@localhost to inform them of the time this error occurred, and the actions you performed just before this error.
More information about this error may be available in the server error log.”
Log files seem to be empty
Hello,
I have the next problem:
mod_wsgi (pid=589): Target WSGI script ‘/usr/lib/python2.7/site-packages/pgadmin4-web/pgAdmin4.wsgi’ cannot be loaded as Python module.
[Sat Jun 15 13:49:46.450167 2019] [:error] [pid 589] [remote ::1:100] mod_wsgi (pid=589): Exception occurred processing WSGI script ‘/usr/lib/python2.7/site-packages/pgadmin4-web/pgAdmin4.wsgi’.
[Sat Jun 15 13:49:46.450783 2019] [:error] [pid 589] [remote ::1:100] Traceback (most recent call last):
[Sat Jun 15 13:49:46.451365 2019] [:error] [pid 589] [remote ::1:100] File “/usr/lib/python2.7/site-packages/pgadmin4-web/pgAdmin4.wsgi”, line 36, in
[Sat Jun 15 13:49:46.453649 2019] [:error] [pid 589] [remote ::1:100] from pgAdmin4 import app as application
[Sat Jun 15 13:49:46.454048 2019] [:error] [pid 589] [remote ::1:100] File “/usr/lib/python2.7/site-packages/pgadmin4-web/pgAdmin4.py”, line 97, in
[Sat Jun 15 13:49:46.454481 2019] [:error] [pid 589] [remote ::1:100] app = create_app()
[Sat Jun 15 13:49:46.454835 2019] [:error] [pid 589] [remote ::1:100] File “/usr/lib/python2.7/site-packages/pgadmin4-web/pgadmin/__init__.py”, line 243, in create_app
[Sat Jun 15 13:49:46.455239 2019] [:error] [pid 589] [remote ::1:100] create_app_data_directory(config)
[Sat Jun 15 13:49:46.455684 2019] [:error] [pid 589] [remote ::1:100] File “/usr/lib/python2.7/site-packages/pgadmin4-web/pgadmin/setup/data_directory.py”, line 42, in create_app_data_directory
[Sat Jun 15 13:49:46.455917 2019] [:error] [pid 589] [remote ::1:100] os.chmod(config.SESSION_DB_PATH, 0o700)
[Sat Jun 15 13:49:46.456133 2019] [:error] [pid 589] [remote ::1:100] OSError: [Errno 1] Operation not permitted: ‘/var/lib/pgadmin4/sessions’
Daniel, have you managed to solve your issue? I have the same problem
I received the following errors from in /var/log/httpd/error.log when attempting to access the web interface
http://localhost/pgadmin4.Resolved by setting the correct SELinux context correctly (bad idea to just disable SELinux)
Regards
@Darren,
Thanks for sharing the tip, hope it will help other users, who face similar issue.. Also I will update the article with SELinux context as shared..
I think I have a similar problem. It appears that Apache is running python 3.6, but this is installing on python 2.7. I believe this is causing a mismatch. But, I do not see a mechanism for telling pgadmin4 to use python 3.6 or telling Apache to use python 2.7.
I’ve repeated all of the steps listed several times over, from clean builds. I am doing a minimal server build. I’m building this on a VM from a Centos 7 image, but I am updating and upgrading (yum -y update && yum -y upgrade) as part of my process. This is my 4th go-round, and I am at a loss to get this working.
Hi, I’m getting this error when accessing it through
http://ip-address/pgadmin4orhttp://localhost/pgadmin4on centos 7.Unable to connect
Firefox can’t establish a connection to the server at localhost.
Please help me with this.
Have you started httpd?
Yes, i started httpd service. Its status is Active Running.
Same problem for me. httpd running, but page not found
I have just tested the installation steps one more time, but I was not able to reproduce the issue. Can you please try to restart Apache, just in case your installation is not aware of the vhost changes made earlier.
Follow this article and disable SELinux – https://www.tecmint.com/disable-selinux-temporarily-permanently-in-centos-rhel-fedora/
Please add EPEL repo installation here.
@Alexandr,
You can install EPEL using your yum package manager as shown.