PXE Server – Preboot eXecution Environment is a standardized client-server architecture that instructs a client system to boot, run, or install multiple Linux operating systems using a PXE-capable network interface on your network infrastructure.
Requirements
In this article, you will learn how to install and configure a PXE Network Boot Server on CentOS/RHEL 8 with mirrored local installation repositories provided by CentOS 8 and RHEL 8 ISO Images.
For this PXE Network Boot set up, we will install following packages on the system:
- DNSMASQ – a lightweight DNS forwarder that provides a DNS and DHCP services with support for PXE and a TFTP server.
- Syslinux – a Linux boot loader that provides boot loaders for network booting.
- TFTP Server – a simple lockstep File Transfer Protocol which creates bootable images available to be downloaded via a network.
- VSFTPD Server – a secure file transfer protocol that will host the locally mounted mirrored DVD image – which will act as an official RHEL/CentOS 8 mirror installation repository from where the installer will take out its required packages.
Step 1: Install and Configure DNSMASQ Server
1. It is important to remind you that one of your network interfaces must be configured with a static IP address from the same network IP range that provides PXE services.
Once you have configured a static IP address, update your system software packages and install the DNSMASQ daemon.
# dnf install dnsmasq
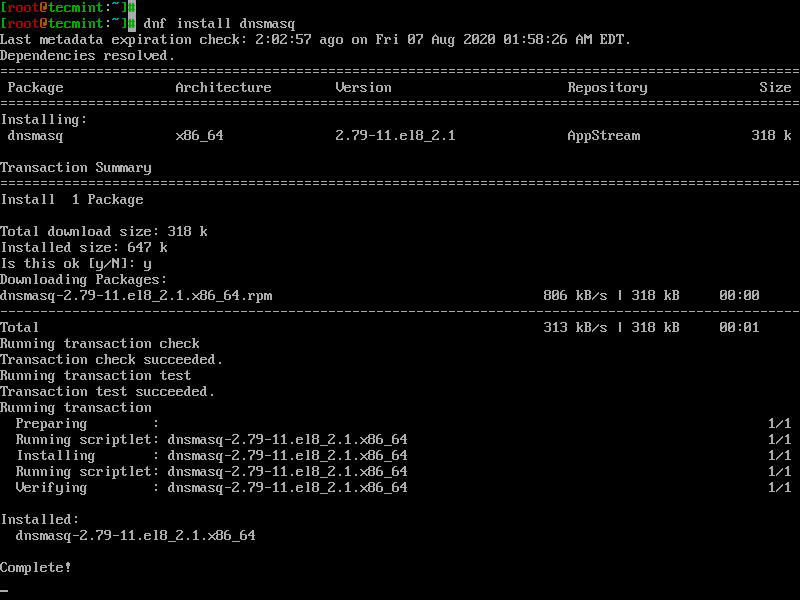
2. Once DNSMASQ installed, you will find its default configuration file under /etc/dnsmasq.conf directory, which is self-explanatory but more difficult to configure, due to its highly commented explanations.
First, make sure to take a backup of this file in case you may need it to review later and then, create a new configuration file using your favorite editor as shown.
# mv /etc/dnsmasq.conf  /etc/dnsmasq.conf.backup
# nano /etc/dnsmasq.conf
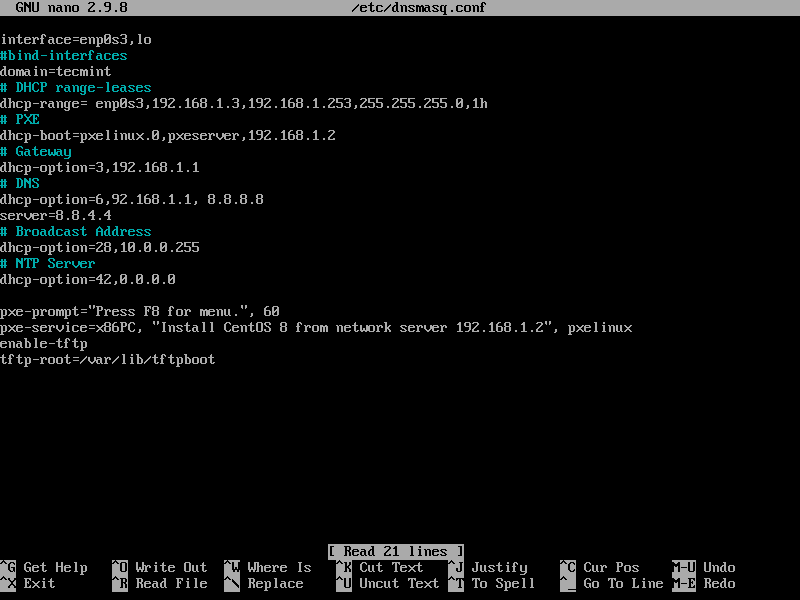
3. Now, copy and paste the following configurations on /etc/dnsmasq.conf file and change the configuration parameters according to your network settings.
interface=enp0s3,lo
#bind-interfaces
domain=tecmint
# DHCP range-leases
dhcp-range= enp0s3,192.168.1.3,192.168.1.253,255.255.255.0,1h
# PXE
dhcp-boot=pxelinux.0,pxeserver,192.168.1.2
# Gateway
dhcp-option=3,192.168.1.1
# DNS
dhcp-option=6,92.168.1.1, 8.8.8.8
server=8.8.4.4
# Broadcast Address
dhcp-option=28,10.0.0.255
# NTP Server
dhcp-option=42,0.0.0.0

pxe-prompt="Press F8 for menu.", 60
pxe-service=x86PC, "Install CentOS 8 from network server 192.168.1.2", pxelinux
enable-tftp
tftp-root=/var/lib/tftpboot
The configuration statements that you need to change are followed:
- interface – A network interfaces of the server should listen and provide services.
- bind-interfaces – Uncomment to bind the interface to a given network card.
- domain – Replace it with your domain name.
- dhcp-range – Change it with your network IP range.
- dhcp-boot – Replace it with your network interface IP Address.
- dhcp-option=3,192.168.1.1 – Replace it with your network Gateway.
- dhcp-option=6,92.168.1.1 – Replace it with your DNS Server IP.
- server=8.8.4.4 – Add your DNS forwarders IPs Addresses.
- dhcp-option=28,10.0.0.255 – Replace it with your network broadcast IP address optionally.
- dhcp-option=42,0.0.0.0 -Add your network time servers (0.0.0.0 Address is for self-reference).
- pxe-prompt – Keep it as default.
- pxe=service – Use x86PC for 32-bit/64-bit architectures and add a menu description prompt under string quotes.
- enable-tftp – Enables the built-in TFTP server.
- tftp-root – Add network booting files location /var/lib/tftpboot.
For other advanced options concerning configuration files feel free to read the dnsmasq manual.
Step 2: Install SYSLINUX Bootloaders
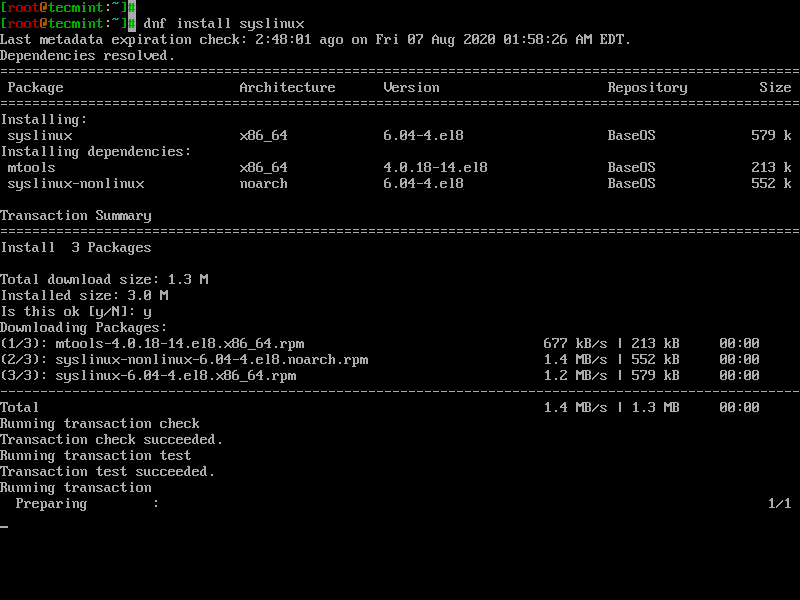
4. After DNSMASQ main configuration done, install the Syslinx PXE bootloader package using the following command.
# dnf install syslinux
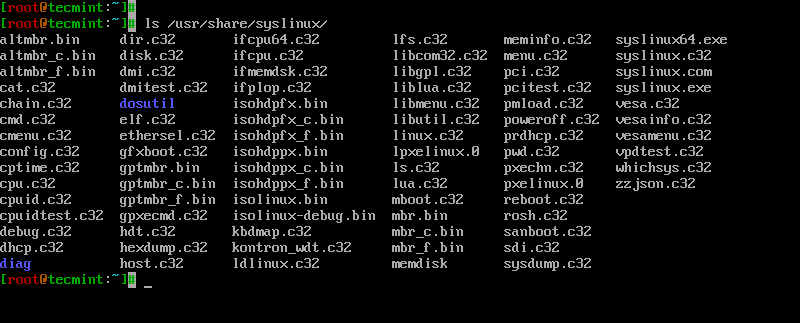
5. The Syslinx PXE bootloaders are installed under /usr/share/syslinux, you can confirm it by running the ls command as shown.
# ls /usr/share/syslinux
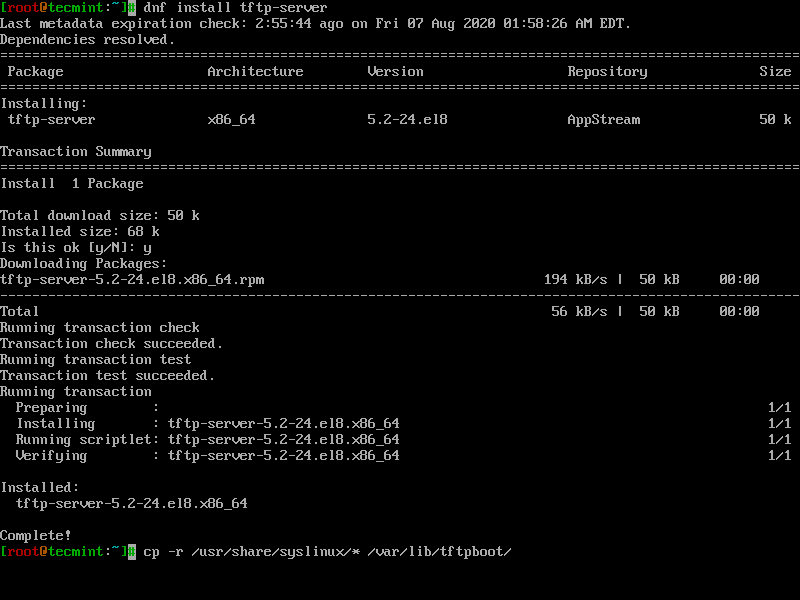
Step 3: Install TFTP-Server and Copy it with SYSLINUX Bootloaders
6. Now, install TFTP-Server and copy all Syslinux bootloaders from /usr/share/syslinux/ to /var/lib/tftpboot as shown.
# dnf install tftp-server
# cp -r /usr/share/syslinux/* /var/lib/tftpboot
Step 4: Setup PXE Server Configuration File
7. By default, the PXE Server reads its configuration from a set of specific files found in pxelinux.cfg, which must be found in the directory described in the tftp-root setting from the DNSMASQ configuration file above.
First, create a pxelinux.cfg directory and create a default file by issuing the following commands.
# mkdir /var/lib/tftpboot/pxelinux.cfg
# touch /var/lib/tftpboot/pxelinux.cfg/default
8. Now open and edit PXE default configuration file with correct Linux distribution installation options. Also, make sure to remember that the paths set in this file must be relative to the /var/lib/tftpboot directory.
# nano /var/lib/tftpboot/pxelinux.cfg/default
The following is an example configuration file that you can use it, but make sure to change the installation images, protocols and IPs to reflect your network installation source repositories and locations accordingly.
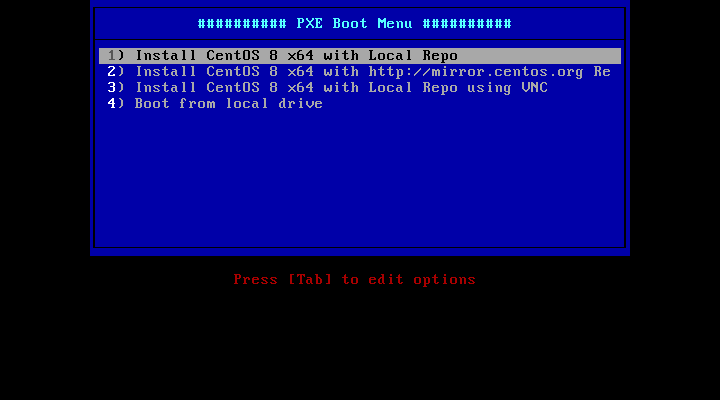
default menu.c32
prompt 0
timeout 300
ONTIMEOUT local

menu title ########## PXE Boot Menu ##########

label 1
menu label ^1) Install CentOS 8 x64 with Local Repo
kernel centos8/vmlinuz
append initrd=centos7/initrd.img method=ftp://192.168.1.2/pub devfs=nomount

label 2
menu label ^2) Install CentOS 8 x64 with http://mirror.centos.org Repo
kernel centos8/vmlinuz
append initrd=centos8/initrd.img method=http://mirror.centos.org/centos/8/BaseOS/x86_64/os/ devfs=nomount ip=dhcp

label 3
menu label ^3) Install CentOS 8 x64 with Local Repo using VNC
kernel centos8/vmlinuz
append  initrd=centos8/initrd.img method=ftp://192.168.1.2/pub devfs=nomount inst.vnc inst.vncpassword=password

label 4
menu label ^4) Boot from local drive
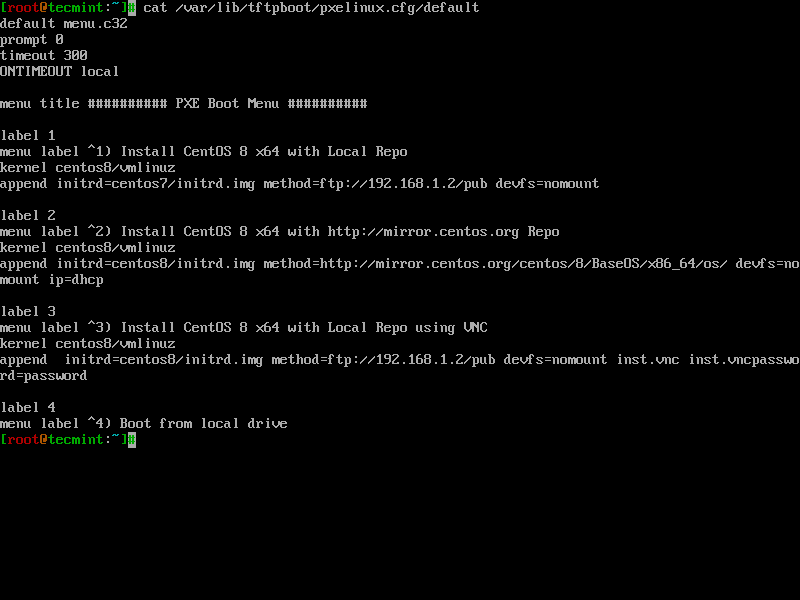
In the above configuration, you can notice that the CentOS 8 boot images (kernel and initrd) reside in a centos7 directory relative to /var/lib/tftpboot (i.e /var/lib/tftpboot/centos7) and the installer repositories can be accessed by using the FTP protocol on 192.168.1.2/pub (IP address of the PXE server).
Also, the menu label 2 describes official CentOS 8 installation sources mirror repositories (internet connection is must on the client system) and menu label 3 describes that the client installation should be done via a remote VNC (here replace VNC password with a strong password).
Important: As you see in the above configuration, we have used CentOS 8 image for demonstration purposes, but you can also use RHEL 8 images.
Step 5: Add CentOS 8 Boot Images to PXE Server
9. To add CentOS 8 images to PXE Server, you need to download CentOS 8 DVD ISO Image locally using wget command and mount it.
# wget http://centos.mirrors.estointernet.in/8.2.2004/isos/x86_64/CentOS-8.2.2004-x86_64-dvd1.iso
# mount -o loop CentOS-8.2.2004-x86_64-dvd1.iso /mnt
10. Once you’ve downloaded CentOS 8, you need to create a centos8 directory and copy bootable kernel and initrd images.
# mkdir /var/lib/tftpboot/centos8
# cp /mnt/images/pxeboot/vmlinuz /var/lib/tftpboot/centos8
# cp /mnt/images/pxeboot/initrd.img /var/lib/tftpboot/centos8
The reason behind having this approach is that later you can have separate directories for each new Linux distributions under /var/lib/tftpboot without messing up the entire directory structure.
Step 6: Create CentOS 8 Local Mirror Installation Source
11. There are a variety of protocols (HTTP, HTTPS, or NFS) that are available for setting up CentOS 8 local installation source mirrors, but I have chosen FTP protocol because it is easy to set up using vsftpd server.
Let’s install Vsftpd server and copy all the CentOS 8 DVD content to FTP directory /var/ftp/pub as shown.
# dnf install vsftpd
# cp -r /mnt/*  /var/ftp/pub/
# chmod -R 755 /var/ftp/pub
12. Now that all the PXE server configuration is completed, you can start, enable, and verify the status of DNSMASQ and VSFTPD servers.
# systemctl start dnsmasq
# systemctl status dnsmasq
# systemctl start vsftpd
# systemctl status vsftpd
# systemctl enable dnsmasq
# systemctl enable vsftpd
13. Next, you need to open ports on your firewall in order for client systems to reach and boot from the PXE server.
# firewall-cmd --add-service=ftp --permanent  	## Port 21
# firewall-cmd --add-service=dns --permanent  	## Port 53
# firewall-cmd --add-service=dhcp --permanent  	## Port 67
# firewall-cmd --add-port=69/udp --permanent  	## Port for TFTP
# firewall-cmd --add-port=4011/udp --permanent  ## Port for ProxyDHCP
# firewall-cmd --reload  ## Apply rules
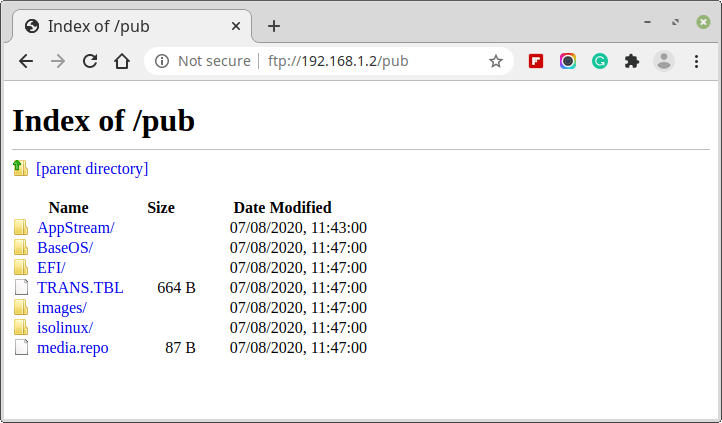
14. To verify the FTP Installation Source network location, open up your browser and type the PXE Server IP address with the FTP protocol followed by /pub network location.
ftp://192.168.1.2/pub
Step 7: Configure Clients to Boot from Network
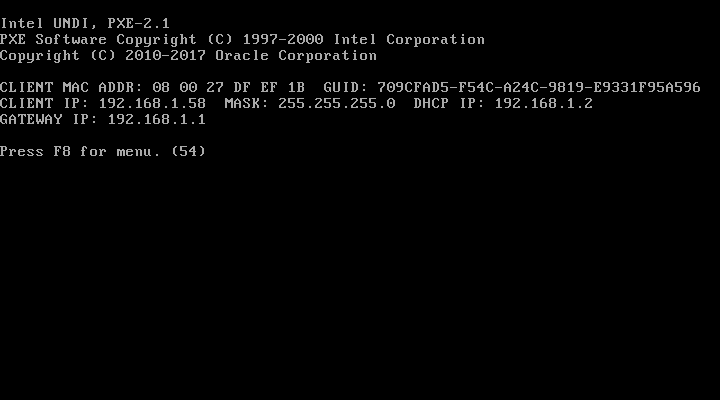
15. Now configure client systems to boot and install CentOS 8 on their systems by configuring Network Boot as prime boot device from BIOS Menu.
After system boots, you will get a PXE prompt, where you need to press F8 key to enter the presentation and then hit Enter key to proceed forward to the PXE menu.
That’s all for setting up a minimal PXE Server on CentOS/RHEL 8.


Does it work when secure boot is enabled on client devices?
Hi,
I have followed the tutorial and was able to Build the Server and it is working fine. But I want to Config the server in such a way that based on my client’s MAC address OS should be installed without manual intervention. can this be possible?
I think this is a mistake in step 10. This is not logical to create folder “centos7” with this name in the tftp server because the distro downloaded is centos8.
10. Once you’ve downloaded CentOS 8, you need to create a “centos7” directory and copy the bootable kernel and initrd images.
The reason behind having this approach is that later you can have separate directories for each new Linux distribution under /var/lib/tftpboot without messing up the entire directory structure.
The “Boot from local Drive” option just keeps counting down over and over for me. Do I need to point it to something?
I followed this tutorial. Thank you for your effort.
But my client does not proceed after the dnsmasq pxe-prompt. After that prompt, when I press enter, it shows “no more network devices. FATAL: No bootable medium found. System halted”
Would you please guide me on resolving it?
This issue is rectified. But the pxe menu is non-responsive. Whenever I press a key the timeout timer gets reset. Options are coming as provided in the default file, I can see that when I press the Tab key.
thank you.
As you only need the boot files from the ISO (Step 5) is there a reason for choosing the full DVD instead of the boot only ISO?
Edit, you would create a source from the base, As explained in https://wiki.centos.org/HowTos/NetworkInstallServer
More, however, shouldn’t that be upgraded to reflect a centos 8 installations, as it’s a general guide from Centos?
-Siri
In order to work you need to comment the line anonymous_enable=NO in vsftpd config file.
Can this be followed as it is on Virtual box ?
@Rakesh,
Yes, you can try in on Virtualbox too..
Is this for legacy boot only? Or is UEFI included?
It’s been a while since I ran network installations, however, most network switches support dhcp-relay which when configured, forwards your client’s DHCP request to the specified IP address (DHCP server) allowing you to run your client on some other subnet to your DHCP server.