This topic will cover the step by step installation process of Zen Cart open source e-commerce platform in Debian-based Linux distributions and in RHEL and CentOS 7 Linux operating systems.
Zen Cart is an easy to manage and popular shopping CMS platform, written in PHP server-side programming language and deployed on top of LAMP stack that is mainly used to create online stores for advertising products and merchandises.
Requirements
Step 1: Install System Pre-Requirements for Zen Cart
1. On the first step, log in to your server console and issue the following commands in order to install unzip and curl utilities in your system.
# yum install unzip zip curl    [On CentOS/RHEL]
# apt install zip unzip curl    [On Debian/Ubuntu]
2. Zen Cart online e-commerce platform is very often installed on top of LAMP stack in Linux systems. If LAMP stack is already installed in your machine you should also make sure you install the following PHP extensions required by Zen Cart e-commerce application by issuing the following command.
------------------ On CentOS/RHEL ------------------
# yum install epel-release
# yum install php-curl php-xml php-gd php-mbstring

------------------ On Debian/Ubuntu ------------------
# apt install php7.0-curl php7.0-xml php7.0-gd php7.0-mbstring
3. After all required PHP modules and installed in your system, open default PHP configuration file specific to your Linux distribution and update the below PHP settings.
Issue the below command according to your distribution to open and edit PHP configuration file.
# vi /etc/php.ini                      [On CentOS/RHEL]
# nano /etc/php/7.0/apache2/php.ini    [On Debian/Ubuntu]
Search and replace the following PHP settings as shown in the below excerpt:
file_uploads = On
allow_url_fopen = On
memory_limit = 64M
upload_max_file_size = 64M
date.timezone = Europe/Bucharest
Visit the official PHP time zone list in order to find the correct timezone according to your server geographical location.
4. After you’ve updated PHP configuration file with the required settings, save and close the file and restart Apache service to re-read the configurations by issuing the following command.
# systemctl restart httpd      [On CentOS/RHEL]
# systemctl restart apache2    [On Debian/Ubuntu]
5. Zen Cart e-commerce platform needs a RDBMS database to store application data. To create a Zen Cart database, log to MySQL server console and issue the below command to create Zen Cart database and the credentials needed to access the database.
Replace the database name, user and password variables with your own settings.
# mysql -u root -p

MariaDB [(none)]> create database zencart_shop;
MariaDB [(none)]> grant all privileges on zencart_shop.* to 'your_user'@'localhost' identified by 'your_password';
MariaDB [(none)]> flush privileges;
MariaDB [(none)]> exit
Step 2: Install Zen Cart in CentOS, Debian and Ubuntu
6. In order to install Zen Cart e-commerce application, first download the latest Zen Cart zip archive file in your system by issuing the below command.
# wget https://sourceforge.net/projects/zencart/files/CURRENT%20-%20Zen%20Cart%201.5.x%20Series/zen-cart-v1.5.5e-03082017.zip
7. After Zen Cart zip file download finishes, issue the following commands to extract the zip archive and copy the installation files to web server document root path.
# unzip zen-cart-v1.5.5e-03082017.zip
# cp -rf zen-cart-v1.5.5e-03082017/* /var/www/html/
8. Next, issue the following command to grant Apache HTTP server full write permission to Zen Cart installation files from server’s document root path.
# chown -R apache:apache /var/www/html/        [On CentOS/RHEL]
# chown -R www-data:www-data /var/www/html/    [On Debian/Ubuntu]
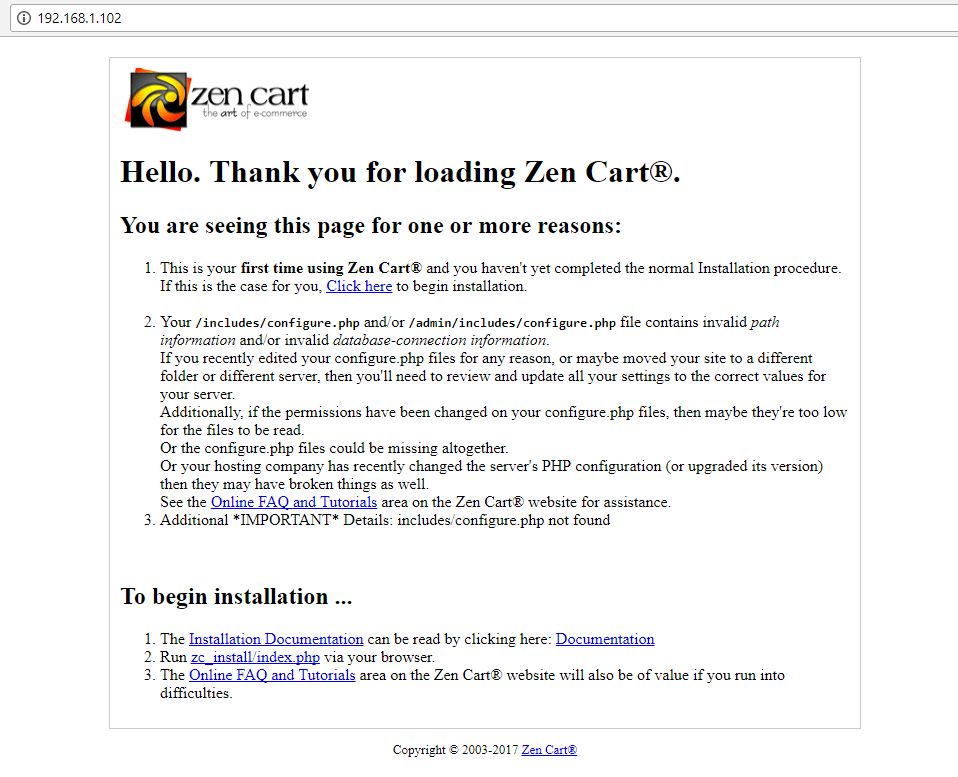
9. Next, open a browser and navigate to your server IP address or domain name via HTTP protocol and hit on Click here link in order to start the installation process of Zen Cart.
http://your_domain.tld/
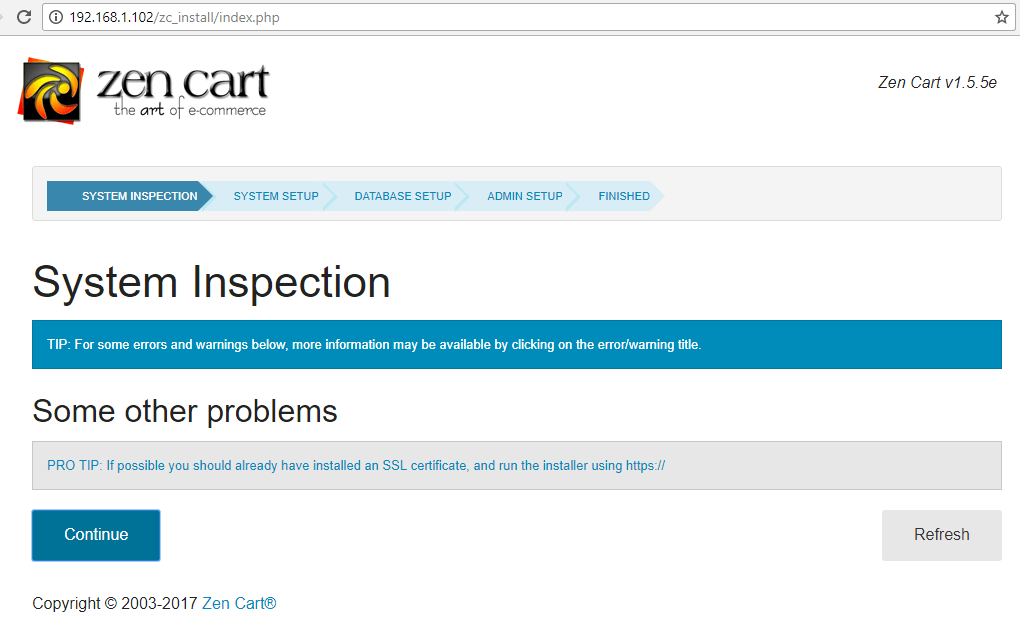
10. In the next step, Zen Cart installer will inspect your system and report eventual problems in case the system configuration does not meet all requirements to install the shopping platform. If no warnings or errors are displayed, click on Continue button to move to the next step.
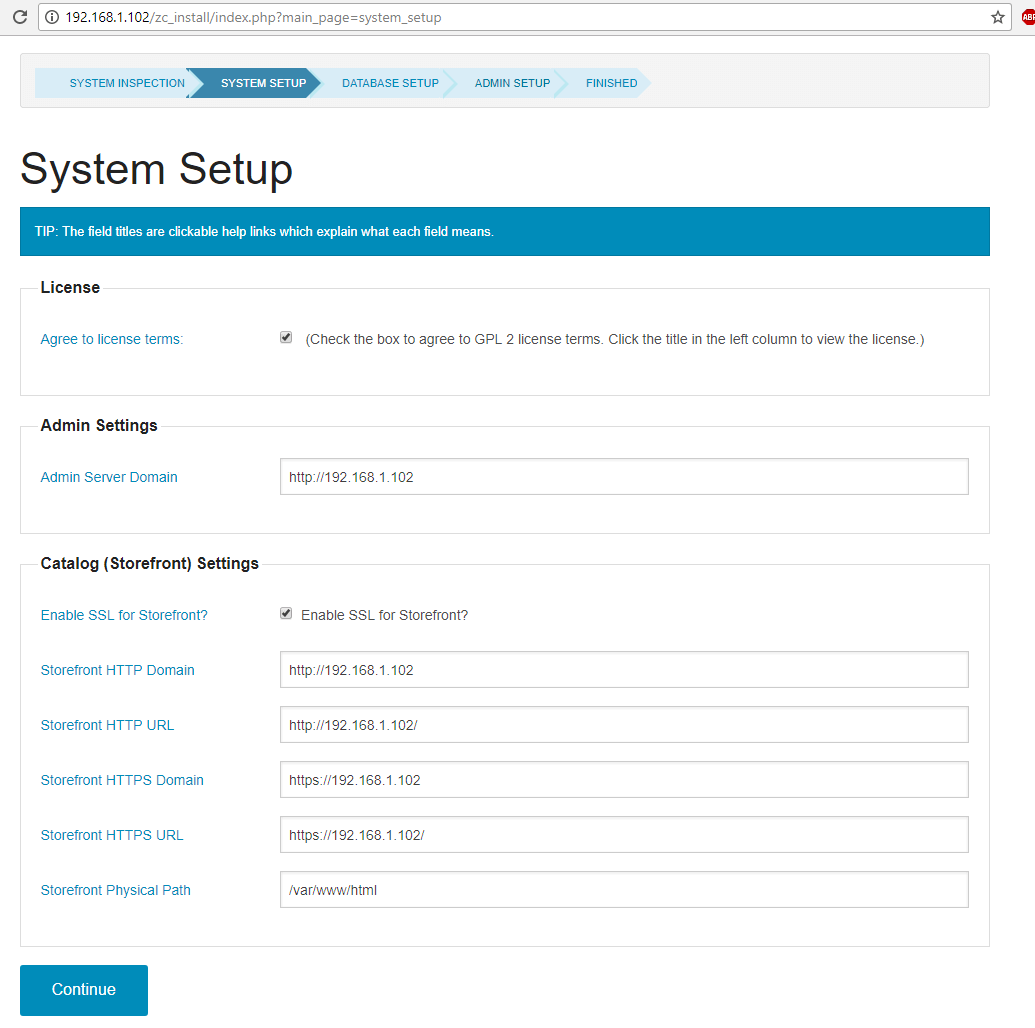
11. On the next installation stage, check to agree the license terms and verify your store frontend URL addresses as illustrated in the below screenshot. Replace the IP address or domain name to match your server configuration. When you finish hit the Continue button to move forward with the installation process.
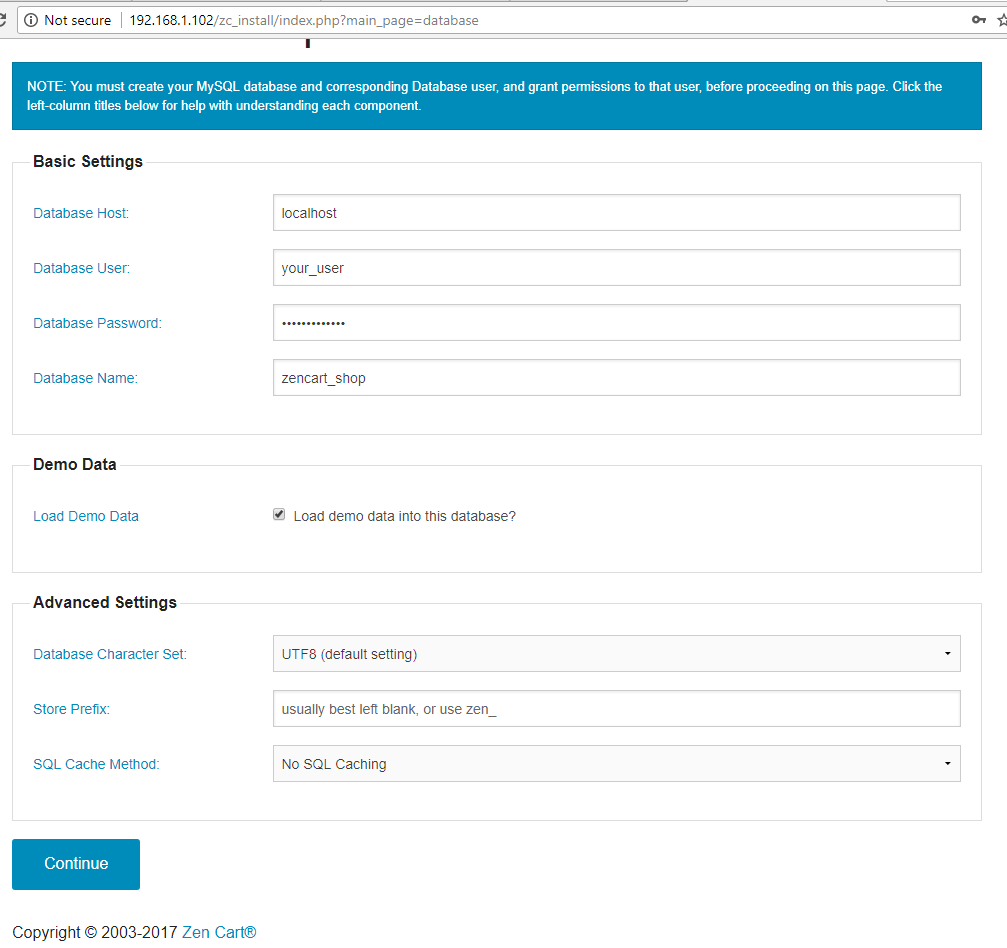
12. Next, supply MySQL database information (database host address, database name and credentials), check the Load Demo Data into Zen Cart database and select database character set, database prefix and SQL Cache Method as illustrated in the below screenshot. Click on Continue button when you finish in order to further configure Zen Cart.
13. In the next installation screen, supply an Admin Superuser name that will be used to log in to store backed and an email address for the Superuser admin account. Write or make a picture of the Admin temporary password and Admin directory name and hit on Continue button to start the installation process.

14. Wait for the installation process to finish and you will redirected to Zen Cart final installation screen. Here you will find two links for accessing Zen Cart Admin Backed dashboard and Your Storefront link, as illustrated in the below screenshot. Make sure you note the store admin backend address.
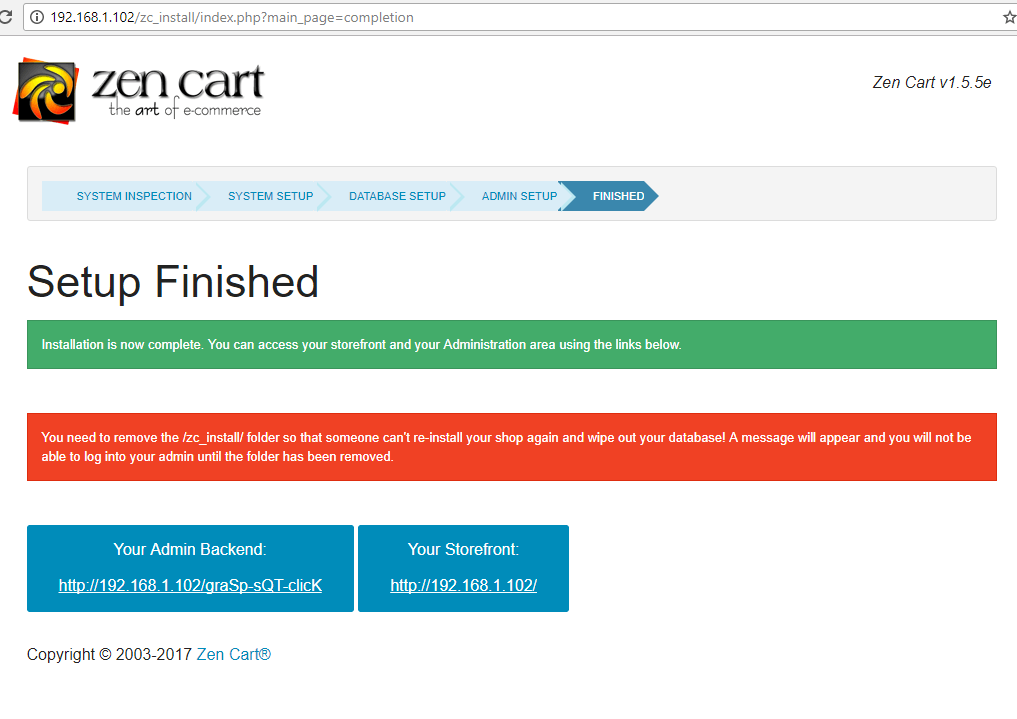
15. Now, before actually logging in to your store backend panel, first return to your server bash console and issue the below command in order to delete the installation directory.
# rm -rf /var/www/html/zc_install/
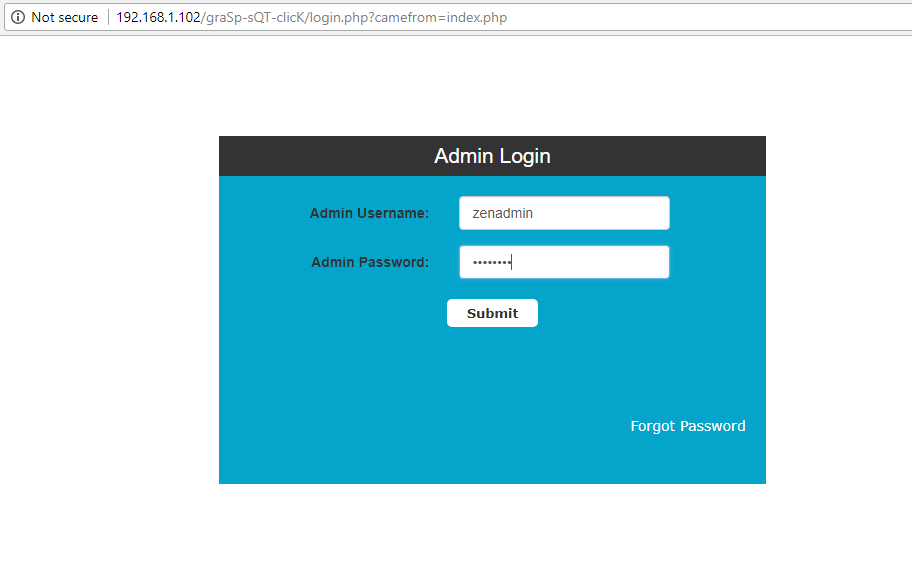
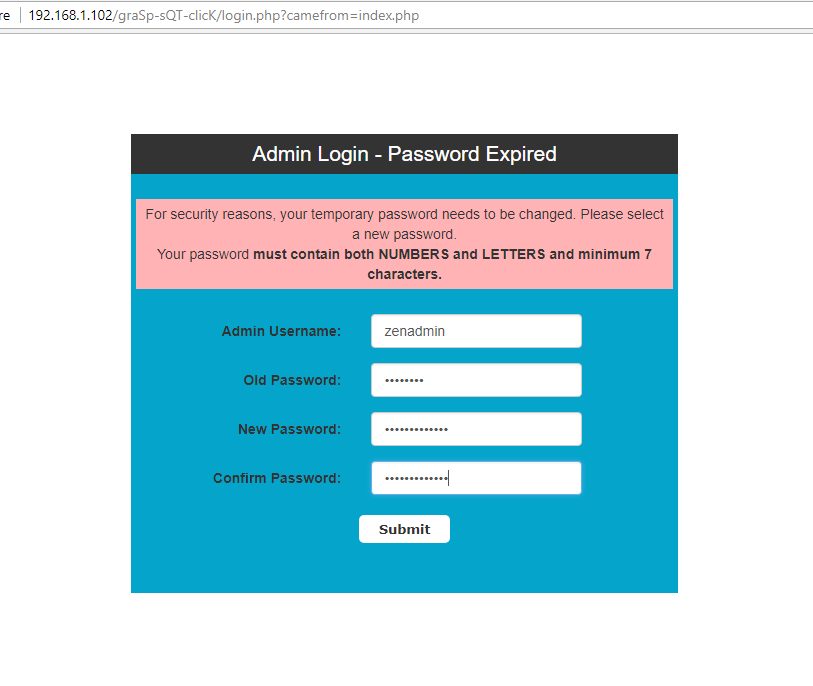
16. Afterwards, go back to browser and click on Admin backend link in order to be redirected to Zen Cart backend dashboard login page. Log in to Zen Cart admin panel with the admin user and password configured earlier and you should be prompted to change admin account temporary password in order to secure your store.
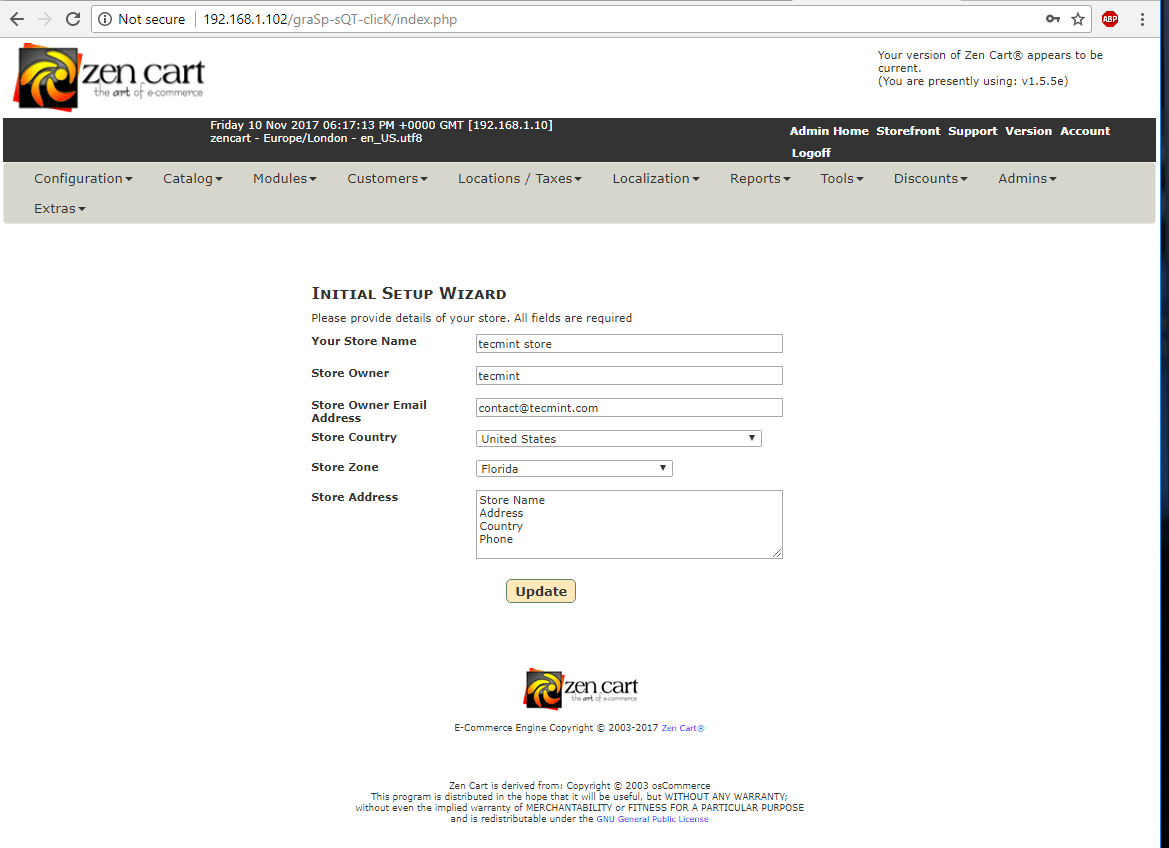
17. When you first log in to Zen Cart backend panel, a new initial setup wizard will be displayed in your screen. In the initial wizard add your store name, owner, store owner email address, store country, store zone and store address and click on Update button to save changes. After completing this last step you can start managing your online store, configure locations and taxes and add some products.
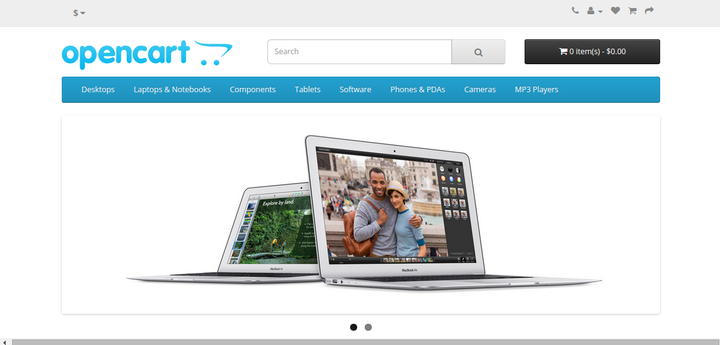
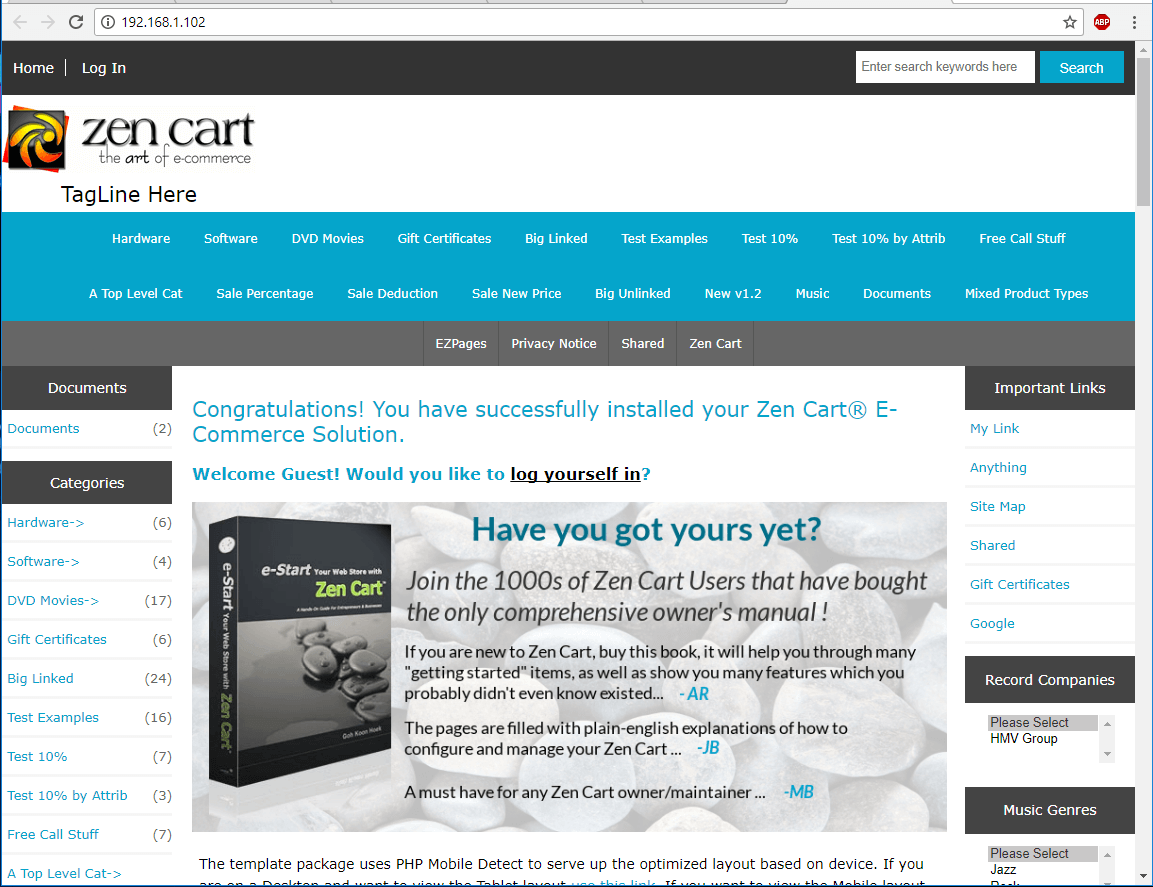
18. Finally, in order to visit your Zen Cart frontend store, navigate to your server IP address or domain name via HTTP protocol, as illustrated in the below screenshot. This is the webpage where your advertised products will be displayed for your clients.
http://ww.yourdomain.tld
Congratulations! You have successfully deployed Zen Cart online e-commerce platform in your system.