L2TP (which stands for Layer 2 Tunneling Protocol) is a tunneling protocol designed to support virtual private networks (VPN connections) over the internet. It is implemented in most if not all modern operating systems including Linux and VPN-capable devices.
The L2TP does not provide any authentication or encryption mechanisms directly to traffic that passes through it, it is usually implemented with the IPsec authentication suite (L2TP/IPsec) to provide encryption within the L2TP tunnel.
In this article, we will show how to set up an L2TP/IPSec VPN connection in Ubuntu and its derivatives and Fedora Linux.
This guide assumes that the L2TP/IPsec VPN server has been set up and that you have received the following VPN connection details from your organization’s or company’s system administrator.
Gateway IP address or hostname
Username and Password
Pre-shared Key (Secret)
How to Setup L2TP VPN Connection in Linux
To add an L2TP/IPsec option to the NetworkManager, you need to install the NetworkManager-l2tp VPN plugin which supports NetworkManager 1.8 and later. It provides support for L2TP and L2TP/IPsec.
To install the L2TP module on Ubuntu and Ubuntu-based Linux distributions, use the following PPA.
$ sudo add-apt-repository ppa:nm-l2tp/network-manager-l2tp
$ sudo apt-get update
$ sudo apt-get install network-manager-l2tp  network-manager-l2tp-gnome
On RHEL/CentOS and Fedora Linux, use the following dnf command to install L2TP module.
# dnf install xl2tpd
# dnf install NetworkManager-l2tp
# dnf install NetworkManager-l2tp-gnome
OR
# yum install xl2tpd
# yum install NetworkManager-l2tp
# yum install NetworkManager-l2tp-gnome
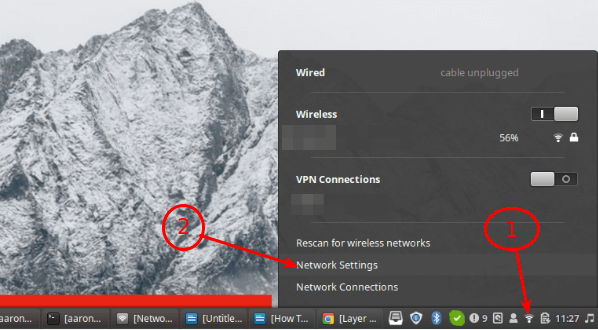
Once the package installation is complete, click on your Network Manager icon, then go to Network Settings.
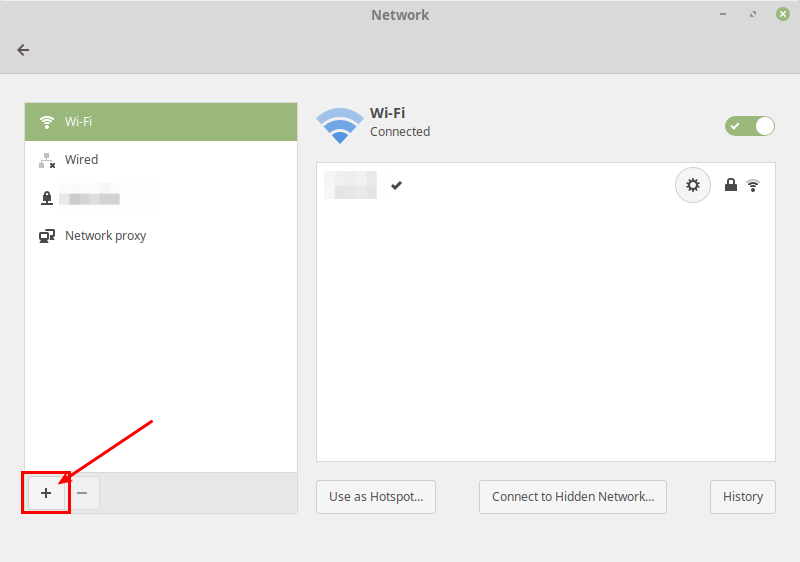
Next, add a new VPN connection by clicking on the (+) sign.
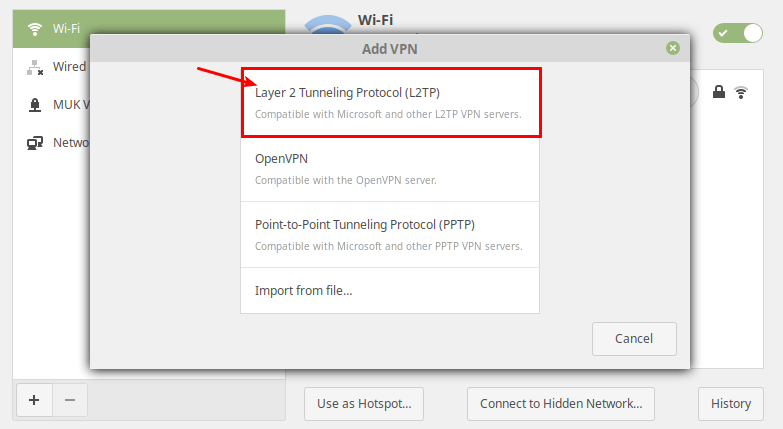
Then select Layer 2 Tunneling Protocol (L2TP) option from the pop-up window.
Next, enter the VPN connection details (gateway IP address or hostname, username and password) you received from the system administrator, in the following window.
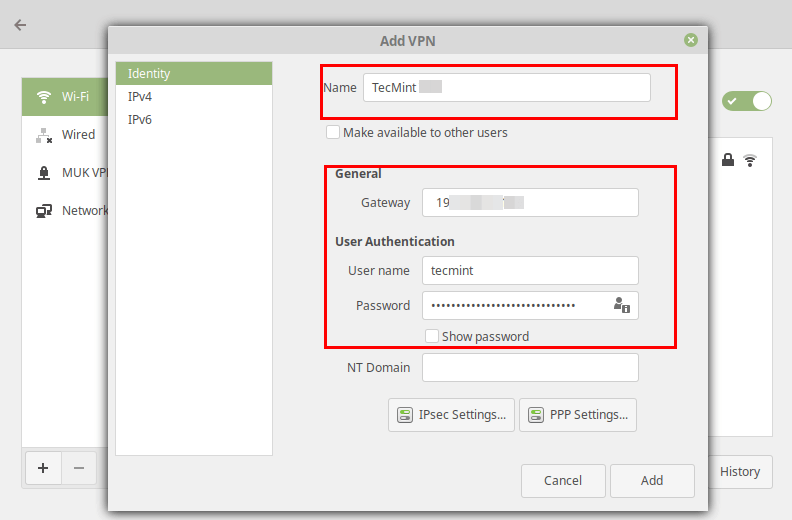
Next, click IPsec Settings to enter the pre-shared key for the connection. Then enable IPsec tunnel to L2TP host, enter (or copy and paste the) the Pre-shared key and click Ok.

After that, click Add. Now your new VPN connection should be added.
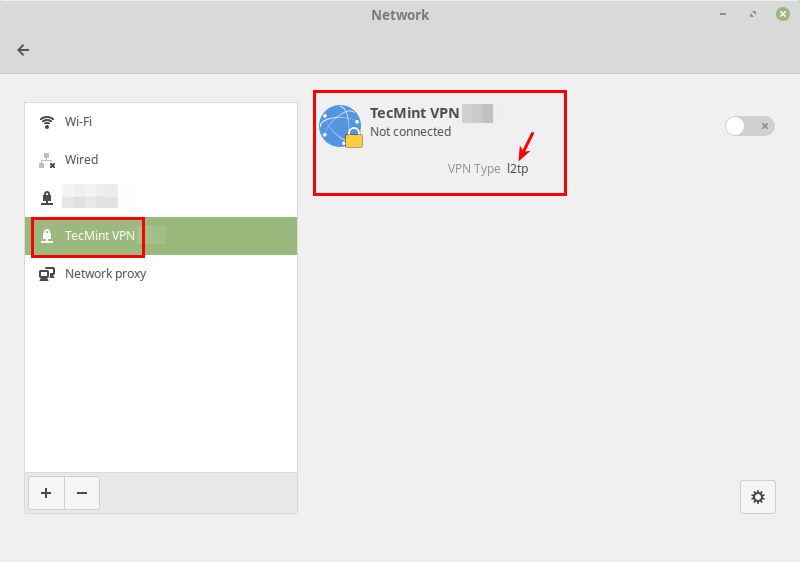
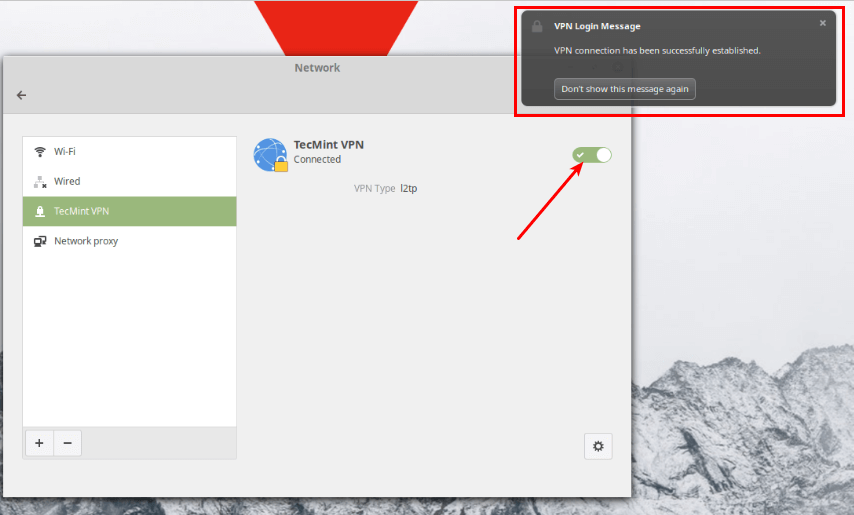
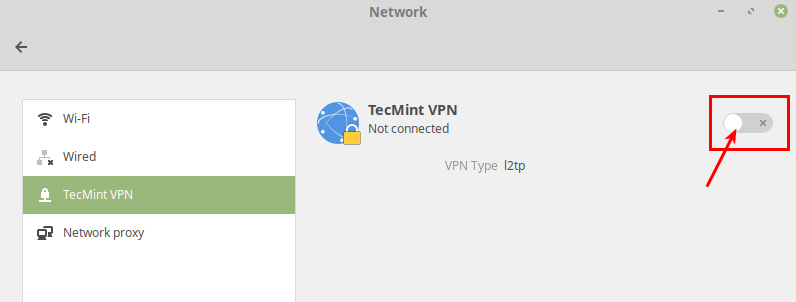
Next, turn on the VPN connection to start using it. If the connection details are correct, the connection should be established successfully.
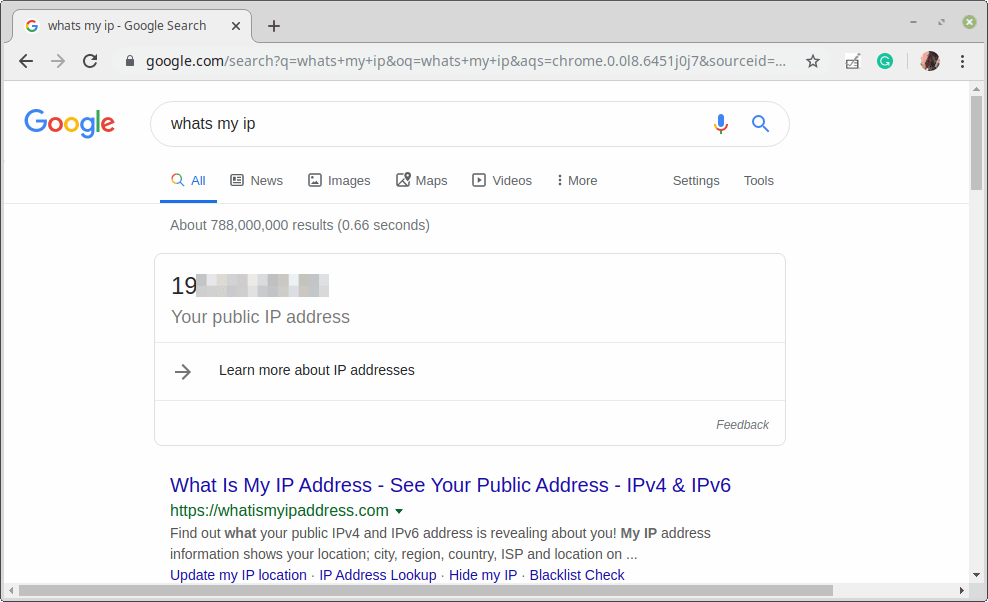
Last but not least, test if the VPN is working fine. You can check your computer’s public IP address to confirm this from a web browser: it should now point to the IP of the gateway.
That’s the end of this article. If you have any queries or thoughts to share, reach us via the feedback form below.