Creating a mail server on Linux-powered machines can be one of the most essential tasks that every system administrator needs to perform while configuring the servers for the first time.
If you’re unfamiliar with what it entails, it’s quite simple. For example, if you have a website like “example.com“, you can create an email account such as “[email protected]“, this enables you to send and receive emails easily without relying on services like Hotmail, Gmail, Yahoo Mail, etc.
In this article, we’ll learn how to do so by installing the Postfix mail server with the “Roundcube” webmail application and its dependencies on Debian and Ubuntu distribution.
Step 1: Set a Hostname and DNS Records for Domain
1. First, set a valid FQDN (Fully Qualified Domain Name) hostname for your Ubuntu server using the hostnamectl command as shown.
sudo hostnamectl set-hostname mail.tecmint.com
2. Next, you need to add a MX and A records for your domain in your DNS control panel that guides other MTAs that your mail server mail.yourdomain.com domain is responsible for email delivery.
MX record    @           mail.tecmint.com
mail.tecmint.com        <IP-address>
Step 2: Installing Apache, MariaDB, and PHP on Ubuntu
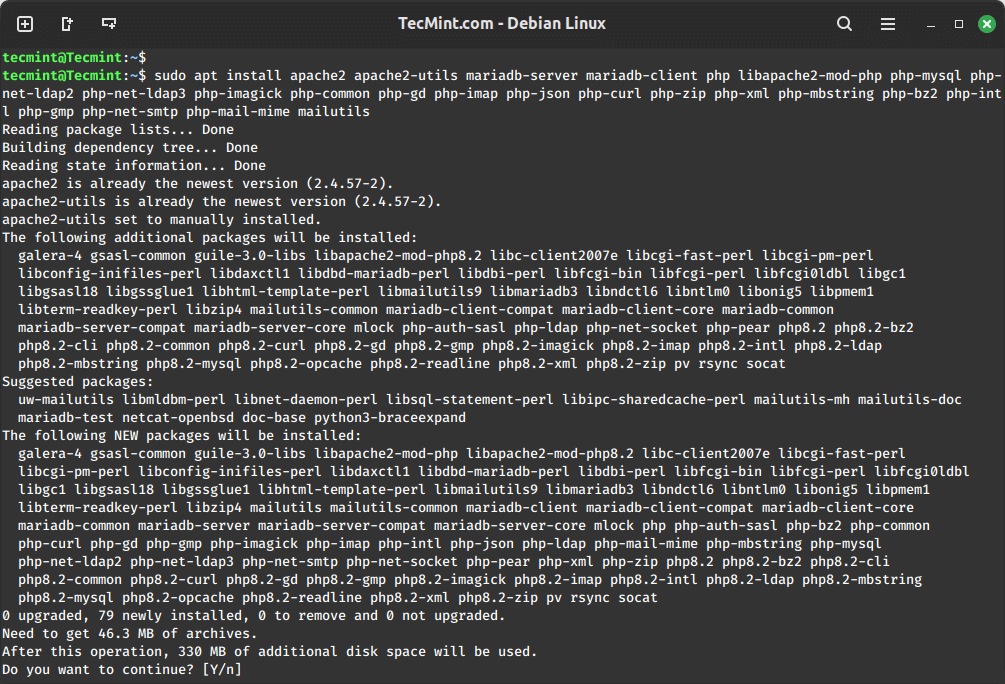
3. To create a running mail server using “Roundcube”, we’ll have to install Apache2, MariaDB, and PHP packages first, to do so, run.
sudo apt update -y
sudo apt upgrade -y
sudo apt install apache2 apache2-utils mariadb-server mariadb-client php libapache2-mod-php php-mysql php-net-ldap2 php-net-ldap3 php-imagick php-common php-gd php-imap php-json php-curl php-zip php-xml php-mbstring php-bz2 php-intl php-gmp php-net-smtp php-mail-mime mailutils
Step 3: Installing Postfix Mail Server on Ubuntu
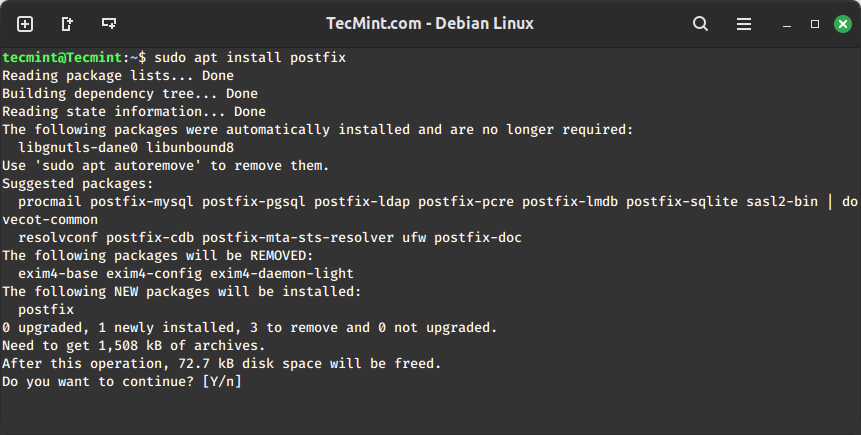
4. Postfix is a mail transfer agent (MTA) which is the responsible software for delivering & receiving emails, it’s essential in order to create a complete mail server.
To install it on Ubuntu/Debian or even Mint, run:
sudo apt install postfix
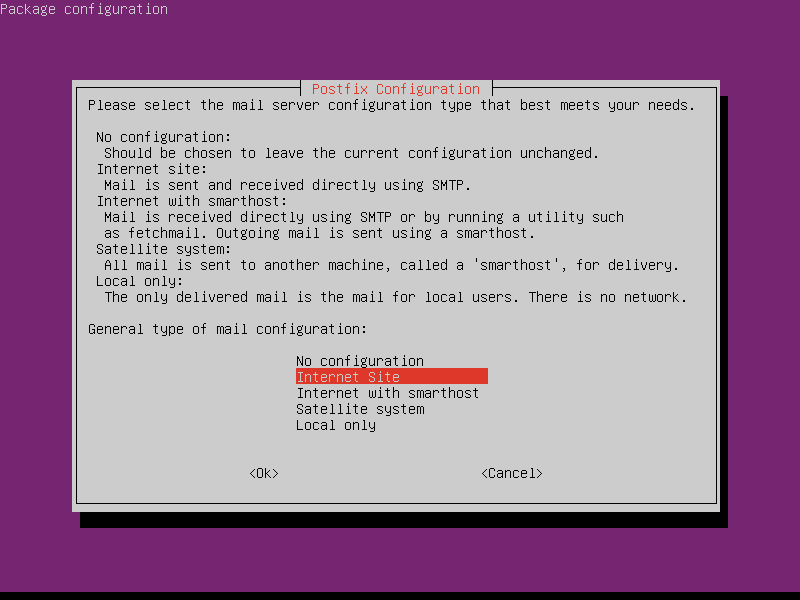
During installation, you will be asked to choose the type of mail configuration, and choose “Internet Site”.
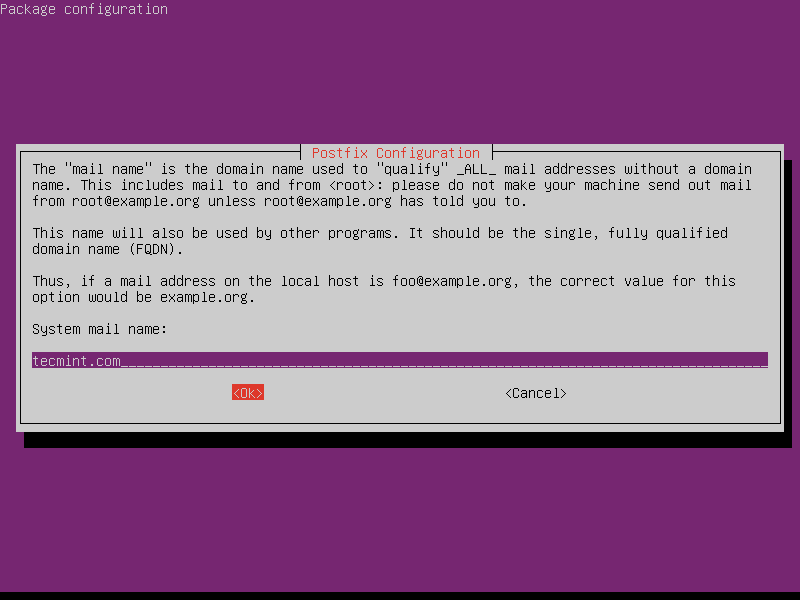
5. Now enter the fully qualified domain name that you want to use for sending and receiving emails.
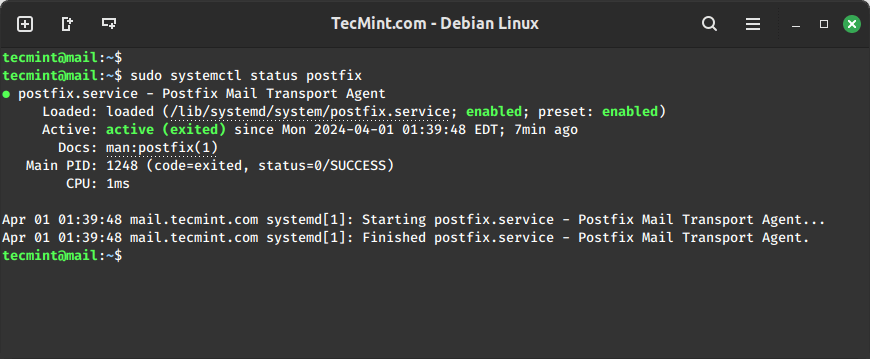
6. Once Postfix is installed, it will automatically start and create a new /etc/postfix/main.cf file. You can verify the Postfix status of the service using the following commands.
sudo systemctl status postfix
Step 4: Testing Postfix Mail Server on Ubuntu
7. Now try to check your mail server is connecting on port 25 using the following command.
$ telnet gmail-smtp-in.l.google.com 25

Trying 74.125.200.27...
Connected to gmail-smtp-in.l.google.com.
Escape character is '^]'.
220 mx.google.com ESMTP k12si849250plk.430 - gsmtp
The above message indicates that the connection is successfully established. Type quit to close the connection.
8. You can also use a mail program to send and read emails using the following command.
$ mail [email protected]

Cc:
Subject: Testing My Postfix Mail Server
I'm sending this email using the postfix mail server from Ubuntu machine
Step 5: Installing Dovecot IMAP and POP in Ubuntu
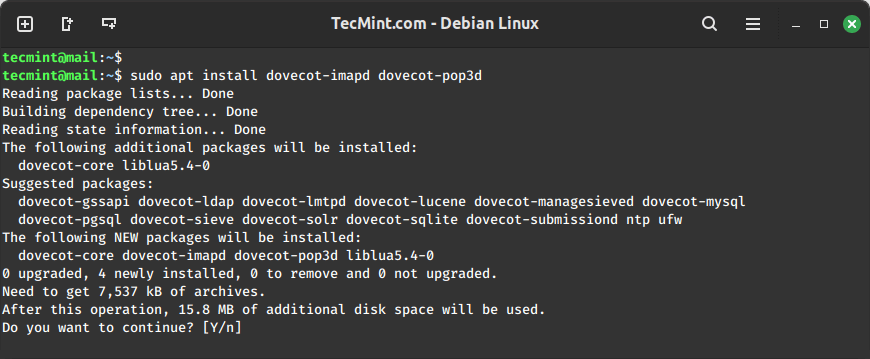
9. Dovecot is a mail delivery agent (MDA), it delivers the emails from/to the mail server, to install it, run the following command.
sudo apt install dovecot-imapd dovecot-pop3d
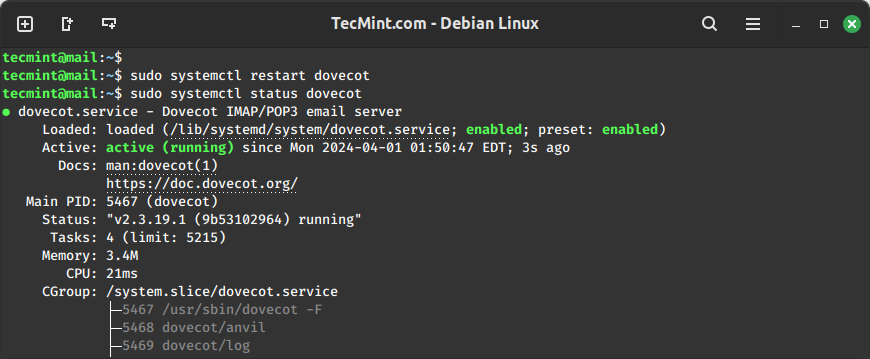
10. Next, restart the Dovecot service and verify the status using the following commands.
sudo systemctl restart dovecot
sudo systemctl status dovecot
Step 6: Installing Roundcube Webmail in Ubuntu
11. Roundcube is the webmail server that you’ll be using to manage emails on your server, it has a simple web interface to do the job, it can be customized by installing more modules & themes.
wget https://github.com/roundcube/roundcubemail/releases/download/1.6.6/roundcubemail-1.6.6-complete.tar.gz
tar -xvf roundcubemail-1.6.6-complete.tar.gz
sudo mv roundcubemail-1.6.6 /var/www/html/roundcubemail
sudo chown -R www-data:www-data /var/www/html/roundcubemail/
sudo chmod 755 -R /var/www/html/roundcubemail/
12. Next, you need to create a new database and user for roundcube and grant all permission to a new user to write to the database.
$ sudo mysql -u root
CREATE DATABASE roundcube DEFAULT CHARACTER SET utf8 COLLATE utf8_general_ci;
CREATE USER roundcubeuser@localhost IDENTIFIED BY 'password';
GRANT ALL PRIVILEGES ON roundcube.* TO roundcubeuser@localhost;
flush privileges;
quit;
13. Next, import the initial tables to the Roundcube database.
sudo mysql roundcube < /var/www/html/roundcubemail/SQL/mysql.initial.sql
Step 7: Create an Apache Virtual Host for Roundcube Webmail
14. Create an Apache virtual host for Roundcube webmail.
sudo nano /etc/apache2/sites-available/roundcube.conf
Add the following configuration to it.
<VirtualHost *:80>
  ServerName tecmint.com
  DocumentRoot /var/www/html/roundcubemail/

  ErrorLog ${APACHE_LOG_DIR}/roundcube_error.log
  CustomLog ${APACHE_LOG_DIR}/roundcube_access.log combined

  <Directory />
    Options FollowSymLinks
    AllowOverride All
  </Directory>

  <Directory /var/www/html/roundcubemail/>
    Options FollowSymLinks MultiViews
    AllowOverride All
    Order allow,deny
    allow from all
  </Directory>

</VirtualHost>
15. Next, enable this virtual host and reload the Apache for the changes.
sudo a2ensite roundcube.conf
sudo systemctl reload apache2
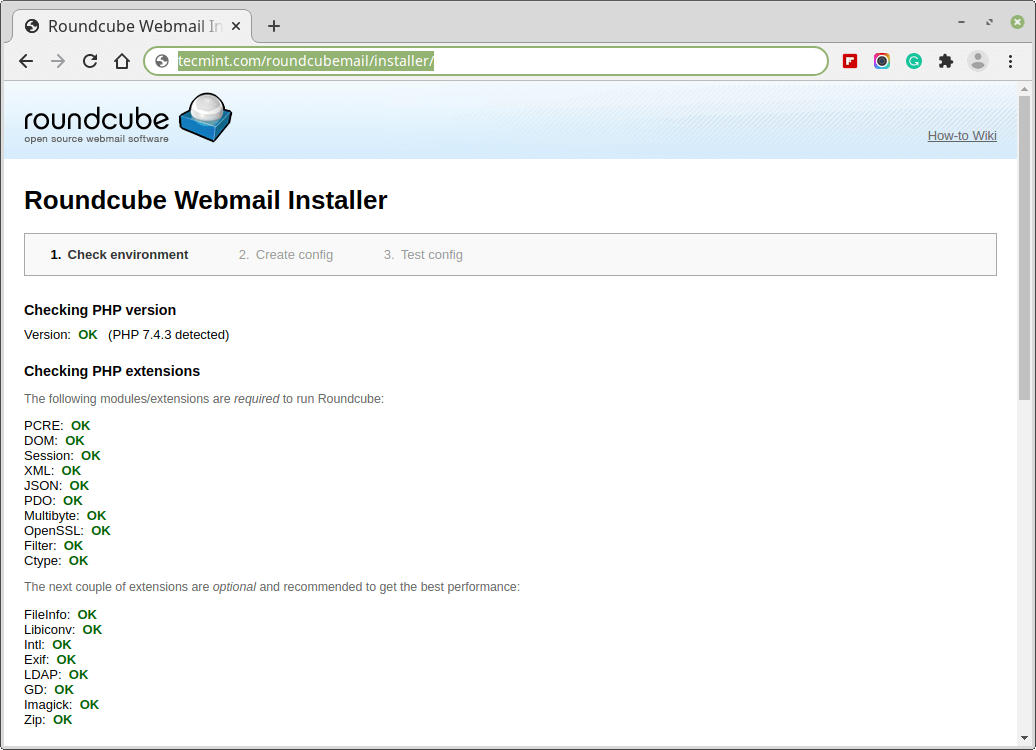
16. You can now access the roundcube webmail by going to the following url.
http://yourdomain.com/roundcubemail/installer/
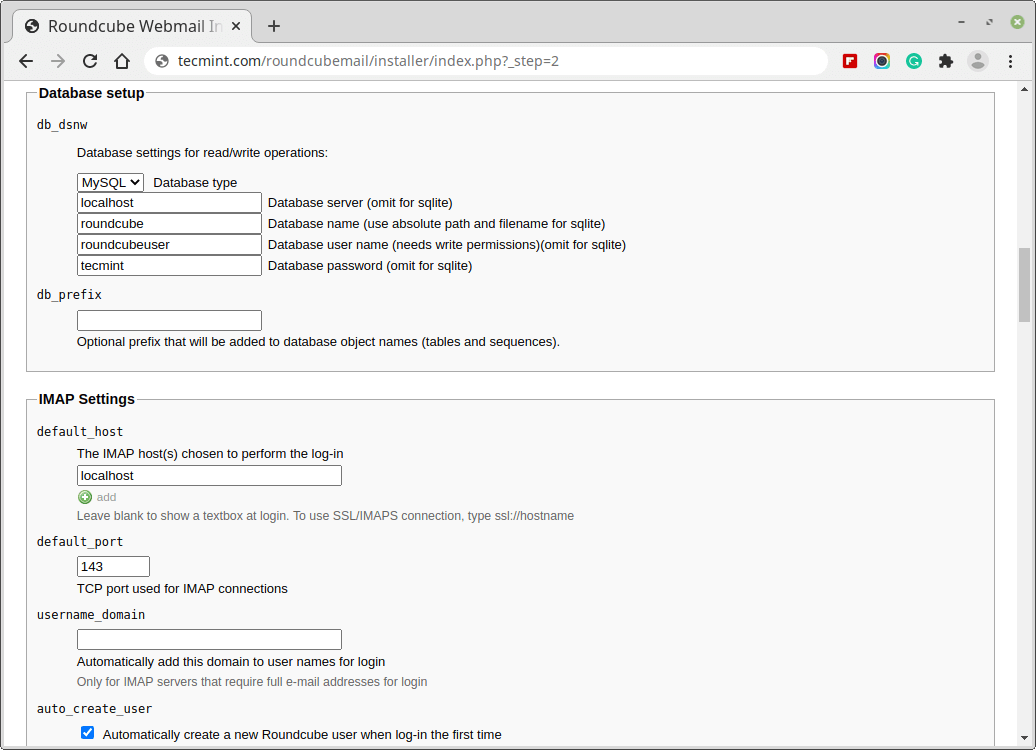
16. Next, go to the Database settings and add the database details.
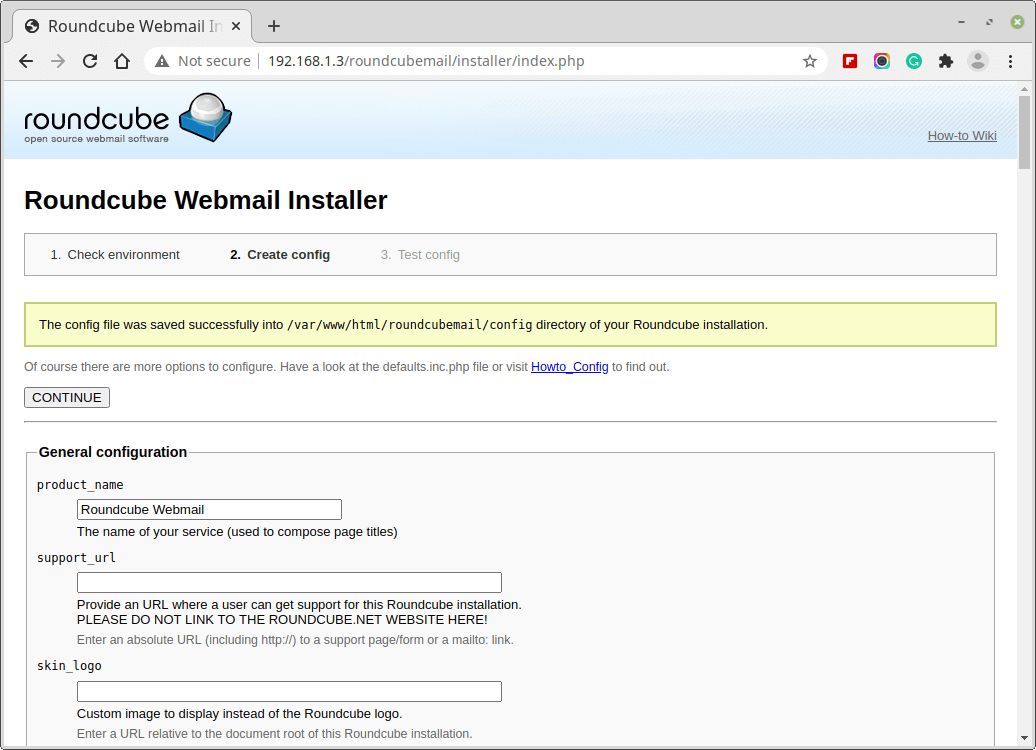
17. After making all the changes, create a config.inc.php file.
18. After finishing the installation and the final tests please delete the installer folder and make sure that enable_installer option in config.inc.php is disabled.
$ sudo rm /var/www/html/roundcubemail/installer/ -r
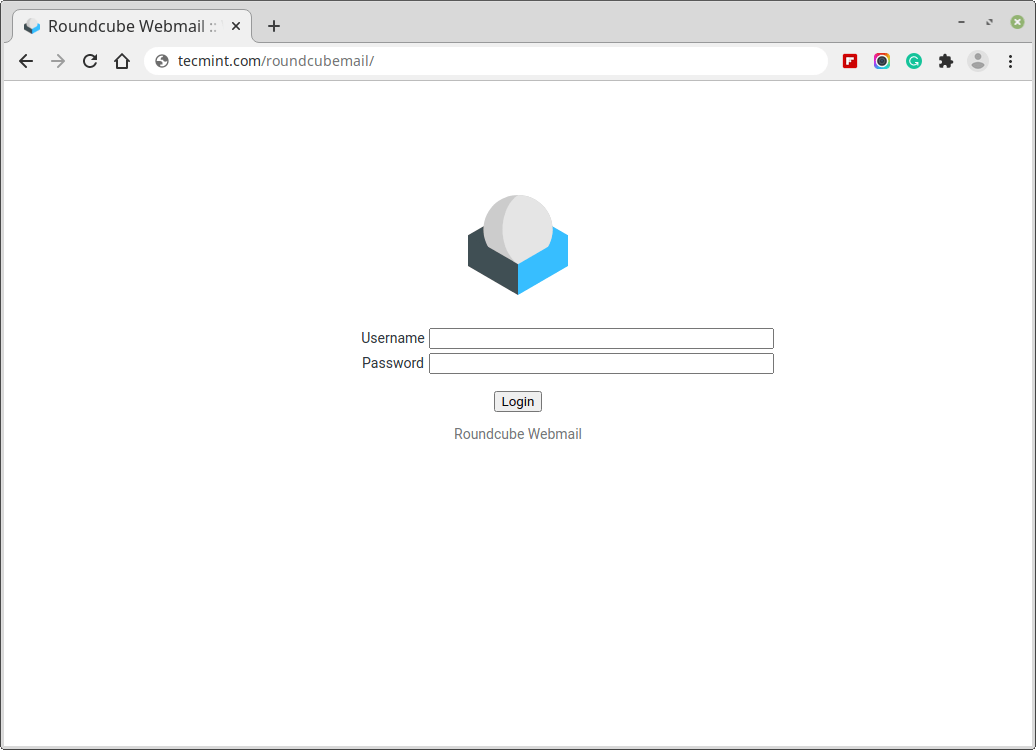
19. Now go to the login page and enter the username and password of the user.
http://yourdomain.com/roundcubemail/
Step 8: Creating Mail Users in Postfix
20. In order to start using the Roundcube webmail, you’ll have to create a new user, to do so, run.
sudo useradd myusername
Replace “myusername” with the user name you want, and create a password for the new user by running.
sudo passwd myusername
21. Now go back to the login page and enter the user name and the password of the newly created user.
Have you tried to create an email server before? How did it go? Have you used Roundcube or any other mail server before? What do you think about it?


Everything works fine, except when sending emails roundcube gives an error and does not send emails. It can receive emails.
Outlook works fine)
Please advise
@Nadun,
It seems like the issue is with Roundcube’s SMTP configuration.
Make sure that the SMTP hostname, port, and encryption (SSL/TLS) settings in Roundcube are correct.
I followed every step I downloaded everything but the webmail said error 404.
@Mario,
Make sure to verify the file and directory permissions, ensuring that the web server has the necessary access to the files. Incorrect permissions could result in a 404 error.
Also, check your configuration settings to ensure they are correctly set up like database connections, and any other relevant configuration details.
Thanks for the helpful tutorial.
I have done everything, of course, I am using nginx. I got an error when I am using the command:
The error is:
I test 587 and 465 ports and they go the same. However, this one goes well: “telnet smtp.gmail.com 587”.
Now in my roundcube panel, I try to send an email and I get this error in the roundcube log:
And another problem is that I receive no emails. No emails are shown in my roundcube panel.
Does anyone know the solutions?
@Farhad,
The error message you’re encountering, “Network is unreachable“, typically indicates that your system is unable to establish a network connection to the target IP addresses.
This can be due to several reasons such as internet connection issues, network configuration issues, or firewalls or security software blocking a request…
The “Connection refused” and “Failed to connect socket” errors indicate that the Roundcube application is unable to establish a connection to the SMTP server.
I suggest you check your SMTP server configuration, firewall, or selinux restricting connection, or check that the PHP socket extension is enabled in the PHP configuration. Also, make sure to check SMTP server logs for more information.
I’m getting an smtp error on the test…
SMTP send: NOT OK(Connection failed: (Code: -1))”
Please help me…
I did the tutorial step by step and actually everything is working but it created a new ip and now I can’t do it locally (my local IP just to work in my virtual machines) and I can’t open the roundcube page because of it!, just the Apache default one that runs on my ip.
Hi, I’m new to this and in step 17 I got lost, I didn’t know how to create what “config.inc.php” asks for, I deleted the installer as requested, but now the domain no longer works for me, I get:
DATABASE ERROR: CONNECTION FAILED!
Unable to connect to the database!
Please contact your server-administrator.
I don’t know what to do, help.
@Alexis,
The config.inc.php file is saved to the /var/www/html/roundcubemail/config directory.
Please check if the file is there, if not, create config.inc.php file by using the defaults.inc.php file.
Hello Bro,
I have already installed the LAMP server on UBUNTU 22.04 Can I install postfix roundcube now or do I need a fresh machine? I am using DigitalOcean hosting.
Please reply as soon as possible.
My application is in trouble with e-mail
@Pardeep,
You can install the Roundcube email client on the same machine, no need to have a fresh system…
Okay, brother Thanks for the quick response…
How about ssl configuration for the mail server?
Is there any advantage to joining the Ubuntu machine to our Active Directory domain before installing the email server?
So I did everything like the turtorial but apache says that this url doesnt exist.
Have you registered your domain ??
Hello,
Is it possible to do this without a fixed IP address? With a dynamic DNS for example? Is it possible to change the DNS records automatically when the external IP changes?
Thanks,
Isaiah
Yeah, you can change the Records automatically with your script or a dyndns client. But with dynamic IP will not have the Reverse DNS that will be a problem for your mail server.
Can anyone please suggest a very good cloud server site apart from digitalocean and vultr?
Anyone with open port 25.
Linode Hosting – https://www.linode.com/
Hi all,
How to create users for dovecot?
I tried as mentioned in this tutorial but it’s impossible to connect in Roundcube.
@Jacques,
What error are you getting while logging into Roundcube as a user?
I can’t connect. I type in the login and password created as indicated but I can’t connect. I have no error message on the interface.
Someone, to help me?
How to create users who can connect to Roundcube?
My server is Ubuntu 20
I am sorry for my bad English, this my problem, with postfix in Linux.
I work in a single vps, with two wordpress,” contact form send mail just for mail “[email protected]”,
If I change file sasl_passwd like this contact form send mail just for "[email protected]",:
If I use shell to send mail like this, both cases work perfectly :
So I need to find a problem with config wordpress or config postfix?
If there solution how to send a message from both wordpress, please help,
Could you update the guide for SASL authentication (openssl) and thunderbird add email account please?
@John,
I Will update the article with SASL authentication and thunderbird as an email client soon…
I have a problem regarding step no 2 I am using the ubuntu 20.04 server but this command is not working terminal says unable to locate the package php-net-ldap3 kindly help me.
On point 16. access webmail. I get an URL not found.
Apache/2.4.41 (Ubuntu) Server at example Port 80
Hi, thank you for this tutorial! I do have one tiny problem though. When I want to access the login page it gives me ‘ Unable to connect to the database, please contact your administrator “. I followed everything to the point. please help!
Hi, may I use the PostgreSQL database for this setup?
I installed Roundcube as described in the HowTo. When I enter the server/install URL, I get a 404. If I enter the URL for the root of the server, I get the following:
CONFIGURATION ERROR
config.inc.php was not found.
Please read the INSTALL instructions!
I also noticed that there were no instructions for configuring the http.conf file, somehow there is something that is not being configured. Can you give me a couple of pointers on where to look?
@Frank,
Check Step 7, point 14 for Apache configuration for Roundcube…
Most of the buttons on the Roundcube interface are un-clickable and grayed out. Why is this?
In step 2, many packages could not be found (I use a Debian 10 server).
Terminal info:
root@Server007:/etc/apache2/sites-enabled# sudo apt install apache2 apache2-utils mariadb-server mariadb-client php7.4 libapache2-mod-php7.4 php7.4-mysql php-net-ldap2 php-net-ldap3 php-imagick php7.4-common php7.4-gd php7.4-imap php7.4-json php7.4-curl php7.4-zip php7.4-xml php7.4-mbstring php7.4-bz2 php7.4-intl php7.4-gmp php-net-smtp php-mail-mime php-net-idna2 mailutils
Reading package lists… Done
Building dependency tree
Reading state information… Done
Package php-net-ldap2 is not available, but is referred to by another package.
This may mean that the package is missing, has been obsoleted, or
is only available from another source
Package php-net-ldap3 is not available but is referred to by another package.
This may mean that the package is missing, has been obsoleted, or
is only available from another source
E: Unable to locate package php7.4
E: Couldn’t find any package by glob ‘php7.4’
E: Couldn’t find any package by regex ‘php7.4’
E: Unable to locate package libapache2-mod-php7.4
E: Couldn’t find any package by glob ‘libapache2-mod-php7.4’
E: Couldn’t find any package by regex ‘libapache2-mod-php7.4’
E: Unable to locate package php7.4-mysql
E: Couldn’t find any package by glob ‘php7.4-mysql’
E: Couldn’t find any package by regex ‘php7.4-mysql’
E: Package ‘php-net-ldap2’ has no installation candidate
E: Package ‘php-net-ldap3’ has no installation candidate
E: Unable to locate package php7.4-common
E: Couldn’t find any package by glob ‘php7.4-common’
E: Couldn’t find any package by regex ‘php7.4-common’
E: Unable to locate package php7.4-gd
E: Couldn’t find any package by glob ‘php7.4-gd’
E: Couldn’t find any package by regex ‘php7.4-gd’
E: Unable to locate package php7.4-imap
E: Couldn’t find any package by glob ‘php7.4-imap’
E: Couldn’t find any package by regex ‘php7.4-imap’
E: Unable to locate package php7.4-json
E: Couldn’t find any package by glob ‘php7.4-json’
E: Couldn’t find any package by regex ‘php7.4-json’
E: Unable to locate package php7.4-curl
E: Couldn’t find any package by glob ‘php7.4-curl’
E: Couldn’t find any package by regex ‘php7.4-curl’
E: Unable to locate package php7.4-zip
E: Couldn’t find any package by glob ‘php7.4-zip’
E: Couldn’t find any package by regex ‘php7.4-zip’
E: Unable to locate package php7.4-xml
E: Couldn’t find any package by glob ‘php7.4-xml’
E: Couldn’t find any package by regex ‘php7.4-xml’
E: Unable to locate package php7.4-mbstring
E: Couldn’t find any package by glob ‘php7.4-mbstring’
E: Couldn’t find any package by regex ‘php7.4-mbstring’
E: Unable to locate package php7.4-bz2
E: Couldn’t find any package by glob ‘php7.4-bz2’
E: Couldn’t find any package by regex ‘php7.4-bz2’
E: Unable to locate package php7.4-intl
E: Couldn’t find any package by glob ‘php7.4-intl’
E: Couldn’t find any package by regex ‘php7.4-intl’
E: Unable to locate package php7.4-gmp
E: Couldn’t find any package by glob ‘php7.4-gmp’
E: Couldn’t find any package by regex ‘php7.4-gmp’
@Michael,
I think PHP 7.4 not included in the official Debian repository. If you still want to install PHP 7.4 on Debian 10, you need to enable SURY PHP PPA repository and then install PHP 7.4 on Debian 10 or Debian 9 as shown.
Install PHP 7.4 on Debian 10
Thanks for this tutorial. It was really helpful.
However, I can get emails from Roundcube but I cannot send emails from that interface. I get the following error: SMTP Error (-1): Connection to server failed.
Pretty much every package failed to load / could not be found when running step 2
Reading package lists… Done
Building dependency tree
Reading state information… Done
E: Unable to locate package php7.4
E: Couldn’t find any package by glob ‘php7.4’
E: Couldn’t find any package by regex ‘php7.4’
E: Unable to locate package libapache2-mod-php7.4
E: Couldn’t find any package by glob ‘libapache2-mod-php7.4’
E: Couldn’t find any package by regex ‘libapache2-mod-php7.4’
E: Unable to locate package php7.4-mysql
E: Couldn’t find any package by glob ‘php7.4-mysql’
E: Couldn’t find any package by regex ‘php7.4-mysql’
E: Unable to locate package php7.4-common
E: Couldn’t find any package by glob ‘php7.4-common’
E: Couldn’t find any package by regex ‘php7.4-common’
E: Unable to locate package php7.4-gd
E: Couldn’t find any package by glob ‘php7.4-gd’
E: Couldn’t find any package by regex ‘php7.4-gd’
E: Unable to locate package php7.4-imap
E: Couldn’t find any package by glob ‘php7.4-imap’
E: Couldn’t find any package by regex ‘php7.4-imap’
E: Unable to locate package php7.4-json
E: Couldn’t find any package by glob ‘php7.4-json’
E: Couldn’t find any package by regex ‘php7.4-json’
E: Unable to locate package php7.4-curl
E: Couldn’t find any package by glob ‘php7.4-curl’
E: Couldn’t find any package by regex ‘php7.4-curl’
E: Unable to locate package php7.4-zip
E: Couldn’t find any package by glob ‘php7.4-zip’
E: Couldn’t find any package by regex ‘php7.4-zip’
E: Unable to locate package php7.4-xml
E: Couldn’t find any package by glob ‘php7.4-xml’
E: Couldn’t find any package by regex ‘php7.4-xml’
E: Unable to locate package php7.4-mbstring
E: Couldn’t find any package by glob ‘php7.4-mbstring’
E: Couldn’t find any package by regex ‘php7.4-mbstring’
E: Unable to locate package php7.4-bz2
E: Couldn’t find any package by glob ‘php7.4-bz2’
E: Couldn’t find any package by regex ‘php7.4-bz2’
E: Unable to locate package php7.4-intl
E: Couldn’t find any package by glob ‘php7.4-intl’
E: Couldn’t find any package by regex ‘php7.4-intl’
E: Unable to locate package php7.4-gmp
E: Couldn’t find any package by glob ‘php7.4-gmp’
E: Couldn’t find any package by regex ‘php7.4-gmp’
@Ian,
Which Ubuntu release version you are using?
And before running install-jsdeps.sh you need to make overwrite the content of file jsdeps.json with this:
https://github.com/roundcube/roundcubemail/blob/master/jsdeps.json
UI does not work because of missing jquery.js files.
https://github.com/roundcube/roundcubemail/issues/5592
we need to execute bin/install-jsdeps.sh script to get those JS files.
Just in case people come across problem-related to packages php not loading, I had to install
over php7.4 to make it working.
sample error logs:
PHP Fatal error: Uncaught Error: Class ‘PEAR’ not found in /var/www/html/roundcubemail/program/lib/Roundcube/bootstrap.php:103\nStack trace:\n#0 /var/www/html/roundcubemail/program/include/iniset.php(62): require_once()\n#1 /var/www/html/roundcubemail/installer/index.php(43): require(‘/var/www/html/r…’)\n#2 {main}\n thrown in /var/www/html/roundcubemail/program/lib/Roundcube/bootstrap.php on line 103
wow.. thanks. Now I can send and receive email from my own domain… thanks for this clear tutorial…
@Winar
Many thanks for the useful feedback.
Why I cannot telnet to SMTP Gmail with port 25?
@Fandi,
Check Port 25 is opened on your UFW firewall and also make sure that port 25 listening on the TCP socket using the netstat command.
Wow, this article just popped up in my RSS reader today.
IMHO:
Why on earth SquirrelMail? I have used it 14 yrs ago on my 50MB webspace, but it seems like since then it has not evolved – besides security fixes – at all.
It might still work just good enough for its purpose, but I think there are a couple of modern alternatives…
@Sebastian,
We didn’t know that SquirrelMail development stopped. We will replace it with Roundcube.
I don’t know for sure that development has “stopped”.
I thought it still is maintained for security patches.
But take a look at its homepage, it has barely seen updates in the last 5-6 yrs.
TIA for updating. I also use Roundcube, it’s a good alternative!
I have updated the article and included Roundcube webmail as suggested by you…
I have this problem:
ERROR: Config file ‘. ‘”config/config.php” not found. You need to ‘ . ‘configure SquirrelMail before you can use it.
‘; exit; } // If we are, go ahead to the login page. header(‘Location: src/login.php’); ?>
Run ./configure and can’t access rahimpenfriends.ddns.net/squirrelmail
Hey, great tutorial. I had some problems at the end though.
If anyone is having the same problem on an Apache2 server, of
www-datanot being able to write to /var/local/squirrelmail/data you have to create the directories, use chown to give it towww-dataand give it write permissions with chmod.I am getting this error on my apache2 php7.3:- Warning: session_set_cookie_params(): Cannot change session cookie parameters when session is active in /var/www/html/squirrelmail/functions/global.php on line 472.
Any solution??
I can’t access the domain.com, I have already made sure that everything was correct and as it is. Please help me and contact me on my email if you are willing to help. this is for my final project.
I’m not sure why, but I am able to send Emails yet I can’t receive them. I’ve tried sending an email to myself, and I followed this tutorial perfectly, with the addition of changing
$data_dirto /var/www/html/squirrelmail/data/ so that my user can log in. I also opened ports 25,80,143,443.Please help me…
Hi Guys,
Everything went well until Step 4.12 When I put
karanpatel.co/squirrelmailin a Google browser (from a different computer) it gives me “internal error – server connection terminated” or sometimes “503 Service Unavailable – No server is available to handle this request”.Just to add here, I’ve just recently bought this domain name for the sake of trying out to set up an email service on my Ubuntu VM (Ubuntu 19.10), I’ve got no website running with that domain – could that be a problem here?
Best Regards,
Karan Patel
How to point the domain to it?
You should install this package to allow PHP to interface with apache2:
Do not forget to edit the dir.conf file to make
.phphave higher precedence than.htmlso that the mail server works. Afterward restart the server and it should workLoggin in with the user account is not a good idea tho. Most server configuration files can be read by all user and some of WordPress files can be written by all users (not by default). Your server will be vulnerable if one of your user accounts is exposed. It is better to use database based mail user account
I can receive emails but no one receives mine…
Got this message:
This is the mail system at host [DOMAIN].
I’m sorry to have to inform you that your message could not
be delivered to one or more recipients. It’s attached below.
For further assistance, please send mail to postmaster.
If you do so, please include this problem report. You can
delete your own text from the attached returned message.
The mail system
: host
gmail-smtp-in.l.google.com[2a00:1450:400c:c01::1b] said: 550-5.7.1
[2a02:c205:3002:4898::1] Our system has detected that this message
550-5.7.1 does not meet IPv6 sending guidelines regarding PTR records and
550-5.7.1 authentication. Please review 550-5.7.1
https://support.google.com/mail/?p=IPv6AuthError for more information 550
5.7.1 . d14si1503938wrn.307 – gsmtp (in reply to end of DATA command)
The problem seems to be Gmail related because outlook addresses get my emails…
Yeah I fixed it :)
Hi, first and foremost, this is a great page; I’m stuck in step 4.12 (installing SquirrelMail-access the webserver (login page)) because I’m getting the PHP code (plain text) instead of the login page in my browser.
I’m running an ubuntu 16.04 server and I will appreciate any help to fix this issue.
Hello there, I’m trying to set up my email, but when I try to log in, I get an error as below.
Error opening ../data/default_pref
Could not create an initial preference file!
/var/local/squirrelmail/data/ should be writable by user www-data
Please contact your system administrator and report this error.
What should I do?
@Katumba,
Make the following directory writable by user www-data.
I had an issue like “Error opening ../config/default_pref”
Could not create initial preference file!
/var/lib/squirrelmail/data/ should be writable by user www-data
Please contact your system administrator and report this error.”
I could fix it by changing the Data Directory in the General Options to /var/www/html/squirrelmail/data.
Hope this helps somebody
@MM,
Make the following directory writable by user www-data.
I work on my client’s Linux servers, and I found your article useful for me. I had permission issues though with the mail server but finally fixed it.
Thanks
@Adnan
Nice! Many thanks for the useful feedback.
I can’t
Hello,
I followed this article and the Sending mail work with @localhost and doesn’t work @mydomain.
I miss something?
FYI:
/var/log/mail.log & /var/log/mail.err doesn’t show error.
.
After sending it to user2@localhost, the sender has user1@mydomain and the mail is received by user2. by sending to user2@mydomain, nothing happens (status=bounced and nothing to tell that:25 is blocked = this mean it’s ok)
Regards,
@ElMokhtar
Have you tried using a valid domain like mydomain.com?
Hello Aaron,
I mean by @mydomain = (My FQDN, in my case hostname.mycountrycode)
@ElMokhtar
Are there any relevant entries in the /var/log/mail.err file?
Hi @ElMokhtar,
Maybe this can help :)
https://drive.google.com/file/d/17nii7skTJi9WfiGSs4BtNl24khY3nxBS/view?fbclid=IwAR1pa5DkFn_nIYUgNkq8mMInYKUFURs_4TJnxHeJBT8N_3kZ3RNRL6R7sOUThis is very grateful and easy to install and configure Postfix (MTA server), Dovecot (MDA server) and Squirrel (MUA server). this is how we can configure a complete mail server. Its easy and very fewer configurations involved.
I got the same error of permissions as:
Error opening ../data/default_pref
Could not create an initial preference file!
but it was resolved as I gave full rights to all required folders like:
Error opening ../data/default_pref
Could not create an initial preference file!
/var/local/squirrelmail/data/ should be writable by user www-data
Please contact your system administrator and report this error.
Hi there,
I read this article and follow all the instructions to set up the Squirrelmail and worked too.
When I login with myusername and password, it gives this error
ERRORError opening ../data/default_pref
Could not create an initial preference file!
/var/local/squirrelmail/data/ should be writable by user www-data
Please contact your system administrator and report this error.
This is the permission of folders
http://prntscr.com/qktqcb.And second thing via command line using this command
usermod -m -d /var/www/etraininghq/etraining etraining.usermod: no changesPlease help me if you have any solution.
Thanks in advance
Create the folder/folders, assign the perms to it, all good after that. It worked for me.
SquirrelMail version 1.4.22
By the SquirrelMail Project Team
ERROR
An unknown user or password is incorrect.
Go to the login page
I feel like a total noob which I am, but even after assigning perms to
myusername:myusernamethe login just wouldn’t succeed. It still gives me the Query: CAPABILITY error, and then in the logs, it says mkdir() failed due to insufficient permissions.Hi, is it possible to login in thunderbird with this mail server?
@Anton,
Yes, you can use POP and Imap setting in Thunderbird to Login…
Oh okay thank you but where do I find my IMAP and SMTP link, because it’s asking me for this. And do I have to change some settings for this?
Simple question. can I build this on the same server I use to host my website? or does it have to be an independent server?
@Abraham,
Not an issue, you can host the Mail server on the same server with Apache.
Hi, This is a great guide, and I am a complete novice to all this. I have come across an issue and cannot figure out how to solve it.
When setting up, I got a screen asking about SSL as I have SSL setup on my server and a forced redirect to HTTPS. It asked me for a name, so I put in my hostname
mattemedia.co.uk, and followed the rest of the guide.Now when I go to open SquirrelMail login, I get a 404 – not available on port 443…
@Matthew,
Please check the SSL and Mail logs, might you will find a solution to fix this problem..
I’ve checked the logs and it just says ‘mailbox could not be auto created’
Try the command
sudo a2enmod php7.0.