We continue the PyGObject programming series with you and here in this 5th part, we’ll learn how to translate our PyGObject applications into different languages. Translating your applications is important if you’re going to publish it for the world, it’ll be more user friendly for end-users because not everybody understands English.
How the Translation Process Works
We can summarize the steps of translating any program under the Linux desktop using these steps:
- Extract the translatable strings from the Python file.
- Save the strings into a .pot file which is format that allows you to translate it later to other languages.
- Start translating the strings.
- Export the new translated strings into a .po file which will be automatically used when system language is changed.
- Add some small programmatic changes to the main Python file and the .desktop file.
And that’s it! After doing these steps your application will be ready for use for end-users from all around the globe (will.. You have to translate your program to all languages around the globe, though !), Sounds easy doesn’t it? :-)
First, to save some time, download the project files from below link and extract the file in your home directory.
Open the “setup.py” file and notice the changes that we did:
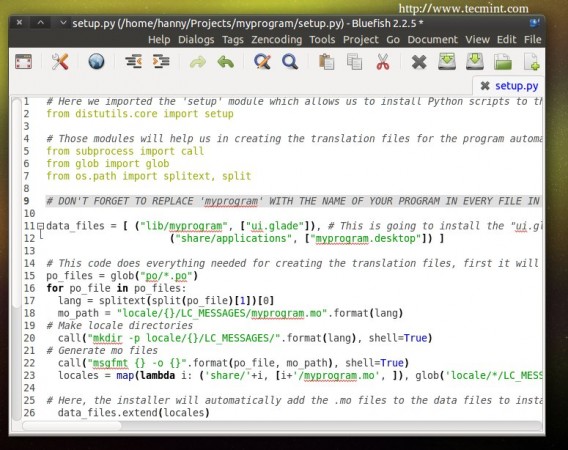
# Here we imported the 'setup' module which allows us to install Python scripts to the local system beside performing some other tasks, you can find the documentation here: https://docs.python.org/2/distutils/apiref.html
from distutils.core import setup

# Those modules will help us in creating the translation files for the program automatically.
from subprocess import call
from glob import glob
from os.path import splitext, split

# DON'T FOTGET TO REPLACE 'myprogram' WITH THE NAME OF YOUR PROGRAM IN EVERY FILE IN THIS PROJECT.

data_files = [ ("lib/myprogram", ["ui.glade"]), # This is going to install the "ui.glade" file under the /usr/lib/myprogram path.
                     ("share/applications", ["myprogram.desktop"]) ]

# This code does everything needed for creating the translation files, first it will look for all the .po files inside the po folder, then it will define the default path for where to install the translation files (.mo) on the local system, then it's going to create the directory on the local system for the translation files of our program and finally it's going to convert all the .po files into .mo files using the "msgfmt" command.
po_files = glob("po/*.po")
for po_file in po_files:
  lang = splitext(split(po_file)[1])[0]
  mo_path = "locale/{}/LC_MESSAGES/myprogram.mo".format(lang)
# Make locale directories
  call("mkdir -p locale/{}/LC_MESSAGES/".format(lang), shell=True)
# Generate mo files
  call("msgfmt {} -o {}".format(po_file, mo_path), shell=True)
  locales = map(lambda i: ('share/'+i, [i+'/myprogram.mo', ]), glob('locale/*/LC_MESSAGES'))

# Here, the installer will automatically add the .mo files to the data files to install them later.
  data_files.extend(locales)

setup(name = "myprogram", # Name of the program.
      version = "1.0", # Version of the program.
      description = "An easy-to-use web interface to create & share pastes easily", # You don't need any help here.
      author = "TecMint", # Nor here.
      author_email = "[email protected]",# Nor here :D
      url = "http://example.com", # If you have a website for you program.. put it here.
      license='GPLv3', # The license of the program.
      scripts=['myprogram'], # This is the name of the main Python script file, in our case it's "myprogram", it's the file that we added under the "myprogram" folder.

# Here you can choose where do you want to install your files on the local system, the "myprogram" file will be automatically installed in its correct place later, so you have only to choose where do you want to install the optional files that you shape with the Python script
      data_files=data_files) # And this is going to install the .desktop file under the /usr/share/applications folder, all the folder are automatically installed under the /usr folder in your root partition, you don't need to add "/usr/ to the path.
Also open the “myprogram” file and see the programmatic changes that we did, all the changes are explained in the comments:
#!/usr/bin/python
# -*- coding: utf-8 -*-

## Replace your name and email.
# My Name <[email protected]>

## Here you must add the license of the file, replace "MyProgram" with your program name.
# License:
#    MyProgram is free software: you can redistribute it and/or modify
#    it under the terms of the GNU General Public License as published by
#    the Free Software Foundation, either version 3 of the License, or
#    (at your option) any later version.
#
#    MyProgram is distributed in the hope that it will be useful,
#    but WITHOUT ANY WARRANTY; without even the implied warranty of
#    MERCHANTABILITY or FITNESS FOR A PARTICULAR PURPOSE.  See the
#    GNU General Public License for more details.
#
#    You should have received a copy of the GNU General Public License
#    along with MyProgram.  If not, see <http://www.gnu.org/licenses/>.

from gi.repository import Gtk
import os, gettext, locale

## This is the programmatic change that you need to add to the Python file, just replace "myprogram" with the name of your program. The "locale" and "gettext" modules will take care about the rest of the operation.
locale.setlocale(locale.LC_ALL, '')
gettext.bindtextdomain('myprogram', '/usr/share/locale')
gettext.textdomain('myprogram')
_ = gettext.gettext
gettext.install("myprogram", "/usr/share/locale")

class Handler:

  def openterminal(self, button):
    ## When the user clicks on the first button, the terminal will be opened.
    os.system("x-terminal-emulator ")

  def closeprogram(self, button):
    Gtk.main_quit()

# Nothing new here.. We just imported the 'ui.glade' file.
builder = Gtk.Builder()
builder.add_from_file("/usr/lib/myprogram/ui.glade")
builder.connect_signals(Handler())

label = builder.get_object("label1")
# Here's another small change, instead of setting the text to ("Welcome to my Test program!") we must add a "_" char before it in order to allow the responsible scripts about the translation process to recognize that it's a translatable string.
label.set_text(_("Welcome to my Test program !"))

button = builder.get_object("button2")
# And here's the same thing.. You must do this for all the texts in your program, elsewhere, they won't be translated.
button.set_label(_("Click on me to open the Terminal"))


window = builder.get_object("window1")
window.connect("delete-event", Gtk.main_quit)
window.show_all()
Gtk.main()
Now.. Let’s start translating our program. First create the .pot file (a file that contains all the translatable strings in the program) so that you
can start translating using the following command:
$ cd myprogram
$ xgettext --language=Python --keyword=_ -o po/myprogram.pot myprogram
This is going to create the “myprogram.pot” file inside the “po” folder in the main project folder which contains the following code:
# SOME DESCRIPTIVE TITLE.
# Copyright (C) YEAR THE PACKAGE'S COPYRIGHT HOLDER
# This file is distributed under the same license as the PACKAGE package.
# FIRST AUTHOR <EMAIL@ADDRESS>, YEAR.
#
#, fuzzy
msgid ""
msgstr ""
"Project-Id-Version: PACKAGE VERSION\n"
"Report-Msgid-Bugs-To: \n"
"POT-Creation-Date: 2014-12-29 21:28+0200\n"
"PO-Revision-Date: YEAR-MO-DA HO:MI+ZONE\n"
"Last-Translator: FULL NAME <EMAIL@ADDRESS>\n"
"Language-Team: LANGUAGE <[email protected]>\n"
"Language: \n"
"MIME-Version: 1.0\n"
"Content-Type: text/plain; charset=CHARSET\n"
"Content-Transfer-Encoding: 8bit\n"

#: myprogram:48
msgid "Welcome to my Test program !"
msgstr ""

#: myprogram:52
msgid "Click on me to open the Terminal"
msgstr ""
Now in order to start translating the strings.. Create a separated file for each language that you want to translate your program to using the “ISO-639-1” languages codes inside the “po” folder, for example, if you want to translate your program to Arabic, create a file called “ar.po” and copy the contents from the “myprogram.pot” file to it.
If you want to translate your program to German, create a “de.po” file and copy the contents from the “myprogram.pot” file to it.. and so one, you must create a file for each language that you want to translate your program to.
Now, we’ll work on the “ar.po” file, copy the contents from the “myprogram.pot” file and put it inside that file and edit the following:
- SOME DESCRIPTIVE TITLE: you can enter the title of your project here if you want.
- YEAR THE PACKAGE’S COPYRIGHT HOLDER: replace it with the year that you’ve created the project.
- PACKAGE: replace it with the name of the package.
- FIRST AUTHOR <EMAIL@ADDRESS>, YEAR: replace this with your real name, Email and the year that you translated the file.
- PACKAGE VERSION: replace it with the package version from the debian/control file.
- YEAR-MO-DA HO:MI+ZONE: doesn’t need explanation, you can change it to any date you want.
- FULL NAME <EMAIL@ADDRESS>: also replace it your your name and Email.
- Language-Team: replace it with the name of the language that you’re translating to, for example “Arabic” or “French”.
- Language: here, you must insert the ISO-639-1 code for the language that you’re translating to, for example “ar”, “fr”, “de”..etc, you can find a complete list here.
- CHARSET: this step is important, replace this string with “UTF-8” (without the quotes) which supports most languages.
Now start translating! Add your translation for each string after the quotes in “msgstr”. Save the file and exit. A good translation file for the
Arabic language as an example should look like this:
# My Program
# Copyright (C) 2014
# This file is distributed under the same license as the myprogram package.
# Hanny Helal <[email protected]<, 2014.
#
#, fuzzy
msgid ""
msgstr ""
"Project-Id-Version: 1.0\n"
"Report-Msgid-Bugs-To: \n"
"POT-Creation-Date: 2014-12-29 21:28+0200\n"
"PO-Revision-Date: 2014-12-29 22:28+0200\n"
"Last-Translator: M.Hanny Sabbagh <hannysabbagh<@hotmail.com<\n"
"Language-Team: Arabic <[email protected]<\n"
"Language: ar\n"
"MIME-Version: 1.0\n"
"Content-Type: text/plain; charset=UTF-8\n"
"Content-Transfer-Encoding: 8bit\n"

#: myprogram:48
msgid "Welcome to my Test program !"
msgstr "أهلًا بك إلى برنامجي الاختباري!"

#: myprogram:52
msgid "Click on me to open the Terminal"
msgstr "اضغط عليّ لفتح الطرفية"
There’s nothing more to do, just package the program using the following command:
$ debuild -us -uc
Now try to install the new created package using the following command.
$ sudo dpkg -i myprogram_1.0_all.deb
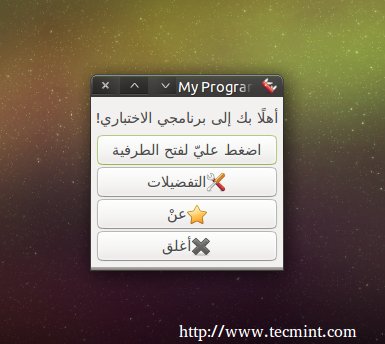
And change the system language using the “Language Support” program or using any other program to Arabic (or the language the you’ve translated your file to):
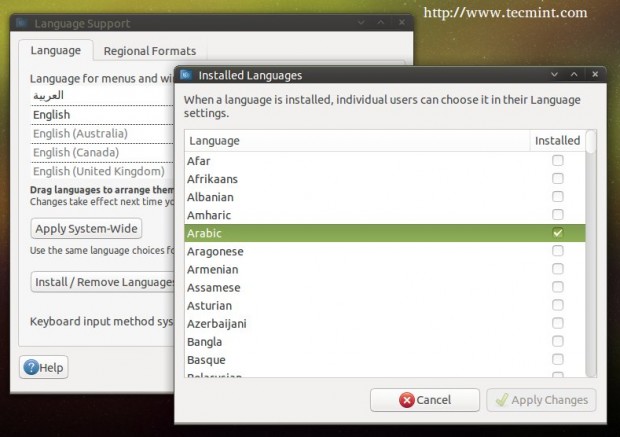
After selecting, your program will be translated to Arabic language.
Here ends our series about PyGObject programming for the Linux desktop, of course there are many other things that you can learn from the official documentation and the Python GI API reference..
What do you think about the series? Do you find it useful? Were you able to create your first application by following this series? Share us your thoughts!