
This tutorial discusses KVM introduction, deployment and how to use it to create virtual machines under RedHat based-distributions such as RHEL/CentOS7 and Fedora 21.
What is KVM?
KVM or (Kernel-based Virtual Machine) is a full virtualization solution for Linux on Intel 64 and AMD 64 hardware that is included in the mainline Linux kernel since 2.6.20 and is stable and fast for most workloads.
KVM Feautres
There are many useful features and advantages which you will gain when you use KVM to deploy your virtual platform. KVM hypervisor supports following features:
- Over-committing : Which means allocating more virtualized CPUs or memory than the available resources on the system.
- Thin provisioning : Which allows the allocation of flexible storage and optimizes the available space for every guest virtual machine.
- Disk I/O throttling : Provides the ability to set a limit on disk I/O requests sent from virtual machines to the host machine.
- Automatic NUMA balancing : Improves the performance of applications running on NUMA hardware systems.
- Virtual CPU hot add capability : Provides the ability to increase processing power as needed on running virtual machines, without downtime.
This is our first on-going KVM (Kernel-based Virtual Machine) series, here we will going to cover following articles in part wise fashion.
Prerequisites
Make sure that your system has the hardware virtualization extensions: For Intel-based hosts, verify the CPU virtualization extension [vmx] are available using following command.
[root@server ~]# grep -e 'vmx' /proc/cpuinfo

For AMD-based hosts, verify the CPU virtualization extension [svm] are available.
[root@server ~]# grep -e 'svm' /proc/cpuinfo

If there is no output make sure that virtualization extensions is enabled in BIOS. Verify that KVM modules are loaded in the kernel “it should be loaded by default”.
[root@server ~]# lsmod | grep kvm
The output should contains kvm_intel for intel-based hosts or kvm_amd for amd-based hosts.

Before starting , you will need the root account or non-root user with sudo privileges configured on your system and also make sure that your system is up-to-date.
[root@server ~]# yum update
Make sure that Selinux be in Permissive mode.
[root@server ~]# setenforce 0
Step 1: KVM Installation and Deployment
1. We will install qemu-kvm and qemu-img packages at first. These packages provide the user-level KVM and disk image manager.
[root@server ~]# yum install qemu-kvm qemu-img
2. Now, you have the minimum requirement to deploy virtual platform on your host, but we also still have useful tools to administrate our platform such as:
- virt-manager provides a GUI tool to administrate your virtual machines.
- libvirt-client provides a CL tool to administrate your virtual environment this tool called virsh.
- virt-install provides the command “virt-install” to create your virtual machines from CLI.
- libvirt provides the server and host side libraries for interacting with hypervisors and host systems.
Let’s install these above tools using the following command.
[root@server ~]# yum install virt-manager libvirt libvirt-python libvirt-client
3. For RHEL/CentOS7 users, also still having additional package groups such as: Virtualization Client, Virtualization Platform and Virtualization Tools to install.
[root@server ~]#yum groupinstall virtualization-client virtualization-platform virtualization-tools
4. The virtualization daemon which manage all of the platform is “libvirtd”. lets restart it.
[root@server ~]#systemctl restart libvirtd
5. After restarting the daemon, then check its status by running following command.
[root@server ~]#systemctl status libvirtd
Sample Output
libvirtd.service - Virtualization daemon
   Loaded: loaded (/usr/lib/systemd/system/libvirtd.service; enabled)
   Active: active (running) since Mon 2014-12-29 15:48:46 EET; 14s ago
 Main PID: 25701 (libvirtd)

Now, lets switch to the next section to create our virtual machines.
Step 2: Create VMs using KVM
As we mentioned early, we have some useful tools to manage our virtual platform and creating virtual machines. One of this tools called [virt-manager] which we use in the next section.
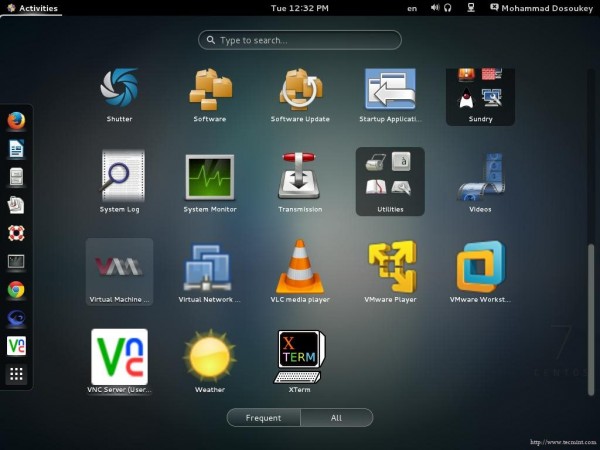
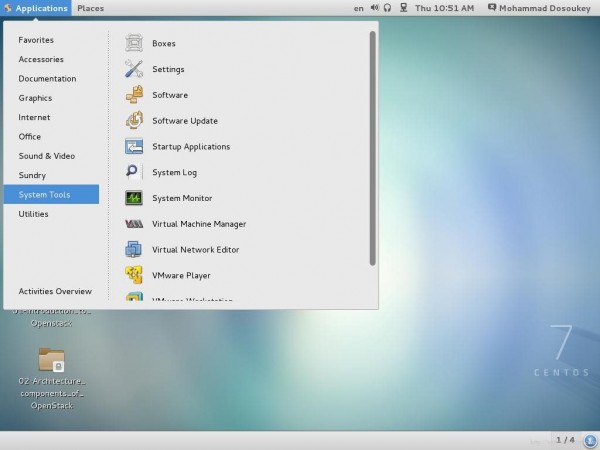
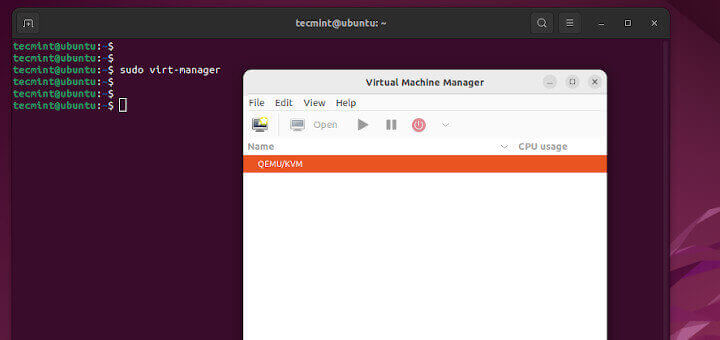
6. Although virt-manager is a GUI based tool, we also could launch/start it from terminal as well as from GUI.
[root@server ~]#virt-manager
Using GNOME
Using GNOME Classic
7. After starting the tool, this window will appear.
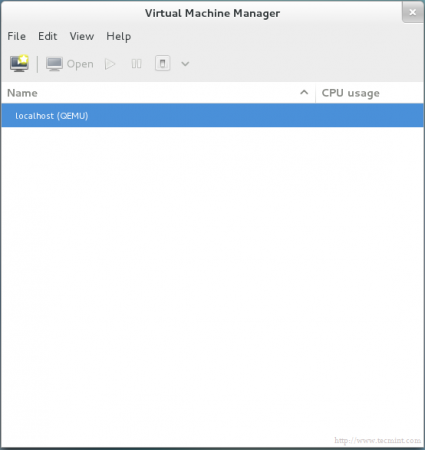
8. By default you will find manager is connected directly to localhost, fortunately you could use the same tool to mange another host remotely. From “File” tab, just select “Add Connection” and this window will appear.
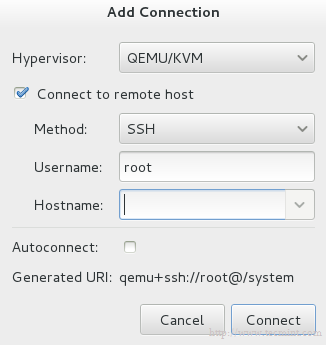
Check “Connect to remote host” option then provide Hostname/IP of the remote server. If you need establishing connection to the remote host at every time the manager starting, just check “Auto Connect” option.
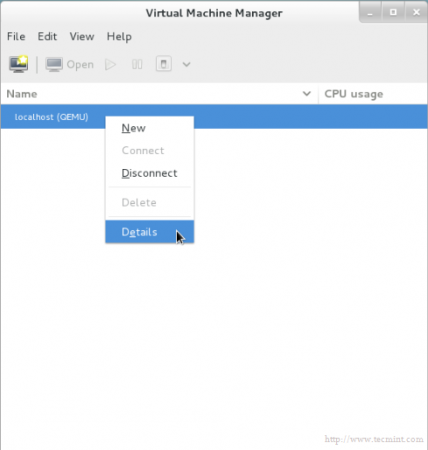
9. Let’s return to our localhost, before creating new virtual machine you should decide where will the files be stored?! in other words, you should create the Volume Disk (Virtual disk / Disk image ) for your virtual machine.
By Right clicking on localhost and selecting “Details” and then select “Storage” tab.
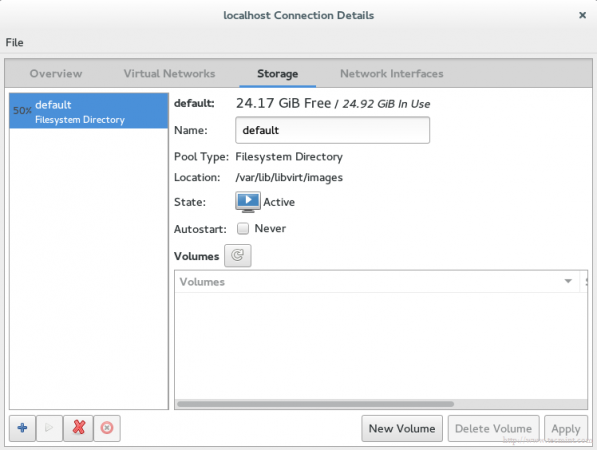
10. Next, press “New Volume” button, then enter the name of your new virtual disk (Volume Disk) and enter the size which you want/need in the “Max Capacity” section.
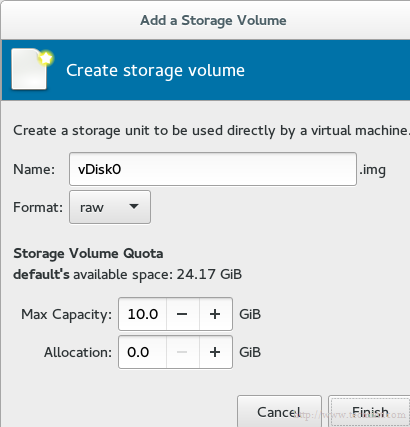
The allocation size is the actual size for your disk which will be allocated immediately from your physical disk after finishing the steps.
Note: This is an important technology in storage administration field which called “thin provision”. It used to allocate the used storage size only, NOT all of available size.
For example, you created virtual disk with size 60G, but you have used actually only 20G, using this technology the allocated size from your physical hard disk will be 20G not 60G.
In another words the allocated physical size will by dynamically allocated depending on the actual used size. You could find more information in details at VMWare vStorage Thin Provisioning.
11. You will note that a label of the new Volume Disk has been appeared in the list.

You should also notice the path of the new disk image (Volume Disk), by default it will be under /var/lib/libvirt/images, you can verify it using the following command.
[root@server Downloads]# ls -l /var/lib/libvirt/images
-rw-------. 1 root root 10737418240 Jan  3 16:47 vm1Storage.img
12. Now, we’re ready to create our virtual machine. Let’s hit the button “VM” in the main window, this wizard window will be appear.
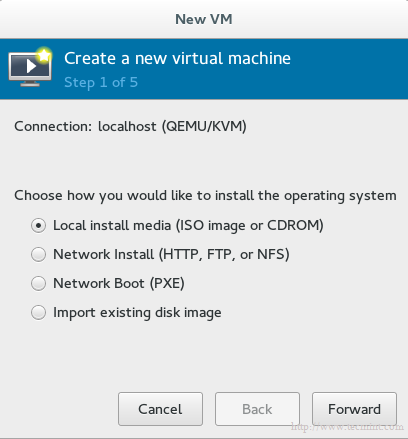
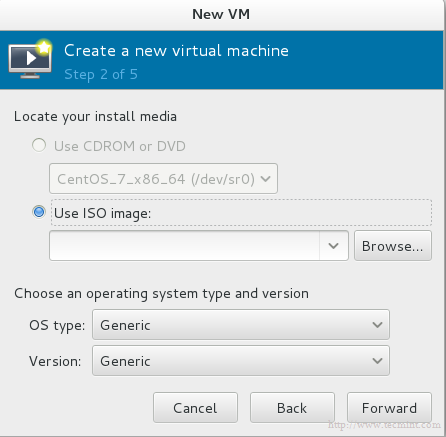
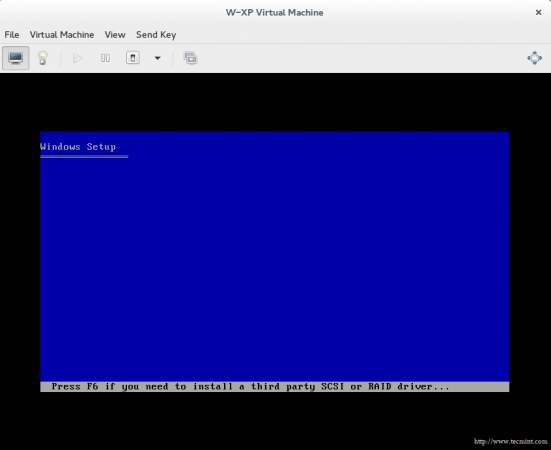
Select the installation method which you will use to create the virtual machine. For now we will use Local install media, later we will discuss the remaining methods.
13. Now its time to specify which Local install media to be used, we have two options:
- From physical [CDROM/DVD].
- From ISO image.
For our tutorial, lets use ISO image method, so you should provide the path of your ISO image.

Important: Unfortunately there’s a really silly bug for whom use RHEL/CentOS7. This bug prevents you from installation using physical [CDROM/DVD], you will find the option is grayed like this.
And if you hold your cursor on it, this error message will appear.
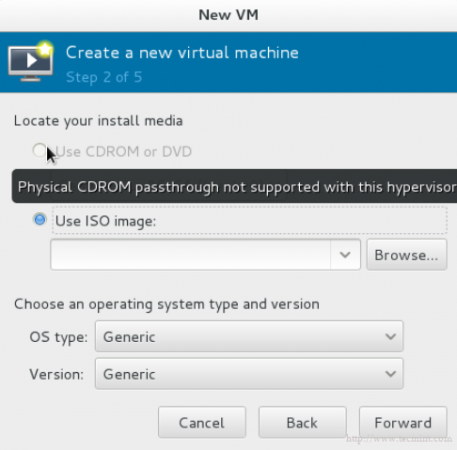
Until now there is no official/direct solution for this bug, you could find more information on the same at https://bugzilla.redhat.com.
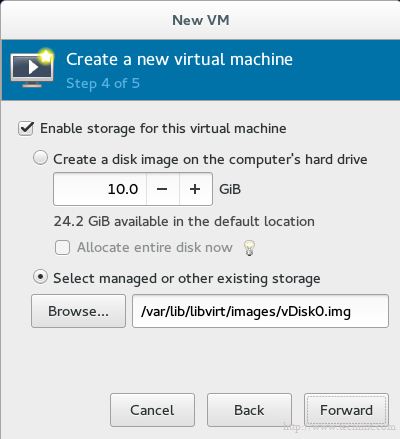
14. The storage has return back, we will use the virtual disk which we have created early to install virtual machine on it. It will be as shown.
15. The final step which ask you about the name of your virtual machine and another advanced options lets talk about it later.
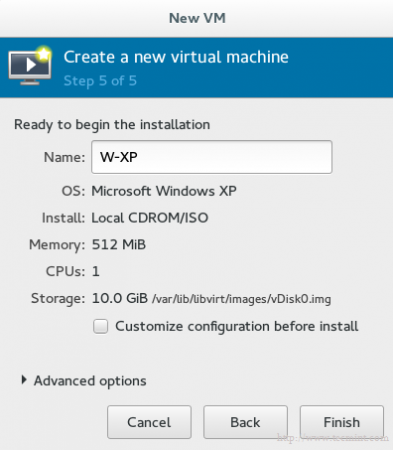
If you like to change some configuration or doing some customization just check “Customize configuration before install” option. Then click finish and wait seconds, control console will appear for your Guest OS to manage it
Conclusion
Now you have learned what is is KVM, How to manage your virtual platform using GUI tools, How to deploy virtual machine using it and another awesome things.
Although this isn’t end of the article, in our up-coming articles, we will discuss another important topics which related to KVM. Make your hands dirty using the previous knowledge and be ready for the next part…..

Here’s my Vagrant configuration using the “generic/debian12” box:
Vagrant.configure("2") do |config| config.vm.define "Lager01" do |lg_config| lg_config.vm.box = "generic/debian12" lg_config.vm.provider "libvirt" do |lv| lv.memory = 2048 end lg_config.vm.network "private_network", type: "static", ip: "192.168.56.*" lg_config.vm.hostname = "Lager01" end endAs I am using CentOS 6.4 in vmware and unable to execute command, while writing command and hitting enter butter the arrow goes to next line with no output. Please resolve issue if any one knows.
Can you please suggest me the best hardware configuration to install KVM for android emulators.
yum install qemu-kvm fails saying package does not exist
Using centOS7
i want to know how to create rht-vmctl reset server, desktop command to reset vm to snapshot image like which we do in rhce lab environment,and i want to create shortcut of virtual machines on desktop
Its not required to remember list of all the rpm names for installing. Just install “yum groupinstall virtualization-client virtualization-platform virtualization-tools” will take care of meeting all dependencies.
Does every new virtual machine need a new storage volume?
heads up, yum install virtualization\ hypervisor has qemu-kvm package not virtualization\ platform, other than that very nice tutorial. To list these groups use yum groups list hidden -v or yum groups list hidden id, followed by yum groups info virtualization-hypervisor.
Mount your rhel 7 or centOS 7 dvd and disk dump it to a folder as an iso. Use the disk dumped iso in your number 13 above as a workaround for you so-called silly bug:
mount /dev/cdrom /mnt
dd if=/dev/sr0 of=/rhel7.iso
mount /dev/cdrom /mnt
dd if=/dev/sr0 of=/rhel7.iso
I tried it but I noted that it is slow tool when i compare it with virtual box or vmware
Nice topic thanks very mutch