The long awaited moment of Linux Mint 17 ‘Qiana‘ Cinnamon and Mate final releases has come, Linux Mint developers proudly announced on Saturday, May 31st, 2014 on their official Linux Mint webpage the newly Linux Mint releases with long term support until 2019.
Clement Lefebvre: “It comes with updated software and brings refinements and many new features to make your desktop even more comfortable to use. The Update manager has been hugely improved. It shows more information, it looks better, it feels faster, and it gets less in your way. It no longer needs to reload itself in root mode when you click on it. It no longer checks for an Internet connection or waits for the network manager and it no longer locks the APT cache at session startup. The UI has been improved, the icons were modified a bit and the changelog retrieval is now much faster and more reliable.”
Linux Mint 17 Features
Some of this release features are:
- A improved new Update Manager version.
- Without internet connection ‘Driver Manager’ can install drivers.
- MDM 1.6 Login Screen now support HiDPI and recovery mode.
- A new Language Settings tool.
- An enhanced Software Sources configuration utility.
- A light redesigned Welcome Screen.
- Better settings for Cinnamon 2.2.
- Improved MATE 1.8.
- Few system improvements.
- A nice collection of backgrounds.
- Linux Kernel 3.13.
- EFI and Bluetooth support.
- PAE Kernel for x32bit versions.
- Booting with non-PAE CPUs
- Solving freezes with some NVIDIA GeForce GPUs
- No support for Nvidia Optimus graphics chipsets yet (minimal support is provided by nvidia-prime package).
For more information and download mirrors please visit official Linux Mint webpage.
- Linux Mint 17 Qiana Mate: http://blog.linuxmint.com/?p=2627
- Linux Mint 17 Qiana Cinnamon: http://blog.linuxmint.com/?p=2626
This tutorial will focus on performing a single-boot fresh installation of Linux Mint 17 Qiana Mate on GPT disks (only for 64-bit OS versions) but the settings can be applied on Cinnamon version also. Be aware that dual-boot with a Windows OS will not work using GPT partition scheme on computers with BIOSes (Microsoft Windows will boot in EFI mode if it detects a GPT partition label) so use GPT partitions with dual-boot only on computers with Extensible Firmware Interface –EFI or Unified EFI -UEFI firmware else use only Linux Mint single boot on non-EFI computers with GPT scheme or dual-boot with Windows OS on BIOSes (Grub Legacy) with MBR partition scheme.
If you already have a previous version of Linux Mint installed on your computer and you want to upgrade to Qiana follow use the instructions from my former tutorial on Upgrade Linux Mint 16 (Petra) to Linux Mint 17 (Qiana).
Step 1: Create GPT Partition Layout
1. Download on of the Linux Mint 17 versions from the above mirrors and burn it to a DVD or create a USB bootable drive.
2. Place your USB stick or DVD in your computer drive and select your appropriate boot medium from BIOS/UEFI menu.
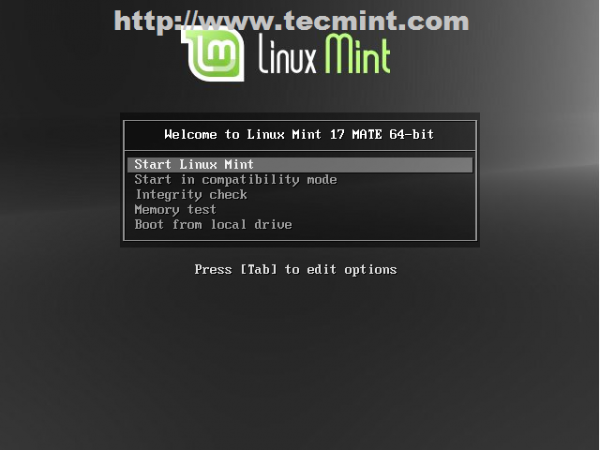
3. When the first Linux Mint screen appears press [Enter] key, choose Start Linux Mint and wait for the system to completely load.

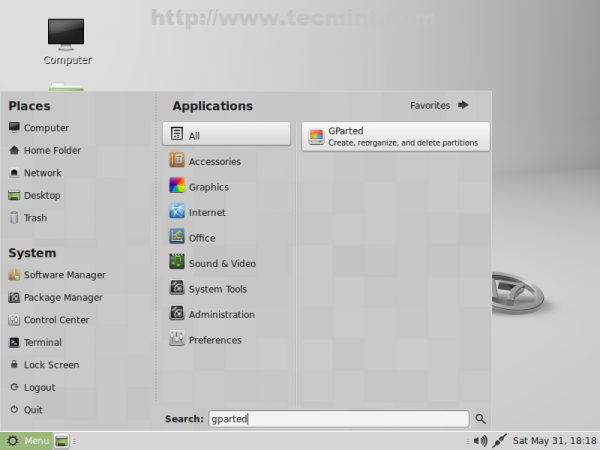
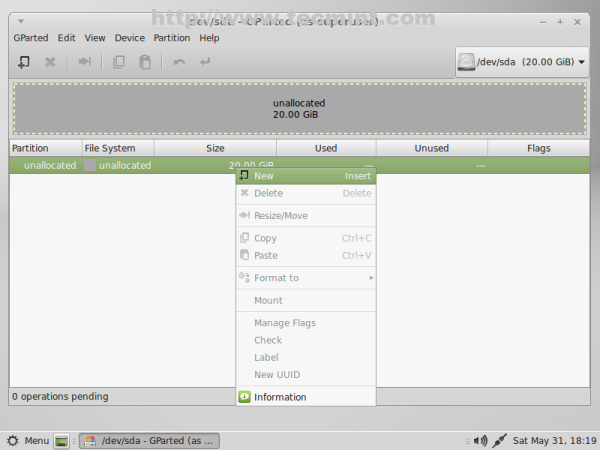
4. After Linux Mint completely loads into a Live state go to Menu, type gparted on Search field and start GParted disk partitioner.
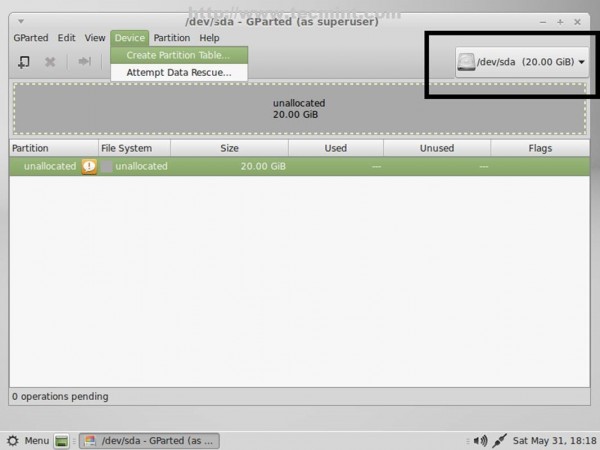
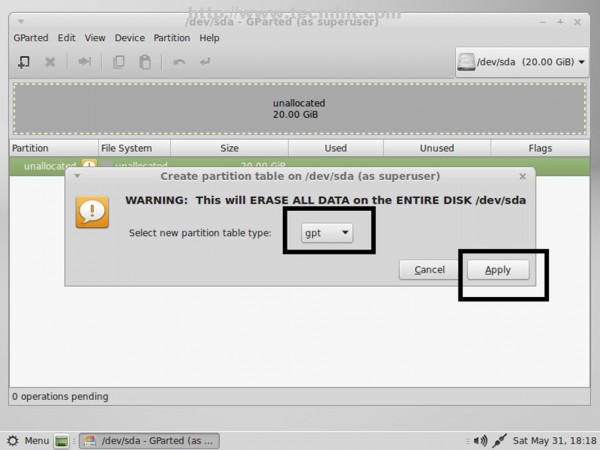
5. On GParted select your first hard-disk from right tab then go to GParted Menu -> Device -> Create Partition Table, choose GPT on Warning window, then click on Apply.
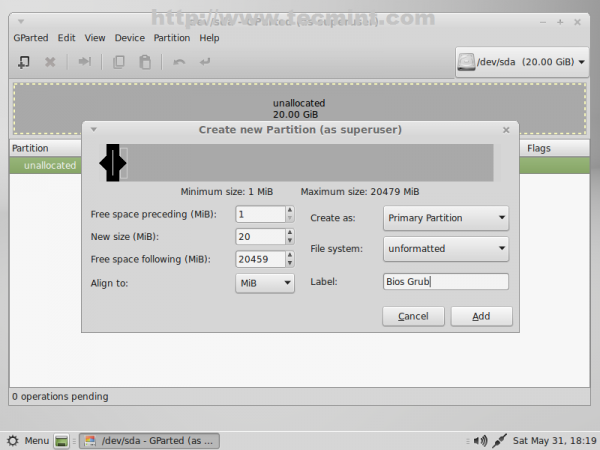
6. Then left click on unallocated space, select New and enter the following settings for this partition then click on Add.
- New size = 20 Mib
- File system = Unformatted
- Label = Bios Grub
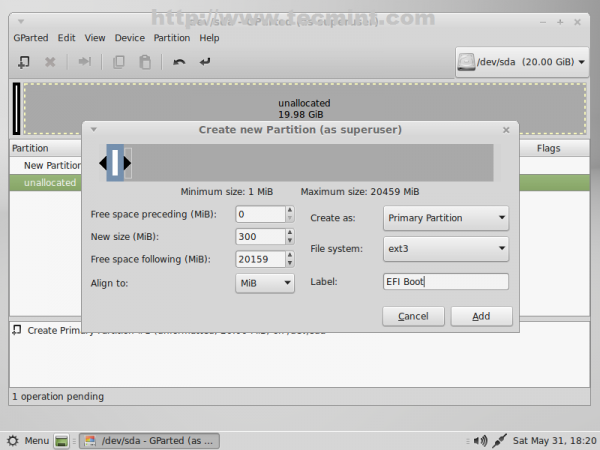
7. The next partition will hold the Boot Grub. Again select unallocated space -> New and use the following settings for this partition.
- New size = ~300 MB
- File system = ext2/ext3/ext4 (choose whatever file system you like)
- Label = EFI Boot
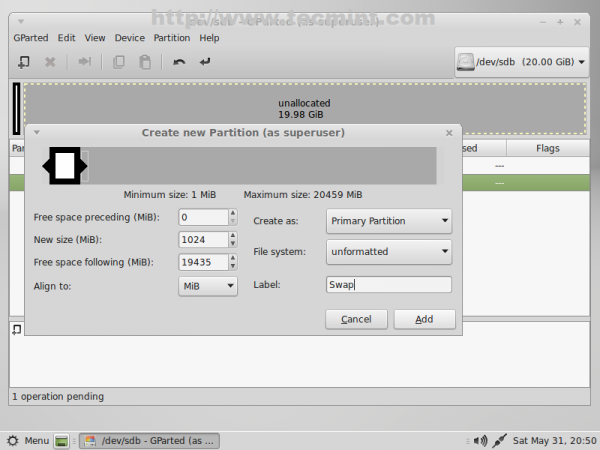
8. The next partition will be for Linux Swap. Again select unallocated space -> New and use the following settings for this partition.
- New size = RAMx2 MB
- File system = Unformatted
- Label = Swap
9. Next partition should be for ROOT. Same steps as previous partitions with following settings.
- New size = min 20000 MB (20Gb)
- File system = ext4
- Label = root

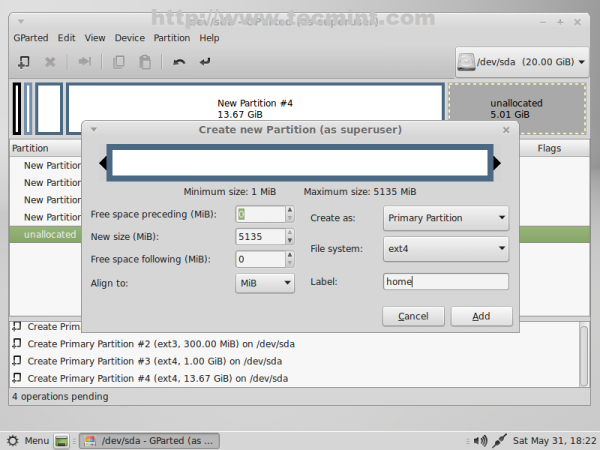
10. The last partition will be for users $HOME. Again select the remaining unallocated space -> New and use the following settings for this partition.
- New size = default value (this will be the rest of free space in case you don’t want to create other partitions)
- File system = ext4
- Label = home
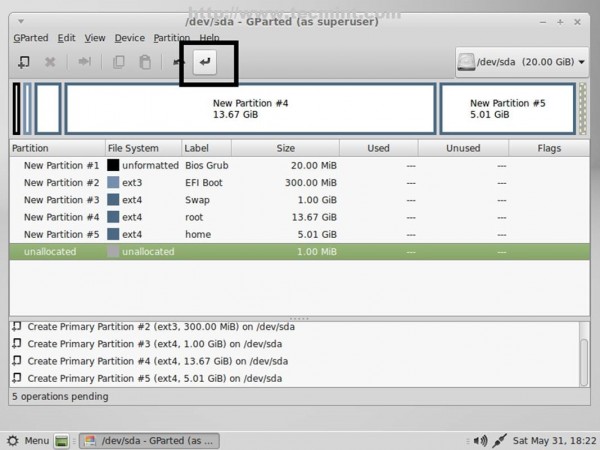
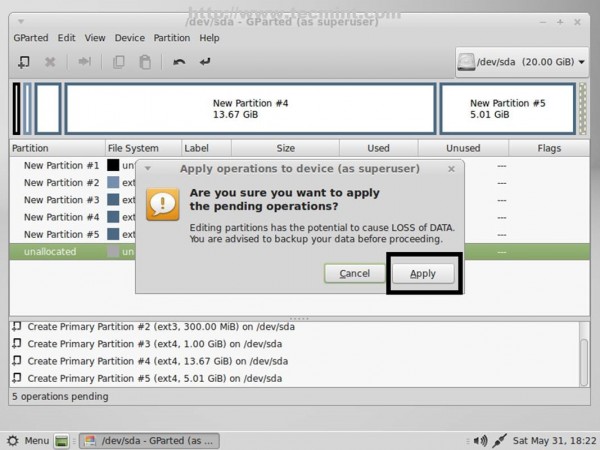
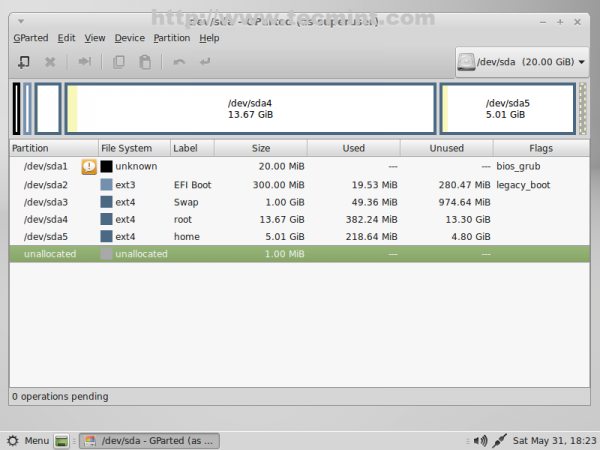
11. After you have finished partition creation process press [Ctrl]+[Enter] keys and hit on Apply pop-up window button to write your newly partition table on hard-disk.

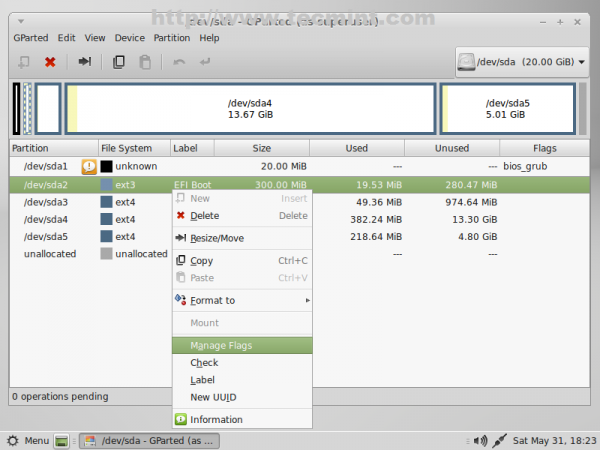
12. After the partition table was successfully written close the window and navigate on your first partition (/dev/sda1), right click on it, go to Manage Flags, select bios_grub then close the window.

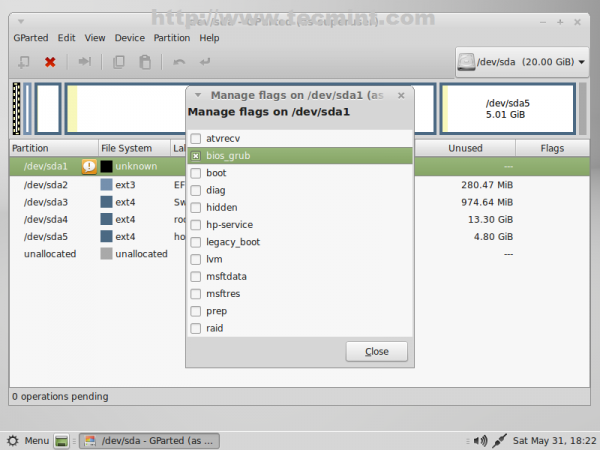
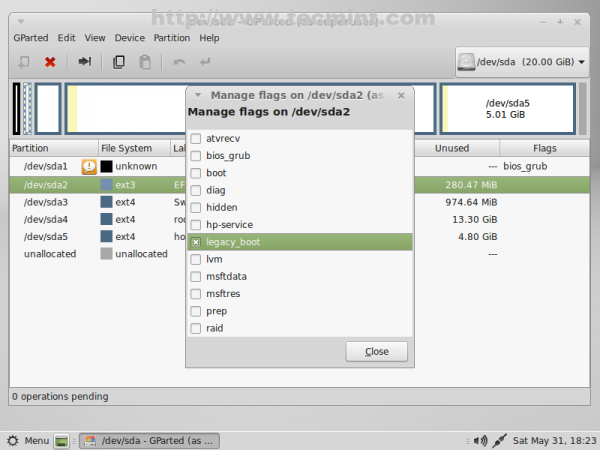
13. Again, do the same thing with EFI Boot partition (/dev/sda2) but this time select legacy_boot partition Flag.
Step 2: Install Linux Mint 17 [Mate]
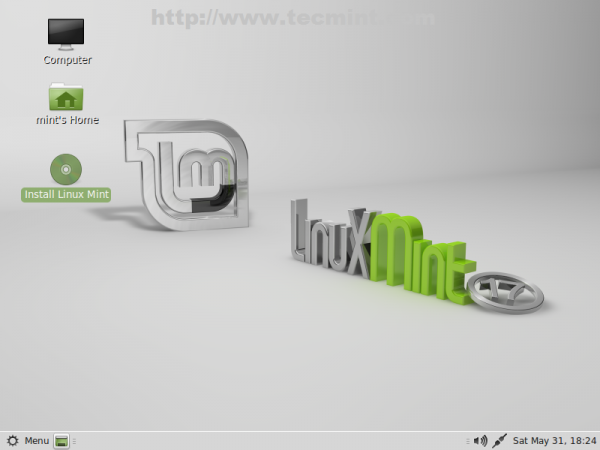
14. After you are done setting the disk partition layout, close Gparted and hit Install Linux Mint icon from desktop.
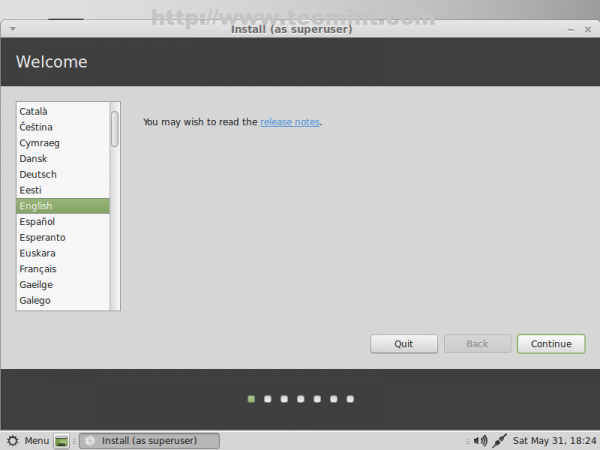
15. Select your system Language and click Continue.
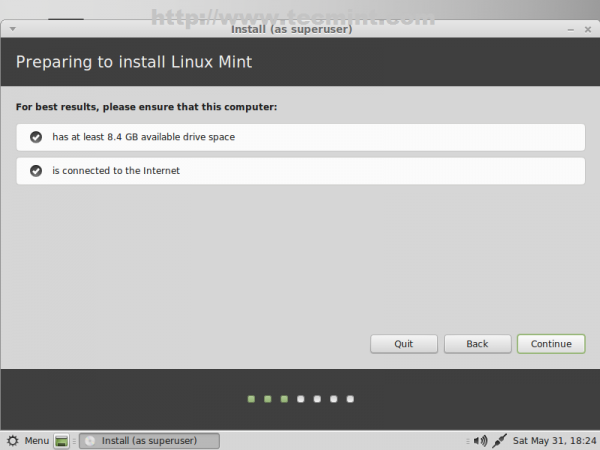
16. The next screen will verify your system available free space and internet connection to ensure that the system meats the minimal requirements for disk space for an optimal installation. If you have no internet connection shouldn’t be a problem so shoot Continue.
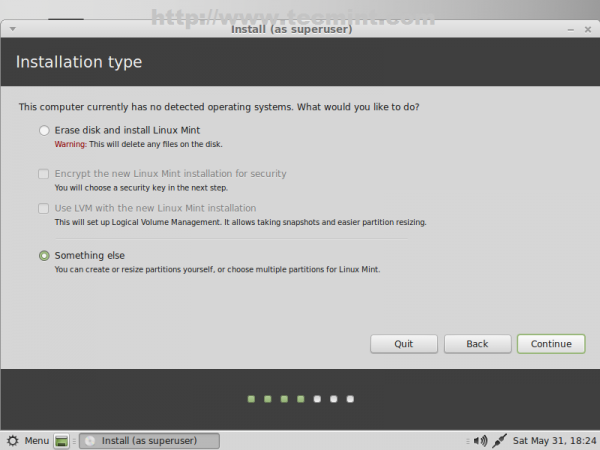
17. Because we previously created system hard-disk partition layout, on the next screen choose Something else and click on Continue.
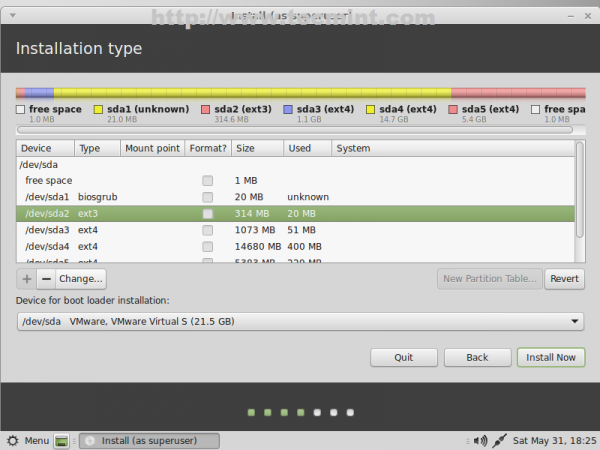
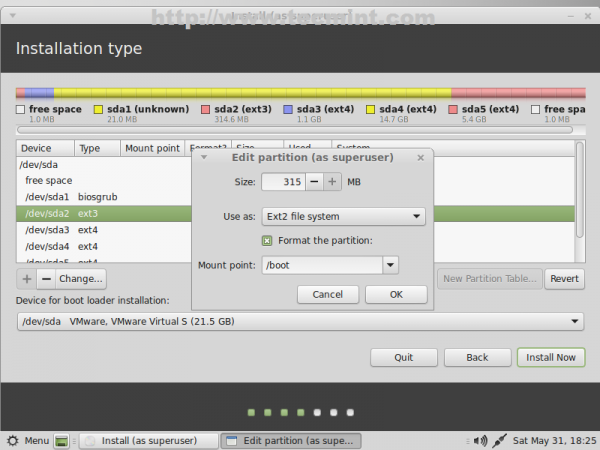
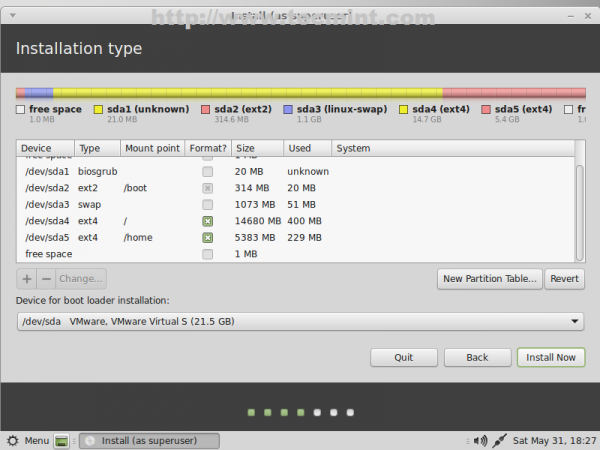
18. Now it’s time to tell installer how to use system partition table, created earlier. First choose the boot partition (/dev/sda2) and make the following settings (/dev/sda1 leave it untouched).
- Size = leave it unchanged
- Use as = Ext2/Ext3/Ext4 filesystem (ext4 is faster while ext2 is more suitable for small partitions due to its lack of journalize)
- Check Format the partition
- Mount point = /boot
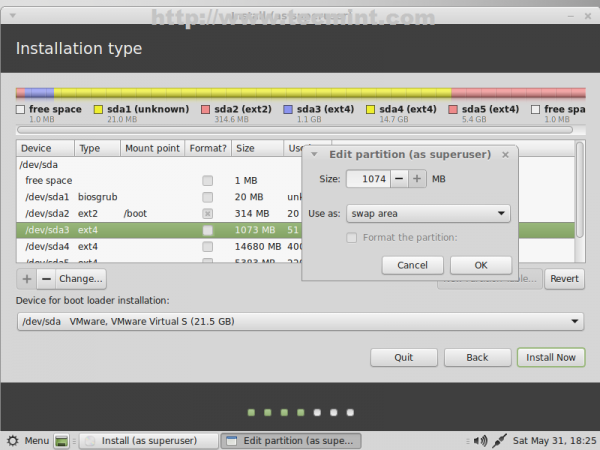
19. Next setup Linux Swap (/dev/sda3) using default chosen size and Use as swap area.
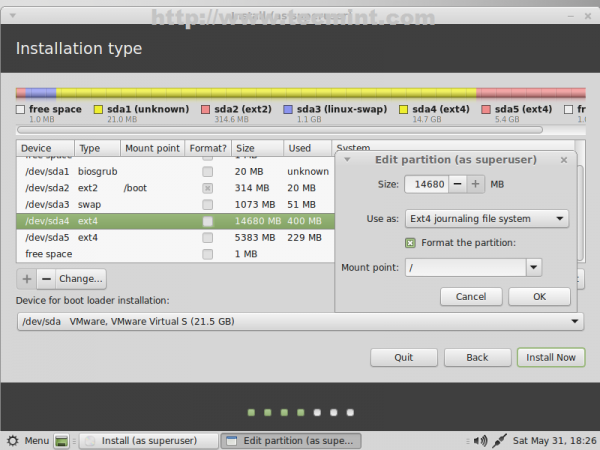
20. Configure root partition (/dev/sda4) with the following options.
- Size = leave it untouched
- Use as = Ext4 journaling file system
- Check Format the partition
- Mount point = /
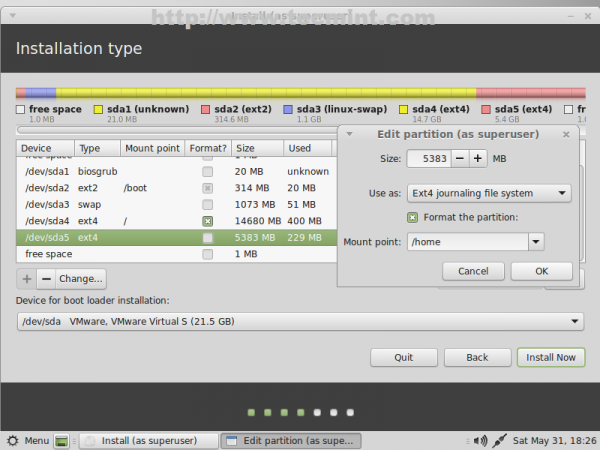
21. Finally configure HOME partition with the following settings.
- Size = leave it untouched
- Use as = Ext4 journaling file system
- Check Format the partition
- Mount point = /home
22. The final partition table should look like in the screenshots below. After you verify it again and make sure it suits your needs hit on Install Now button.

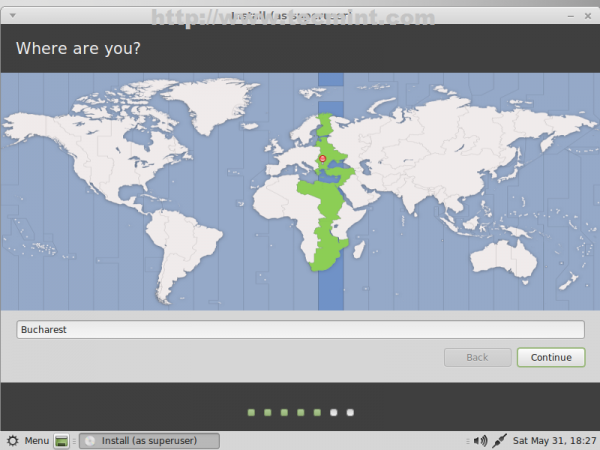
23. If your computer has Internet connection the installer will automatically detect your location else choose your real location using the provided map and hit on Continue.
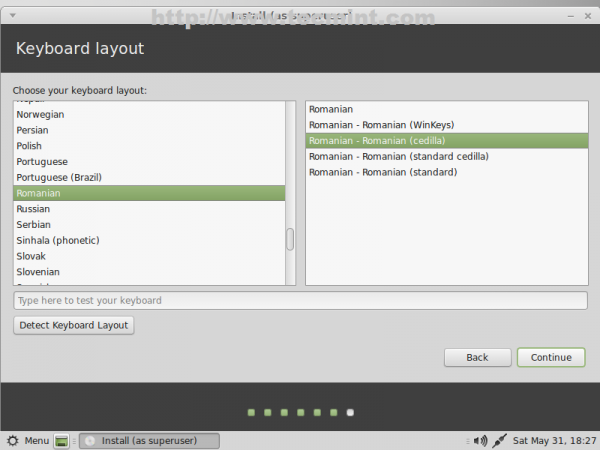
24. On the next screen choose your Keyboard layout then click on Continue.
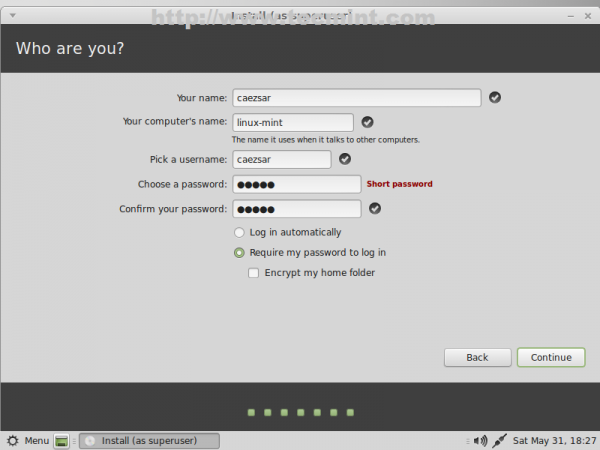
25. For the final settings of your system pick a username and a password for your computer and choose an appropriate name for Computer then Continue.
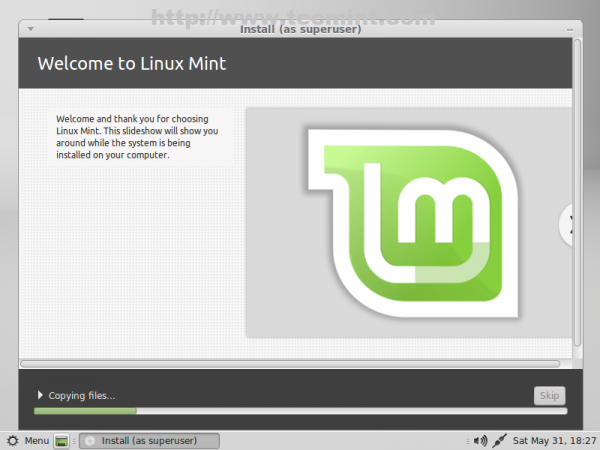
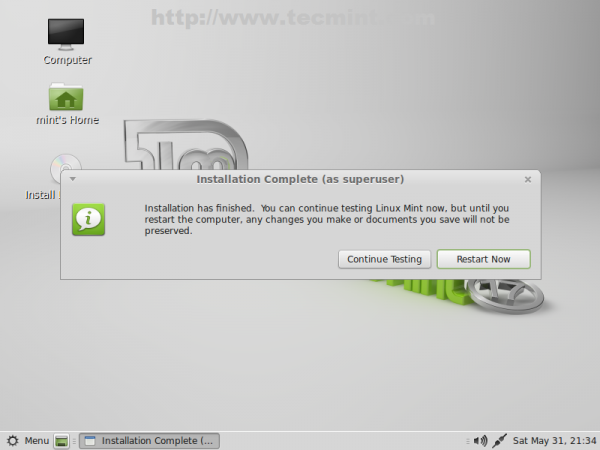
26. After the installer successfully finishes its job remove the installer media and reboot your computer.
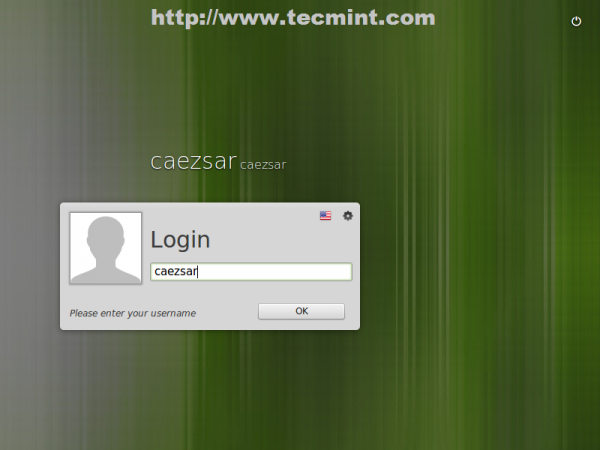
Congratulations! Now you have Linux Mint 17 Qiana with Mate desktop environment installed on your computer using GPT partition layout.
Note down that depending on your computer EFI/UEFI the system might not boot properly and this settings may not work for you, so should dig the subject as a starting point using this pages.
- EFI Bootloaders Principles
- UEFI Community
- Install Linux Mint on UEFI Supported Device
Although this experiment was done as a single boot under a virtualized environment with no UEFI and using a small disk in size the partition table scheme should be valid for most of EFI/BIOS computers with the remark that you can’t use GPT disk layout in dual-boot on BIOS computers and some UEFI/EFI systems can impose problems on booting from GPT disks (disabling Secure Boot might help in some cases), so if you plan on using disks smaller than 2GB in size you should stick to MBR partition layout.


First THANKYOU for the clean, concise and accurate procedures presented here. Im a former 90s/ early Y2K (remember that?) IT guy, Computer Consultant in the day. Fell asleep for 15 years. Installed 1st dedicated Linux Mint Cinnamon Ver 17.3 desktop last night. Great Instructions! One observation is very few sites reference ver 17.3, even the LinuxMint user docs are still 17.2.
One issue was with Bios grub partition in step 6. Then left click on unallocated space, select New and enter the following settings for this partition then click on Add.
1. New size = 20 Mib
2. File system = Unformatted
3. Label = Bios Grub
Upon Step 11 press [Ctrl]+[Enter] keys and hit on Apply pop-up…. The File system automatically set itself to NTFS. This just felt wrong… I deleted the entry and redone. Same thing occurred. Still felt wrong for Bios grub so I changed File system to ext4 and it accepted it. Continued with installation and all so far seems fine. Is this CORRECT? I believe it has something to do with my bios. American Megatrends ver 2.61? I didn’t find anything in bios config which allowed me to specify OS to be installed. How will the ext4 for Bios Grub effect system performance and communicating with other windows drives/ files (when I add them)? Also is there any adverse effects or steps to take if I attempt to upgrade my bios?
Thank you again… Very nice much appreciated!
@lxhopeful, instead of leaving it as unformatted, you can choose ext4. In some of the other screenshots of step #13 it shows the format as ext4. I first tried with unformatted and was unsuccessful in the install. I went back into gparted and changed it to ext4 and was able to run through the install successfully.
I got to instruction #13 and stopped. The Swap partition has one of those orange warning icons and the File system = unknown, the label is gone and under Used and Unused there are —.
the info states:
Status: not mounted; there’s no UUID or label and the Warning says:
Unable to detect the file system! Possible reasons are:
-file system is damaged
-file system is unknown to GParted
-there is no file system available (unformatted)
-the device entry /dev/sda3 is missing
Can this be fixed, can the partitions be deleted and I start over. I have not completed the installation as I have already replaced Windows 8.1, I think. That is not a big deal as that was my intent anyway.
Don’t know if this has anything to do with it, but while I setting up swap, I clicked undo a couple of times because I had entered the incorrect amount.
Also the other thing I noticed in screenshot #13 is that the /dev/sda1 (the one set for 20MB) as unknown File System but mine came up as nfts with the orange warning icon.
Is anything major wrong and can I start over. I won’t shut the computer down since there’s no OS at the moment except for the Live USB.
Since you don’t have any important data to save from partitions, a complete start over is indicated. In case you must save data from partitions use a live CD to mount damaged partitions and proceed with data saving, using testdisk or photorec!
Hi
I have ASUS AM1A-ITX as my motherboard which only has UEFI .Do I need to do the 7th step (i.e. creating 300 MB partition to hold the Boot Grub) ?
No, there’s no need to create a separate partition for /boot on desktops, but, still, it’s indicated to do it!
Hi.
I’ve been insider for W8 and W10.
I do not like the way MS is turning this systen into a supermarket supporter. The program prior case is to makeit easy to shop – in as many shops as you like.
Bugs are not beeing taken proper care of. Devicemanager do not show all CPU activity – CPU beeing hot with no activity ? Not born yesterday…
And IrDA does not work, an I am dependent on that. SI’m dropping out !
Before this insiderhoaks I used Mint up to v.13.
Now I’m sitting on UEFI mobo and GPT-disks all over – and no DVD player.
It has to be USB-stik for the first time.
This – wery long – instruction I didn’t quite follow.
1. Can I dowload Mint17 directly to the stick ?
2. Do I have to do anything with the stick? (USB3-NTFS)
3. Do I have to do anything in the UEFI ? Its running sole UEFI, Legacy is disabled.
Many questions from me….
Thanks i anvance :)
@Finni,
Download the Linux Mint ISO and make a your stick bootable using Unebootin tool.
YOU ARE GUYS DOIN GOOD JOB KEEP IT UP & GOD BLESS YOU……
Why not put all the caviots at the top of the article? I’m on a small hard drive and followed the guide step by step only to read at the end, “stick with MBR”.
I appreciate the thoroghness and simplicity of this tutorial , however it has a fatal flaw:
If the EFI partition is not set to FAT32 before beginning installation, the new Mint installation will not build the GPT correctly and will not boot, showing the error “Reboot and select proper boot device or insert boot media in selected.” on the boot screen… until I changed the partition to FAT32 and reinstalled. Then it booted just fine.
Cheers,
This is a late answer, but may it will help you:
http://forums.linuxmint.com/viewtopic.php?f=46&t=173423
I would suggest change Fat32 in NTFS
This is a pretty old threat but I’m hoping one of you guys can help me..
I can’t get mint linux 17.1 to allow me to install on FAT32 format /boot partition… Any suggestions?
If you’re just looking for a shared space for music and videos format a new partition in FAT32 for that purpose. FAT is not a very good file system… it blocks all the time. NTFS would be better for such a shared area.
@Mark,
FAT32 is too old filesystem and don’t have much support for latest filesystems, so always use NTFS…:)
Hi there.
Boy, I’v been trying to install this baby (mint17.1 cinnamon) for days now.
As ‘newbie’ I couldn’t understand what was really the issue ..
THiS tutorial finally(!) solve my existed broblems once and for all.
Couldn’t be happier right now. Thank you!, ain’t just enough..
I have been trying to understand this procedure do a fresh install on my Toshiba but all i do is get confused please do something more simpler for Newbies
I have a brand new virgin self made computer using an ASUS H87M-Plus motherboard. After a lot of tinkering, I finally got a GRUB to show up and was able to launch LM17. The guide is excellent. Here are the changes I had to make.
Step 7 is wrong:
The next partition will hold the Boot Grub. Again select unallocated space -> New and use the following settings for this partition.
New size = ~300 MB
File system = FAT32
Label = EFI Boot
The file system must be FAT32 otherwise you cannot have EFI work.
Between Step 9 and 10 I added a few more partitions for future OSs.
Step 13 needs to be modified. Now that it is FAT32, you will have two flags to check: legacy_boot and msftdata
Now Step 18 has to be modified. Since the table is FAT32, you will get other options. You will not be able to “Format the Partition”, and when you click Change, you can select EFI boot. The program will know to mount it as /boot/efi.
When I made these changes, the computer actually had a Grub 2 and Linux Mint 17 was an option! I am now updating the OS.
If you laptop can support disabling UEFI and install it with Bios legacy then switch to this option and install Linux Mint with MBR partition scheme (only if your HDD is smaller than 2GB)
I followed your mostly excellent instructions but would echo Rich’s and kggy’s comments above. I needed to go back and re-partition my laptop with regard to the EFI boot instructions and the flag for that partition which needs to be FAT32 format. If you have the time to update and correct this it would save trouble for other people.
Even though I read their comments before I started I did not know enough to understand their implication until I hit the problems myself.
I understand Charmaine’s frustration. I have a new Lenovo laptop with Win 8.1 and it took a bit of trouble, including finding out how to disable Secure boot and going to Lenovo websites, to find out how to interrupt the startup process to get my computer to boot from the DVD. My previous experience getting Mint16 working dual boot with Win XP taught me a lot of patience!
It doesn’t work.
Linux most assuredly does NOT boot up from either usb OR dvd.
To think that I’d wanted to entirely remove all things Microsoft from my pc and go with Linux after all I’d read about it – I was obviously deluded.
It’s clearly not as ‘user friendly’ or as well made as geeks claim.
As for it being ‘great for beginners’…really? What the hell is a ‘grub’? Or a ‘partition’? Or a ‘legacy’?
Why don’t you linux people learn to talk straight. Tell the average non-geek that your system is NOT for beginner’s and that it mostly doesn’t work unless one has a degree in ‘Geekdom’ and ‘Jibberish’.
Thanks for the tutorial. Used it to install LinuxMint 17 32bit on a MacPro2,1 and it is running perfectly. I tried using the 64bit version but I couldn’t get it to boot from CD or USB.
Again, thank you very much.
Thank you so much for your tutorial.
I had to change your partition recommendation to work on a Acer RL80 mini pc. It was a clean install on a new hard drive with no other operating systems. I had to move the EFI Boot partition first, FAT32 format and set flag to “boot” and gave it ~ 550 mb. If I didn’t do that I got a warning during Mint install saying “Go back to menu and correct problem?” and notes about normally requiring “EFI Boot partition”.
Other than that, your help was spot on!
I had no idea about BIOS morphing into EFI/UEFI. learned something new. :)
Rich
Thanks for the tutorial. I been meaning to install with a home partition for some time now. Your tutorial made it easy. Very much appreciated!
Hello! I do not understand why you did the first two partitions, grub and boot legacy. Systems are needed only if new EFI BIOS / UEFI? Usually partitioned as follows: “/”, “swap”, “/ home” and a partition for data / backup. One more thing and it’s OK and you? Thank you! Congratulations for this tutorial!