Munin (Network Monitoring Tool) is an open source web based network monitoring application written in Perl that shows network usage of servers and services in graphical form using RRDtool. With the help of Munin you can monitor the performance of your systems, networks, SANS’s and applications.
It has a master/node architecture where master connects to each node regularly and pulls the data from them. It then uses RRDtool to log and generate updated graphs.
Suggested Read: 20 Command Line Tools to Monitor Linux Performance
In this article, we will walk through you the steps in setting up Munin ( Network Monitoring Tool ) with Munin Node in RHEL, CentOS and Fedora systems using following environment.
Munin Server - hostname: munin.tecmint.com and IP Address: 192.168.103
Munin Client - hostname: munin-node.tecmint.com and IP Address: 192.168.15
Installing Munin in RHEL, CentOS & Fedora
Installing Munin is very simple, just follow my below step-by-step commands to install it on your server.
Step 1: Install EPEL Repository
Munin can be installed by using Fedora‘s EPEL repository under RHEL 7.x/6.x/5.x and CentOS 7.x/6.x/5.x.
Just, run the following commands as root user to install and enable Epel repository using wget.
RHEL/CentOS 7
------------------ RHEL/CentOS 7 - 64-Bit ------------------
# wget http://dl.fedoraproject.org/pub/epel/7/x86_64/e/epel-release-7-9.noarch.rpm
# rpm -ivh epel-release-7-9.noarch.rpm
RHEL/CentOS 6
------------------ RHEL/CentOS 6 - 32-Bit ------------------
# wget http://download.fedoraproject.org/pub/epel/6/i386/epel-release-6-8.noarch.rpm
# rpm -ivh epel-release-6-8.noarch.rpm

------------------ RHEL/CentOS 6 - 64-Bit ------------------
# http://dl.fedoraproject.org/pub/epel/6/x86_64/epel-release-6-8.noarch.rpm
# rpm -ivh epel-release-6-8.noarch.rpm
RHEL/CentOS 5
------------------ RHEL/CentOS 5 - 32-Bit ------------------
# wget http://download.fedoraproject.org/pub/epel/5/i386/epel-release-5-4.noarch.rpm
# rpm -ivh epel-release-5-4.noarch.rpm

------------------ RHEL/CentOS 5 - 64-Bit ------------------
# wget http://download.fedoraproject.org/pub/epel/5/x86_64/epel-release-5-4.noarch.rpm
# rpm -ivh epel-release-5-4.noarch.rpm
Note : Fedora users don’t need to install EPEL repository, because munin is included in Fedora and can be installed using yum or dnf package manager.
Suggested Read: 20 Yum Commands to Manage Linux Package Management
Suggested Read: 27 Dnf Commands to Manage Fedora Package Management
Next, do a system update to make sure that the EPEL package database is loaded before we going to install Munin.
------------------ On RHEL and CentOS Only ------------------
# yum -y update
Step 2: Install Apache Web Server
Munin needs a working web server such as Apache or Nginx to display its statistics files. We will install Apache web server to serve Munin graphs here.
------------------ On RHEL, CentOS and Fedora ------------------
# yum install httpd

------------------ On Fedora 22+ Releases ------------------
# dnf install httpd
Once Apache installed, start and enable the service to automatically start at system boot time.
------------------ On RHEL, CentOS and Fedora ------------------
# service httpd start
# chkconfig --level 35 httpd on

------------------ On RHEL/CentOS 7 and Fedora 22+ ------------------
# systemctl enable httpd
# systemctl start httpd
Step 3: Install Munin and Munin-Node
Now its time to install the Munin and Munin-Node as shown.
------------------ On RHEL, CentOS and Fedora ------------------
# yum -y install munin munin-node

------------------ On Fedora 22+ Releases ------------------
# dnf -y install munin munin-node
By default the above installation creates following directories.
- /etc/munin/munin.conf : Munin master configuration file.
- /etc/cron.d/munin : Munin cron file.
- /etc/httpd/conf.d/munin.conf : Munin Apache configuration file.
- /var/log/munin : Munin log directory.
- /var/www/html/munin : Munin web directory.
- /etc/munin/munin-node.conf : Munin Node master configuration file.
- /etc/munin/plugins.conf : Munin plugins configuration file.
Step 3: Configure Munin and Password Protect Munin
This is step is optional and only applicable if you want to use munin.tecmint.com instead localhost in HTML output as shown:
Open /etc/munin/munin.conf configuration file and make the changes as suggested and don’t forget to replace munin.tecmint.com with your server name.
# a simple host tree
[munin.tecmint.com]
    address 127.0.0.1
    use_node_name yes
[...]
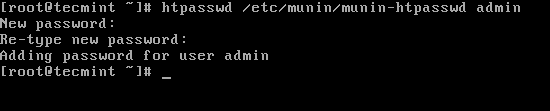
Next password protect Munin statistics with username and password using Apache basic auth module as shown:
# htpasswd /etc/munin/munin-htpasswd admin
Next restart Munin and enable it to start at boot time automatically.
------------------ On RHEL, CentOS and Fedora ------------------
# service munin-node start
# chkconfig --level 35 munin-node on

------------------ On RHEL/CentOS 7 and Fedora 22+ ------------------
# systemctl enable munin-node
# systemctl start munin-node
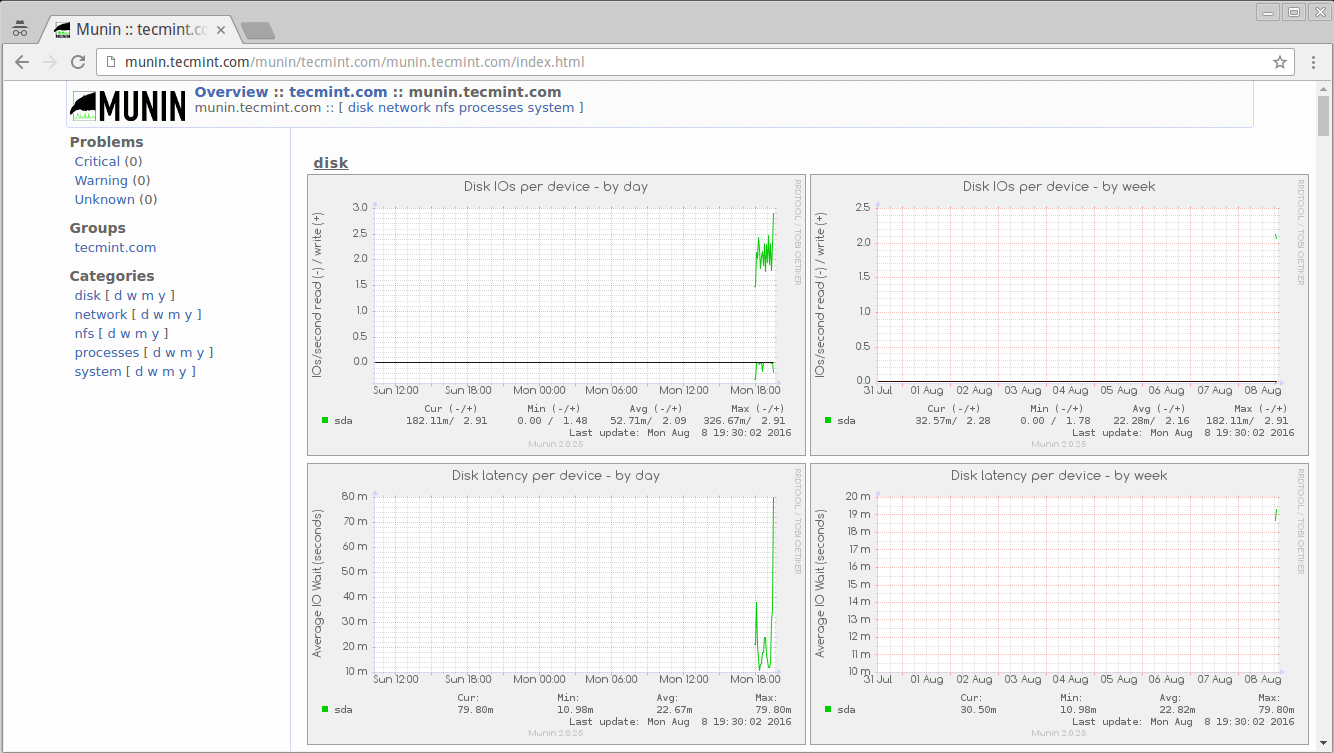
Step 4: Accessing Munin Web Interface
Wait for 30 minutes so that Munin can generate graphs and displayed it. To see first output of graphs, open your browser and navigate to http://munin.tecmint.com/munin and enter login credentials.
If it didn’t prompt for username and password, open /etc/httpd/conf.d/munin.conf and change the username from Munin to admin and restart Apache.
AuthUserFile /etc/munin/munin-htpasswd
AuthName "admin"
AuthType Basic
require valid-user
Step 5: Add Linux Client to Munin Server
Login into Linux client machine and install only munin-node package as shown:
# yum install munin-node
# dnf install munin-node      [On Fedora 22+ versions]
# apt-get install munin-node  [On Debian based systems]
Now open /etc/munin/munin-node.conf configuration file and add the munin server IP address to enable data fetching from the client.
# vi /etc/munin/munin-node.conf
Add the IP address of Munin sever in the following format as shown:
# A list of addresses that are allowed to connect.

allow ^127\.0\.0\.1$
allow ^::1$
allow ^192\.168\.0\.103$
Finally, restart the munin client:
------------------ On RHEL, CentOS and Fedora ------------------
# service munin-node start
# chkconfig --level 35 munin-node on

------------------ On RHEL/CentOS 7 and Fedora 22+ ------------------
# systemctl enable munin-node
# systemctl start munin-node
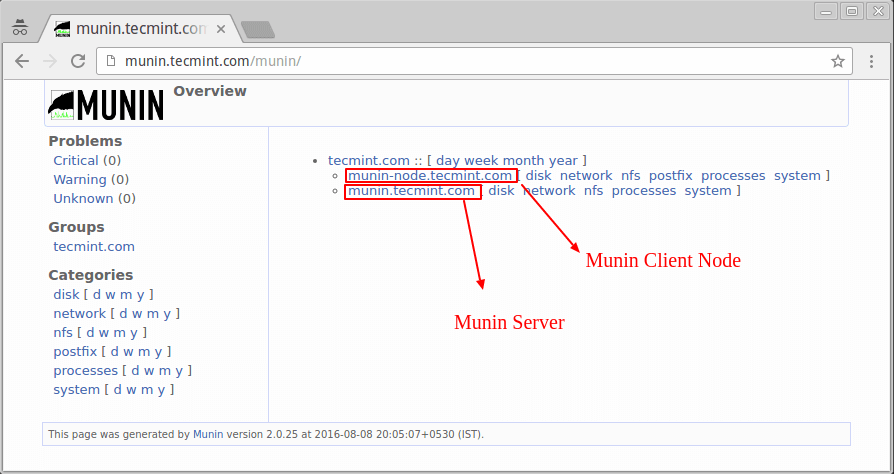
Step 6: Configure Munin Server to Connect Client Node
Open /etc/munin/munin.conf configuration file and add the following new section of remote Linux client node with the server name and IP address as shown:
# a simple host tree
[munin.tecmint.com]
    address 127.0.0.1
    use_node_name yes

[munin-node.tecmint.com]
    address 192.168.0.15
    use_node_name yes
Next, restart munin server and navigate to the http://munin.tecmint.com/munin page to see the new client node graphs in action.
For more information and usage please visit at http://munin-monitoring.org/wiki/Documentation.


I cannot see my munin node on the munin server web…
I Added the host name and IP address of one of my nodes to the Munin Server in the vi munin.conf editor and I cannot see my munin node on the munin server web. and yes I also, added the munin server IP address to the node in the /etc/munin/munin-nod.conf.
Any suggestions on how to see the node on the munin server web.
@Henry,
Have you added the IP address of Munin sever in the /etc/munin/munin-node.conf file with the following format as shown:
And Also have you configured Munin server to connect to client in /etc/munin/munin.conf file in the correct format.
[munin-node.tecmint.com]
    address 192.168.0.15
    use_node_name yes
Please check these two configurations again..
wget http://dl.fedoraproject.org/pub/epel/7/x86_64/e/epel-release-7-8.noarch.rpm
it should be “epel-release-7-9.noarch.rpm”
@Alex,
Thanks for notifying about new epel version, corrected the link in the article.
Hi,
I install Munin and munin node as your post. On Munin web, I can browse the munin master info, but client. I got below error for munin client
Process Backgrounded
2017/04/17-15:30:10 Munin::Node::Server (type Net::Server::Fork) starting! pid(1622)
Resolved [*]:4949 to [::]:4949, IPv6
Not including resolved host [0.0.0.0] IPv4 because it will be handled by [::] IPv6
Binding to TCP port 4949 on host :: with IPv6
Setting gid to “0 0”
2017/04/17-15:30:13 [1622] Error output from if_virbr0:
2017/04/17-15:30:13 [1622] /etc/munin/plugins/if_virbr0: line 94: [: : integer expression expected
2017/04/17-15:30:14 [1622] Error output from if_virbr0-nic:
2017/04/17-15:30:14 [1622] /etc/munin/plugins/if_virbr0-nic: line 94: [: : integer expression expected
so I cannot see my munin node on munin server web
Hello Ravi,
On my Centos 7 vm , munin URL works with https instead of http.
@Vijay,
May you have SSL module install and enabled, but it should work both way http and https..
Hi, I want to install it in my zimbra mailserver (centos 6.8), is it possible….
thanks..
Hi,
I want a user not to access all the munin graphs except few. how can i do that. can you please help me on this
Also provide complete,i dont think so oly above steps could give munin inetrface
No info regarding port opening 4949…
@Hema,
We’re sorry for that..we will update the article….
Hey guys !!!!
I have installed MUNIN on rhel 6 ,
But in webpage am getting only index .
No grpahs etc…..
could you please explain the problem why my server unable to resolve the host address.
i am a great follower of techmint
thanks in advance
add hostname in /etc/hosts file and check.
[root@server ~]# wget http://download.fedoraproject.org/pub/epel/6/i386/epel-release-6-5.noarch.rpm
–2013-11-26 21:43:32– http://download.fedoraproject.org/pub/epel/6/i386/epel-release-6-5.noarch.rpm
Resolving download.fedoraproject.org… failed: Temporary failure in name resolution.
wget: unable to resolve host address `download.fedoraproject.org’
[root@server ~]#
[root@server ~]#
I am Getting above error while giving the first command as mentioned in procedure
After the installation using the above steps password authentication enabled. you can configure Authentication details using the following command.
—
htpasswd -c /etc/munin/munin-htpasswd Munin
Enter the correct password
—
Hi,
I have installed Munin in our server successfully but when i browse in browser it’s asking username and password, so what is the default username and password for munin
Thanks,
Ela
Hi Ela,
That’s per file /etc/httpd/conf.d/munin.conf that such authentication is required.
You can easily disable it my modifying this conf file. Do not hesitate to look at Apache Http doc to get help on the conf file contents.