MySQL is a popular and widely used database management system that stores and organizes data and allows users to retrieve it. It comes with a vast array of options that grant users certain permissions to tables and databases.
In this guide, you will learn how to create a new user and grant permissions in the MySQL database.
How to Create a New User in MySQL
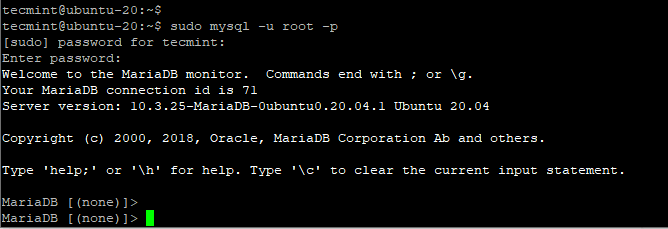
To create a new user first log in to the MySQL shell.
$ sudo mysql -u root -p
Provide the sudo password followed by the password that provided when setting up the MySQL database and hit ENTER. Thereafter, you will get this prompt.
To create a new user, use the syntax shown below:
MariaDB [none]> CREATE USER 'newuser'@'localhost' IDENTIFIED BY 'password';
For example, to create a new user called ‘tecmint’ within the database, invoke the command:
MariaDB [none]> CREATE USER 'tecmint'@'localhost' IDENTIFIED BY 'QkYKmw$5tec';
A Few Points to Keep in Mind
When adding a user locally i.e., on the system that you have installed MySQL, the user’s host is specified as localhost, and not the IP address. The keyword ‘localhost‘ translates to ‘this computer‘ and MySQL treats it uniquely. Basically, localhost is used by the mysql client to establish a connection to the locally installed MySQL database server.
Thus far, the tecmint user does not have any permissions to interact with the databases. As a matter of fact, the user cannot even access the MySQL shell.
To grant the user full access to all the databases, including the tables, run.
MariaDB [none]> GRANT ALL PRIVILEGES ON * . * TO 'tecmint'@'localhost';
In the command above, the asterisks point to the database and the table respectively that the user can access. It grants the user all the rights on the database – read, write, edit, and execute including performing all the tasks across other databases and tables as well.
So far, we have granted the user full access to the database. While this is handy in explaining MySQL concepts, it’s generally not recommended as it could pose a security risk to your databases. Just think of what might happen if a hacker got hold of the user’s password. We will proceed further and discuss how to assign specific permissions in the next section.
When you are done assigning permissions to the user, reload all the privileges as shown for the changes to take effect.
MariaDB [none]> FLUSH PRIVILEGES
How To Grant Different User Permissions
Here’s a breakdown of the possible permissions that you can grant users:
- ALL PRIVILEGES – As previously seen, this grants a MySQL user full access to a specific database.
- CREATE – Allows users to create new databases or tables.
- DROP – Enables users to delete databases or users.
- INSERT – Allows users to insert rows in tables.
- DELETE – Allows users to delete rows from tables.
- SELECT – with ‘SELECT’ permission, users are able to read the contents of a table.
- UPDATE – Allows users to updates the rows in a table.
- GRANT OPTION – Users can grant or remove the privileges of other users.
To grant a specific user permission, use the syntax:
MariaDB [none]> GRANT permission_type ON database_name.table_name TO 'username'@'localhost';
Additionally, you can assign permissions to all the tables in a database with a single asterisk symbol as shown:
MariaDB [none]> GRANT permission_type ON database_name.* TO 'username'@'localhost';
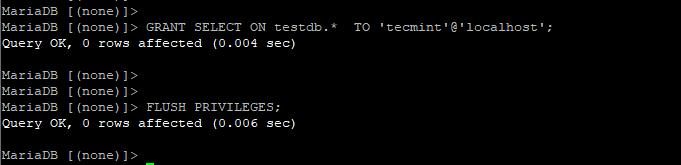
For example, to assign SELECT permissions to ‘tecmint‘ user on all tables of the database testdb, run the command.
MariaDB [none]> GRANT SELECT ON testdb.* TO 'tecmint'@'localhost';
Then flush privileges for the changes to take effect.
MariaDB [none]> FLUSH PRIVILEGES;
Additionally, you can assign multiple permissions at a go by separating them with a comma as shown.
MariaDB [none]> GRANT INSERT, UPDATE ON testdb.* TO 'tecmint'@'localhost';

How to Revoke MySQL Permissions
To revoke permissions from a user, use the syntax:
MariaDB [none]> REVOKE permission_type ON database_name.table_name FROM 'username'@'localhost';
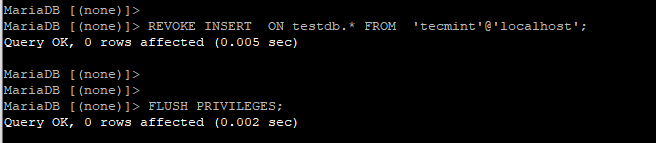
For example, to revoke INSERT permissions from the user ‘tecmint’, run the command.
MariaDB [none]> REVOKE INSERT ON testdb.* FROM tecmint'@'localhost';
MariaDB [none]> FLUSH PRIVILEGES
To have a peek at a user’s current permissions, execute:
MariaDB [none]> SHOW GRANTS FOR 'username'@'localhost';
From the output below, we can see that the INSERT permission has been expunged from the ‘tecmint’ user leaving only SELECT and UPDATE rights on the testdb database.

To test out logging in to the MySQL shell using the new user, first log out.
MariaDB [none]> quit;
Then login back again.
$ sudo mysql -u tecmint -p
Provide the user’s password and hit ENTER to access the shell.
To drop a user, use the DROP command, just as you would when deleting a database.
MariaDB [none]> DROP USER 'username'@'localhost';
You might also like to read the following MySQL related articles:
- Useful Tips to Troubleshoot Common Errors in MySQL
- Mytop – A Useful Tool for Monitoring MySQL/MariaDB Performance in Linux
- How to Change Default MySQL/MariaDB Port in Linux
- How to Reset MySQL or MariaDB Root Password in Linux
Conclusion
Hopefully, by now, you can create users in your MySQL database servers and comfortably assign or revoke permissions.


