Mautic is a free open source, web-based and leading marketing automation tool that enables you to understand, manage, and grow your business or organization conveniently. It is highly customizable and extensible, to meet your business requirements.
It is still a very young project at the time of writing this article. It runs on most standard hosting environments and it is easy to install and setup. In this article, we will show how to install Mautic in Linux distributions.
Step 1: Install LEMP Stack in Linux
1. First, install LEMP stack (Nginx, MySQL or MariaDB and PHP) on your respective Linux distributions using the default package manager as shown.
Install LEMP on Debian and Ubuntu
$ sudo apt install python-software-properties
$ sudo add-apt-repository ppa:ondrej/php
$ sudo apt update
$ sudo apt install nginx php7.0  php7.0-fpm  php7.0-cli php7.0-common php7.0-zip php7.0-xml php7.0-mailparse php7.0-mcrypt php7.0-intl php7.0-mbstring php7.0-imap php7.0-apcu  php7.0-mysql mariadb-server mariadb-client
Install LEMP on CentOS and RHEL
-------- On CentOS / RHEL 8 --------
# dnf install https://dl.fedoraproject.org/pub/epel/epel-release-latest-8.noarch.rpm
# dnf install http://rpms.remirepo.net/enterprise/remi-release-8.rpm
# dnf install dnf-utils
# dnf module reset php
# dnf module enable php:remi-7.4
# dnf install nginx php  php-fpm  php-cli php-common php-zip php-xml php-mailparse php-mcrypt php-mbstring php-imap php-apcu php-intl php-mysql mariadb-server


-------- On CentOS / RHEL 7 --------
# yum install https://dl.fedoraproject.org/pub/epel/epel-release-latest-7.noarch.rpm
# yum install http://rpms.remirepo.net/enterprise/remi-release-7.rpm
# yum install yum-utils
# yum-config-manager --enable remi-php74
# yum install nginx php  php-fpm  php-cli php-common php-zip php-xml php-mailparse php-mcrypt php-mbstring php-imap php-apcu php-intl php-mysql mariadb-server
2. Once LEMP stack installed, you can start Nginx, PHP-fpm and MariaDB services, enable them and check if these services are up and running.
-------- On Debian / Ubuntu --------
$ sudo systemctl start nginx php7.0-fpm mariadb
$ sudo systemctl status nginx php7.0-fpm mariadb
$ sudo systemctl enable nginx php7.0-fpm mariadb

-------- On CentOS / RHEL --------
# systemctl start nginx php-fpm mariadb
# systemctl status nginx php-fpm mariadb
# systemctl enable nginx php-fpm mariadb
3. If your system has a firewall enabled by default, you need to open the port 80 in the firewall to allow client requests to the Nginx web server, as follows.
-------- On Debian / Ubuntu --------
$ sudo ufw allow 80/tcp
$ sudo ufw reload

-------- On CentOS / RHEL --------
# firewall-cmd --permanent --add-port=80/tcp
# firewall-cmd --reload
Step 2: Secure MariaDB Server and Create Mautic Database
4. By default, the MariaDB database installation is unsecure. To secure it, run the security script which comes with the binary package.
$ sudo mysql_secure_installation
You will be asked to set a root password, remove anonymous users, disable root login remotely and remove the test database. After creating a root password, and answer yes/y to the rest of the questions.
5. Then log in to MariaDB database and create a database for Mautic.
$ sudo mysql -u root -p
Run these commands to create the database; use your own values here, and set a more secure password in a production environment.
MariaDB [(none)]> CREATE DATABASE mautic;
MariaDB [(none)]> CREATE USER 'mauticadmin'@'localhost' IDENTIFIED BY '=@!#254mauT';
MariaDB [(none)]> GRANT ALL PRIVILEGES ON mautic.* TO 'mauticadmin'@'localhost';
MariaDB [(none)]> FLUSH PRIVILEGES;
MariaDB [(none)]> exit
Step 3: Download Mautic Files to Nginx Web Server
6. The latest release (version 2.16 at the time of this writing) of Mautic is available as a zip file, go to the download page, then provide your details in a short form and click on the download link.
7. Once you have downloaded, create a directory for storing the Mautic files for your site under your web server document root (this will be your application base or root directory).
Then unzip the archive file into your application root directory, and define correct permissions on the root directory and mautic files, as follows:
$ sudo mkdir -p /var/www/html/mautic
$ sudo unzip 2.16.0.zip -d /var/www/html/mautic
$ sudo chmod -R 775 /var/www/html/mautic
$ sudo chown -R root:www-data /var/www/html/mautic
Step 4: Configure PHP and Nginx Server Block for Mautic
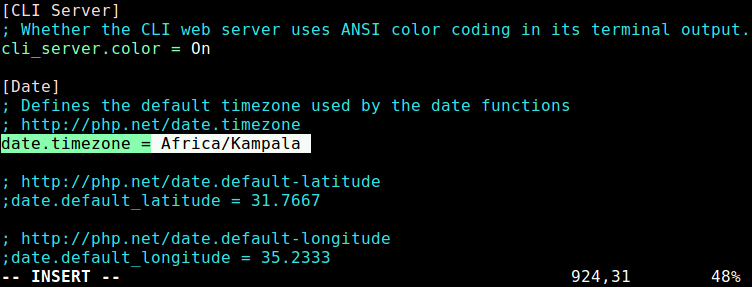
8. In this step, you need to configure the date.timezone setting in your PHP configuration, set it to a value applicable to your current location (for example “Africa/Kampala”), as shown in the screenshot.
-------- On Debian / Ubuntu --------
$ sudo vim /etc/php/7.0/cli/php.ini
$ sudo vim /etc/php/7.0/fpm/php.ini

-------- On CentOS / RHEL --------
# vi /etc/php.ini
9. Then restart the php-fpm service to effect the changes.
$ sudo systemctl restart php7.4-fpm   [On Debian / Ubuntu]
# systemctl restart php-fpm           [On CentOS / RHEL]
10. Next, create and configure an Nginx server block for serving the Mautic application, under /etc/nginx/conf.d/.
$ sudo vi /etc/nginx/conf.d/mautic.conf
Add the following configuration in the above file, for the purpose of this guide, we will use a dummy domain called mautic.tecmint.lan (you may use your own test or full registered domain):
server {
	listen      80;
	server_name mautic.tecmint.lan;
	root         /var/www/html/mautic/;
	index       index.php;

	charset utf-8;
	gzip on;
	gzip_types text/css application/javascript text/javascript application/x-javascript 	image/svg+xml text/plain text/xsd text/xsl text/xml image/x-icon;
	location / {
		try_files $uri $uri/ /index.php?$query_string;
	}
	location ~ \.php {
		include fastcgi.conf;
		fastcgi_split_path_info ^(.+\.php)(/.+)$;
		fastcgi_pass unix:/var/run/php/php7.0-fpm.sock;
	}
	location ~ /\.ht {
		deny all;
	}
}
11. Save the file and then restart the Nginx web server for the above changes to work.
$ sudo systemctl restart nginx
Step 5: Complete Mautic Installation via Web installer
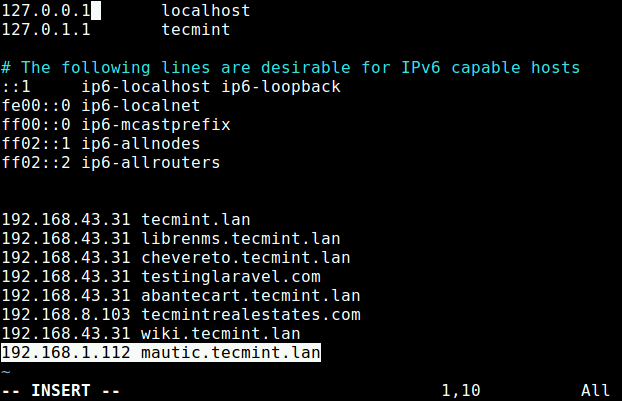
12. Because we are using a dummy domain, we need to set up a local DNS using the hosts’ file (/etc/hosts), for it to work, as shown in the following screenshot.
192.168.1.112 mautic.tecmint.lan
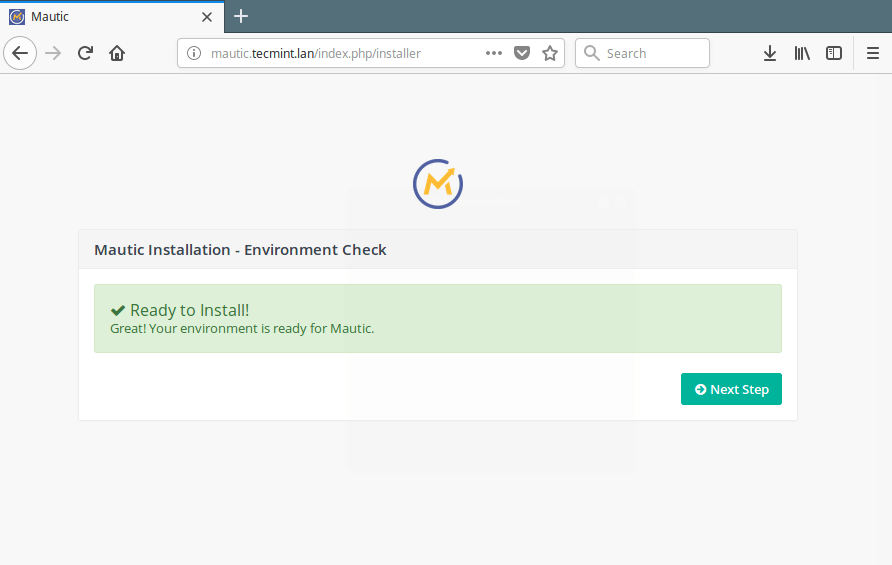
13. Then use the following URL to access the Mautic web installer. It will, first of all, check your system to ensure that all requirements are met (if you see any error or warning, correct them before proceeding, especially in a production environment).
http://mautic.tecmint.lan
If your environment is ready for mautic, click on the Next Step.
14. Next, provide your database server connection parameters and click on the Next Step. The installer will be verifying the connection settings and create the database.
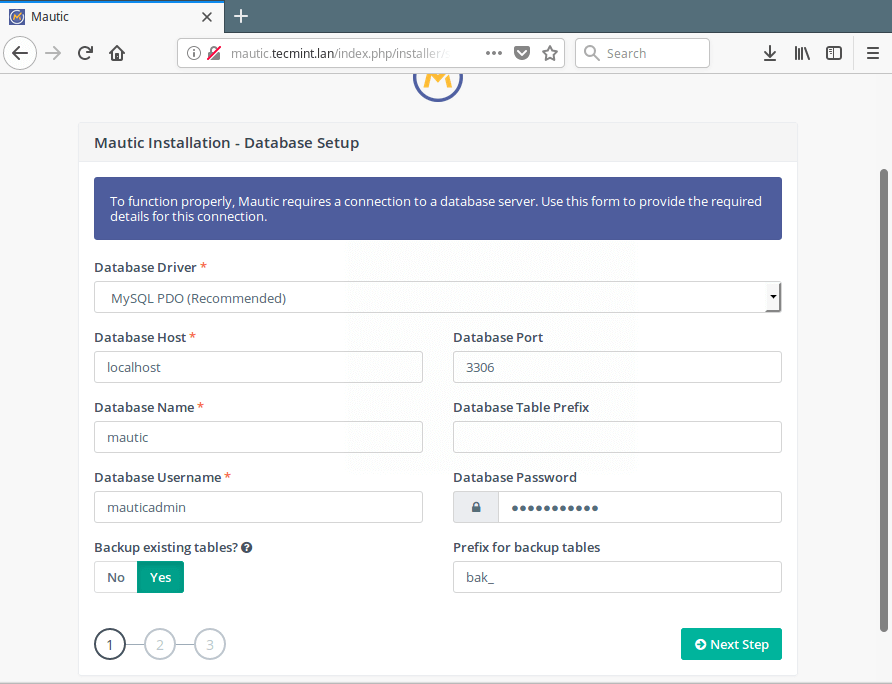
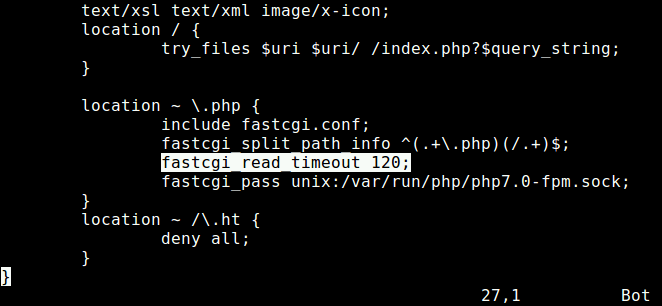
Note at this stage, if you get a “504 Gateway Timeout Error”, it is because Nginx is failing to get any response from PHP-FPM while the database is being created; it times out.
To fix this, add the following highlighted line in the PHP location block inside the mautic server block configuration file /etc/nginx/conf.d/mautic.conf.
location ~ \.php {
                include fastcgi.conf;
                fastcgi_split_path_info ^(.+\.php)(/.+)$;
                fastcgi_read_timeout 120;
                fastcgi_pass unix:/var/run/php/php7.0-fpm.sock;
15. Then restart Nginx and php-fpm services for the recent change to take effect.
$ sudo systemctl restart nginx php7.4-fpm   [On Debian / Ubuntu]
# systemctl restart nginx php-fpm           [On CentOS / RHEL]
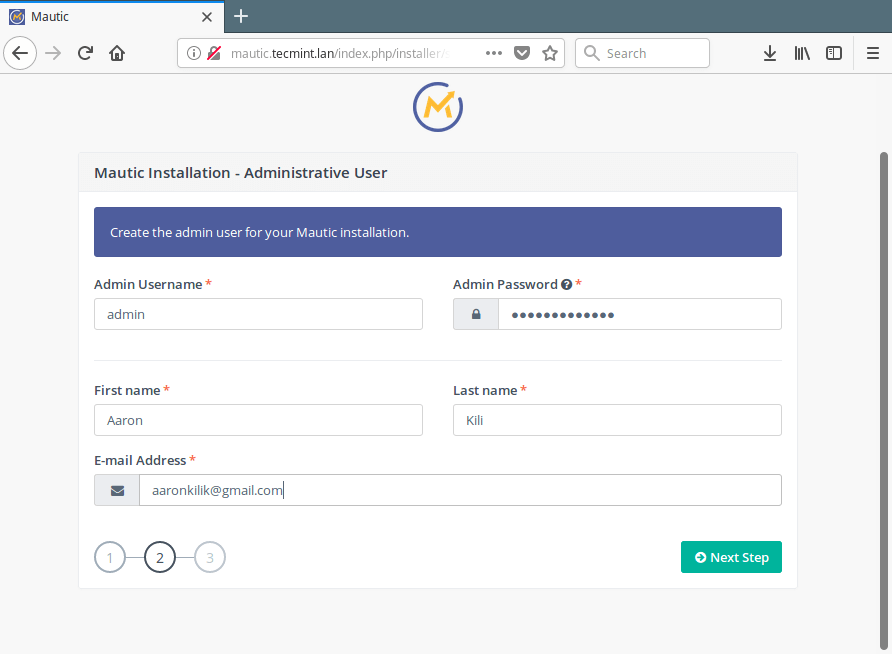
16. Next, create your mautic application admin user account and click Next Step.
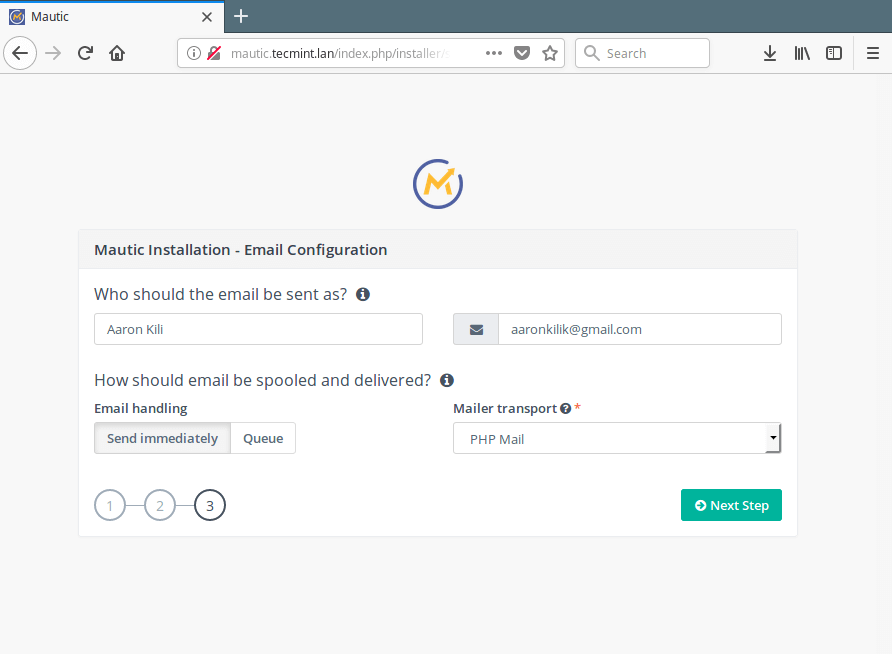
17. As a final step, configure your email services as shown in the following screenshot and click Next Step.
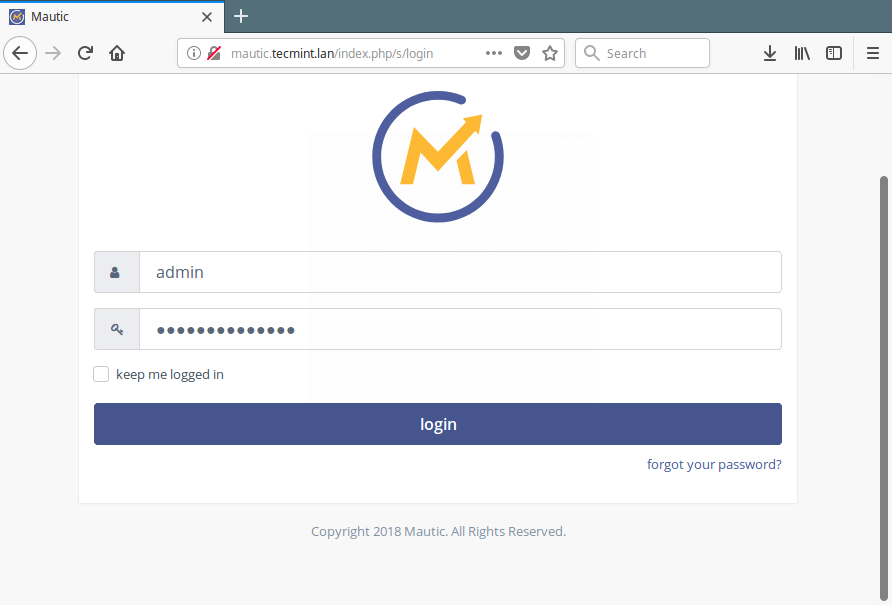
17. Now log into your mautic application using the admin account credentials.
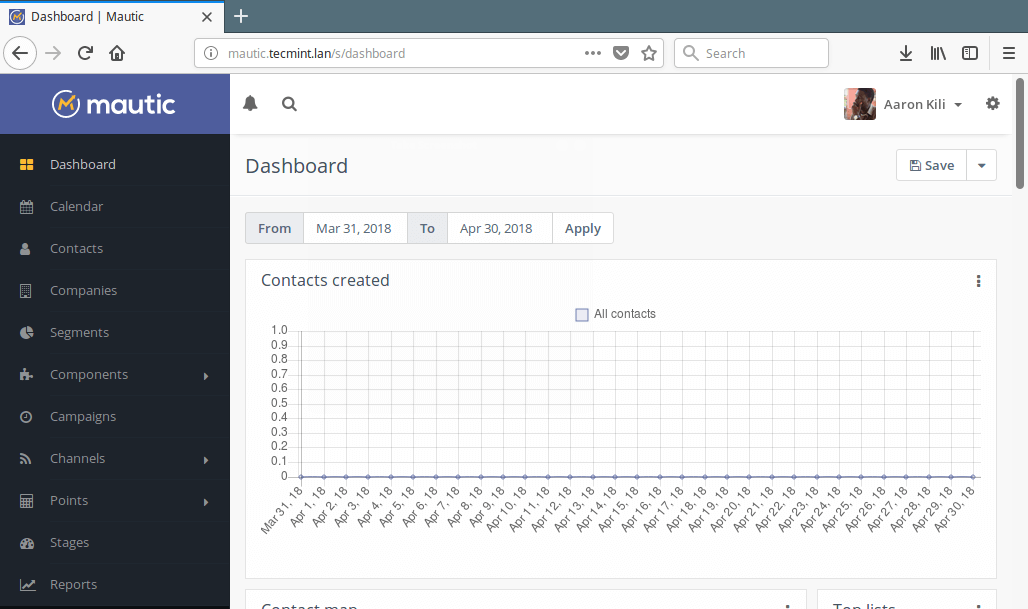
18. At this point, you can start automating your business marketing from the admin control panel, as shown in the following screenshot.
Mautic is a leading marketing automation platform. It is still a very young project and many features, that you can think of, are yet to be added. If you encountered any issues while installing it, let us know via the feedback form below. Also share your thoughts about it with us, especially concerning features you would like it to have.


Following the steps I found i had to change the mautic.conf to work with centos 8, now i am getting in /etc/nginx/conf.d/mautic.conf, but the error log is empty? any ideas?
When I go to
http://mautic.tecmint.lanI get 502 bad gateway? Any suggestions?I am running centos8 and followed all of the steps.
Hi,
How did the ‘index.php‘ from URL on step 18 disappear?
It was there until step 19.
I am trying to remove that but it is not working. I have installed the latest version of Mautic v2.16.0 Apache 2.4.
Please advise.
@Vivek
You need to log in before it points to dashboard instead of index.php.
@Aaron,
Thank you, I did try, but did not work for me.
Is it possible to install mautic onto a Chromebook with ubuntu?
@Devan
It is possible if you are running Ubuntu or any of the supported operating systems.
I’m trying to install mautic in Digital Ocean, Ubuntu 18.04 with a LEMP server, the one provided by Digital Ocean, I have mautic in a subfolder
/mautic(I have another app in the same server) and when I try to do the installation I get a 404 over/mautic/index.php/installer.I don’t know what else to do.
@Eduardo
You can run many web applications on the same VPS, as long as you have configured well how the web server will serve them. I believe the issue could be with your Nginx server block configuration.
Check where the root parameter is pointing to the correct address (replace /var/www/html/mautic/ with the actual location of your mautic root directory):
After making changes, restart the Nginx service.
Can you share your Nginx config here, if possible?
Mautic current package is doesn’t support PHP 7.4. If you install Mautic on PHP 7.4 you will get a warning and can’t use Mautic. Are you really install Mautic on PHP 7.4 server??
@Thanh
We did a test with PHP 7.0. Please allow us to cross-check this, many thanks for the feedback.