If you want to build your own wiki website, you can easily do it by using MediaWiki – a PHP opensource application, originally created for WikiPedia. Its functionality can be easily extended thanks to the third party extensions developed for this application.
In this article we are going to review how to install MediaWiki on CentOS 7 with LAMP (Linux, Apache, MySQL and PHP) stack.
Installing LAMP Stack on CentOS 7
1. First you need to enable the epel and remi repositories to install LAMP stack with the latest PHP 7.x version.
# yum -y install http://rpms.remirepo.net/enterprise/remi-release-7.rpm
# yum install epel-release
2. Next, we are going to use php7.3, we will need to disable the installation of php5.4 to install php7.3 from the remi repository as shown.
# yum-config-manager --disable remi-php54
# yum-config-manager --enable remi-php73
3. Now we can proceed with installing Apache, MariaDB and PHP with necessary extensions required to run MediaWiki – For better performance you can also install Xcache. .
# yum -y install httpd
# yum -y install mariadb-server mariadb-client
# yum install php php-mysql php-pdo php-gd php-mbstring php-xml php-intl texlive
4. Start and enable the services with:
# systemctl start httpd
# systemctl enable httpd
# systemctl start mariadb
# systemctl enable mariadb
5. Now secure you MariaDB installation by running:
# mysql_secure_installation
6. To make the changes active, you will have to restart the Apache web server:
# systemctl restart httpd
Installing MediaWiki on CentOS 7
7. Next move is to download the MediaWiki package. Head over to the MediaWiki Download page and download the latest package or you can use the following wget command.
# cd /var/www/html
# wget https://releases.wikimedia.org/mediawiki/1.32/mediawiki-1.32.0.tar.gz
8. Now extract the contents of the archive with the tar command.
# tar xf  mediawiki*.tar.gz
# mv mediawiki-1.32.0/* /var/www/html/
9. After that we will create database for our MediaWiki installation as shown.
# mysql -u root -p
On the MySQL prompt run the following commands to create database, create database user and grant that user privileges on the newly created database;
# CREATE DATABASE media_wiki;
# CREATE USER 'media_wiki'@'localhost' identified by 'mysecurepassword';
# GRANT ALL PRIVILEGES on media_wiki.* to 'media_wiki’@'localhost';
# quit;
10. Now you can access the MediaWiki application by reaching http://ipaddress of your server and follow the installation steps.
First you can choose the language settings:
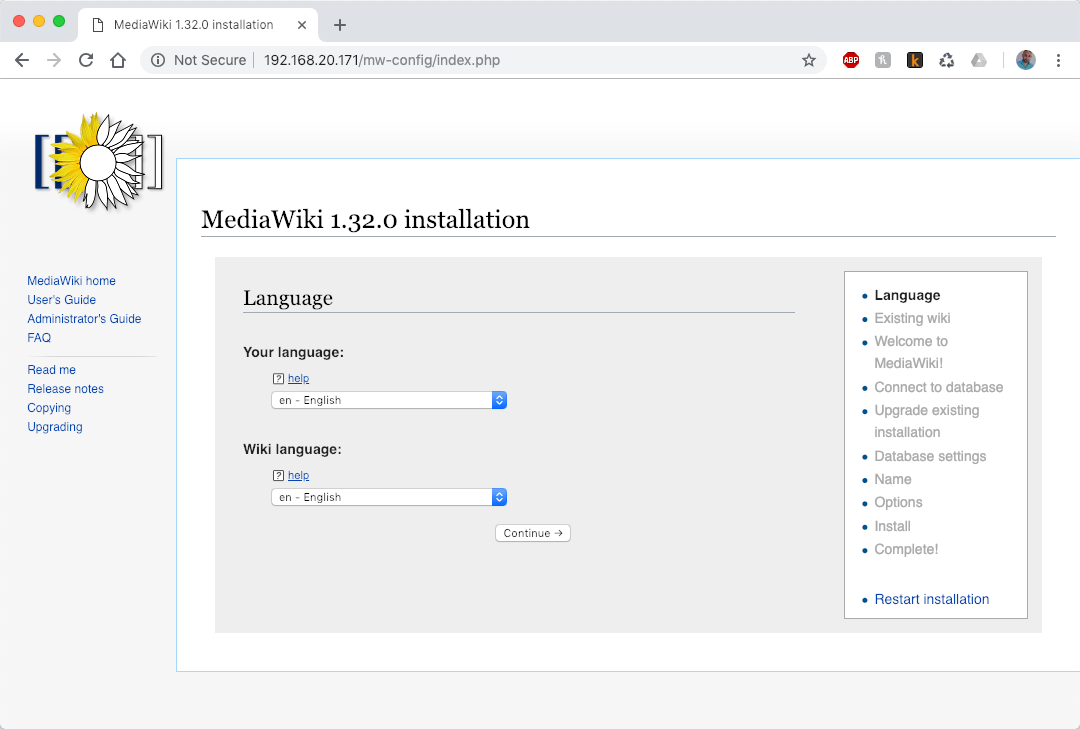
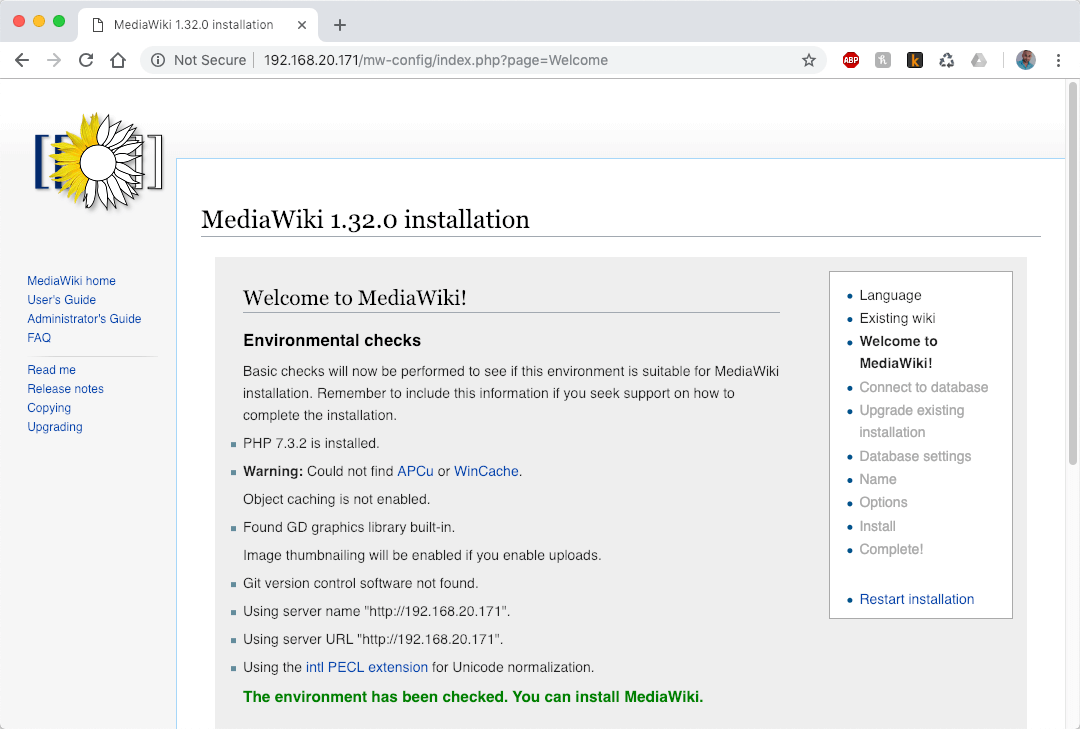
11. Next, the script will run environment check to ensure that all requirements are met:
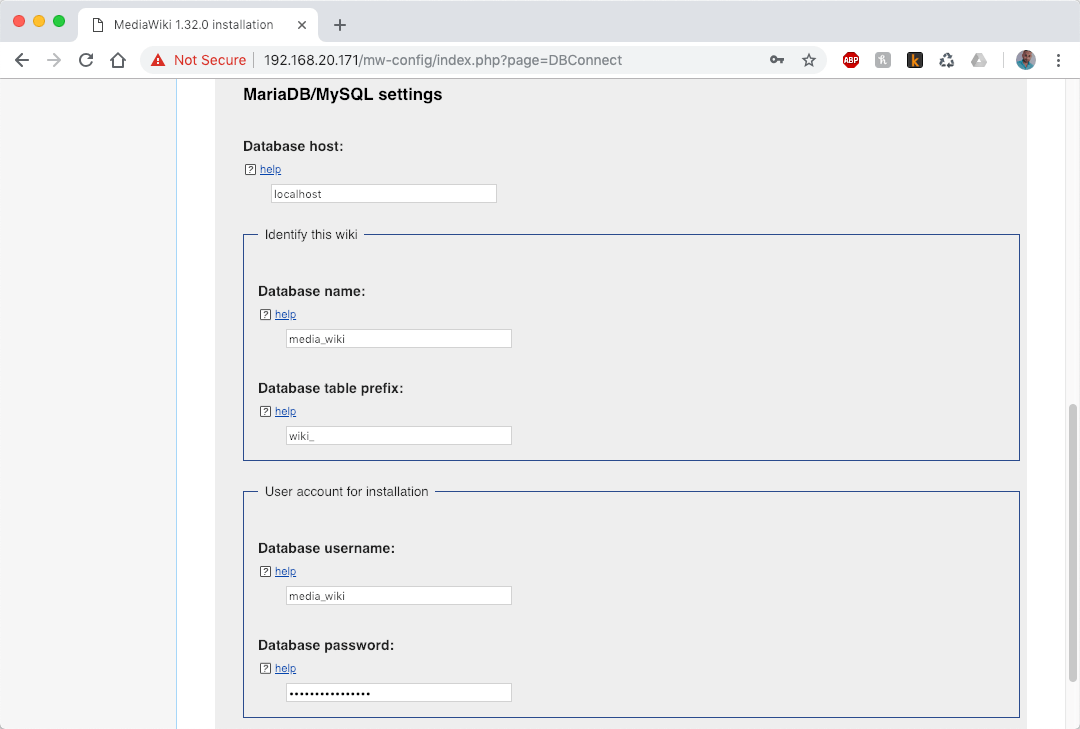
12. If you have followed the steps so far, the checks should be OK and you can proceed to the next page where you will setup the database details. For that purpose, use the database, user and password that you have created earlier:
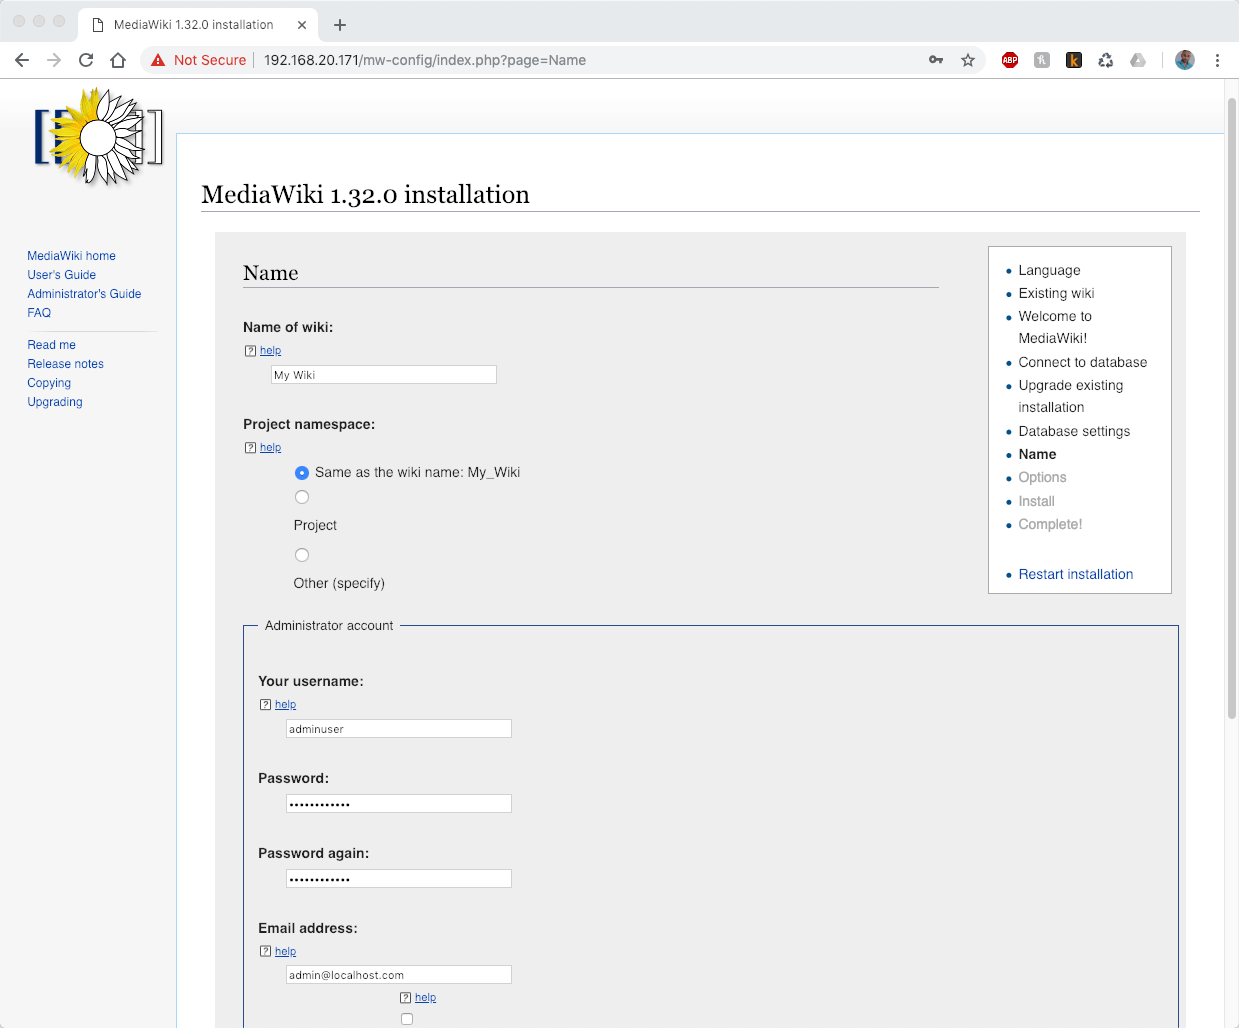
13. On the next page you can choose the database engine – InnoDB or MyIsam. I have used InnoDB. Finally you can give your wiki a name and create administrative username and password by filling the necessary fields.
14. Once you have filled the details click continue. On the next screens, you can leave the default settings, unless you want to make any other custom changes.
When you complete those steps, you will be provided with a file called LocalSettings.php. You will have to place that file in the directory root for your Wiki. Alternatively you can copy the contents of the file and create the file again. If you wish to copy the file you can do:
# scp /path-to/LocalSettings.php remote-server:/var/www/html/
15. Now when you try to access http://youripaddress you should see the newly installed MediaWiki:
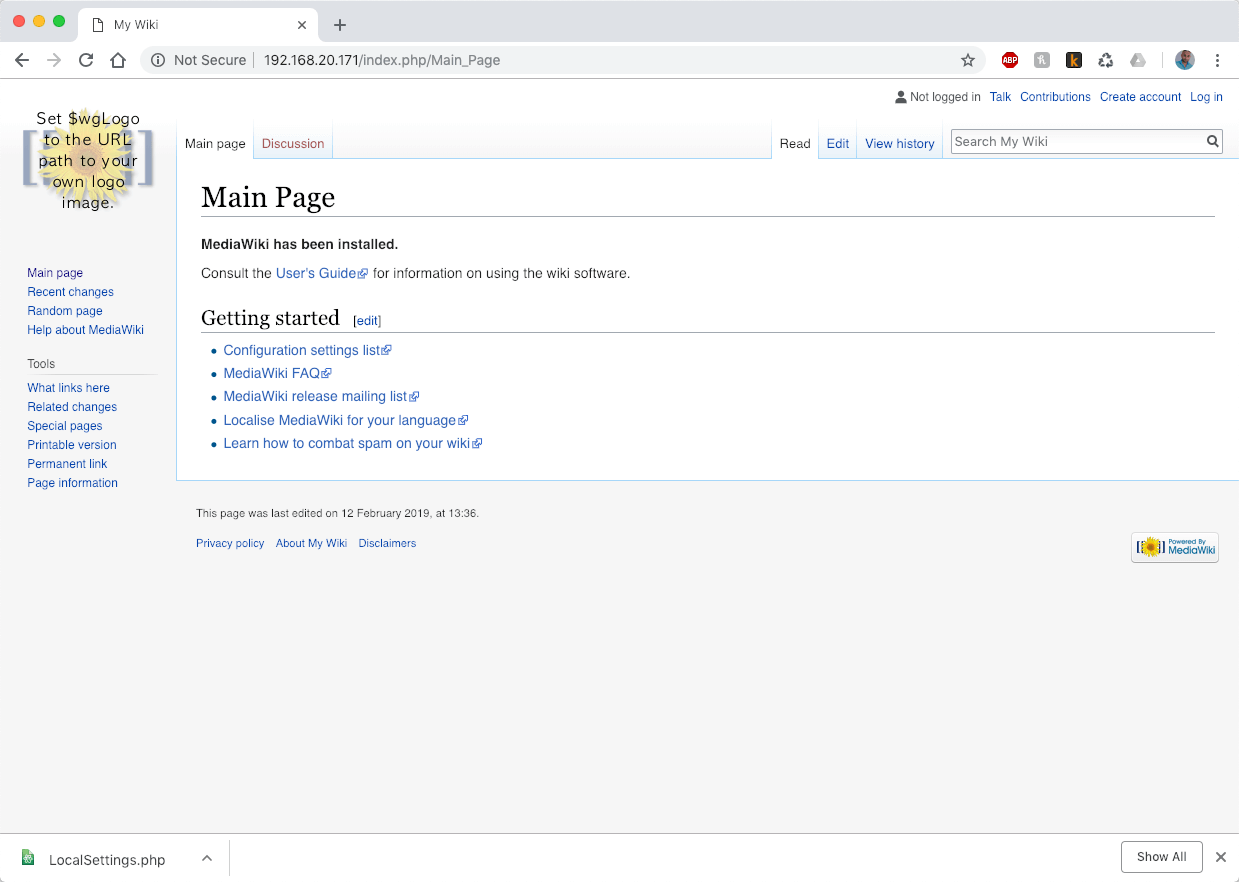
You can authenticate with your admin user created earlier and start editing your MediaWiki installation.
Conclusion
You now have your own Wiki page that you can manage and edit your pages. For using the correct syntax, you can check the MediaWiki documentation.