The Windows Subsystem for Linux (WSL) runs a GNU/Linux Environment which includes most of the command-line utilities and applications on top of Windows OS. Traditionally there are many ways we can set up Linux OS to work with. Either it can be a dual boot, running through VMWare or VirtualBox, or installing it as our main OS.
Now with Windows Subsystem for Linux, adds a new capability eliminating the overhead of setting up the OS from scratch. It is easy to set up with WSL and Install Linux and get going. To know more about the architecture of WSL refer to “Microsoft Build 2019 – BRK3068”.
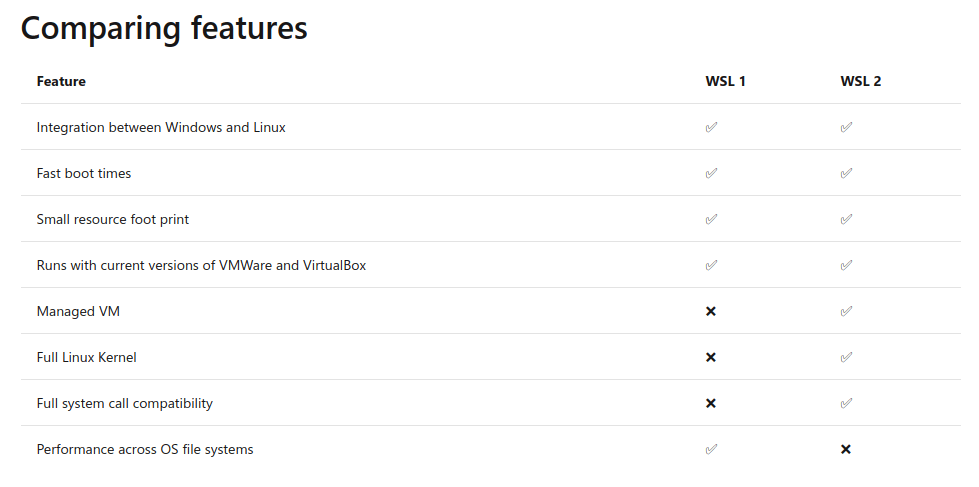
Here we will be setting up WSL 2 which is the latest release. WSL 2 is part of Windows 10, version 2004 released in May 2020. WSL 1 used a translation or compatibility layer between Linux and Windows while WSL 2 uses virtual machine technology to allow you to run a real Linux kernel directly on Windows 10.
Comparisons Between WSL 1 and WSL 2
Before Installing WSL 2 you need Windows 10, Version 1903, Build 18362, or higher.
Enable the Windows Subsystem and Virtual Machine for Linux
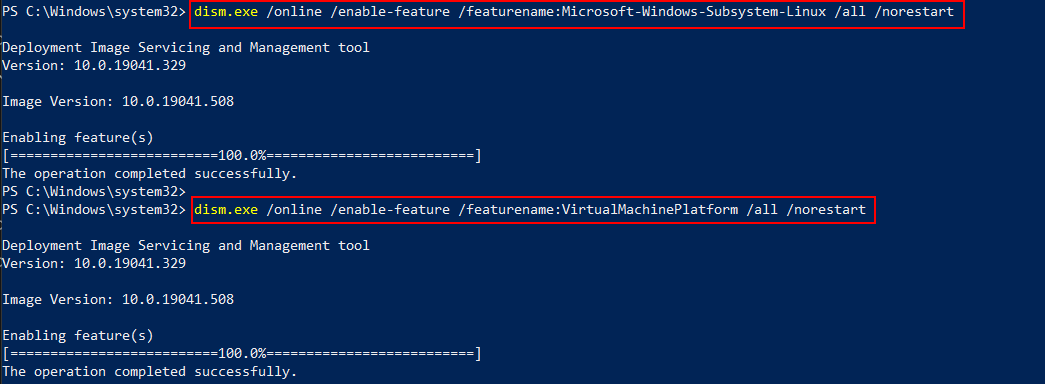
You must first enable the “Windows Subsystem for Linux” and Virtual Machine Platform optional features before installing any Linux distributions on the Windows system. The WSL 2 uses Virtual Machine technology instead of a translation layer to communicate between Windows and Linux.
Open PowerShell as Administrator and run the following commands to turn on WSL and VM feature and reboot the system once.
Enable Windows Subsystem for Linux
dism.exe /online /enable-feature /featurename:Microsoft-Windows-Subsystem-Linux /all /norestart
Enable Virtual Machine for Linux
dism.exe /online /enable-feature /featurename:VirtualMachinePlatform /all /norestart
Install Your Linux Distribution of Choice on Windows
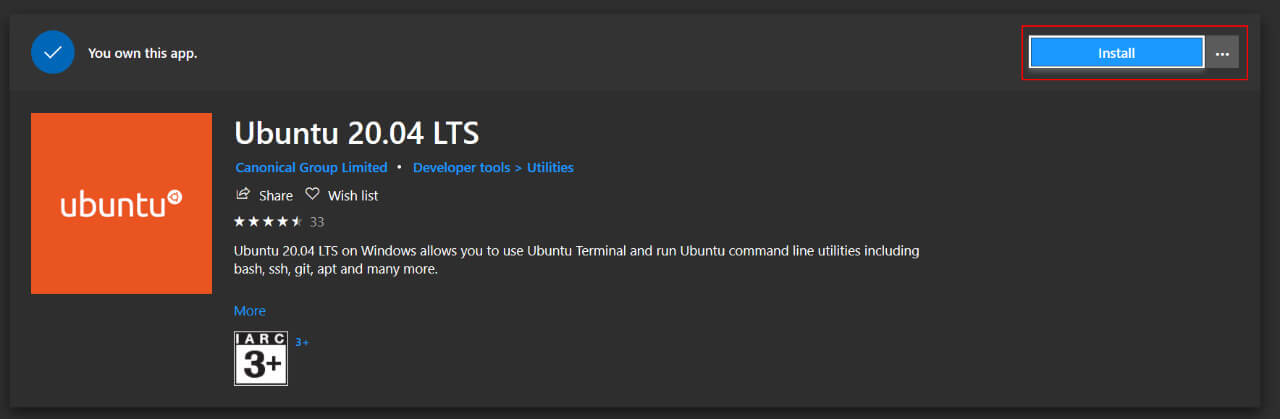
Open the Microsoft Store and select your favorite Linux distribution.
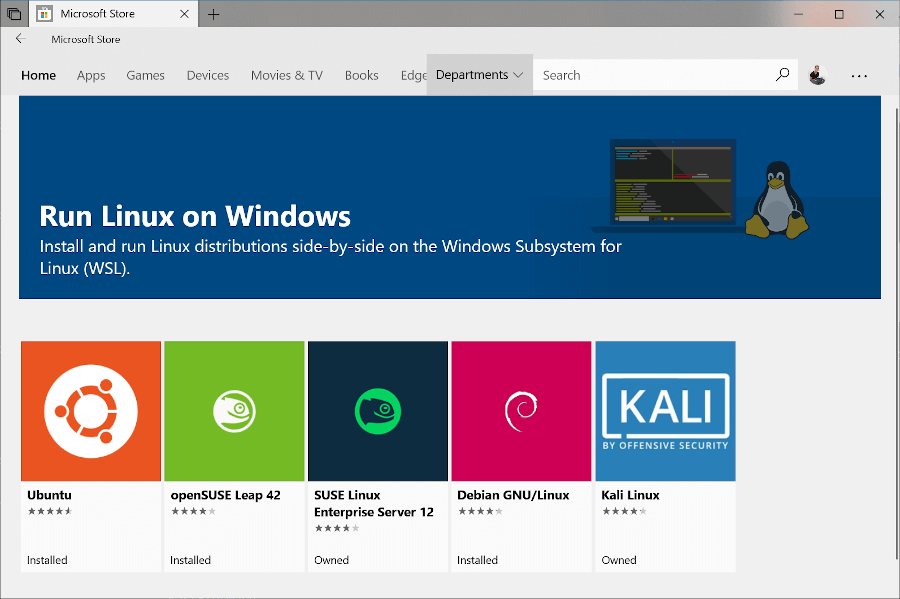
For demonstration purposes, we will install Ubuntu, go to Microsoft store, and in the search bar type Ubuntu.
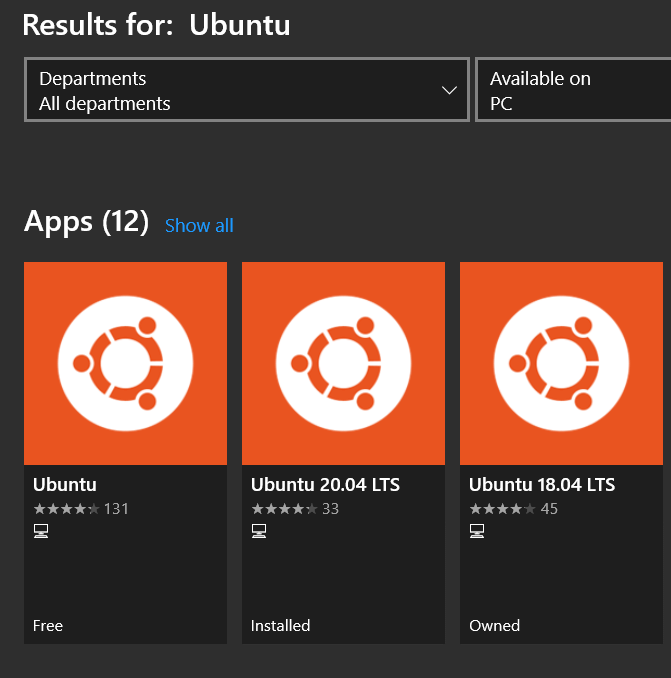
Open Ubuntu 20.04 LTS and click Install.
Launching Ubuntu is pretty easy in Windows. Just go to search and type Ubuntu, it will show all the installed versions of Ubuntu.
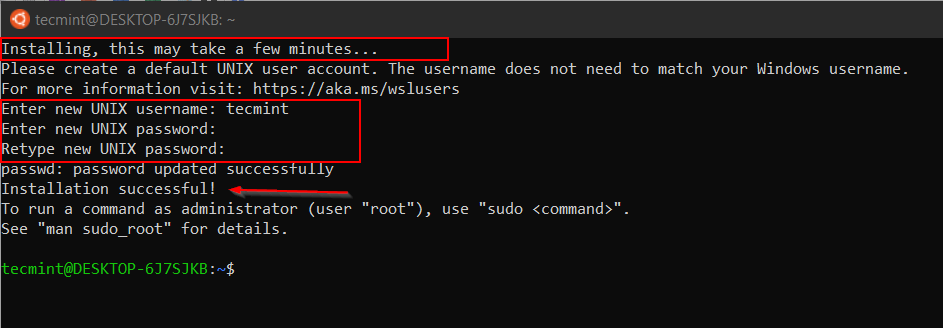
You can also pin that in the Windows Taskbar or if you are using a new Windows Terminal you can configure in it. Now we will launch Ubuntu 20.04. If you are launching it for the first time it will take some time to set up a few things at the backend then it will prompt us to set username and password.
At this stage, you may receive an error to install the kernel component. To fix this error you have to manually download and install WSL2 Linux Kernel.
0x1bc WSL 2 requires an update to its kernel component.
For information please visit https://aka.ms/wsl2kernel
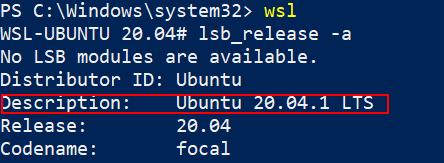
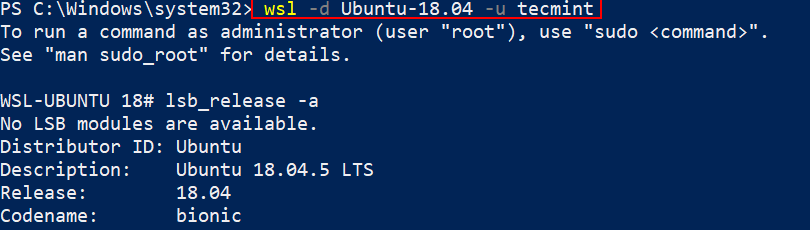
Now I have configured both 18.04 and 20.04 in the same way as shown in the previous section. Open the shell and type the following command to check the Distribution and Release of your Ubuntu.
lsb_release -a

Now we are done with installing Ubuntu on Windows. Within less time we can have a functional distro where we can start installing tools and packages like docker, ansible, git, python, etc. as per our requirement.
Learn Windows Subsystem Commands for Linux Distro
There are few options we can use to launch our Linux Distribution directly from PowerShell or CMD prompt.
1. Type the following command, which will show the list of options we can use along with wsl.
wsl -help
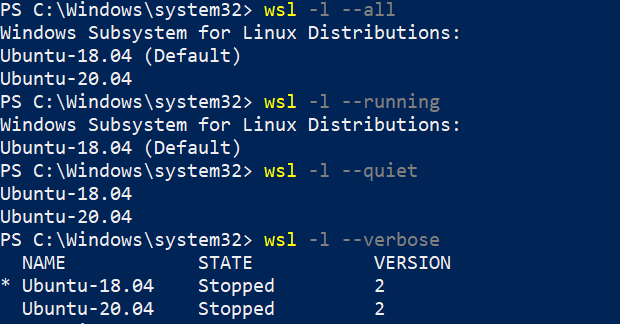
2. Check the installed version of distribution by running the command the following command.
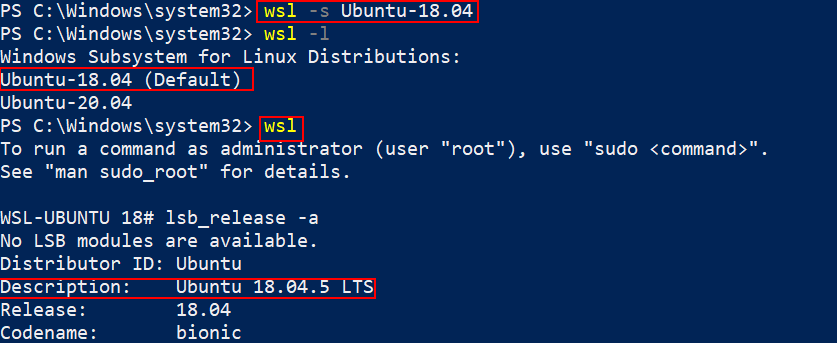
wsl -l

From the output of this command, you can see two versions of Ubuntu is installed and Ubuntu 20.04 is set to be launched as default.
3. Default Distribution (Ubuntu 20.04) can be launched by simply typing.
wsl
4. Change the default Linux distribution by running the command.
wsl -s Ubuntu-18.04
5. Connect to specific distribution with a specific user by running the command.
wsl -d Ubuntu-18.04 -u tecmint
6. We can pass a few flags along with the "wsl -l" command to check the status of the distribution.
wsl -l --all– List all distributions.wsl -l --running– List only distributions that are currently running.wsl -l --quiet– Only show distribution names.wsl -l --verbose– show detailed information about all distributions.
7. By running the following command, we can check what WSL version my Linux Distribution is running with.
wsl -l -v
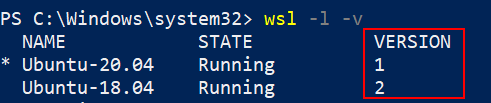
My Ubuntu 20.04 is running with version WSL 1 since it is configured long back. I can convert that to WSL 2 by running the command.
wsl --set-version Ubuntu-20.04 2
This will take some time to complete and you can see “Conversion Complete” when WSL 1 is converted to WSL 2.

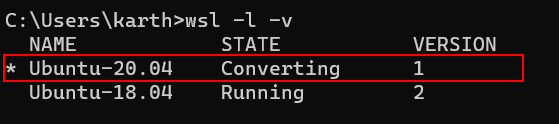
When running the --set-version command, open another PowerShell window and run wsl -l -v to check the current state. It will show as “Converting”.
wsl -l -v
You can run the following command again to check the current WSL version. Both my Distribution will now be running with WSL2.
wsl -l -v

We can also set WSL2 as the default version so when we install new distribution it will run with WSL2. You can set the default version by running.
wsl --set-default-version 2

In this article, we have seen how to configure WSL 2 to install Ubuntu Linux on Windows and learned a few command-line options that we can use from PowerShell or cmd prompt.
During Installation, you may encounter different errors which I have not encountered, in that case, the official troubleshooting document will be a good place to start. Also, take a look at the official FAQ section from Microsoft documentation to get more insight about WSL.


Because without the recognition of the usb ports, you cannot use the tokens, and since I use yubico 5 nfc for fido2 ssh authentication, I cannot access my ssh servers with token authentication.
Just… no. Accept defeat and run Windows, or do the right thing and run proper Linux. WSL is like taking a majestic eagle, symbol of freedom, and shoving it into a dingy cage. Totally defeats the purpose, and keeps you a hostage of the MSFT corporation.
Yeah no. This makes no sense if you’re a Windows user? the easier route is just VMWare or VirtualBox. All that command line stuff is just complicated for nothing. Even a noob would find the alternative route easier:
Find distro you like/want to test out.
Download the Linux .ISO file.
Setup VirtualBox and install it there, configure and launch Linux distro.
Voila’!…..you’re done!…..all without using PowerShell…and a lot of convoluted Windows commands. smh… sometimes…..we are the engineers of our own demise.
The big problem with wsl1 and wsl2 is the impossibility of sharing the USB ports.
Why would you want the extra layer of windows between the hardware and Linux? It runs perfectly well without it.