For those who cannot afford the hustles of developing websites from scratch, there are now several content management systems (CMSs) such as WordPress that you can take advantage of to set up blogs as well as complete websites with a few clicks.
WordPress is a powerful, free, and open-source, highly pluggable, and customizable CMS that is being used by millions around the world to run blogs and fully functional websites.
It is easy to install and learn, especially for persons who do not have prior website design and development knowledge. With millions of plugins and themes available, developed by an active and dedicated community of fellow users and developers, that you can utilize to tailor your blog or website to work and look just the way you want.
Requirements:
- A dedicated Ubuntu server with a registered domain name, I suggest you go for Linode hosting, which offers $100 credit to try it for free.
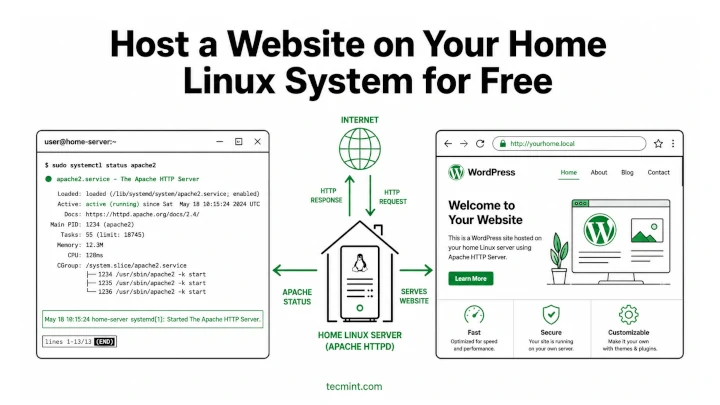
In this post, we shall run through the various steps you can follow, to install the latest version of WordPress on Ubuntu 20.04, Ubuntu 18.04, and Ubuntu 16.04 with LAMP (Linux, Apache, MySQL, and PHP) stack.
Install LAMP Stack on Ubuntu Server
First, we shall uncover the various steps for the installation of the LAMP stack before progressing to install WordPress.
Step 1: Install Apache Web Server on Ubuntu
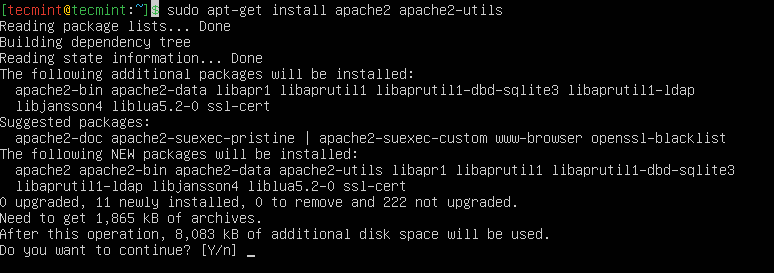
First, update and upgrade the software package list and then install the Apache webserver using the following commands.
$ sudo apt-get update
$ sudo apt-get upgrade
$ sudo apt-get install apache2 apache2-utils
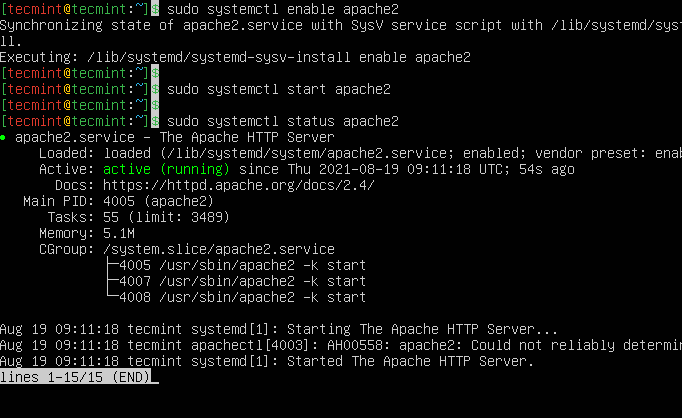
We need to enable the Apache2 web server to start at system boot time, as well as start the service and verify the status as follows:
$ sudo systemctl enable apache2
$ sudo systemctl start apache2
$ sudo systemctl status apache2
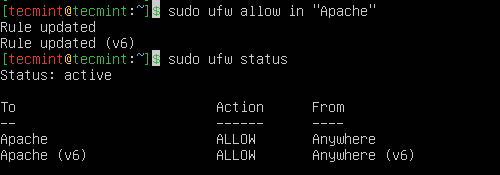
Once you’ve started Apache, you then need to allow HTTP traffic on your UFW firewall as shown.
$ sudo ufw allow in "Apache"
$ sudo ufw status
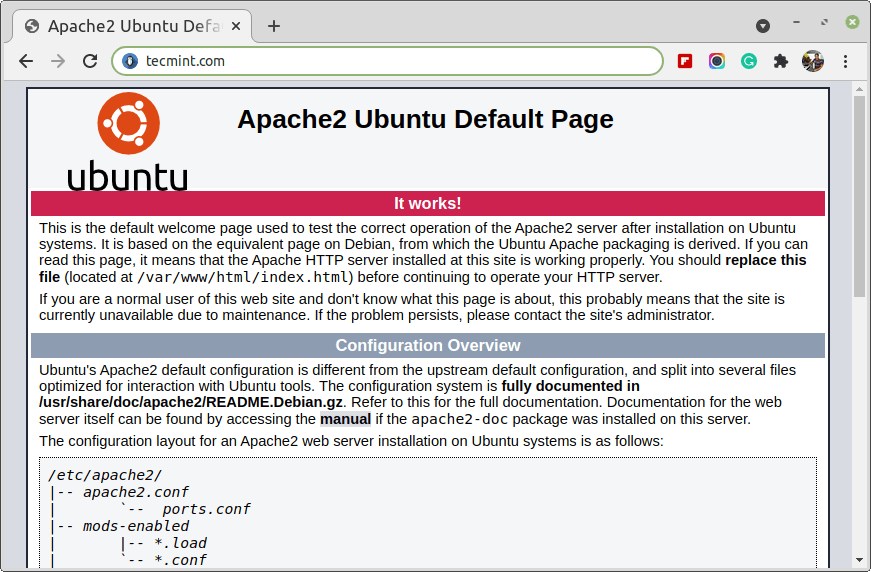
To test whether the Apache server is running, open your web browser and enter the following URL in the address bar.
http://server_address
OR
http://your-domain.com
The Apache2 default index page will be displayed in case the webserver is up and running.
Note: The Apache default root directory is /var/www/html, all your web files will be stored in this directory.
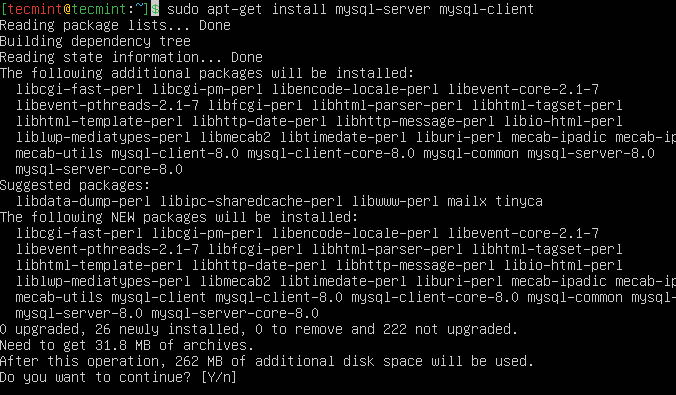
Step 2: Install MySQL Database Server
Next, we need to install the MySQL database server by running the command below:
$ sudo apt-get install mysql-client mysql-server
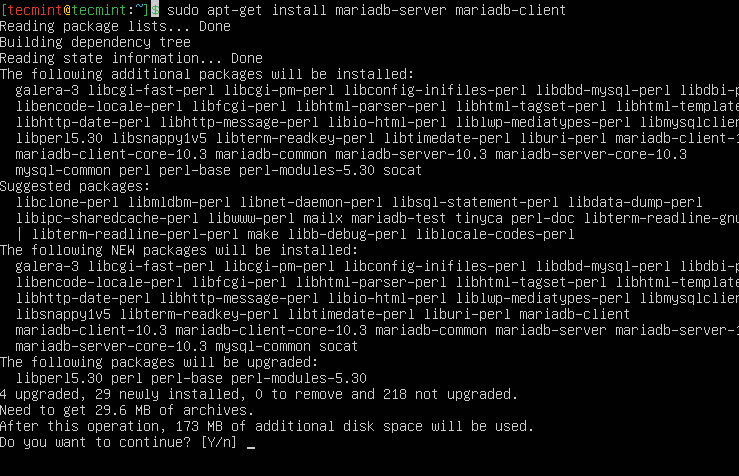
If you want to install MariaDB, you can install it using the following command.
$ sudo apt-get install mariadb-server mariadb-client
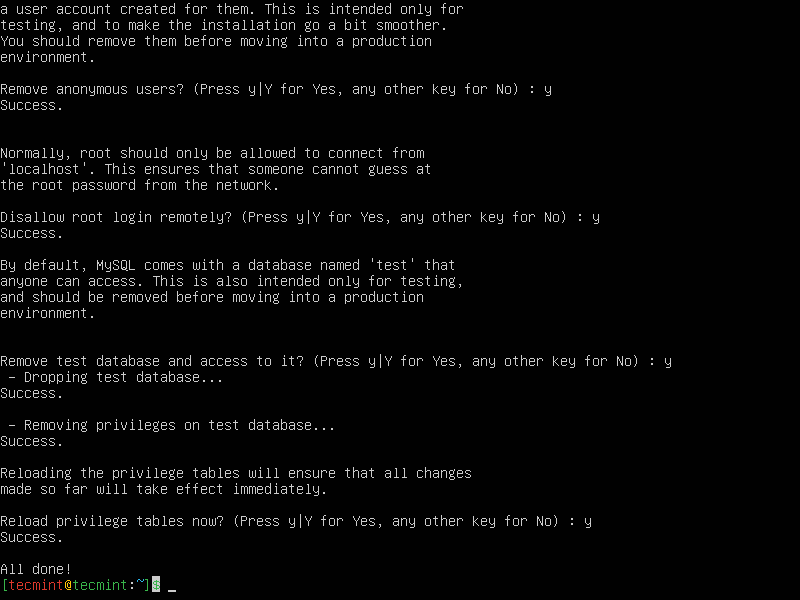
Once the database server is installed, it is strongly advised that you run a security script to remove insecure default settings and protect your database system.
$ sudo mysql_secure_installation
Firstly, you will be asked to install the ‘validate_password’ plugin, so type in Y/Yes and press Enter and also choose the default password strength level.

For the remaining questions, press Y and hit the ENTER key at each prompt.
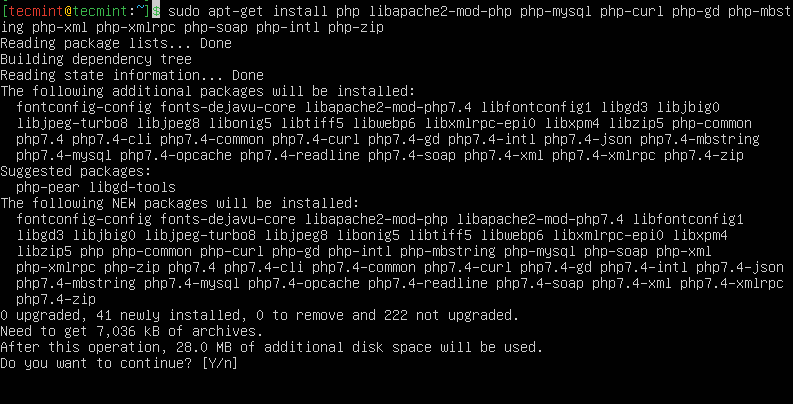
Step 3: Install PHP in Ubuntu
Last but not least, we shall install PHP and a few modules for it to work with the web and database servers using the command below:
$ sudo apt-get install php libapache2-mod-php php-mysql php-curl php-gd php-mbstring php-xml php-xmlrpc php-soap php-intl php-zip
Once PHP and all required extensions are installed, you need to restart Apache to load these new extensions.
$ sudo systemctl restart apache2
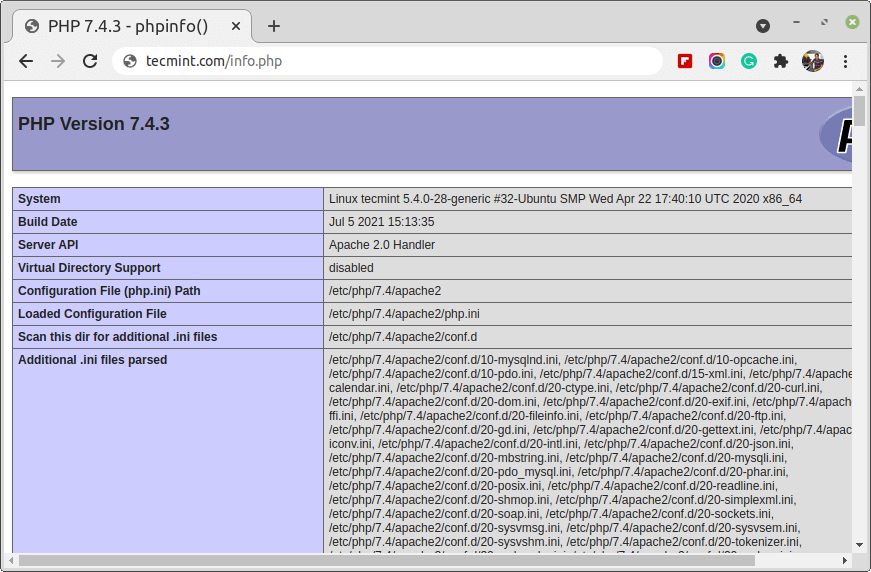
Furthermore, to test if php is working in collaboration with the webserver, we need to create a info.php file inside /var/www/html.
$ sudo vi /var/www/html/info.php
And paste the code below into the file, save it, and exit.
<?php
phpinfo();
?>
When that is done, open your web browser and type in the following URL in the address bar.
http://server_address/info.php
OR
http://your-domain.com/info.php
You should be able to view the php info page below as a confirmation.
Step 4: Install WordPress in Ubuntu
Download the latest version of the WordPress package and extract it by issuing the commands below on the terminal:
$ wget -c http://wordpress.org/latest.tar.gz
$ tar -xzvf latest.tar.gz
Then move the WordPress files from the extracted folder to the Apache default root directory, /var/www/html/:
$ sudo mv wordpress/* /var/www/html/
Next, set the correct permissions on the website directory, that is give ownership of the WordPress files to the webserver as follows:
$ sudo chown -R www-data:www-data /var/www/html/
$ sudo chmod -R 755 /var/www/html/
Step 5: Create WordPress Database
Execute the command below and provide the root user password, then hit Enter to move to the mysql shell:
$ sudo mysql -u root -p
At the mysql shell, type the following commands, pressing Enter after each line of a mysql command. Remember to use your own, valid values for database_name, database user, and also use a strong and secure password as databaseuser_password:
mysql> CREATE DATABASE wp_myblog;
mysql> CREATE USER 'username'@'%' IDENTIFIED WITH mysql_native_password BY 'password';
mysql> GRANT ALL ON wp_myblog.* TO 'username'@'%';
mysql> FLUSH PRIVILEGES;
mysql> EXIT;

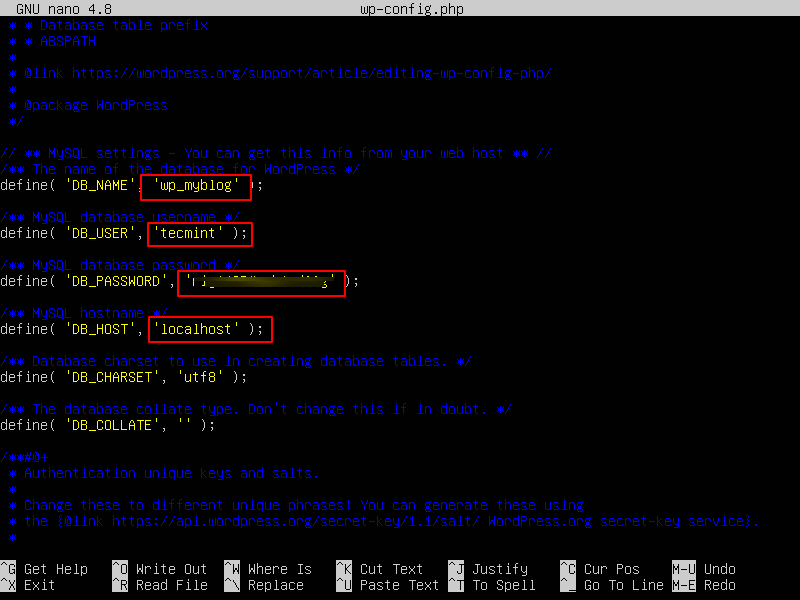
Go the /var/www/html/ directory and rename existing wp-config-sample.php to wp-config.php. Also, make sure to remove the default Apache index page.
$ cd /var/www/html/
$ sudo mv wp-config-sample.php wp-config.php
$ sudo rm -rf index.html
Then update it with your database information under the MySQL settings section (refer to the highlighted boxes in the image below):
Afterward, restart the web server and mysql service using the commands below:
$ sudo systemctl restart apache2.service
$ sudo systemctl restart mysql.service
Open your web browser, then enter your domain name or server address as shown.
http://server_address/info.php
OR
http://your-domain.com/info.php
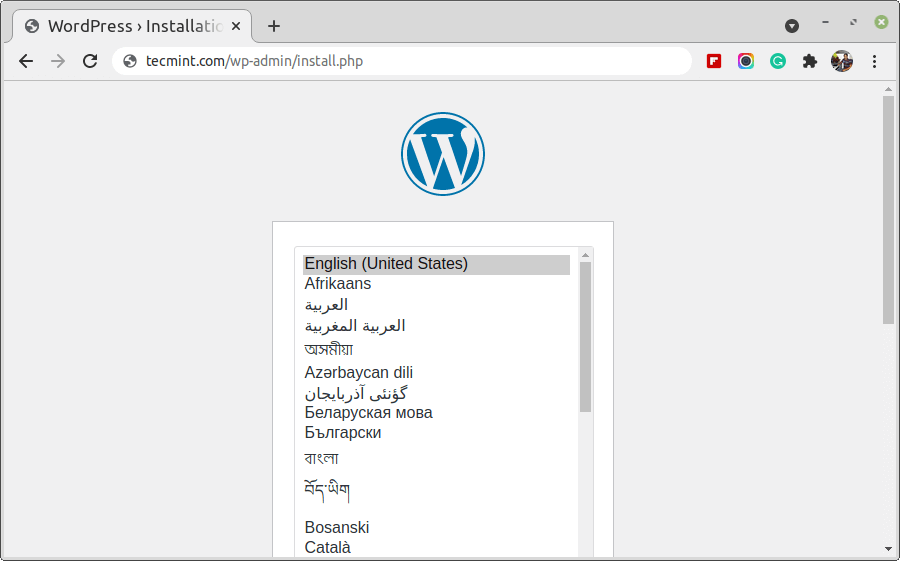
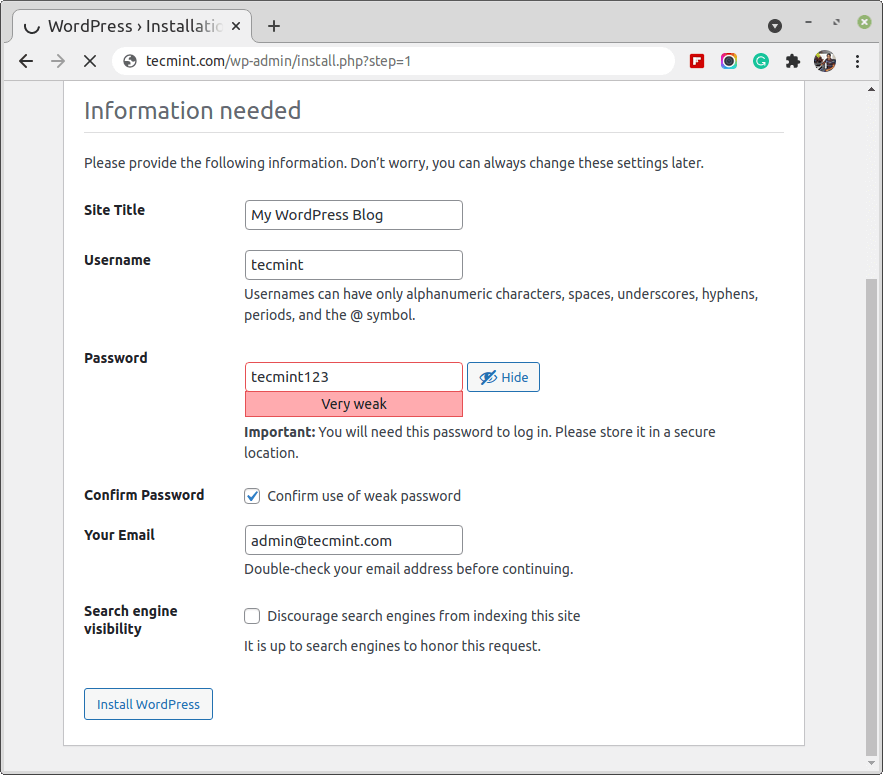
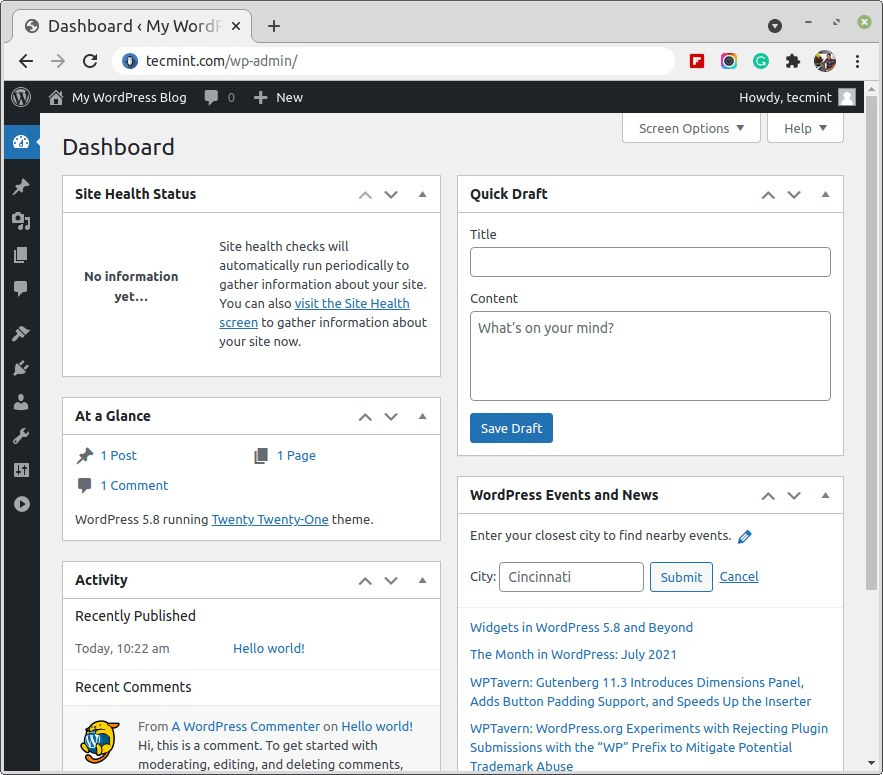
You will get the welcome page below. Read through the page and click on “Let’s go!” to proceed further and fill in all requested on-screen information.
Hoping that everything went on just fine, you can now enjoy WordPress on your system. However, to express any concerns or ask questions concerning the steps above or even provide additional information that you think has not been included in this tutorial, you can use the feedback section below to get back to us.


Hi,
Everything worked fine until the end when I got en error of 500.
Any idea why?
Hi, I installed this and it runs perfectly when I access it from my local IP.
But i can not access it when typing my domain. Can you help me?
Hey! I am hosting different sites on my server. After following the tutorial I reach a 404, here’s my apache file:
    # The primary domain for this host
    ServerName mysite.xyz
    # Optionally have other subdomains also managed by this Virtual Host
    ServerAlias mysite.xyz *.mysite.xyz
    DocumentRoot /var/www/html/mysite.xyz/public_html

        Require all granted
        # Allow local .htaccess to override Apache configuration settings
        AllowOverride all
        Order allow,deny
        Allow from all

    # Enable RewriteEngine
    RewriteEngine on
    RewriteOptions inherit

    # Block .svn, .git
    RewriteRule \.(svn|git)(/)?$ - [F]

    # Catchall redirect to www.mysite.xyz
    RewriteCond %{HTTP_HOST}   !^www.mysite\.xyz [NC]
    RewriteCond %{HTTP_HOST}   !^$
    RewriteRule ^/(.*)         https://www.mysite.xyz/$1 [L,R]

    # Recommended: XSS protection

        Header set X-XSS-Protection "1; mode=block"
        Header always append X-Frame-Options SAMEORIGIN
Any idea what I am doing wrong here?
Please update this guide for Ubuntu 20.04.
The configuration commands for MySQL have been deprecated.
Thank you, great article in setting up WordPress on Linux.
You are the best…:)
@Ahmed
Welcome, thanks for the useful feedback.
Hi, After giving
mysql_secure_installation, I got this error:ERROR 2002 (HY000): Can't connect to local MySQL server through socket '/var/run/mysqld/mysqld.sock' (2 "No such file or directory")What should I do? I use Linux Mint. Thanks
@ambars
Check if the mysql service is running, it should be started automatically in Ubuntu:
Otherwise, start and enable it like this:
I had similar issues, just to add to future refs to this. Stop Nginx/Apache2 “sudo service apache2 stop” then “sudo service MySQL start” solves this issue.
like jayjay said, doing ‘sudo chmod -R 755 /var/www/html/‘ is a silly idea. You are giving read and execute permissions on everything to the world.
Better way of doing this would be:
# find /var/www/html -type d -exec chmod 0755 {} \;
# find /var/www/html -type f -exec chmod 0644 {} \;
Setting all directories to 755 and all files to 644. once you’re finished with the
.htaccessit also advised to chmod that to 600 too so you don’t even have read access from the world or group.Thank you for the blog, it works well, except the “due to “mv wp-config-sample.php wp-config.php” I was not able to get the page. so I revert the changes and give wp-config-sample.php.” issue.
Thank you! Thanks to you I was able to create my blog in WordPress :)
Regards!
@Multiselect
Welcome. Thanks for the feedback.
due to “
mv wp-config-sample.php wp-config.php” I was not able to get the page. so I revert the changes and give wp-config-sample.php. Then I only I am able to see given page.I had an error: bash: syntax error near unexpected token `’DB_NAME’,’ when updating MySQL information. Help me, please.
@Sultan
There is a difference between ‘DB_NAME‘ and ’DB_NAME’. Please cross-check this, in case you have copied and pasted.
I seem to have some sort of permission errors, I cannot publish pages, I get update failed when ever I try to add a new page
sudo chmod -R 755 /var/www/html/is not a good idea. You give executable status to ALL files.Then update it with your database information under the MySQL settings section (refer to the highlighted boxes in the image below):
I do not understand about this
Sorry for bad English
@SUTAN
The screenshot is not actually included but all you need to do in that step is enter database connection settings. Check out the command section(dark blue).
Followed all the steps but I am still seeing the Apache2 Ubuntu Default Page and not the WordPress welcome page. Any ideas?
@Leandri,
Remove default index.html page from Root directory.
Good article, but there is some problem how to connect WordPress with MySQL and how data can be retrieved from MySQL to WordPress and vice versa ??
@Onir
Go the /var/www/html/ directory and rename existing wp-config-sample.php to wp-config.php, then update it with your database information under the MySQL settings section. Refer to Step 5: Create WordPress Database.
Where is this MySQL “settings section“? When I try to use
define(...); while logged in, I get a syntax error. That part is extremely vague.Hi, everything worked well thanks, but when I’m in WordPress and go to customize the site I’m shown the Apache2 Ubuntu Default Page :( and not the site.
Hope you can help me.
Thanks
@Artem,
Remove that default Apache web page from that location..
Amazing! Thank you. Worked.
Delete the index.html in ‘/var/www/html‘ if you have the same issue.
I stopped at step 2 (with this error) in this guide :(
Do you have any solution to solve this error?
Thanks, Kim
@Kim,
Run the following command to fix these dependencies.
After running the command:
"sudo apt-get install -f".I tried to run the command:
"sudo apt-get install mariadb-server mariadb-client"again. But still got the same error.Is there other things that can solve this problem ??
Thanks, Kim
@Kim,
First remove the installed MariaDB using the following commands.
Once removed, try to install MariaDB again.
When i try the
http://server-address– it shows me the Apache Ubuntu default page, did I miss something?, I was able to access the config file thruhttp://server-address/wp-admin/setup-config.php.@Lester,
Please remove the default index.html page in /var/www directory.
I followed the instructions and this worked great! Built it on an EC2 Instance ion AWS and shut it down over night. When i restarted the server in the morning, It no longer starts the WP site. I have checked the services to ensure Apache and mySQL services are running.
I’m not a Linux engineer, but what else do i need to check to get it started?
It all installed fine :(
Thanks
@James,
Any error you getting on the browser while checking WordPress?
Had some issue at the PHP install a bit, but followed these instructions and got it working :-)
@seth
Oh, that’s great! We are glad that this worked well for you. Thanks for the feedback.
Cannot go any further..
@Dr2232,
Please set the MySQL password as explained in the article, and then connect to mysql.
Help please I am stuck on step 3 and I am getting the following error messages:
What should I do?
@Freeman,
Are you sure you are using Ubuntu 16.10 or 16.04? please confirm this first. If you are using older Ubuntu 14.04, then PHP 7 is not available from the standard Ubuntu repositories (2016-01-02).
You could use the PPA ppa:ondrej/php.
You forgot to delete index.html – Did you test your steps? Ubuntu 16!
@Catypus
Oh, yes, I tested but forgot to include it the guide. We shall update article to reflect this.
Hello,
I have setup vista CP + WP but i am getting issue to edit files through ftp and can’t upload images in admin.
I am having issues with restarting mysql. It says it failed because the control process exited with error code.
I installed wordpress on ubuntu and I am trying various plugins but how I will check plugin is working on website, I mean will it show changes just by writing IP address on browser or any other process to check plugins effect working or not .
@ashish
Refer to the documentation of a plugin, if you want to know how ti works or how to use it.
Last step
Enter
http://server-adress/wordpress
@Mr.S
Okay, thanks for the addition, but, adding wordpress parameter depends on your website root(where actual wordpress files are stored).
I think a missing step that everyone is likely to hit is the need to remove the “index.html” from the root directory. I removed and things got immediately better. The next hurdle for me is figuring out why the mod-rewrite rules are not working (or that’s what I’m assuming is happening) … basically anything outside the root directory is coming as not found.
Hi,
Thanks for sharing the information. I really need to setup a WordPress on my Linux server, I have one more Question is 512 ram is enough for WordPress on VPS server?
@Gurjeet,
At least you need 1GB of RAM to run a WordPress on a Linux VPS server.
At the final step when I enter my wordpress website it says THIS SITE CAN’T BE REACHED and my IP address took too long to respond.
This problem is driving me crazy PLEASE HELP!
@Ben
Ensure that there is connectivity to your server, if you are running a firewall, check if client requests are allowed via port 80(HTTP) to the web server. You can try pinging your server.
“then update it with your database information under the MySQL settings section (refer to the highlighted boxes in the image below):”
I got stuck at this step. Where should I do all these? Is it I have to go to mysql -u root -p and then type all those command?
@Sara
Do that in the wp-config.php file. Remember, you first have to create the database after running mysql -u root -p, then you add those settings(database host, database name, database username and user password) in the wp-config.php.
Thank you for your respond. When I proceed, I keep on getting the message below. Can you please help me once again?
Why do I keep getting this message when I try to update my database information?
@Sara,
When a file is not properly closed, it will create a temporary file with same name as extension .swp, deleting this file will solve problem.
I’m setting this up on a home server. I had LAMP installed already, and my server IP address would load my “index.html” file. After loading WordPress, it still loads the “index.html” file (so no changes from pre-installation.) If I rename the “index.html” file, then nothing loads. What have I missed in my configuration? I can’t get to the “Let’s Go” welcome page. Thanks!
@Benjamin
Remove the default Apache index.html page and you will get the WordPress page, something like this:
I was having the same problem as Benjamin and I followed your recommendation by removing the default Apache index.html page, now when I load my localhost page I just get an error page that says “Error establishing a database connection”. I followed the tutorial, or I thought I did, do you have any idea what the problem could be?
I have no experience on this, I got stuck on step 2 of step 1. When I type this into virtual box it as a command.
It does nothing, i get the enable part but nothing when i do start?
I am I suppose to type those in together then enter? if so how do you make it hit return to start a new line
@J
The command:
shows no output, to check if Apache2 server has been started yet, simply run this command:
Thanks.
Error establishing a database connection. I double and triple checked that my login details are right. I also checked that my database is up and running.
Only thing I’m not sure is that in:
mysql> GRANT ALL PRIVILEGES ON wp_myblog.* TO 'your_username_here'@'localhost' IDENTIFIED BY 'your_chosen_password_here';
should I include the
' 'or delete them and replace with my username just. The same question about' 'in the wp-config.php file.@kke
You can use the same username in wp-config file here, as long as that user is responsible for managing the wordpress database:
mysql> GRANT ALL PRIVILEGES ON wp_myblog.* TO ‘your_username_here’@’localhost’ IDENTIFIED BY ‘your_chosen_password_here’;
Works like a charm !
Great job putting this together.
@Venkatachalam
We are glad that this worked well for you, thanks for the feedback.
so can you please copy an example ?
I followed all the steps, but when I entered my server address in my browser it shows the apache2 default page index. Really need help. Thank you.
@Chris
Remove the default Apache index.html page and you will get the WordPress page.
Thank you so much. Very helpfull.
@Mohit
Welcome, many thanks for the feedback.
This blog save my day.. thanks a lot
@Rahul
We feel good to know this, thanks for the feedback.
Quick addition! When I want to, say, host 5 wordpress sites on this server, one will need to follow these directions here:
https://www.linux.com/blog/shared-hosting-your-web-server-multiple-virtual-hosts
If you could add this to your article, that would be VERY helpful for those looking to host several websites! :)
@Jack
Thanks for the recommendation, we will find a way to add instructions to host multiple wordpress sites to this article or prepare a whole new article.
THANK YOU! I have an IIS+PHP+Wordpress+MySQL setup, and host 9 websites from my house. I’d LOVE the stability and security of Linux as the backend, so I’m interested in making the leap! I’m marking this comment for follow-up via email. :) Thanks!
@Jack
Okay, Linux is great, stable, secure and flexible. I am pretty sure you will enjoy using it. Thanks for the feedback.
I am not able to edit my wp-config.php file as it has Read-Only permission. How do I edit it?
@Hemant
Use sudo command to gain root privileges:
$sudo vi /path/to/file
By doing this you are changing the permission to write also.
@spetto
Great, thanks for the addition.
When I tried to do this, I got a forbidden error.
@John
What did you try in particular? Or in what step did you get the error?
it’s okay now, I deleted the instance and set up a new wordpress site.
This was pretty great. I followed the step and could get wordpress running on my server. However, when I navigate to
http://server_address, I still get the apache test page not the wordpress landing page.@Nassar,
Remove the default Apache index.html page and you will get the WordPress page.
Thank you @Ravi. This worked.
I followed these directions using Ubuntu Server 16.04 LTS. When connecting from another computer, it tells me “Error establishing a database connection.” Any thoughts?
@Richard
Provide the correct database settings(host, database name, user and user password) in the wp-config.php file. Then try to connect once more.
This is by far the best explanation that I have seen for WordPress installation on Ubuntu Using LAMP Stack. Thank you very much. Very straight forward direction. Nicely written!
@msrobin
Welcome, we truly appreciate these kind words of appreciation. Thanks for following us.
I really found it helpfull , easy to reproduce steps!
Thanks
It seems your syntax is incorrect I copy and paste from your line:
define(‘DB_NAME’, ‘database_name_here’); /** MySQL database username */ define(‘DB_USER’, ‘username_here’); /** MySQL database password */ define(‘DB_PASSWORD’, ‘password_here’); /** MySQL hostname */ define(‘DB_HOST’, ‘localhost’); /** Database Charset to use in creating database tables. */ define(‘DB_CHARSET’, ‘utf8’); /** The Database Collate type. Don’t change this if in doubt. */ define(‘DB_COLLATE’, ”);
replace as you suggest but get the following error for all the entries
ERROR 1064 (42000): You have an error in your SQL syntax; check the manual that corresponds to your MySQL server version for the right syntax to use near ‘define(‘DB_COLLATE’, ”)’ at line
@callum
Please, open the file wp-config.php:
$sudo vi wp-config.php
Then change the settings(database name, user, user password, host etc…) according to your database server configurations.
Great tutorial until i get to the section “then update it with your database information under the MySQL settings section (refer to the highlighted boxes in the image below):”
I am sitting looking at command prompt how do i do the next section?
@callum
Create your wp-config.php file:
$sudo mv wp-config-sample.php wp-config.php
$sudo vim wp-config.php
open and configure your database information in there.
Very helpful, many thanks…
@Frank
Welcomes, many thanks for the feedback.
Nice post. It was so helpful to me. Thanks so much for shared your knowledge
@Felipe
Thanks for the kind words of appreciation, i glad that you found this article useful. Many thanks, also for following us.
So I followed the instructions and when I try to go to localhost I get a blank page. But the source for the page is as follows.
<?php
/**
 * Front to the WordPress application. This file doesn't do anything, but loads
 * wp-blog-header.php which does and tells WordPress to load the theme.
 *
 * @package WordPress
 */

/**
 * Tells WordPress to load the WordPress theme and output it.
 *
 * @var bool
 */
define('WP_USE_THEMES', true);

/** Loads the WordPress Environment and Template */
require( dirname( __FILE__ ) . '/wp-blog-header.php' );
What did I do wrong?
@Tom,
That means PHP not installed on the system, please follow the instructions carefully…
I’m new to the Linux OS and able to install my first php library i.e wordpress by myself. super easy to use instruction. Please keep up the good work.
Many Thanks
@Ravi
Welcome, thanks for the kind words of appreciation. We always intend to offer simple, easy-to-follow and useful instructions in out guides, for Linux users with a special consideration for newbies.
very good explaination
@srk
Many thanks for the kind words of appreciation.
Nice! thank you. just got WordPress installed on my new Mint server in Virtual Box on my MacBook pro
@Tech4Eleven.com
Welcome, many thanks for appreciating this piece of work and for the feedback as well.
Hello, thank you for this guide. Is this a good guide for a production server facing the internet? Are there any other steps that need to be taken in order to properly configure a production web server? Additional security, etc…
@Matt
It is a good guide for production server, however, though you also need additional security measures, tips or best practices not mentioned here.
If you need any support, do contact us at
[email protected].hi, how can add my domain on this server? i just install and the address is my ip address?
@juanita
You can set locally in the /etc/hosts file, as explained in this guide: https://www.tecmint.com/setup-local-dns-using-etc-hosts-file-in-linux/
This is a reliable method if you haven’t setup a DNS server.
Thank you! Easy, painless install on Ubuntu Mate 17.04 using this tutorial. The only additional step I needed to take was renaming the original Apache index.html page so that I would be directed to index.php by default.
@Brendan
Oh sure, we’ll add this to the guide. Thanks for reading, and for the feedback.
Shame you forgot to do it.
@Terence
No one is perfect, we sometimes forget the smallest things. However, though, we’ll update the article to include it.
Thanks for the feedback.
How did you do that please?
Thank you Aaron!
Great job easy installation and no problems.
Just had a small one with the mysql creating user and granting privileges.
@Mero
Many thanks for reading, and for the feedback.
One item that I found needs to be added into this is after creating the database, it helps to do a :
USE ; otherwise, MySQL doesn’t always change the database focus – this is particularly relevant if the password is wanting to be changed for the internal MySQL account.
Thanks for all your help. I was able to follow along on my up to date Linux Mint box up to the final steps of restarting the web server and mySQL:
When I enter that, I always get the same error message:
command not found
I have rebooted, but I still encounter the same problem. When I go to localhost, I still only get the Apache2 Ubuntu Default Page, not WordPress.
Second, for the step just above it, the config stage, I used the define DB_NAME, DB_USER and DB_PASSWORD from the actual online install of my site, although I presume at the fresh starting point it does not make much difference since the DB that will be used locally will be, well, local, and can have its own name, user and pw. So my question is this. Are we putting this info in there so that when WordPress does start up and go to create the DB, it uses that info provided?
Thanks so much for all your help and info!
Very nice and useful tutorial, hats off to you !!!
@Pascal
Hope you enjoyed every bit of the article, and thanks for the useful feedback.
Great article specially code + photo it helps a lot thanks..
@amin
Hope you enjoyed it, many thanks for the feedback.
Thanks for this awesome guide, it helped a ton! I had a problem trying to connect to WP server after installing everything and editing my wp-config.php file. After a while of trouble shooting I realized the build file required the presence of the wp-config-sample.php file. I changed the name back to that ( so basically I ignored the $ sudo mv wp-config-sample.php wp-config.php ) and it came out fine.
I am new to Linux and WordPress, this helped me out a lot! Should the user create unique authentication keys and salts for this?
@Isaac
Not really, you can use the same credentials(username and password) for logging into the system here, or else create a new user for the database; hope that is what you meant.
Many thanks for the feedback.
I love the conciseness of it. I’ve been working with *nix for years now and it’s great to have a simple article with clear commands; without any bloated discussion of why they should be run. I love that the lines don’t have a LF at the end so I can paste in without it executing. Keep it up!
@Gibbs
Hope you enjoyed reading it. We always intend to keep our articles simple, direct but with a lot of details to help a Linux user(especially with high consideration of newbies). Thanks a ton for the kind words of appreciation.
Very useful tutorial, totally hassle-free. Thanks a lot !
@Jérôme
Welcome, thanks for the useful feedback.
I am getting database error
checked config.php
ERROR ESTABLISHING A DATABASE CONNECTION
help me
@hari
Check your database connection settings(i.e host, database name, user username and password). Ensure that they are correct as explained in Step 5 of the guide.
Hello, it’s really helpful but i have a question, why whenever i want to open the home and it doesn’t come out.. can you help me?
@Tiara
If you still have the Apache default page in your web server root, remove it like this:
sudo rm /var/www/html/index.html
Then you should be able to view the home page.
Hi Aaron, Thanks a lot. Simply I can say that just follow steps and anyone can simply install wordpress. Thank you very much. Only point that we need to remove index.html file as after all done, it used to come to Apache page. Rest all great. I sorted out it by checking one of comment.
Once again thank you and wish you good luck… Cheers!!!
@Prashant
Welcome, hope you enjoyed the article. Our aim is to always make guides that are practical, simple, direct and effective for the reader. And many thanks for following us.
This worked pretty well, sometimes the copy paste adds an extra space in the .php file. The only thing I haven’t found a way to fix is when I try to add a theme that is zipped, PHP says the file is too big and the php.ini file needs an update.
well looked and there is no setting I can find that sets the max file size.. my file is 4 mb.. any ideas?
@Ed Terry
This is possibly as a result of allowed file upload size, you can change it in the php.ini file using the variable below(take note of your PHP version to find location of the config file):
sudo vi /etc/php/7.0/apache2/php.ini
upload_max_filesize = 2M(set this to an appropriate size)
why we are changing permissions as below?
sudo chown -R www-data:www-data /var/www/html/
@Vignesh
To change ownership of all files/sub-directories under /var/www/html to user www-data and group www-data. www-data is a user/group created specifically for web servers such as Apache.
Thank you VERY much for this free & detailed guide. I ran into a few bumps but I got it solved. You are the best. Thank you. It is people like you who put in the hard hours posting excellent documentation that makes life easy for the rest of us.
@Stephen
Welcome, hope you enjoyed it and many thanks for the useful feedback.
I did everything correctly but it still displays the ordinary apache2 page, the info.php thing worked but wordpress doesn’t
@ahmedhara
Remove the Apache default page like this:
sudo rm /var/www/html/index.html
HELP! i can’t put the php code on the vi editor…
@ariel
Simply open the info.php file and type the php code in the file as shown.
This is easily my favorite installation guide. It doesn’t miss a thing and is straight to the point. I think it took me less than five minutes to set up my desktop sandbox server.
I’ve done this before but always need a guide and this is my favorite
Thanks
@Joseph
Good to know, many thanks for appreciating our work and following us.
I have to thanks, Great job Aaron! This should be a template for other installation guides? It took literally 10 min to set up the WordPress on our server.
@Mahesh
Sure, welcome and thanks for the kind words of appreciation. Always remember to follow Tecmint for the best, up-to-date guides and more.
While uploading any file under WordPress, it asking to provide FTP details, so can you please tell me how to create FTP account and how to configure it properly?
@Bablu
Check out these tutorials:
1. How to Install and Configure FTP Server in Ubuntu
2. How to Install, Configure and Secure FTP Server in CentOS 7 – [Comprehensive Guide]
3. RHCSA Series: Installing, Configuring and Securing a Web and FTP Server – Part 9
Worked on the first try on ubutun 14.x
thanks!
@ubuntu user
Welcome, and many thanks for following us as well as the useful feedback.
My wordpress setup page is not loading. I even tried the fix from Anthony K above. Any suggestions?
“I also had to modify `/etc/php/7.0/apache2/php.ini`:
From:
short_open_tag = Off
To:
short_open_tag = On
To get the browser to load the WordPress page.”
@Mark
There could be a an issue with your configs, try to check and make sure they are correct. Alternatively, if you have the default web server page(.html), try to remove it.
I removed the index.html page from /var/www/html/ but the default Apache page still shows up. I’ve followed all of the steps carefully and they have gone smoothly, but the WordPress setup page still doesn’t appear.
@Evan
Did you use the correct URL, if not try using the one in the screenshot.
Thanks for responding. I fixed the issue by reinstalling WordPress. However, I was working on developing a WordPress theme when I refreshed the page to see the changes I made, and suddenly every WordPress page I visit (including wp-login.php) is just blank. I’m not sure what happened, all I did before refreshing was create a .css file in my theme’s folder.
I also had to modify `/etc/php7.0/apache2/php.ini`:
From:
To get the browser to load the WordPress page.
Thanks for the tutorial. Easy to follow. I did have a problem getting up the WordPress page when I entered http://server-address (in my case localhost). It bought up the apache default test page, so I had to go in and rename or delete the index.html file in /var/www/html. Page now comes up straight away.
The newest Ubuntu Server 16.04 LTS and their built-in LAMP stack required the following addition to the PHP section:
I’m not sure if that’s what solved my issue, or in combination with the following that I also did, before forgetting to restart apache2:
Disclaimer: I don’t know anything about Linux/UNIX/etc — I was just trying to get a little LAMP Ubuntu wordpress server going in Hyper-V. However, after PHP configuration, apache2 failed to start.
Cheers!
Excellent its very helpful
@Ashok
Many thanks for appreciating our efforts.
I’m trying to get through this process on a fresh Linux mint os. Step 3, creating the info.php inside /var/www/html I do the sudo vi command and get asked for the root password into the file. But for some reason when i paste the code provided I get this. And am unable to even save the file.
I have had success in the past installing, but everytime I see the Apache 2 Ubuntu Default Page, I’m right back to square 1. Could it be permissions? Or am I simply pasting this he wrong way? Any help would be greatly appreciated, even if you know another linux distribution that would ease the pain. I’m new to linux and had kali before mint, I like to keep it all open source as I cant really take the crap from windows anymore. Cheers and Thanks in advance.
@Charlie,
I think you not familiar with VI editor, better use nano editor to add the php code to info.php file under /var/www/html directory..
Great tutorial kudos! Probably the most error free experience I’ve had, however a couple of things went wrong for me.
1. WordPress was installed in my user folder and not /var/www/html
2. /var/www/html didn’t have permissions to rename/delete wp-config-sample.php so had to use:
Thanks
Don
I’ve gone through this Tutorial twice, and I keep getting the “Error establishing a database connection” Error, what could I be doing wrong/ how can I fix it?
@Jessie,
Please make sure that your MySQL database is running and also make sure that you’ve added correct MySQL database settings in wp-config.php file..
I got it working, I was using the computer name in the host name slot, once i figured out the error of my ways I got it working, Thanks!
After renaming wp-config-sample.php to wp-config.php you have mentioned “update it with your database system under MySQL settings section” where can i find it in Ubuntu ?
@Anirudhh,
You find under /var/www/html/ the wp-confing.php file, update it with the database settings.
What will be my database settings?
@Madhav
Use the settings in the article to guide you on defining settings(such as database_name, user_name, password,hostname etc) appropriate to your environment.
Can you add or explain how I would get a .Org or .Com to work with this. I am trying to set up a website and cannot figure this part out. I have my DNS record setup with my host. I just don’t know on Ubuntu what configs needs to be done.
Having my database connection info just setting in that file seems questionable. Are there any security concerns here?
@Jeff,
Nothing to worry, its usual that all database settings are placed in config file of application only, no security concerns it will not expose to world..
How can I do multiple installs in my Ubuntu desktop ? directories ?
@Mahade?
Simple, create directories and install WordPress on each directory with separate database.
Good tutorial, worked for me on 16.10 after also removing the Apache default page.
Hi
Thanks for the instructions, Unfortunately I am a newbie to Linux commands etc, I am having trouble copying and pasting this step.
Furthermore, to test if php is working in collaboration with the web server, we need to create a info.php file inside /var/www/html.
And paste the code below into the file, save it and exit.
When that is done, open your web browser and type in the this address http://server_address/info.php. You should be able to view the php info page below as a confirmation.
please can you advise me in lehmans terms how to do this?
sorry and thanks
Regards
Sean
I’ve followed these instructions and success fully installed WordPress. But when i click to the ‘Visit site’ link from the dashboard, it takes me to Apache2 default page instead of the wordpress welcome page. Can you help me to solve this ?
@Nena
Try to remove the Apache2 default page like so:
sudo rm /var/www/html/index.html
This should work.
Thank you , this worked
@NenaRahim
Welcome, thanks for the feedback.
I noticed a typo in step 4.
$ tar-xzvf latest.tar.gz
should read
$ tar -xzvf latest.tar.gz
there should be a space between tar and -xzvf
@Joe,
Thats really a good catch man, yes there should be a space between tar and
-xzvfoption, corrected in the writeup.I’ve followed these instructions twice from scratch. not sure what I’m doing wrong but when I go to http://server-address, it takes me to Apache2 default page “it works” instead of the wordpress welcome page. Any ideas on what I’m doing wrong? Thanks in advance
@Sunja
You need to remove the Apache2 default page like so:
sudo rm /var/www/html/index.html
This should work.
Thank you, this worked!
@Welcome, thanks for always staying connected to Tecmint.
May want to add that to the steps above! Thanks!
Thanks Aaron. You’ve got a typo in the tar process for the WP file: should be “tar -zxcf” not “tar-xzvf“. For newbies staring at the “tar-xzvf: command not found“, it’s confusing. A Google search turned up the answer, but it’s not readily apparent.
Also, if you change the name of the wp-config.sample.php file, WordPress won’t find it when it initially comes up. You’ll get a “Sorry, I need a wp-config-sample.php file to work from. Please re-upload this file from your WordPress installation.”
when you connect to WP from the browser. I changed it back and got the config screen. One more thing for newbies or the inattentive: when you go into the config file to change things, make sure you note that you are using your sql name (probably root)/password.
I used vi to make the changes, which was kinda’ nice to use again after 35 years (now where’s my cheat sheet… :^)
Bottom line, it works. Thanks and cheers,
-mark
@Mark
Welcome, and many thanks for the wonderful suggestions and feedback. As for the typo, we shall correct it in the writeup. Lastly, i hope the newbies will find your insights useful and helpful.
Nice tutorial. How to make multiple wordpress installations?
@Askar,
Thanks for finding it useful article, for multiple wordpress installation, I just you to go for Ansible, here is the guide that shows how to install multiple wordpress installations automatically..
https://www.tecmint.com/automate-wordpress-installations-in-multiple-linux-servers-using-ansible/