Managers of web projects often need to protect their work one way or another. Often people ask how to password protect their website while it is still in development.
In this tutorial, we are going to show you a simple, but effective technique how to password protected web directory when running Nginx as web server.
In case you are using Apache web server, you can check our guide for password protecting a web directory:
Requirements
To complete the steps in this tutorial, you will need to have:
- Nginx web server installed
- Root access to the server
Step 1: Create User and Password
1. To password protect our web directory, we will need to create the file that will contain our encrypted username and password.
When using Apache, you can use the “htpasswd” utility. If you have that utility installed on your system, you can use this command to generate the password file:
# htpasswd -c /path/to/file/.htpasswd username
When running this command, you will be asked to set a password for the above user and after that the .htpasswd file will be created in the specified directory.
2. If you don’t have that tool installed, you can create the .htpasswd file manually. The file should have the following syntax:
username:encrypted-password:comment
The username that you will use depends on you, choose whatever you like.
The more important part is the way that you will generate the password for that user.
Step 2: Generate Encrypted Password
3. To generate the password, use Perl’s integrated “crypt” function.
Here is an example of that command:
# perl -le 'print crypt("your-password", "salt-hash")'
A real life example:
# perl -le 'print crypt("#12Dfsaa$fa", "1xzcq")'
Now open a file and put your username and the generated in string it, separated with semicolon.
Here is how:
# vi /home/tecmint/.htpasswd
Put your username and password. In my case it looks like this:
tecmint:1xV2Rdw7Q6MK.
Save the file by hitting “Esc” followed by “:wq”.
Step 3: Update Nginx Configuration
4. Now open and edit the Nginx configuration file associated with the site you are working on. In our case we will use the default file at:
# vi /etc/nginx/conf.d/default.conf       [For CentOS based systems]
OR
# vi /etc/nginx/nginx.conf                [For CentOS based systems]


# vi /etc/nginx/sites-enabled/default     [For Debian based systems]
In our example, we will password protect the directory root for nginx, which is: /usr/share/nginx/html.
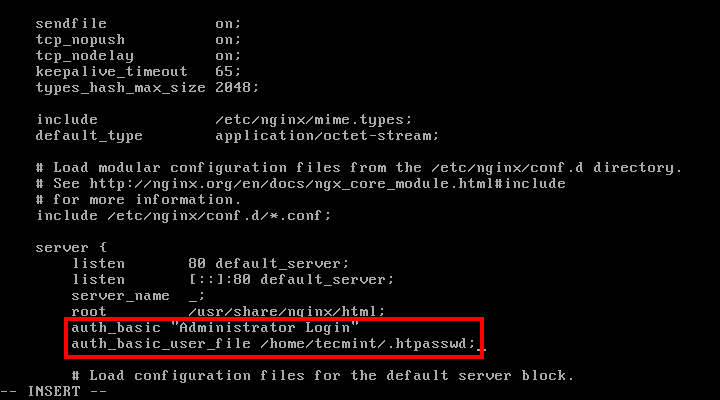
5. Now add the following two lines section under the path you wish to protect.
auth_basic "Administrator Login";
auth_basic_user_file /home/tecmint/.htpasswd;
Now save the file and restart Nginx with:
# systemctl restart nginx
OR
# service nginx restart
6. Now copy/paste that IP address in your browser and you should be asked for password:
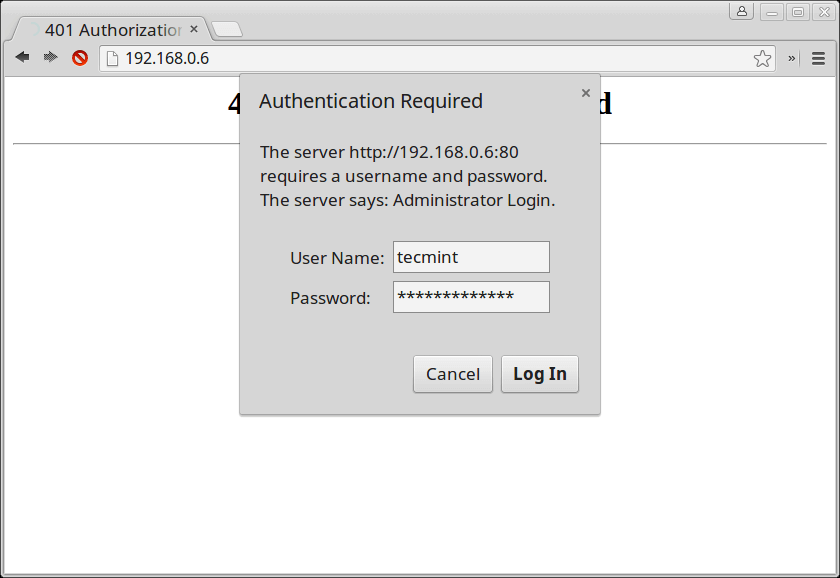
That’s it! Your main web directory is now protected. When you want to remove the password protection on the site, simply remove the two lines that you just added to .htpasswd file or use the following command to remove the added user from a password file.
# htpasswd -D /path/to/file/.htpasswd username


Apache uses the Require user directive to demand the user, which allowed me to control access to a specific directory, but I don’t see nginx handling it and any user who is in the .passwd file can access any directory, they know of some alternative solution for nginx?
semicolon is missing at the “auth_basic” line
In step three, you mention semicolon. Shouldn’t that be colon?