MySQL Replication is a process where data from one server is automatically copied or replicated onto another backup server in real-time. Replication provides redundancy and fault tolerance and gives the user peace of mind that even after a failure in the master server, data can still be recovered.
In this tutorial, you are going to learn how to configure and set up a MySQL master-slave replication on an RHEL 8 Linux.
Prerequisites
In the setup, we are going to have two servers running RHEL 8 with the following IP addresses.
Master = 173.82.120.14
Slave  = 173.82.115.165
Let’s now proceed and see how we can configure the MySQL Master-slave replication setup on RHEL 8 Linux.
Step 1: Install MySQL on Master and Slave Server
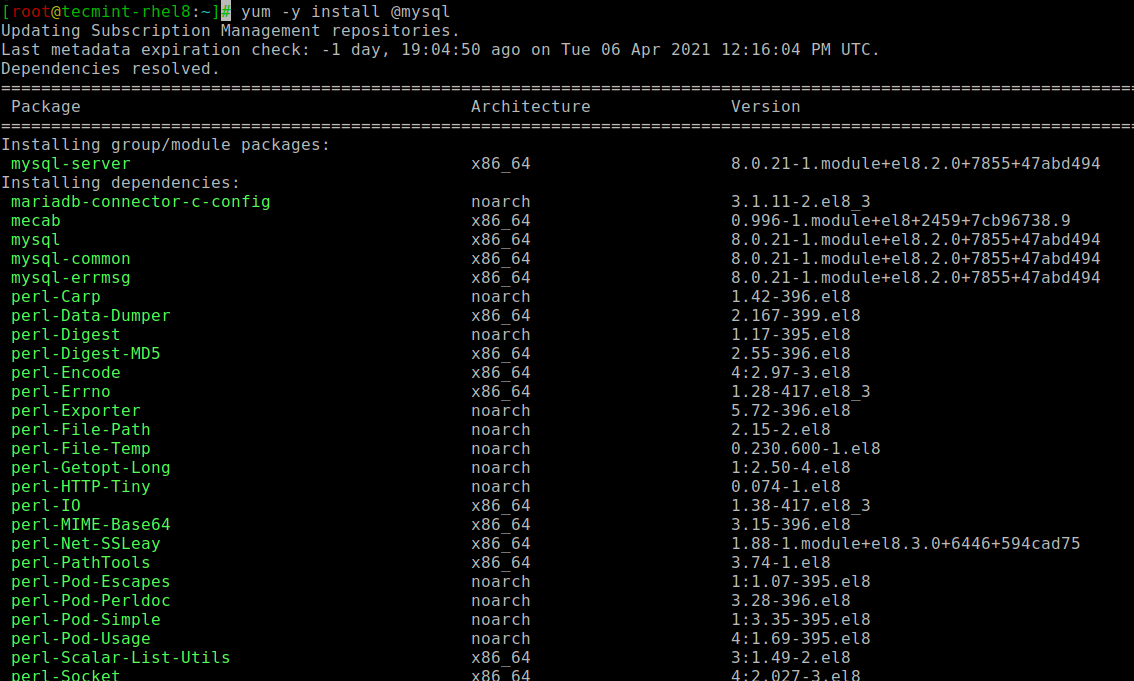
1. The latest version of the MySQL 8.x is already included in the default repository of RHEL 8 and you can install it using the following yum command.
# yum -y install @mysql
Step 2: Secure MySQL on Master and Slave Server
After the installation, you should now start the MySQL service you just installed and make it start automatically each time you start the server. Therefore, use the following command.
# systemctl enable mysqld
# systemctl start mysqld
Next, you need to secure your MySQL installation by running the security script that comes with several security-based operations such as setting the root password, removing anonymous users, disallow root login remotely, remove test database and reload privilege.
# mysql_secure_installation
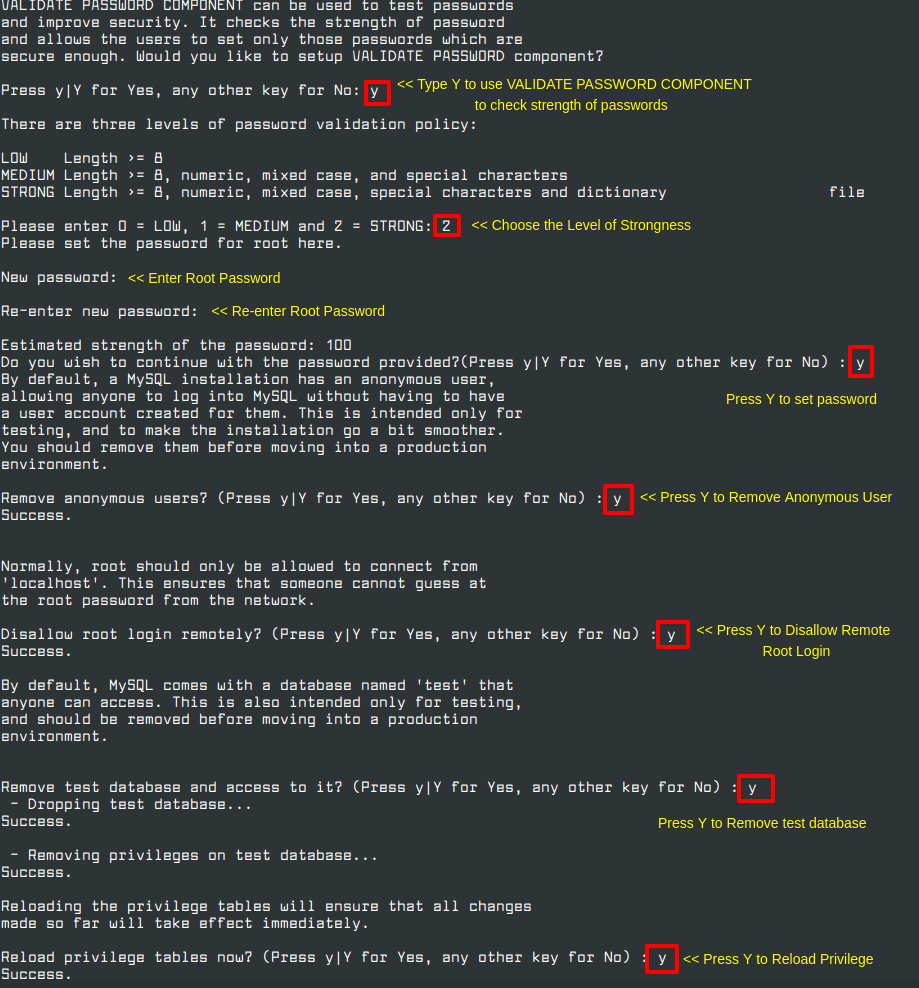
Proceed with the rest of the prompt and answer Yes to all the questions so set up the server to best security practices.
Step 3: Configuring the MySQL Master Server
To start off with the Master server configuration, proceed and open the MySQL configuration file by typing the following command.
$ sudo vim /etc/my.cnf
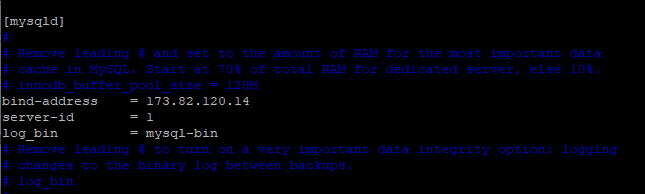
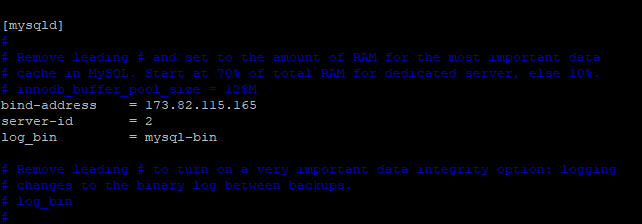
In the mysqld section, append the lines as shown below.
bind-address =173.82.120.14
server-id = 1
log_bin =mysql-bin
Finally, restart the MySQL service.
$ sudo systemctl restart mysqld
Now we are going to create a replication user. Therefore, log in to your MySQL master server as the root user and provide the password.
$ sudo mysql -u root -p
Now run the following commands to create the replica user while at the same time granting the slave access to the user. Remember to use your machines IP address.
mysql> CREATE USER 'replica'@'173.82.115.165' IDENTIFIED BY 'strong_password';
mysql> GRANT REPLICATION SLAVE ON *.*TO 'replica'@'173.82.115.165';

Now, you are going to type the following command that will print the binary filename and position.
mysql> SHOW MASTER STATUS\G
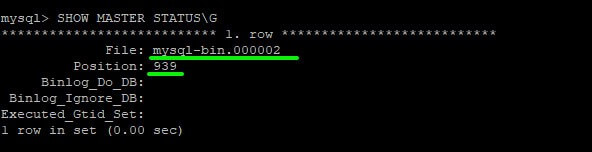
Remember to take note of the resulting filename msql-bin.000002 and its position 939.
Step 4: Configuring the MySQL Slave Server
Just like the process of setting up the master, you should make the following changes to the mysql slave configuration file.
$ sudo vim /etc/my.cnf
Append the following lines in the configuration file under mysqld section.
bind-address =173.82.115.165
server-id = 2
log_bin =mysql-bin
Restart the server.
$ sudo systemctl restart mysqld
Now the next step is to configure the slave server to replicate from the Master server. Log in to MySQL server.
$ sudo mysql -u root -p
First, stop the replication threads.
mysql> STOP SLAVE;

Now, run the following query that will configure the slave to replicate from the Master server.
mysql> CHANGE MASTER TO
    -> MASTER_HOST='173.82.120.14' ,
    -> MASTER_USER='replica' ,
    -> MASTER_PASSWORD='Jupiter@2030' ,
    -> MASTER_LOG_FILE='mysql-bin.000002' ,
    -> MASTER_LOG_POS=939;
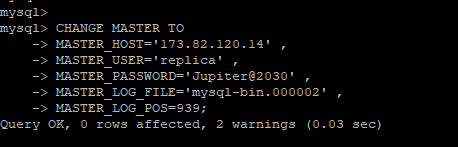
Make sure you are using the correct IP username and password. Also, use the filename and position that you got from the master server.
Finally, type the following command to start the slave threads.
mysql> START SLAVE;

Step 5: Testing MySQL Master-Slave Replication
At this point, you have completed the configuration of both the master and slave servers. We now need to verify if the configuration is working and if the replication can take place.
To do this, head out to the master server and log in to the MySQL database server.
$ sudo mysql -u root -p
Create a sample database.
mysql> CREATE DATABASE replication_database;

Now head out to the Slave server and again, log in to the MySQL database server.
$ sudo mysql -u root -p
Now list all the databases using the following command.
mysql> SHOW DATABASES;
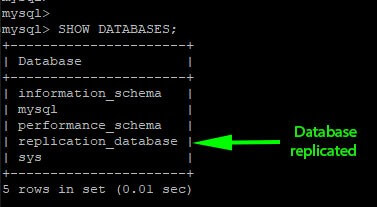
If you see the created database, then the MySQL Master-Slave Replication setup works.
Conclusion
Replication is a fairly simple process that can be easily done. In this guide, you have learned how you can create a replication of a MySQL master to slave in an RHEL 8 Linux.


Hi James, the replication went well, but I didn’t see the database I created on the master node in the slave node.
Hi James,
With CentOS 7, is the same process?
Cheers.
~Chris
@Chris,
The same MySQL Master-Slave replication instructions also work on CentOS 7…
very helpful thanks.
I wonder what should be done here if we want to deploy GTID-based replication.
I moved from MariaDB 10.3 to MySQL 5.7.30 and faced some issues and fixed, then I started implementing the replication and it worked for me.
Thank you so mush.
Thank you for the feedback Ziad, I’m glad you found this tutorial helpful.
Hi James, thanks for your amazing post!
I try to do it in a testing environment, but could you share more details about version applications and operating systems?
Best regards |
Hey Fabio, In the setup, we used two instances of RHEL 8 and installed MySQL 5.7 in both cases.