KVM, (kernel-based Virtual Machine) is a free and opensource virtualization platform for the Linux kernel. When installed on a Linux system, it becomes a Type-2 hypervisor.
In this article, we look at how you can install KVM on Ubuntu 20.04 LTS.
Step 1: Check Virtualization Support in Ubuntu
Before installing KVM on Ubuntu, we are first going to verify if the hardware supports KVM. A minimum requirement for installing KVM is the availability of CPU virtualization extensions such as AMD-V and Intel-VT.
To check whether the Ubuntu system supports virtualization, run the following command.
$ egrep -c '(vmx|svm)' /proc/cpuinfo
An outcome greater than 0 implies that virtualization is supported. From the output below, we have confirmed that our server is good to go.

To check if your system supports KVM virtualization execute the command:
$ sudo kvm-ok
If the “kvm-ok” utility is not present on your server, install it by running the apt command:
$ sudo apt install cpu-checker
Now execute the “kvm-ok” command to probe your system.
$ sudo kvm-ok

The output clearly indicates that we are on the right path and ready to proceed with the installation of KVM.
Step 2: Install KVM on Ubuntu 20.04 LTS
With the confirmation that our system can support KVM virtualization, we are going to install KVM, To install KVM, virt-manager, bridge-utils and other dependencies, run the command:
$ sudo apt install -y qemu qemu-kvm libvirt-daemon libvirt-clients bridge-utils virt-manager
A little explanation of the above packages.
- The qemu package (quick emulator) is an application that allows you to perform hardware virtualization.
- The qemu-kvm package is the main KVM package.
- The libvritd-daemon is the virtualization daemon.
- The bridge-utils package helps you create a bridge connection to allow other users to access a virtual machine other than the host system.
- The virt-manager is an application for managing virtual machines through a graphical user interface.
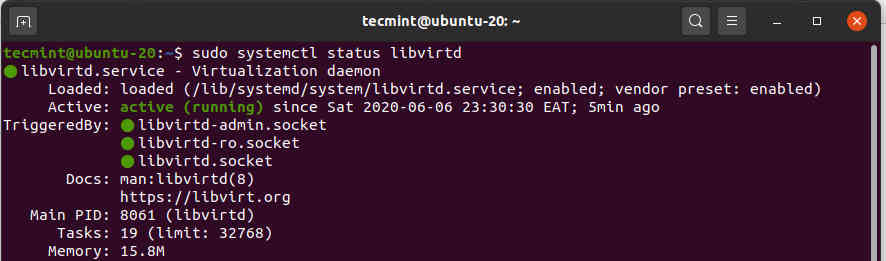
Before proceeding further, we need to confirm that the virtualization daemon – libvritd-daemon – is running. To do so, execute the command.
$ sudo systemctl status libvirtd
You can enable it to start on boot by running:
$ sudo systemctl enable --now libvirtd
To check if the KVM modules are loaded, run the command:
$ lsmod | grep -i kvm
From the output, you can observe the presence of the kvm_intel module. This is the case for Intel processors. For AMD CPUs, you will get the kvm_intel module instead.

Step 3: Creating a Virtual Machine in Ubuntu
With KVM successfully installed, We are now going to create a virtual machine. There are 2 ways to go about this: You can create a virtual machine on the command-line or using the KVM virt-manager graphical interface.
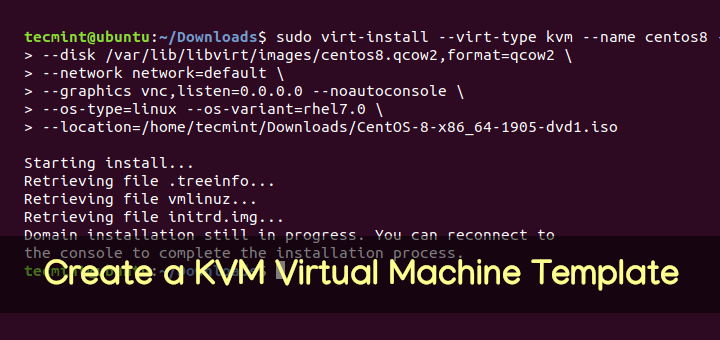
Create a Virtual Machine via Command Line
The virt-install command-line tool is used for creating virtual machines on the terminal. A number of parameters are required when creating a virtual machine.
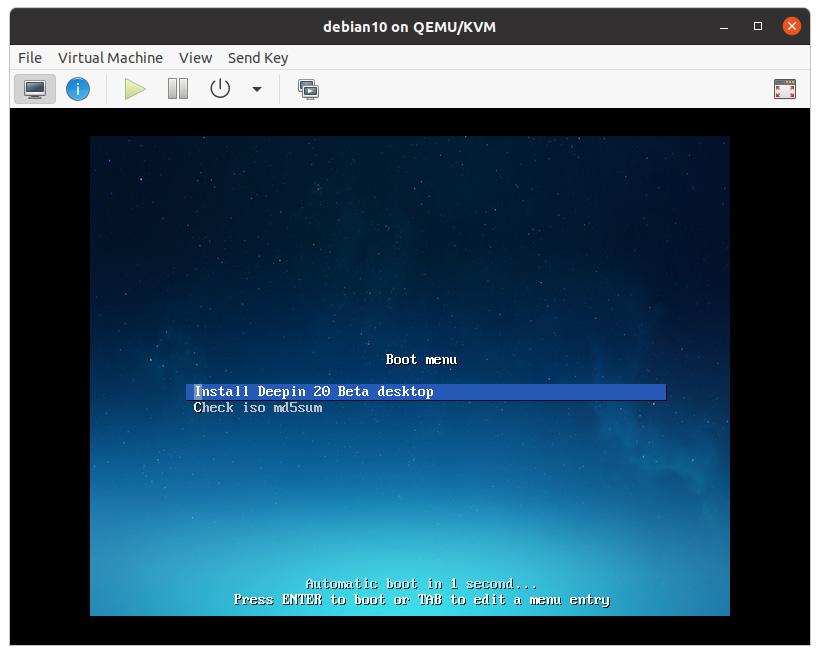
Here’s the full command I used when creating a virtual machine using a Deepin ISO image:
$ sudo virt-install --name=deepin-vm --os-variant=Debian10 --vcpu=2 --ram=2048 --graphics spice --location=/home/Downloads/deepin-20Beta-desktop-amd64.iso --network bridge:vibr0
The --name option specifies the name of the virtual machine – deepin-vm The --os-variant flag indicates the OS family or derivate of the VM. Since Deepin20 is a derivative of Debian, I have specified Debian 10 as the variant.
To get additional information about OS variants, run the command
$ osinfo-query os
The --vcpu option indicates the CPU cores in this case 2 cores, the --ram indicates the RAM capacity which is 2048MB. The --location flag point to the absolute path of the ISO image and the --network bridge specifies the adapter to be used by the virtual machine. Immediately after executing the command, the virtual machine will boot up and the installer will be launched ready for the installation of the virtual machine.
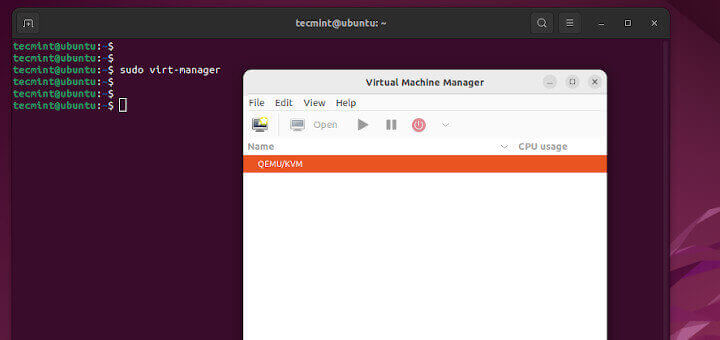
Create a Virtual Machine via virt-manager
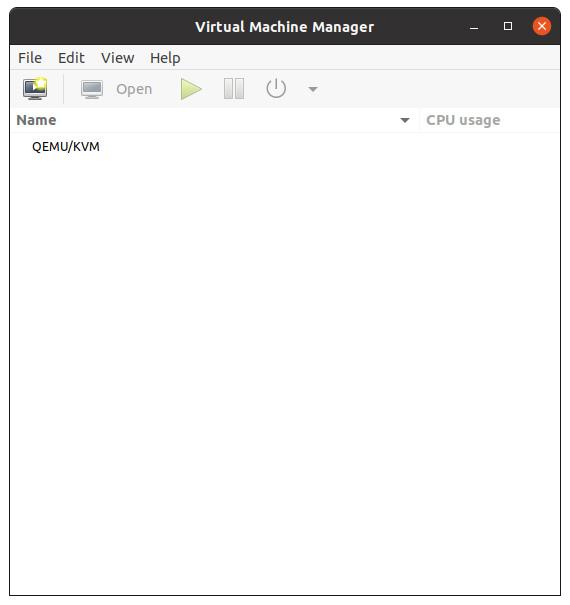
The virt-manager utility allows users to create virtual machines using a GUI. To start off, head out to the terminal and run the command.
$ virt-manager
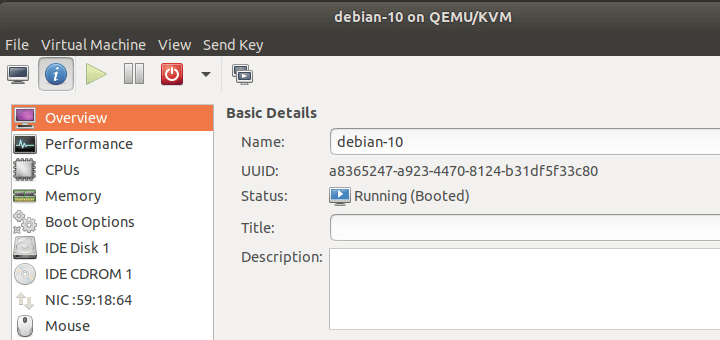
The virtual machine manager window will pop open as shown.
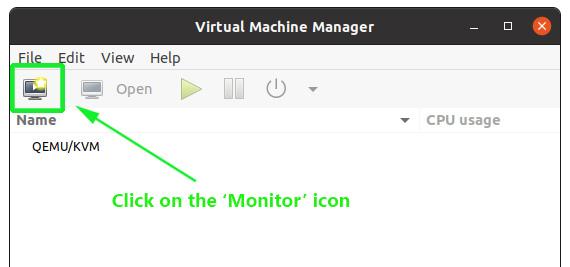
Now click the monitor icon to start creating a virtual machine.
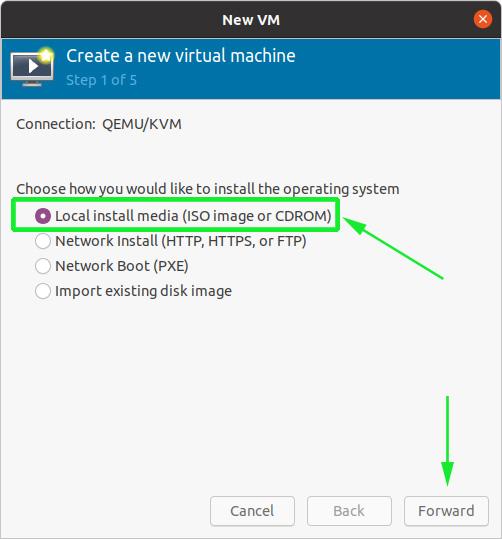
On the pop-up window, specify the location of your ISO image. In our case, the ISO image is located in the ‘Downloads’ folder in the home directory, so we’ll select the first option – Local Install Media ( ISO image or CDROM). Next, click the ‘Forward’ button to continue.
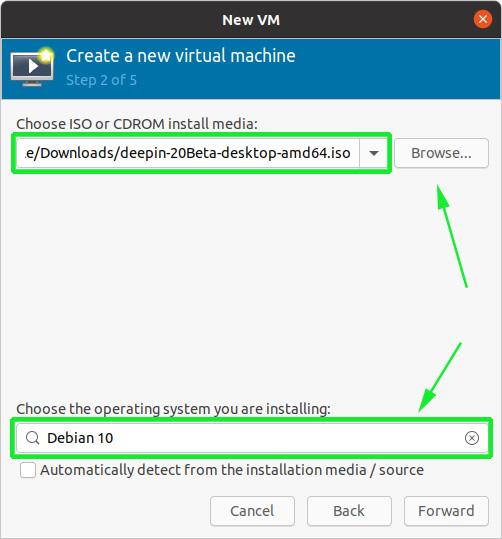
In the next step, browse to the ISO image on your system and directly below, specify the OS family that your image is based on.
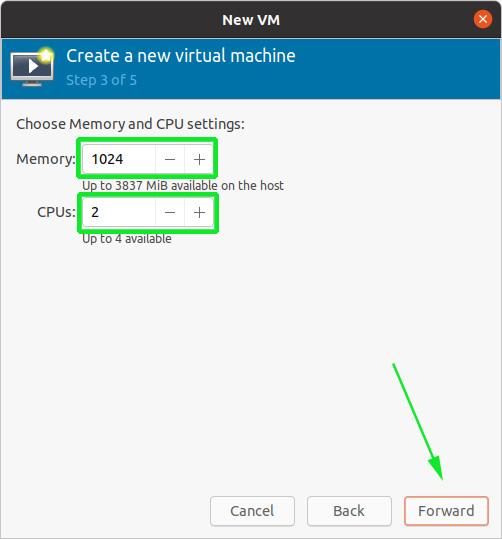
Next, select the memory capacity and the number of CPUs that your virtual machine will be allocated, and click ‘Forward’.
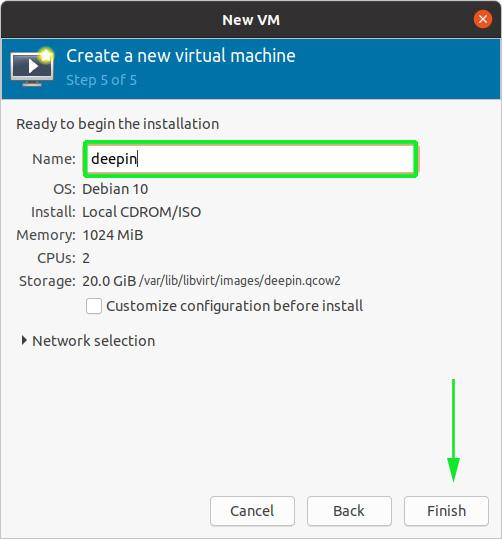
And finally, in the last step, specify a name for your virtual machine and click on the ‘Finish’ button.
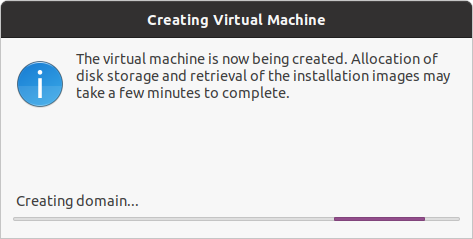
The creation of the virtual machine will take a few minutes upon which the installer of the OS you are installing will pop open.
At this point, you can proceed with the installation of the virtual machine.
And that’s how you go about installing KVM hypervisor on Ubuntu 20.04 LTS.


“libvritd“.
Network Boot (PXE) missing, from my new installation, Ubuntu 20.04, 20.10. Did I miss anything? Thanks and very much appreciate it.
From the output, you can observe the presence of the kvm_intel module. This is the case for Intel processors. For AMD CPUs, you will get the kvm_intel module instead.
simple feedback – you meant the latter “kvm_intel” to say “kvm_amd“.
I got this error while trying to follow this guide so I had to stop until I resolve this issue and move on to following the rest of the guide. this is for Ubuntu 20.10.
jd@jd-MacBookPro:~$ sudo apt install -y qemu qemu-kvm libvert-daemon libvirt-clients bridge-utils
Reading package lists… Done
Building dependency tree
Reading state information… Done
E: Unable to locate package libvert-daemon
jd@jd-MacBookPro:~$ sudo systemctl status libvirtd
Unit libvirtd.service could not be found.
jd@jd-MacBookPro:~$ sudo systemctl enable –now libvirtd
Failed to enable unit: Unit file libvirtd.service does not exist.
any suggestions to get through this ?
Try to install there this package:
There is minor correction required (very minor). In the “Create a Virtual Machine via virt-manager” section the highlighted portion shows command as virt manager ( actually it should be virt-manager, “-” is missed”
@Arun,
Corrected the command in the article…
Thanks
what is the safe way to shut down? I’ve installed MX-Linux several times, every time I wish to leave I go to the shut down from the virt interface checked to boot on host startup. I get message shut down failed.
Thanks for the help
scott
In many cases, you need to do “sudo usermod -aG libvirt-qemu myUser” to permit qemu access to iso files.
thanks so much for the help
You typed kvm_intel for AMD too LOL
and you made a lot of typos like “deeping” for Deepin … et cetera.
but thanks a TON
@Bonda,
Thanks, corrected in the article…
Why are you telling us to install `bridge-utils` if the tutorial doesn’t use it at all?
Thanks for this most helpful tutorial. I suppose they must go out of date fairly frequently, as I had previously followed another guide, but was unable to find the libvirt repositories using their method.
As of 13-September-20202, your method works for me.
Here are some suggestions to help make things a little smoother for newbies like me:
Thanks again,
Henry
libvirtd service is masked so it can not start.
Hi, great guide, another typo when we are checking the kvm module for amd you wrote that we should get kvm_intel and not kvm_amd.
Little typo in:
“To check if the KVM modules are loaded, run the command:”
but must be:
as shown in the picture below it.
@Marty,
Thanks, corrected the command in the article…