Oozie is an open source scheduler for Hadoop, it simplifies workflow and coordination between jobs. We can define dependency between jobs for an input data and hence can automate job dependency using ooze scheduler.
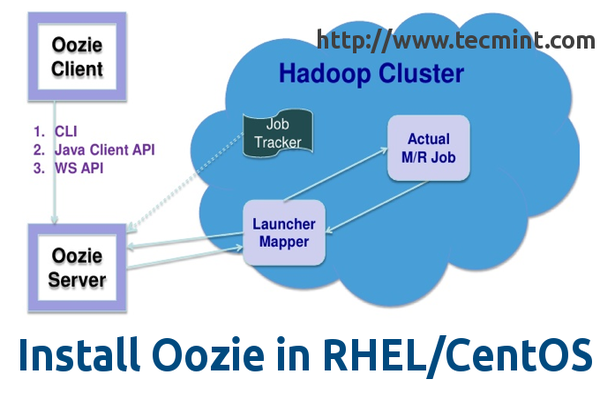
In this tutorial, I have installed Oozie on my master node (i.e. master as hostname and where namenode/JT are installed) however in production system oozie should be installed on separate Hadoop node.
The installation instructions are divided into two parts, we call it A and B.
- A. Oozie Installation.
- B. Oozie Configuration.
Let’s first verify system hostname, using following ‘hostname‘ command.
[root@master]# hostname

master
Method A: Oozie Installation on RHEL/CentOS 6/5
We use official CDH repository from cloudera’s site to install CDH4. Go to official CDH download section and download CDH4 (i.e. 4.6) version or you can also use following wget command to download the repository and install it.
On RHEL/CentOS 6
# wget http://archive.cloudera.com/cdh4/one-click-install/redhat/6/i386/cloudera-cdh-4-0.i386.rpm
# yum --nogpgcheck localinstall cloudera-cdh-4-0.i386.rpm

# wget http://archive.cloudera.com/cdh4/one-click-install/redhat/6/x86_64/cloudera-cdh-4-0.x86_64.rpm
# yum --nogpgcheck localinstall cloudera-cdh-4-0.x86_64.rpm
On RHEL/CentOS 5
# wget http://archive.cloudera.com/cdh4/one-click-install/redhat/5/i386/cloudera-cdh-4-0.i386.rpm
# yum --nogpgcheck localinstall cloudera-cdh-4-0.i386.rpm

# wget http://archive.cloudera.com/cdh4/one-click-install/redhat/5/x86_64/cloudera-cdh-4-0.x86_64.rpm
# yum --nogpgcheck localinstall cloudera-cdh-4-0.x86_64.rpm
Once, you’ve added CDH repository under your system, you can use following command to install Oozie on the system.
[root@master ~]# yum install oozie
Now, install oozie client (above command should cover client installation part however if not then try below command).
[root@master ~]# yum install oozie-client
Note: The above installation also configures oozie service to run at system startup. Good job! We are done with the first part of installation now let’s move to the second part to configure oozie.
Method B: Oozie Configuration on RHEL/CentOS 6/5
As oozie does not directly interact with Hadoop, we do not need any mapped configuration here.
Caution: Please configure all the settings while oozie is not running, that means you have to follow below steps while oozie service is not running.
Oozie has ‘Derby‘ as default built in DB however, I would recommend that you use Mysql DB. So, let’s install MySQL database using the following article.
Once you are done with the installation part, next move further to create oozie DB and grant privileges as shown below.
[root@master ~]# mysql -uroot -p
Enter password:
Welcome to the MySQL monitor.  Commands end with ; or \g.
Your MySQL connection id is 3
Server version: 5.5.38 MySQL Community Server (GPL) by Remi

Copyright (c) 2000, 2014, Oracle and/or its affiliates. All rights reserved.

Oracle is a registered trademark of Oracle Corporation and/or its
affiliates. Other names may be trademarks of their respective
owners.

Type 'help;' or '\h' for help. Type '\c' to clear the current input statement.

mysql> create database oozie;
Query OK, 1 row affected (0.00 sec)

mysql> grant all privileges on oozie.* to 'oozie'@'localhost' identified by 'oozie';
Query OK, 0 rows affected (0.00 sec)

mysql> grant all privileges on oozie.* to 'oozie'@'%' identified by 'oozie';
Query OK, 0 rows affected (0.00 sec)

mysql> exit
Bye
Next, configure Oozie properties for MySQL. Open ‘oozie-site.xml‘ file and edit following properties as shown.
[root@master ~]# cd /etc/oozie/conf
[root@master conf]# vi oozie-site.xml
Enter following properties ( just replace master [my hostname] with your hostname).
<property>
        <name>oozie.service.JPAService.jdbc.driver</name>
        <value>com.mysql.jdbc.Driver</value>
    </property>
    <property>
        <name>oozie.service.JPAService.jdbc.url</name>
        <value>jdbc:mysql://master:3306/oozie</value>
    </property>
    <property>
        <name>oozie.service.JPAService.jdbc.username</name>
        <value>oozie</value>
    </property>
    <property>
        <name>oozie.service.JPAService.jdbc.password</name>
        <value>oozie</value>
    </property>
Download and add the MySQL JDBC connectivity driver JAR to Oozie lib directory. To do so, run the following serious of command on the terminal.
[root@master oozie]# cd /tmp/
[root@master tmp]# wget http://dev.mysql.com/get/Downloads/Connector-J/mysql-connector-java-5.1.31.tar.gz
[root@master tmp]# tar -zxf mysql-connector-java-5.1.31.tar.gz
[root@master tmp]# cd mysql-connector-java-5.1.31
[root@master mysql-connector-java-5.1.31]# cp mysql-connector-java-5.1.31-bin.jar /var/lib/oozie/
Create oozie database schema by executing below commands and please note that this should be run as oozie user.
[root@master ~]# sudo -u oozie /usr/lib/oozie/bin/ooziedb.sh create -run
Sample Output
setting OOZIE_CONFIG=/etc/oozie/conf
setting OOZIE_DATA=/var/lib/oozie
setting OOZIE_LOG=/var/log/oozie
setting OOZIE_CATALINA_HOME=/usr/lib/bigtop-tomcat
setting CATALINA_TMPDIR=/var/lib/oozie
setting CATALINA_PID=/var/run/oozie/oozie.pid
setting CATALINA_BASE=/usr/lib/oozie/oozie-server-0.20
setting CATALINA_OPTS=-Xmx1024m
setting OOZIE_HTTPS_PORT=11443
...
DONE
Oozie DB has been created for Oozie version '3.3.2-cdh4.7.0'
The SQL commands have been written to: /tmp/ooziedb-8250405588513665350.sql
You need to download ExtJS lib from internet to enable oozie web console. Go to the official CDH ExtJS page, and download ExtJS version 2.2 libraries or you can download the package using the following command.
[root@master ~]# cd /tmp/
[root@master tmp]# wget http://archive.cloudera.com/gplextras/misc/ext-2.2.zip
[root@master tmp]# unzip ext-2.2.zip
[root@master tmp]# mv ext-2.2 /var/lib/oozie/
Finally, start the oozie server, by running following commands.
[root@master tmp]# service oozie status
not running.

[root@master tmp]# service oozie start

[root@master tmp]# service oozie status
running

[root@master tmp]# oozie admin -oozie http://localhost:11000/oozie -status
System mode: NORMAL
Open oozie UI using your favorite browser, and point to your IP address. In this case, my IP is 192.168.1.129.
http://192.168.1.129:11000
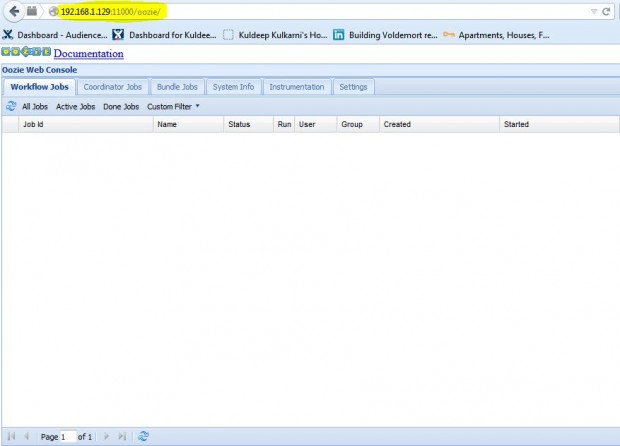
Now if you see this UI. Congratulations!! You have successfully configured oozie.
This procedure has been successfully tested on RHEL/CentOS 6/5. In my upcoming articles, I’m going to share how to configure and schedule hadoop jobs via oozie. Stay connected for more and don’t forget to comment your feedback.


Thanks for this wonderful article!
The mysql connector jar file needs to be copied in libext folder. Otherwise it gives error.
Excellent article. Thank you…
when i run “sudo -u oozie /usr/lib/oozie/bin/ooziedb.sh create -run ” this command for creating database schema… then it gives this error “Error: Could not connect to the database: java.sql.SQLException: Access denied for user ‘oozie’@’master’ (using password: YES)”
i have checked all the properties which are ok as per your blog, still it giving same error.
Please suggest.
Hi Hari,
Could you please elaborate your question ? I’m sorry I did not get it
How is this different from oozie running from CDH parcel ?
If you are going to install Oozie from Cloudera Manager then you would use a parcel. Otherwise, this is the procedure for installing Oozie manually using Cloudera packages.