Discourse is a free, open source, modern, feature-rich and remarkable community-oriented forum software. It’s a powerful, reliable, and flexible platform that comes with a wide range of tools for community discussions.
It is designed for building community discussion platforms, mailing list or chat room for your team, customers, fans, patrons, audience, users, advocates, supporters, or friends and most importantly, it seamlessly integrates with the rest of your established online platforms.
Discourse Features:
- It’s easy-to-use, a simple and flat.
- It comes with a built-in mobile layout; has apps for Android and iOS.
- It comes with all modern forum tools and is highly extensible through plugins.
- Supports both private ad public conversations.
- Supports searchable discussions.
- Customize its look and feel with HTML and CSS theming.
- Supports email notifications and email replies.
- Supports various authentication methods such as social networks, single sign on, or oAuth 2.0.
- Supports emojis and badges.
- It can be integrated with WordPress, Google Analytics, Zendesk, Patreon, Slack, Matomo, and more.
- Offers webhooks and simple JSON based comprehensive APIs for further integration.
- Allows users to mark solutions as the official answer.
- Allows users to vote up favorite ideas.
- Also allows users to collaboratively edit with full revision history.
- Supports assigning of topics to yourself or others.
- Supports a single-click upgrade, and comes with quick and accurate support, and many other features.
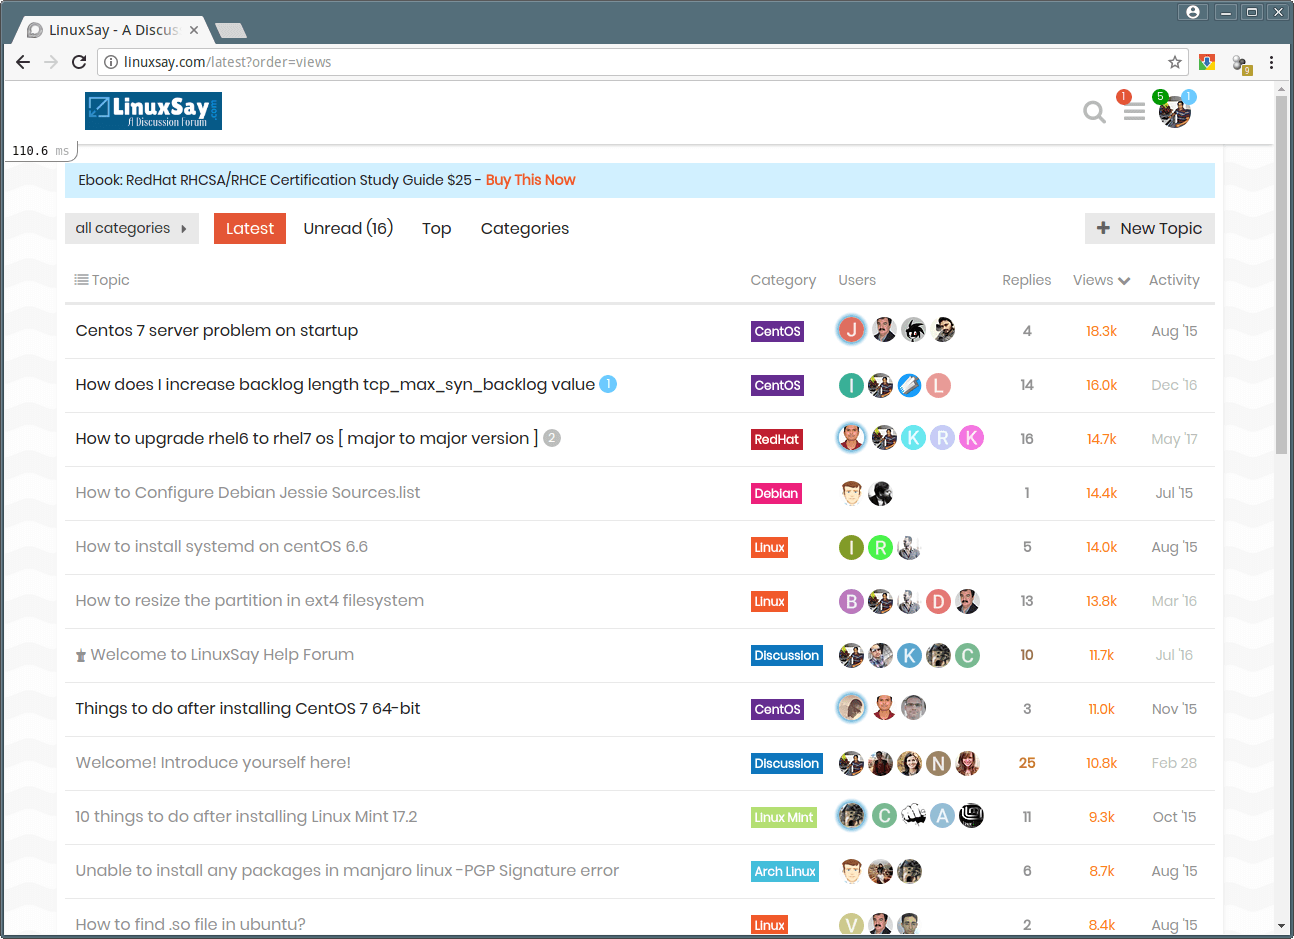
We are using Discourse since last two years for supporting our Linux readers, you can check out Live Demo at the following URL before installing it on Linux system.
Live Demo URL: http://linuxsay.com/
Requirements:
- A dedicated VPS with a registered domain name
- A CentOS 7 Server with Minimal Install
- A Ubuntu 16.04 Server or Ubuntu 18.04 Server with Minimal Install
Discourse is an open source project which can be deployed on a VPS server of your choice.
In this article we will explain how to install and configure Discourse Forum via a officially supported method i.e. using Docker image on a CentOS 7 VPS or Ubuntu VPS server.
Step 1: Install Latest Version of Git and Docker
1. There is a script prepared to install the latest versions of Docker and Git on your server, download and run it as shown.
# wget -qO- https://get.docker.com/ | sh
If the script fails on your system for one reason or the other, run the following commands to install the latest versions of Git and Docker (from the official repository):
Install Docker and Git on Debian/Ubuntu
$ sudo apt install git apt-transport-https ca-certificates curl software-properties-common
$ curl -fsSL https://download.docker.com/linux/ubuntu/gpg | sudo apt-key add -
$ sudo add-apt-repository "deb [arch=amd64] https://download.docker.com/linux/ubuntu xenial  stable"
$ sudo apt update
$ sudo apt install docker-ce
Install Docker and Git on CentOS/RHEL
# yum install -y git yum-utils device-mapper-persistent-data lvm2
# yum-config-manager --add-repo https://download.docker.com/linux/centos/docker-ce.repo
# yum install docker-ce
2. Once you have installed docker, on Ubuntu/Debian, it is triggered to auto-start under Systemd, you can check its service status with the following command.
$ sudo systemctl status docker
On CentOS/RHEL, start and enable Docker and view its status.
# systemctl start docker
# systemctl enable docker
# systemctl status docker
Step 2: Install Discourse on Linux Server
3. Next create a directory /var/discourse and clone the official Discourse Docker Image into it using following commands.
----------- On Debian/Ubuntu -----------
$ sudo mkdir /var/discourse
$ sudo git clone https://github.com/discourse/discourse_docker.git /var/discourse
$ cd /var/discourse

----------- On CentOS/RHEL -----------
# mkdir /var/discourse
# git clone https://github.com/discourse/discourse_docker.git /var/discourse
# cd /var/discourse
4. Now run the Discourse setup script using following command.
$ sudo ./discourse-setup
OR
# ./discourse-setup
Once running the above command, the script will try to validate your system for requirements. Then you will be asked to answer the following questions, provide the correct values and conform them later to auto-generate an app.yml configuration file.
Hostname for your Discourse? [discourse.example.com]: forum.tecmint.lan
Email address for admin account(s)? [[email protected]]: admin.tecmint.lan
SMTP server address? [smtp.example.com]: smtp.tecmint.lan
SMTP port? [587]: 587
SMTP user name? [[email protected]]: [email protected]
SMTP password? []: password-here
Let's Encrypt account email? (ENTER to skip) [[email protected]]:
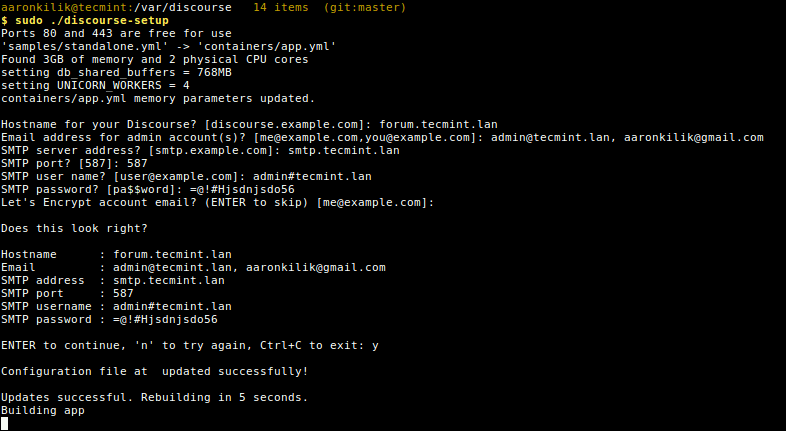
Once the configuration file is updated, it will start downloading the Discourse base image. The whole setup may take from 10 minutes to half an hour, depending on your internet connection speed; just sit back and wait for it to complete.
5. When the setup is completed, the Discourse container should be up and running. To verify it, check all running docker containers using the following command.
$ sudo docker container ls -a
OR
# docker container ls -a

Step 3: Configure Nginx for Discourse Container
6. In this step, you can now configure Nginx web server and reverse proxy (note that this is the web server outside the container) to run in front of your Discourse container. This allows you to run other websites or apps together with Discourse container on the same server.
First stop the running discourse container using following command.
$ sudo ./launcher stop app
OR
# ./launcher stop app

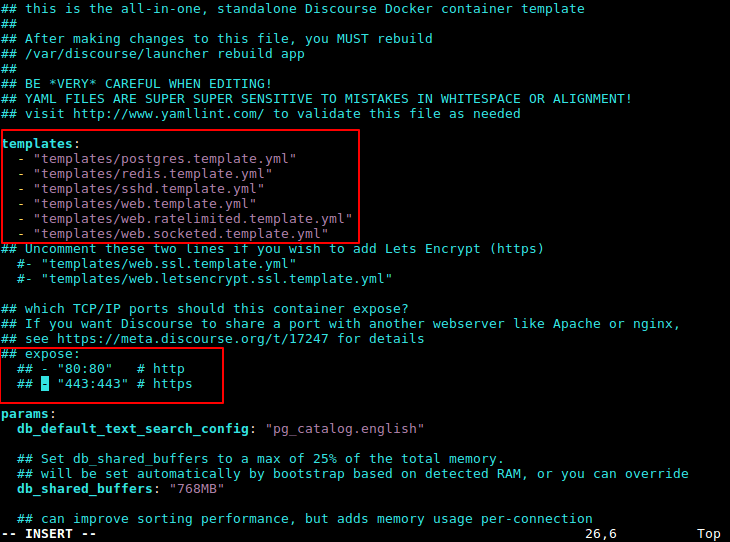
7. Next, modify your discourse container configuration file /var/discourse/containers/app.yml to set it to listen on a special file, other than port 80.
$ sudo vim containers/app.yml
OR
# vim containers/app.yml
Then modify the template section as shown below.
templates:
  - "templates/cron.template.yml"
  - "templates/postgres.template.yml"
  - "templates/redis.template.yml"
  - "templates/sshd.template.yml"
  - "templates/web.template.yml"
  - "templates/web.ratelimited.template.yml"
- "templates/web.socketed.template.yml"
And comment out the expose section as shown in the screenshot.
8. Next, you need to configure a Nginx server block to proxy requests for Discourse in /etc/nginx/conf.d/discourse.conf or /etc/nginx/sites-enabled/discourse.conf file.
$ sudo vim /etc/nginx/conf.d/discourse.conf
OR
# vim /etc/nginx/conf.d/discourse.conf
Add these settings in it, (use your own domain name instead of forum.tecmint.lan).
server {
        listen 80;
        server_name  forum.tecmint.lan;

        location / {
                proxy_pass http://unix:/var/discourse/shared/standalone/nginx.http.sock:;
                proxy_set_header Host $http_host;
                proxy_http_version 1.1;
                proxy_set_header X-Forwarded-For $proxy_add_x_forwarded_for;
                proxy_set_header X-Forwarded-Proto $scheme;
        }
}
Save the changes and exit the file. Then check the Nginx web server configuration for any syntax error, if all it okay, start the web server.
$ sudo nginx -t
$ sudo systemctl start nginx
OR
# systemctl start nginx
9. Now it’s time to rebuild the Discourse container to apply the recently made changes (this will remove old container), and also restart the Nginx service to detect the upstream server.
$ sudo ./launcher rebuild app
$ sudo systemctl restart nginx
OR
# ./launcher rebuild app
# systemctl restart nginx
Step 4: Access Discourse Forum Web UI
10. Once everything configured, you can access Discourse from a web browser via the domain name you set above (for our case, we have used a dummy domain called forum.tecmint.lan).
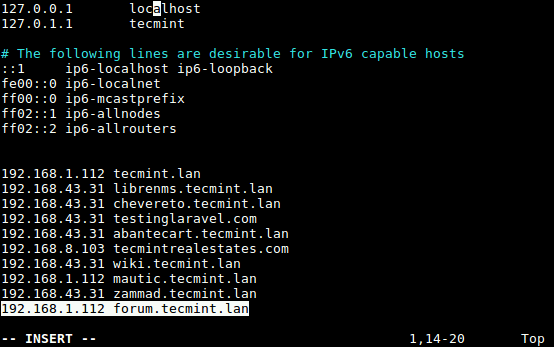
We have also used the /etc/hosts file to configure local DNS on the testing system (where 192.168.8.105 is the server address on the local network).
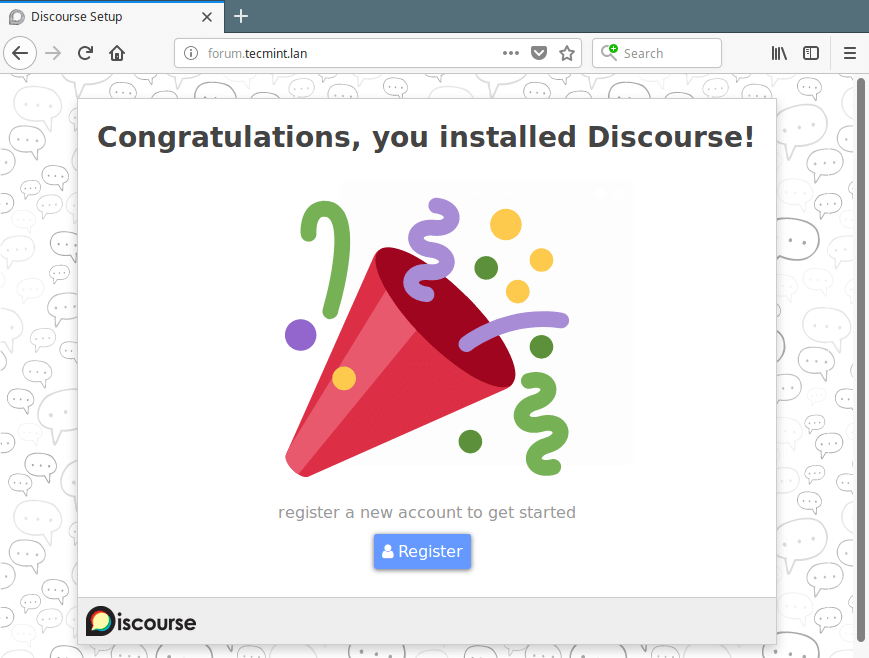
Type the following URL to access Discourse and click on Register to create a new admin account.
http://forum.tecmint.lan
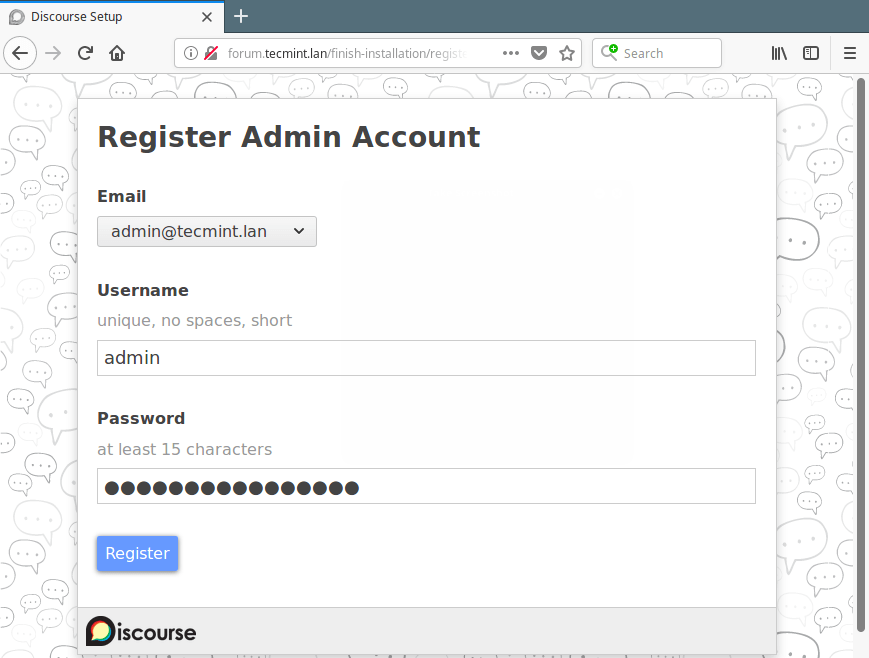
11. Next, choose an email to use (in case you specified more than one while setting up discourse), username and password, then click on Register to create the new admin account.
12. Next, an account confirmation email will be sent to the email address you selected (if you provided more than one while setting up discourse) in the previous step. In case you fail to receive the email, then ensure your email system is working properly (install postfix mail server) or check your spam folder.
Click on the confirmation link to get the ‘Discourse Welcome‘ page. Then activate your account, setup Discourse default options such as language to use, access your Discourse admin account and administer your discussion forum.
You can find additional information from the Discourse website: https://www.discourse.org/
That’s all for now! Discourse is an open, modern and feature-rich community discussion software with a wide range of tools. Use the comment form below to share any queries concerning the installation process or give us your thoughts about this amazing forum software.
If you’re looking for someone to install Discourse community forum software, consider us, because we offer wide range of Linux services at fair minimum rates with 14-days free support via email. Request Installation Now.


Hi, will this tutorial also work on Apache? Thanks
@Mo
The docker image includes Nginx only as far as i know.