

The Network Time Protocol (NTP) is a protocol used to synchronize computer system clocks automatically over a network. The machine can have the system clock use Coordinated Universal Time (UTC) rather than local time.
Maintaining accurate time on Linux systems, especially servers is an important task for many reasons. For example, in a networked environment, accurate timekeeping is required for accurate timestamps in packets and system logs for root-cause analysis, determining when problems occurred, and finding correlations.
Chrony is now the default NTP implementation package on the latest versions of RHEL-based distributions such as CentOS Stream, Fedora, Rocky Linux & AlmaLinux, and Debian-based distributions such as Ubuntu & Linux Mint, among others, and comes pre-installed by default.
The Chrony package consists of chronyd, a daemon that runs in userspace, and chronyc a command-line program for monitoring and controlling chronyd.
Chrony is a versatile NTP implementation and performs well in a wide range of conditions (check out the comparison of the chrony suite to other NTP implementations). It can be used to synchronize the system clock with NTP servers (act as a client), with a reference clock (e.g a GPS receiver), or with a manual time input. It can also be employed as an NTPv4 (RFC 5905) server or peer to provide a time service to other computers in the network.
In this article, you will learn how to synchronize server time with NTP in Linux using chrony.
Installing Chrony in Linux Server
In most Linux systems, the chrony command is not installed by default. To install it, execute the below command.
$ sudo yum install chrony         [On RHEL/CentOS/Fedora and Rocky Linux/AlmaLinux]
$ sudo apt install chrony         [On Debian, Ubuntu and Mint]
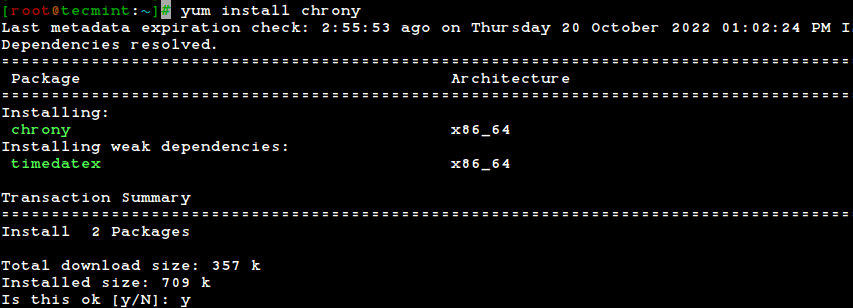
The default location for the chrony daemon is /usr/sbin/chronyd and the command line program will be installed to /usr/bin/chronyc.
Once the installation is complete, start the chrony service and enable it to automatically start at system boot, then check if it is up and running.
# systemctl enable --now chronyd
# systemctl status chronyd
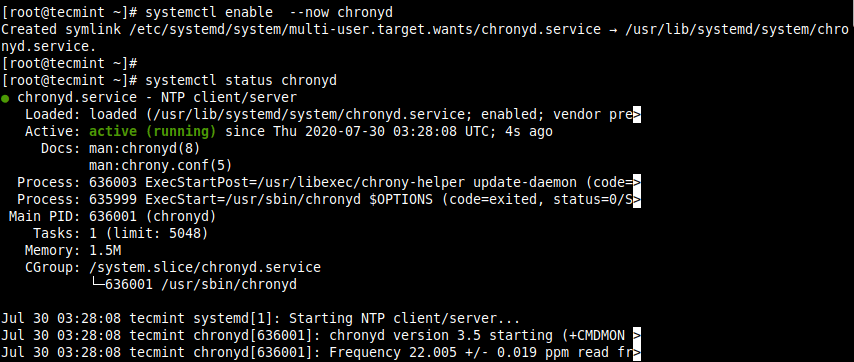
To cross-check if chrony is now up and running fine and to see the number of servers and peers that are connected to it, run the following chronyc command.
# chronyc activity
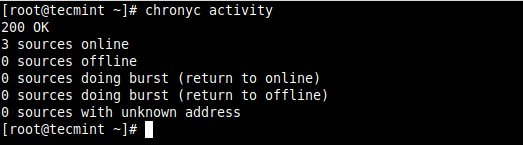
Checking Chrony Synchronization in Linux
To display information (list of servers available, status, and offsets from the local clock and the source) about the current time sources that chronyd is accessing, run the following command with the -v flag shows the description for each column.
# chronyc sources
OR
# chronyc sources -v
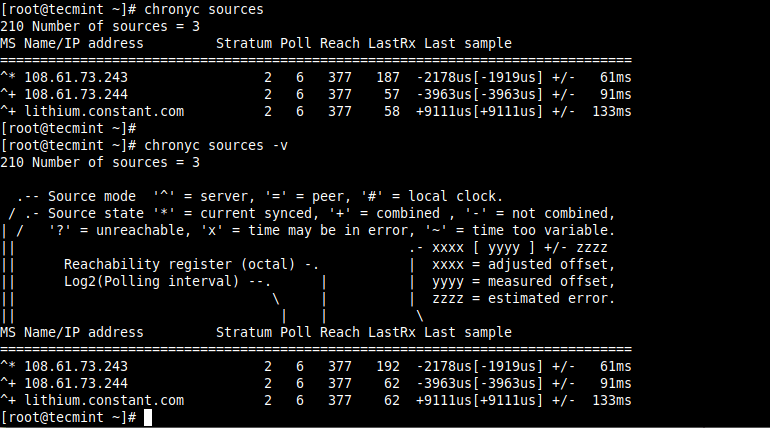
Concerning the previous command, to display other useful information for each of the sources currently being examined by chronyd (such as the drift rate and offset estimation process), use the sourcestats command.
# chronyc sourcestats
OR
# chronyc sourcestats -v
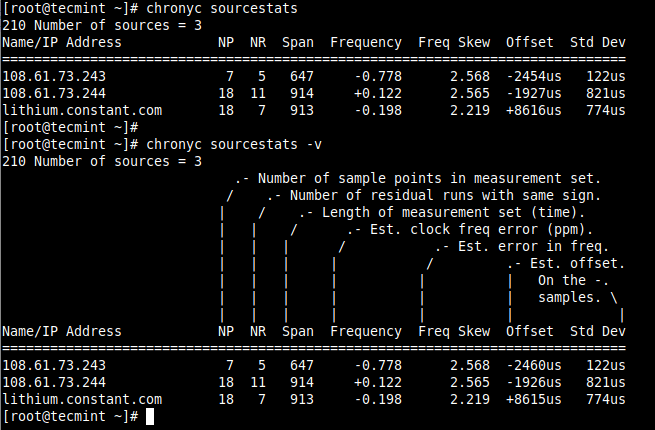
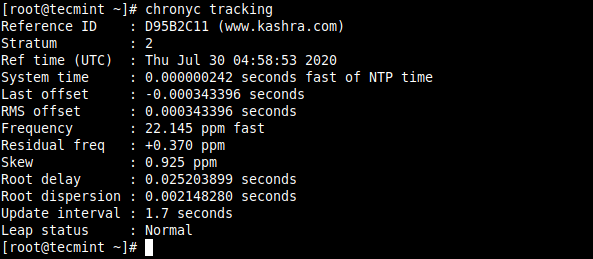
To check chrony tracking, run the following command.
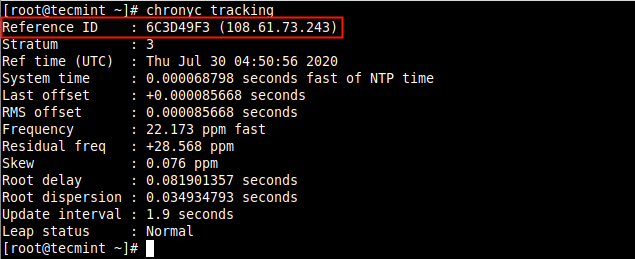
# chronyc tracking
In the output of this command, the reference ID specifies the name (or IP address) if available, of the server to which the computer is currently synchronized, out of all the available servers.
Configuring Chrony Time Sources in Linux
The main chrony configuration file is located at /etc/chrony.conf (CentOS/RHEL/Fedora) or /etc/chrony/chrony.conf (Ubuntu/Debian).
When installing a Linux OS in the cloud, your system should have some default servers or a pool of servers added during the installation process. To add or change the default servers, open the configuration file for editing:
# vi /etc/chrony.conf
OR
# vi /etc/chrony/chrony.conf
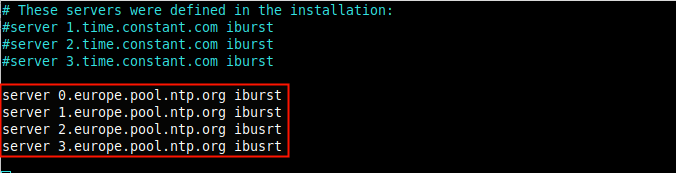
You can either add several servers using the server directive as shown.
server 0.europe.pool.ntp.org iburst
server 1.europe.pool.ntp.org iburst
server 2.europe.pool.ntp.org ibusrt
server 3.europe.pool.ntp.org ibusrt
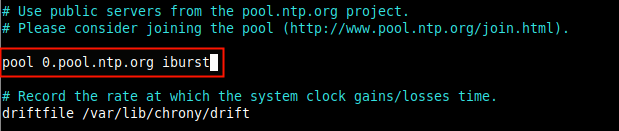
or in most cases, it’s best to use ntppool.org to find an NTP server. This allows the system to try to find the closest available servers for you. To add a pool, use the pool directive:
pool 0.pool.ntp.org burst
There are many other options you can configure in the file. After making changes, restart the chrony service.
$ sudo systemctl restart chrony
OR
# systemctl restart chronyd
To show information about the current time sources that chronyd is querying, run the following command once more.
# chronyc sources
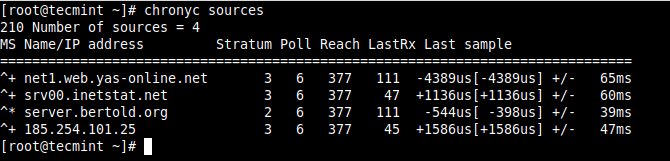
To check the chrony tracking status, run the following command.
# chronyc tracking
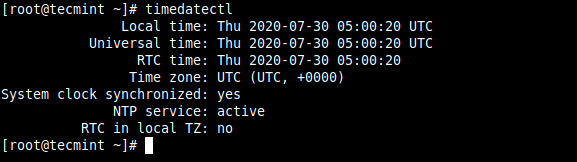
To display the current time on your system, check whether the system clock is synchronized and whether NTP is indeed active, run the timedatectl command:
# timedatectl
That brings us to the end of this guide. If you have any questions, reach us via the comment section below. For more information, check out: using the chrony suite to configure NTP from the RHEL documentation or using chrony to configure NTP from the Ubuntu official blog.

On my system – Debian Bullseye with KDE desktop. Ntp does not work, Chrony does. I do not wreck my brain to figure it out. I will leave that to the code boys.
I have a dual boot W10/Ubuntu PC. When I boot to Ubuntu from W10, the displayed time is correct before the Ubuntu home page comes up, then decreases by 4 hours when the Ubuntu home page is displayed.
When booting back to W10, the time stays in error by 4 hours.
How do I get correct time without having to synchronize after every boot ?
Use ntpdate on machine where you don’t want to run a NTP server. A simple Cron task can automate time synchronization with a upstream NTP server.
ntpdate is not available on centos 8
@Serg,
We’ve updated the article, and included chrony…
According to a post at https://askubuntu.com/questions/297560/ntpd-vs-ntpdate-pros-and-cons ntpdate has been deprecated since 2012. The current tools are ntpd and chrony.
We have updated the article and included Chrony instructions…