NGINX (short for Engine X) is a free, open-source and powerful HTTP web server and reverse proxy with an event-driven (asynchronous) architecture. It is written using C programming language and runs on Unix-like operating systems as well as Windows OS.
It also works as a reverse proxy, standard mail and TCP/UDP proxy server, and can additionally be configured as a load balancer. It is powering many sites on the web; well known for its high-performance, stability and feature-rich set.
Read Also: How to Install Apache on CentOS 7
In this article, we will explain how to install, configure and manage Nginx HTTP web server on a CentOS 7 or RHEL 7 server using command line.
Prerequisites:
- A CentOS 7 Server Minimal Install
- A RHEL 7 Server Minimal Install
- A CentOS/RHEL 7 system with static IP address
Install Nginx Web Server
1. First update the system software packages to the latest version.
# yum -y update
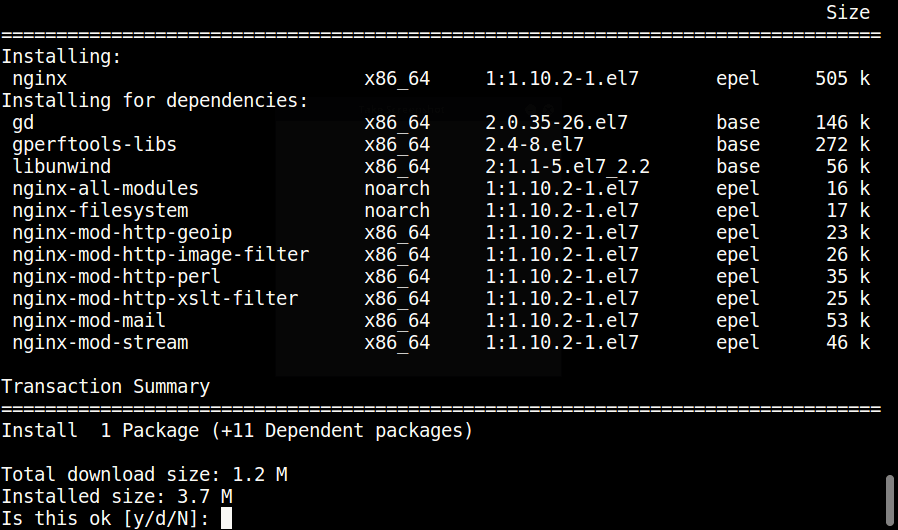
2. Next, install Nginx HTTP server from the EPEL repository using the YUM package manager as follows.
# yum install epel-release
# yum install nginx
Manage Nginx HTTP Server on CentOS 7
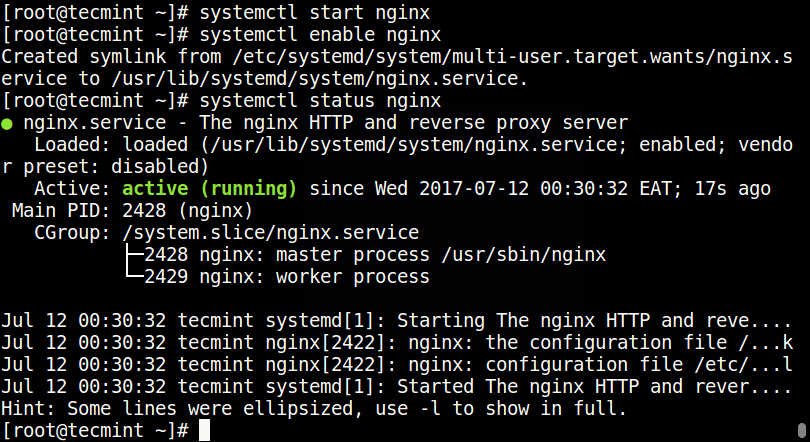
3. Once Nginx web server installed, you can start it first time and enable it to start automatically at system boot.
# systemctl start nginx
# systemctl enable nginx
# systemctl status nginx
Configure firewalld to Allow Nginx Traffic
4. By default, CentOS 7 built-in firewall is set to block Nginx traffic. To allow web traffic on Nginx, update the system firewall rules to permit inbound packets on HTTP and HTTPS using the commands below.
# firewall-cmd --zone=public --permanent --add-service=http
# firewall-cmd --zone=public --permanent --add-service=https
# firewall-cmd --reload

Test Nginx Server on CentOS 7
5. Now you can verify Nginx server by going to the following URL, a default nginx page will be shown.
http://SERVER_DOMAIN_NAME_OR_IP

Nginx Important Files and Directories
- The default server root directory (top level directory containing configuration files): /etc/nginx.
- The main Nginx configuration file: /etc/nginx/nginx.conf.
- Server block (virtual hosts) configurations can be added in: /etc/nginx/conf.d.
- The default server document root directory (contains web files): /usr/share/nginx/html.
You may also like to read these following Nginx web server related articles.
- How to Setup Name-based and IP-based Virtual Hosts (Server Blocks) with NGINX
- The Ultimate Guide to Secure, Harden and Improve Performance of Nginx Web Server
- How to Install Varnish Cache 5.1 for Nginx on CentOS 7
- Install Latest Nginx 1.10.1, MariaDB 10 and PHP 5.5/5.6 on CentOS 7
In this article, we showed how to install and manage Nginx HTTP server from the command line on CentOS 7. You can ask questions or give us any feedback via the comment form below.