Cockpit is a free and open-source front-end tool that provides administrative access to Linux systems. It allows system administrators to monitor, manage, and troubleshoot Linux servers. It provides an intuitive web interface that easy to navigate and keep track of the salient system features and resources.
There’s a whole lot of things you can do with the Cockpit. You can monitor system metrics such as CPU and memory utilization, view system logs, configure networking, check the status of running service, manage user accounts and so much more.
In this guide, we will focus on how you can manage KVM virtual machines with the Cockpit web console in Linux.
Requirements
Before we proceed further, ensure that you have installed the KVM virtualization platform on your Linux system. We have a detailed guide on how to install KVM on CentOS 8 and how to install KVM on Ubuntu 20.04.
Step 1: Install the Cockpit Web Console in Linux
The first task will be to install Cockpit on a Linux server. We will demonstrate how to do so on Debian and Ubuntu systems. We already have an article on how to install Cockpit on CentOS 8 and RHEL 8.
To get started, update your system package lists.
$ sudo apt update
Afterward, install the cockpit console by invoking the command:
$ sudo apt install cockpit
Along with the cockpit, you need to install the cockpit-machines package to help you manage virtual machines.
$ sudo apt install cockpit-machines
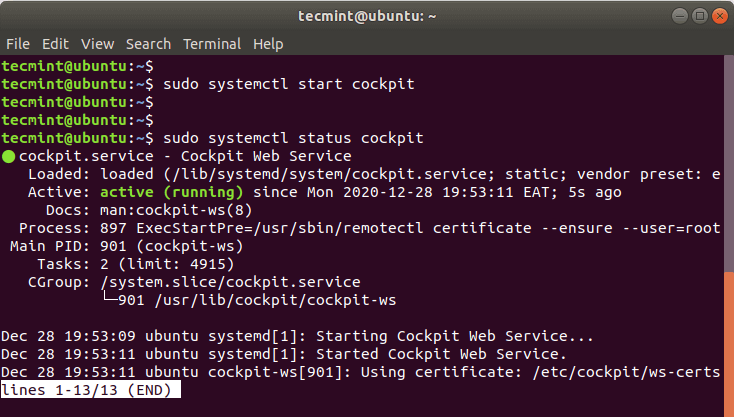
Once successfully installed, start Cockpit using the command:
$ sudo systemctl start cockpit
To verify its status, run:
$ sudo systemctl status cockpit
The output below confirms that the cockpit GUI frontend is running as expected.
Step 2: Accessing Cockpit Web Console
By default, cockpit listens on TCP port 9090, You can confirm this using the netstat command as shown.
$ sudo netstat -pnltu | grep 9090

If you accessing Cockpit remotely and your server is behind the UFW firewall, you need to allow port 9090 on the firewall. To achieve this, run the command:
$ sudo ufw allow 9090/tcp
$ sudo ufw reload
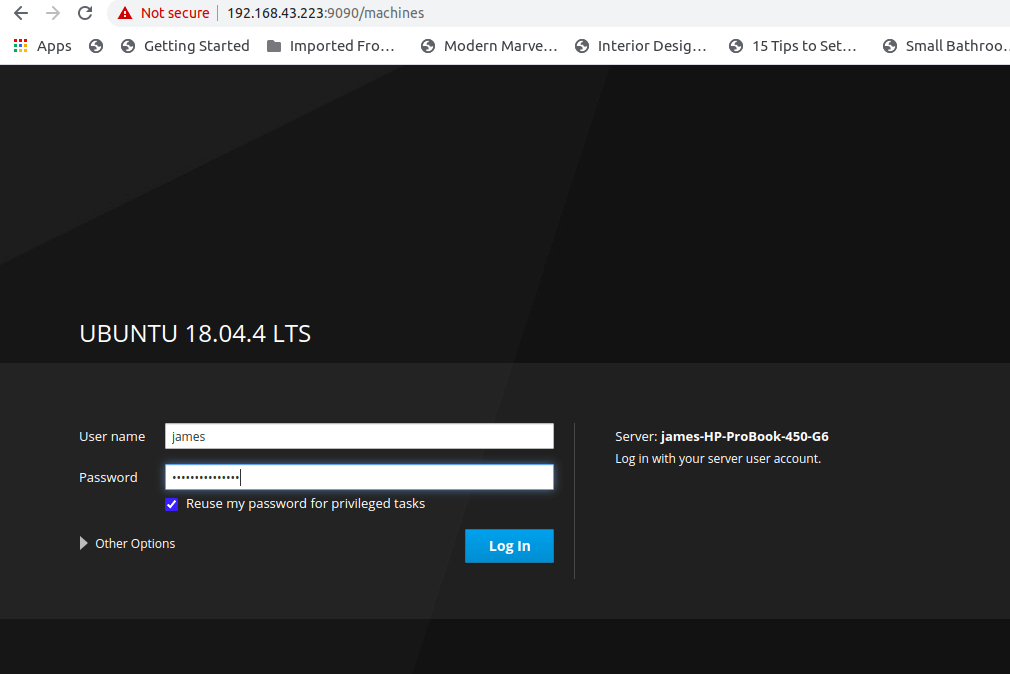
To access the Cockpit interface, open your browser and browse the following address:
https://server-ip:9090
At the login page, provide your user credentials and click the ‘Log In‘ button.
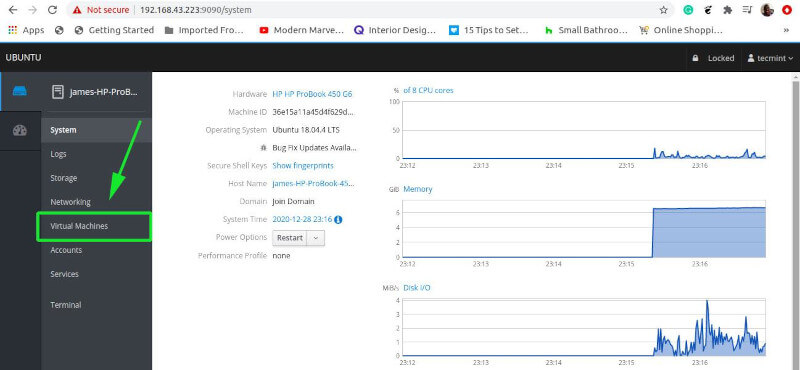
Step 3: Create and Manage KVM Virtual Machines in Cockpit Web Console
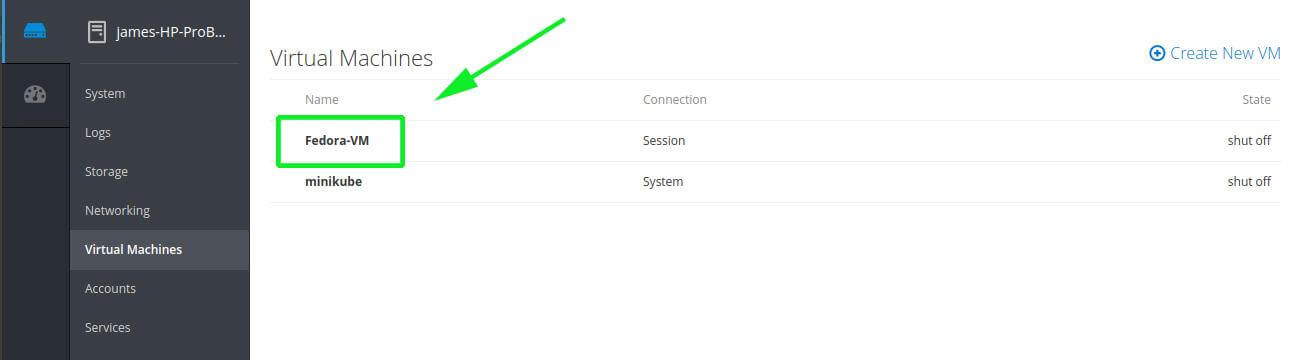
To start creating and managing a virtual machine, locate and click the ‘Virtual Machines’ option as shown.
On the ‘Virtual Machines’ page, click on the ‘Create New VM’ button.

Be sure to fill out all the details required as shown.
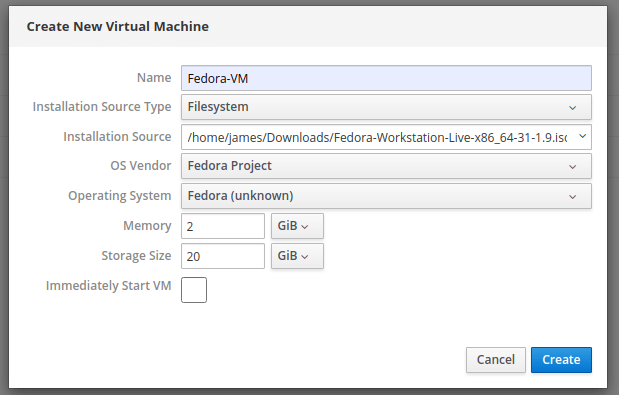
A detailed explanation of the above options used:
- Name: This refers to an arbitrary name given to the virtual machine, for example, Fedora-VM.
- Installation Source type: This can either be a Filesystem or a URL.
- Installation Source: This is the path of the ISO image to be used during the installation of the Virtual machines.
- OS vendor – The company/entity that develops and maintains the OS.
- Operating System – The OS to be installed. Select your OS from the dropdown menu.
- Memory – The RAM size is either Megabytes or Gigabytes.
- Storage size – This is the hard disk capacity for the guest OS.
- Immediately Start VM – If you want to immediately launch the VM upon creation, then simply check the checkbox option. For now, we will leave it unchecked and simply create the VM by clicking the ‘Create’ button.
Once done, your VM will be listed as shown.
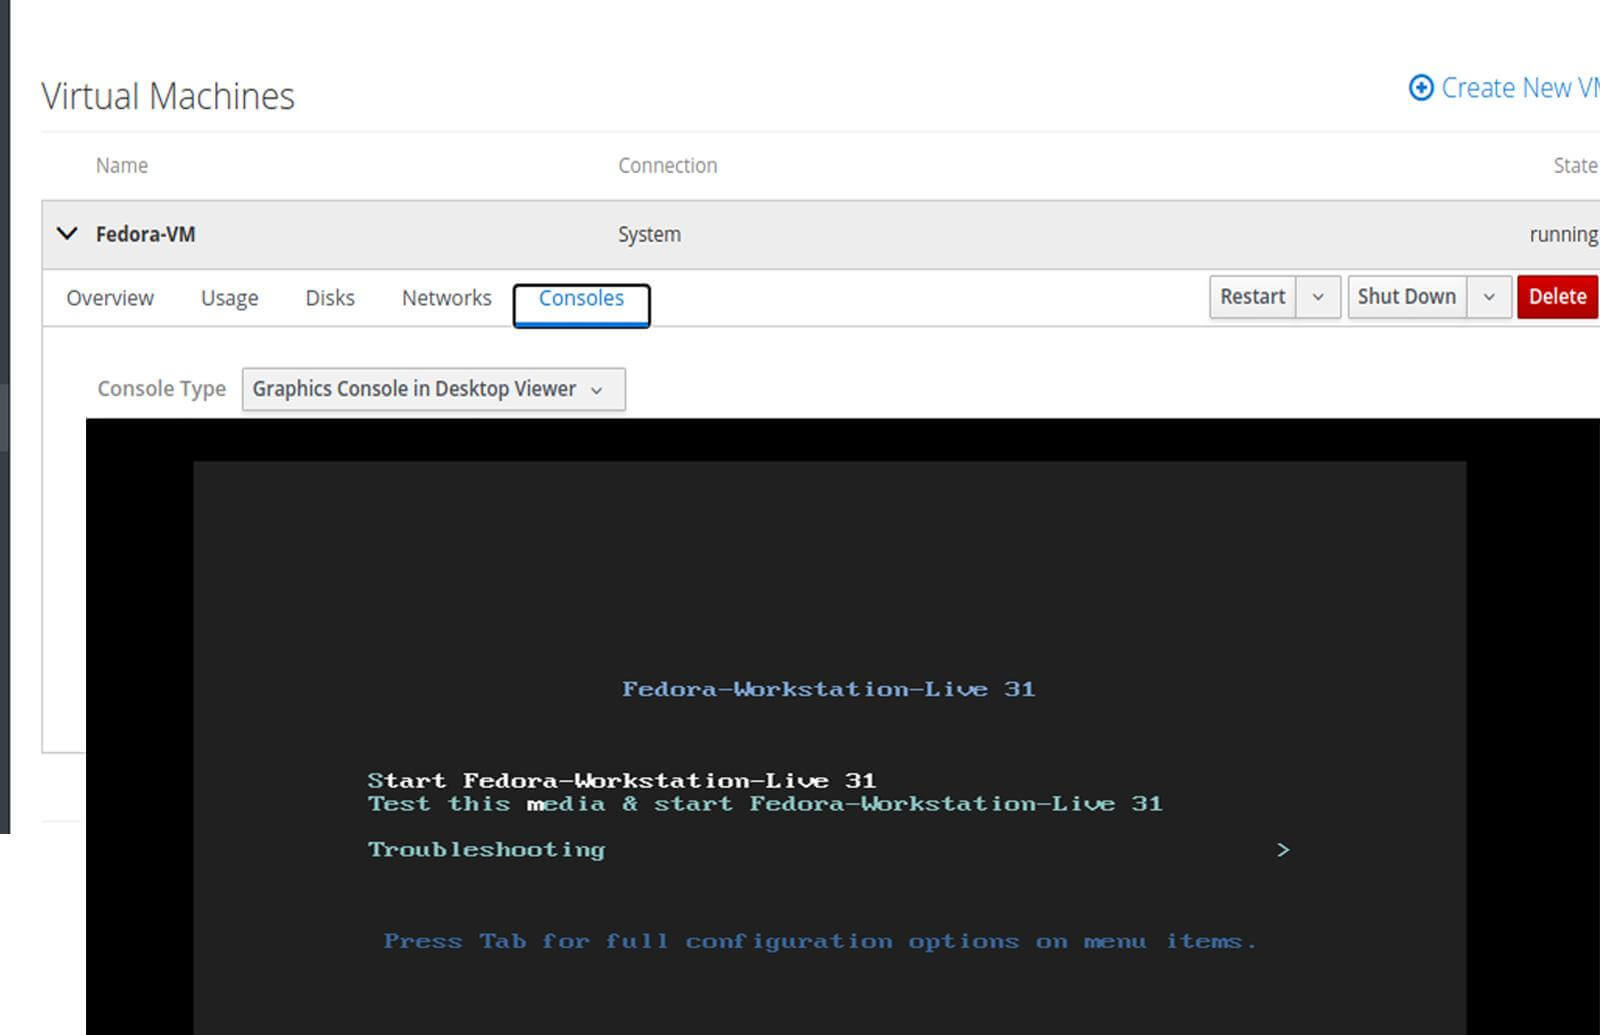
Click on the newly created VM to get an overview of it as shown. To launch the virtual machine, simply click on the ‘Install’ button. This takes you to a black console that shows you the VM booting and will provide the first installation step with various options as shown.
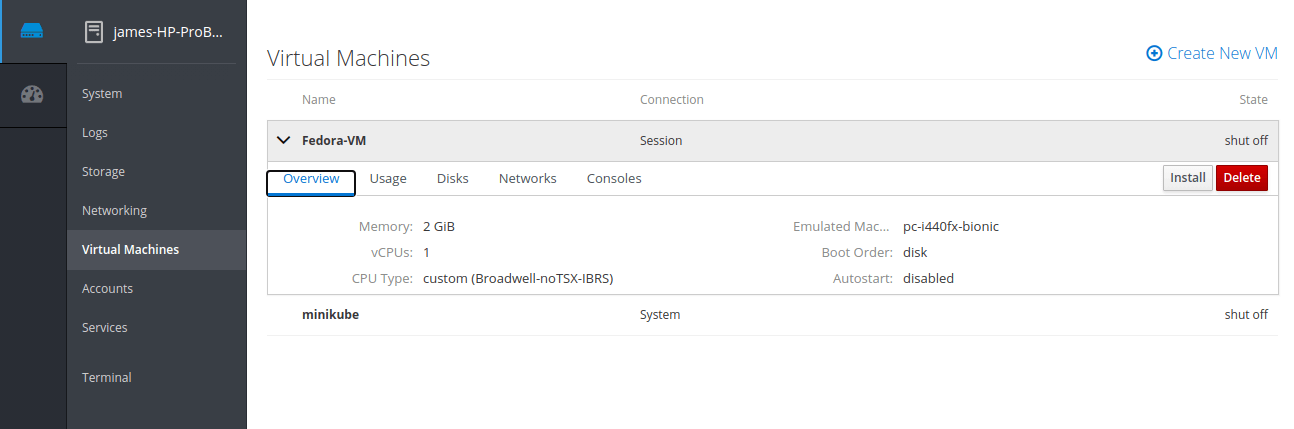
As the virtual machine boots, let’s briefly have a look at other tabs options. The ‘Overview‘ tab provides basic information about the VM such as Memory size, and no. of vCPUs.
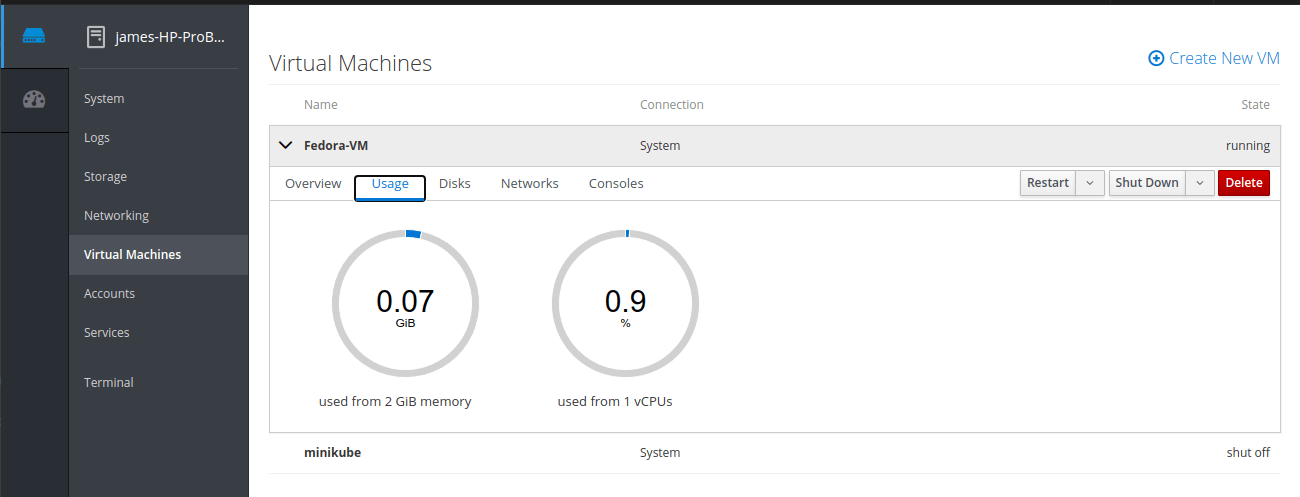
The ‘Usage’ section offers information about Memory and vCPU usage.
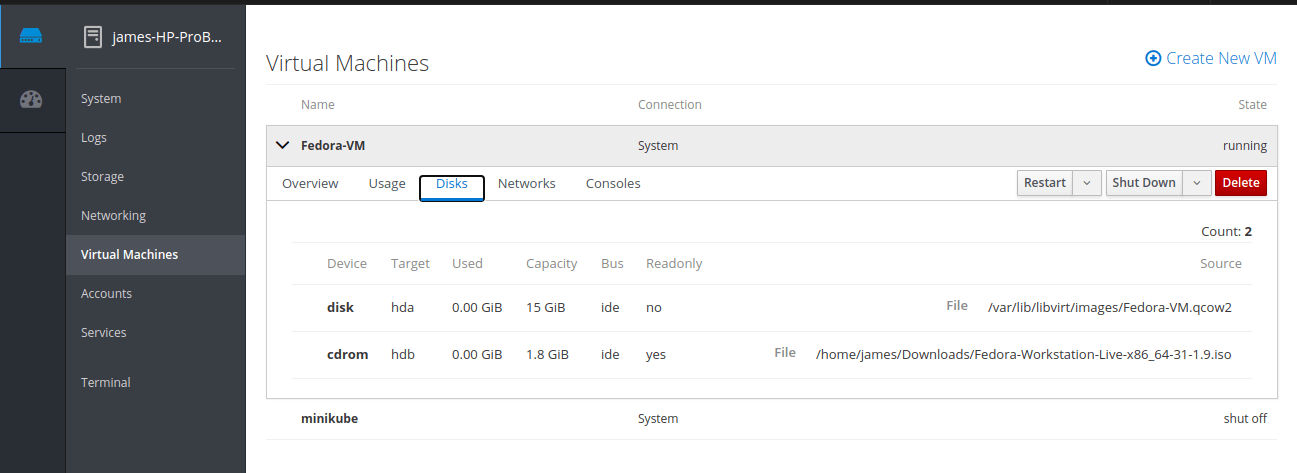
To view information about the virtual hard disk and the path of the ISO image used to create it, click on the ‘Disks’ tab.
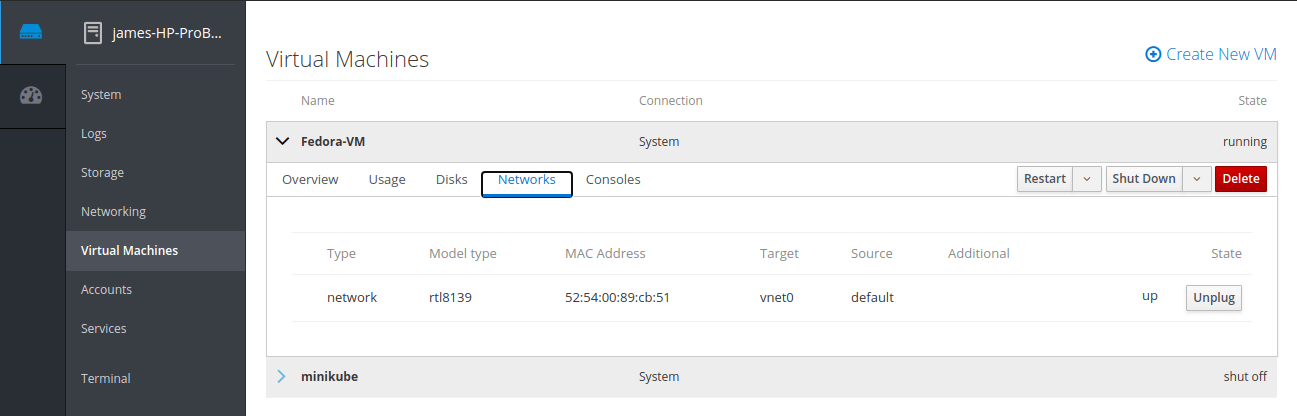
The ‘Networks’ tab gives insights into the virtual network interfaces attached to the virtual machine.
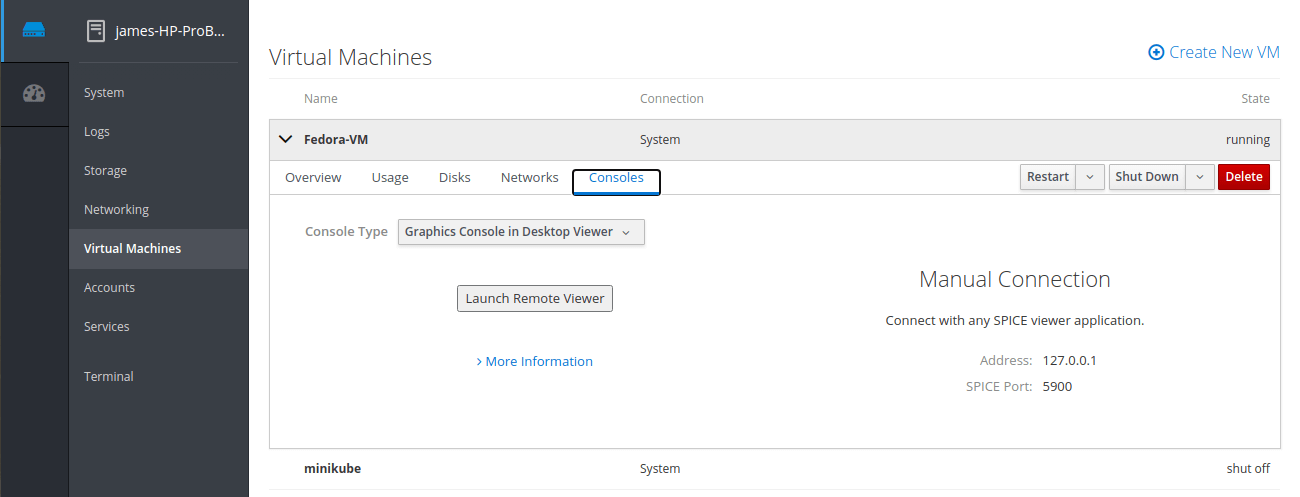
Lastly, the console section gives you access to a VM using the Graphics console – thanks to the virt-viewer – or the serial console.
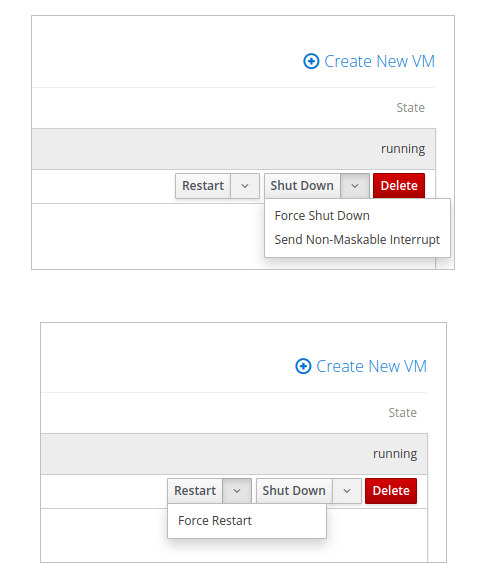
Additionally, you can Restart, Shutdown, or even Delete the virtual machine once done. You can find these options in the far right corner as shown.
Closing Thoughts
That basically sums up the management of KVM virtual machines using the Cockpit web interface. The cockpit console provides a seamless experience in the management of virtual machines by offering an intuitive and easy-to-use web interface.
Source: redhat.com


I have been using the Cockpit tool to manage a number of servers remotely and it is really cool.
This saved my day!
This is great! Exactly what I was looking for, something the like of the old VMware Server, but free and even better! Thanks for the article, I’m glad I stumbled across it, most people just seem to refer to things like unRAID or Proxmox, but if you already have a machine set up and only need a web-based VM interface, this is perfect! Worked like a charm!
Is it possible to have a full-page window when launching VM in Graphics console mode of Cockpit?
Hey Christian, sadly, by the time of writing this, Cockpit-machines does not have an option to switch VM’s console to fullscreen mode. We hope that the developers will provide that feature in the not so far future.
Is Cockpit supported on an ARM-based CPU platform like Apple M1?
I’m not sure about Apple M!, however, you can install Cockpit on ARM-based Linux platforms such as Ubuntu and Arch Linux.
Hi,
Thank you so much for the great topic…
Thank you Jalal. You are very much welcome.